
User Manual
Page 11
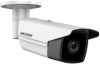
Network Camera User Manual Chapter 1 System Requirement Operating System: Microsoft Windows XP SP1 and above version CPU: 2.0 GHz or higher RAM: 1G or higher Display: 1024×768 resolution or higher Web Browser: Internet Explorer 8.0 and above version, Apple Safari 5.0.2 and above version, Mozilla Firefox 5.0 and above version and Google Chrome 18 and above version. 1
Network Camera User Manual Chapter 1 System Requirement Operating System: Microsoft Windows XP SP1 and above version CPU: 2.0 GHz or higher RAM: 1G or higher Display: 1024×768 resolution or higher Web Browser: Internet Explorer 8.0 and above version, Apple Safari 5.0.2 and above version, Mozilla Firefox 5.0 and above version and Google Chrome 18 and above version. 1

User Manual
Page 28
On the PC side, search the network and you can choose the Security Mode as not-encrypted, WEP, WPA-personal, WPA-enterprise, WPA2-personal, and WPA2-enterprise. Customize a SSID for your PC. 5. Choose the Security Mode of the camera listed. Figure 4-4 Ad-hoc Connection Point 6. Security Mode Description: Figure 4-5 Security Mode You can see the SSID of the wireless connection. 4. Network Camera User Manual 2. WEP mode: 18 Choose the SSID and connect. Enable the wireless connection function for the camera. 3.
On the PC side, search the network and you can choose the Security Mode as not-encrypted, WEP, WPA-personal, WPA-enterprise, WPA2-personal, and WPA2-enterprise. Customize a SSID for your PC. 5. Choose the Security Mode of the camera listed. Figure 4-4 Ad-hoc Connection Point 6. Security Mode Description: Figure 4-5 Security Mode You can see the SSID of the wireless connection. 4. Network Camera User Manual 2. WEP mode: 18 Choose the SSID and connect. Enable the wireless connection function for the camera. 3.

User Manual
Page 55
... Manual Steps: (1) Click the Add to finish modifying. Delete an IP Address or IP Addresses. Select the IP address(es) and click Delete. 5. Figure 6-18 Modify an IP (3) Click the OK to add an IP. (2) Input the IP Adreess.
... Manual Steps: (1) Click the Add to finish modifying. Delete an IP Address or IP Addresses. Select the IP address(es) and click Delete. 5. Figure 6-18 Modify an IP (3) Click the OK to add an IP. (2) Input the IP Adreess.

User Manual
Page 118
... to Task 2 Set the Arming Schedule for Face Detection, and then the detected face is , the more easily the face can be detected. 5. Figure 10-18 Face Detection 108
... to Task 2 Set the Arming Schedule for Face Detection, and then the detected face is , the more easily the face can be detected. 5. Figure 10-18 Face Detection 108

Quick Start Guide
Page 19
.... And you can use the self-tapping screws directly if the camera is mounted to the cement wall/ceiling. Wall Ceiling Figure 2-4 Install the Camera 18 Note: Please insert the expansion screws first if the camera is mounted to the wall/ceiling with the supplied screws.
.... And you can use the self-tapping screws directly if the camera is mounted to the cement wall/ceiling. Wall Ceiling Figure 2-4 Install the Camera 18 Note: Please insert the expansion screws first if the camera is mounted to the wall/ceiling with the supplied screws.
Quick Start Guide
Page 38
...×768 resolution or higher Web Browser: Internet Explorer 8.0 and above version, Apple Safari 5.0.2 and above version, Mozilla Firefox 5.0 and above version and Google Chrome 18 and above version Steps: 1. The admin user should configure the device accounts and user/operator permissions properly. Delete the unnecessary accounts and user/operator permissions...
...×768 resolution or higher Web Browser: Internet Explorer 8.0 and above version, Apple Safari 5.0.2 and above version, Mozilla Firefox 5.0 and above version and Google Chrome 18 and above version Steps: 1. The admin user should configure the device accounts and user/operator permissions properly. Delete the unnecessary accounts and user/operator permissions...