
Quick Start Guide
Page 2
..., AND NON-INFRINGEMENT OF THIRD PARTY. This user manual (hereinafter referred to be "the Manual") cannot be "Hikvision"). Please use this Manual This Manual is subject to change, without the prior written permission of Hikvision in the company website (http://overseas.hikvision.com/en/). or its subsidiaries (hereinafter referred to Bullet Network Camera. Quick Start Guide ALL RIGHTS RESERVED Any and all other reasons...
..., AND NON-INFRINGEMENT OF THIRD PARTY. This user manual (hereinafter referred to be "the Manual") cannot be "Hikvision"). Please use this Manual This Manual is subject to change, without the prior written permission of Hikvision in the company website (http://overseas.hikvision.com/en/). or its subsidiaries (hereinafter referred to Bullet Network Camera. Quick Start Guide ALL RIGHTS RESERVED Any and all other reasons...

Quick Start Guide
Page 3
..., HIKVISION WILL PROVIDE TIMELY TECHNICAL SUPPORT IF REQUIRED. SURVEILLANCE LAWS VARY BY JURISDICTION. HIKVISION SHALL NOT BE LIABLE IN THE EVENT THAT THIS PRODUCT IS USED WITH ILLEGITIMATE PURPOSES. Regulatory Information FCC Information Please take attention that interference will not occur in a residential installation. This equipment generates, uses and can be determined by turning the equipment off and on, the user...
..., HIKVISION WILL PROVIDE TIMELY TECHNICAL SUPPORT IF REQUIRED. SURVEILLANCE LAWS VARY BY JURISDICTION. HIKVISION SHALL NOT BE LIABLE IN THE EVENT THAT THIS PRODUCT IS USED WITH ILLEGITIMATE PURPOSES. Regulatory Information FCC Information Please take attention that interference will not occur in a residential installation. This equipment generates, uses and can be determined by turning the equipment off and on, the user...

Quick Start Guide
Page 5
... any responsibility for password and security configuration and its settings. Safety Instruction These instructions are responsible for problems caused by overload. Refer to avoid over-heating or fire hazards caused by unauthorized repair or maintenance. Maintenance If the product does not work properly, please contact your dealer or the nearest service center. DO NOT connect multiple devices to one power adapter, to the...
... any responsibility for password and security configuration and its settings. Safety Instruction These instructions are responsible for problems caused by overload. Refer to avoid over-heating or fire hazards caused by unauthorized repair or maintenance. Maintenance If the product does not work properly, please contact your dealer or the nearest service center. DO NOT connect multiple devices to one power adapter, to the...

Quick Start Guide
Page 6
... not place the camera in a dry and well-ventilated environment. Contact your dealer for details. Do not aim the lens at the sun or any laser equipment is in use, make sure that the device lens is recommended. Time Synchronization Do not use a soft and... out. Cleaning Please use alkaline detergents. A few device components (e.g., electrolytic capacitor) require regular replacement. The operating temperature shall be 95% or less (no condensing). Emergency If smoke, odor, or noise arises from the device, immediately turn off the power, unplug the power cable, and contact the...
... not place the camera in a dry and well-ventilated environment. Contact your dealer for details. Do not aim the lens at the sun or any laser equipment is in use, make sure that the device lens is recommended. Time Synchronization Do not use a soft and... out. Cleaning Please use alkaline detergents. A few device components (e.g., electrolytic capacitor) require regular replacement. The operating temperature shall be 95% or less (no condensing). Emergency If smoke, odor, or noise arises from the device, immediately turn off the power, unplug the power cable, and contact the...

Quick Start Guide
Page 7
... VDC, please make sure your power supply matches with your camera. Make sure that the wall is strong enough to any precautions that shall be taken. Make sure that the power has been disconnected before you wire, install, or disassemble the device. Symbols and Marks Notice Visit the camera via Web browse/client software and go to install the camera and accessories. Set up camera time manually...
... VDC, please make sure your power supply matches with your camera. Make sure that the wall is strong enough to any precautions that shall be taken. Make sure that the power has been disconnected before you wire, install, or disassemble the device. Symbols and Marks Notice Visit the camera via Web browse/client software and go to install the camera and accessories. Set up camera time manually...

Quick Start Guide
Page 28
For the position of the reset button, refer to restore the default settings, including the user name, password, IP address, port No., etc. Reset and Restore Camera Press Reset button for about 10s when the camera is powering on or rebooting to the figure in the page 16. 18
For the position of the reset button, refer to restore the default settings, including the user name, password, IP address, port No., etc. Reset and Restore Camera Press Reset button for about 10s when the camera is powering on or rebooting to the figure in the page 16. 18

User Manual
Page 1
... described in the manual. 0100001080518 We will be added to contact the dealer. TURBO HD Full Time Color Series Bullet Camera User Manual User Manual Thank you for purchasing our product. This manual applies to the models below: Type Type I Camera Type II Camera Model DS-2CE10DFT-F DS-2CE12DFT-F This manual may contain several technical incorrect places or printing errors, and the content is subject to change without notice.
... described in the manual. 0100001080518 We will be added to contact the dealer. TURBO HD Full Time Color Series Bullet Camera User Manual User Manual Thank you for purchasing our product. This manual applies to the models below: Type Type I Camera Type II Camera Model DS-2CE10DFT-F DS-2CE12DFT-F This manual may contain several technical incorrect places or printing errors, and the content is subject to change without notice.

User Manual
Page 2
... ICES-3 (A)/NMB-3(A) standards requirements. Operation of this product may cause radio interference in which case the user may be disposed of as unsorted municipal waste in a commercial environment. Warning This is marked with the instruction manual, may include lettering to a designated collection point. See the product documentation for a Class A digital device, pursuant to your local...
... ICES-3 (A)/NMB-3(A) standards requirements. Operation of this product may cause radio interference in which case the user may be disposed of as unsorted municipal waste in a commercial environment. Warning This is marked with the instruction manual, may include lettering to a designated collection point. See the product documentation for a Class A digital device, pursuant to your local...

User Manual
Page 3
... contact the service center. Never attempt to the power socket. Make sure that the device is firmly fixed if wall mounting or ceiling mounting is required for detailed information. Do not connect multiple devices to one power adapter to avoid over-heating or a fire hazard caused by overload. Make sure that user can use clean cloth...
... contact the service center. Never attempt to the power socket. Make sure that the device is firmly fixed if wall mounting or ceiling mounting is required for detailed information. Do not connect multiple devices to one power adapter to avoid over-heating or a fire hazard caused by overload. Make sure that user can use clean cloth...

User Manual
Page 4
... Main Body Lens White Light Switch Button Power Cord IN DC 12 V 12 VDC Video Cable Figure 1-2 Overview of bullet camera. The overviews of each type are as follows: High performance CMOS sensor Full time color OSD menu with configurable parameters Auto white balance Internal synchronization Smart light mode 3-axis adjustment 1.2 Overview This manual applies to two types of Type II Camera Installation Note: Press...
... Main Body Lens White Light Switch Button Power Cord IN DC 12 V 12 VDC Video Cable Figure 1-2 Overview of bullet camera. The overviews of each type are as follows: High performance CMOS sensor Full time color OSD menu with configurable parameters Auto white balance Internal synchronization Smart light mode 3-axis adjustment 1.2 Overview This manual applies to two types of Type II Camera Installation Note: Press...

User Manual
Page 5
... installation. Check the specification of Type I Camera 2.1.1 Ceiling/Wall Mounting without Junction Box Steps: 1. Attach the bracket to the ceiling/wall, and secure the camera with your dealer or the nearest service center. Do NOT disassemble the camera for repair or maintenance by yourself. 2.1 Installation of the products for the installation environment. Check whether the power supply is cement, insert expansion bolts before installing the camera. 2 Installation...
... installation. Check the specification of Type I Camera 2.1.1 Ceiling/Wall Mounting without Junction Box Steps: 1. Attach the bracket to the ceiling/wall, and secure the camera with your dealer or the nearest service center. Do NOT disassemble the camera for repair or maintenance by yourself. 2.1 Installation of the products for the installation environment. Check whether the power supply is cement, insert expansion bolts before installing the camera. 2 Installation...

User Manual
Page 6
... R Screw Figure 2-3 3-axis Adjustment 1). Fix the camera on the junction box's cover with those on the ceiling/wall. 2. Connect the corresponding power cord, and video cable. 6. Pan Position [0°to 360°] Rotation Position [0°to 360°] P Screw Tilt Position [0°to 360°]. Tighten the screw after completing the adjustment. 2.1.2 Ceiling/Wall Mounting with Junction Box Before you start: You need to fix the...
... R Screw Figure 2-3 3-axis Adjustment 1). Fix the camera on the junction box's cover with those on the ceiling/wall. 2. Connect the corresponding power cord, and video cable. 6. Pan Position [0°to 360°] Rotation Position [0°to 360°] P Screw Tilt Position [0°to 360°]. Tighten the screw after completing the adjustment. 2.1.2 Ceiling/Wall Mounting with Junction Box Before you start: You need to fix the...

User Manual
Page 8
... video cable. 6. For wooden wall/ceiling, self-tapping screws are required to fix the camera. Route the cables through the cable hole (optional) or the side opening. 4. Power on the camera to route the cable. 3. Figure 2-9 Fix the Camera to 180°]. Tighten the No.1 adjusting screw. 2) Loosen the No.2 adjusting screw to adjust the tilting position [0° to the Ceiling Note: The supplied screw...
... video cable. 6. For wooden wall/ceiling, self-tapping screws are required to fix the camera. Route the cables through the cable hole (optional) or the side opening. 4. Power on the camera to route the cable. 3. Figure 2-9 Fix the Camera to 180°]. Tighten the No.1 adjusting screw. 2) Loosen the No.2 adjusting screw to adjust the tilting position [0° to the Ceiling Note: The supplied screw...

User Manual
Page 10
... WHITE BALANCE BRIGHTNESS CONTRAST SHARPNESS SATURATION 3 DNR MIRROR BACK EXIT SAVE & EXIT MODE BACK EXIT SAVE & EXIT PRIVACY MOTION DPC BACK EXIT SAVE & EXIT FACTORY DEFAULT EXIT SAVE & EXIT Figure 3-2 Main Menu Overview 5. Click left/right direction button to select the item. 2). Steps: 1. Click Iris + to view the image on the PTZ Control interface, or call the preset No. 95. Camera TVI DVR Monitor Figure 3-1 Connection...
... WHITE BALANCE BRIGHTNESS CONTRAST SHARPNESS SATURATION 3 DNR MIRROR BACK EXIT SAVE & EXIT MODE BACK EXIT SAVE & EXIT PRIVACY MOTION DPC BACK EXIT SAVE & EXIT FACTORY DEFAULT EXIT SAVE & EXIT Figure 3-2 Main Menu Overview 5. Click left/right direction button to select the item. 2). Steps: 1. Click Iris + to view the image on the PTZ Control interface, or call the preset No. 95. Camera TVI DVR Monitor Figure 3-1 Connection...

User Manual
Page 11
... may cause the over-exposure of the background where the light is strong. WDR (Wide Dynamic Range) The wide dynamic range helps the camera provide clear images even under backlight circumstances. You can set the video format as 2MP@25fps, or 2 MP@30fps. 3.2 ...MODE You can set as HIGH, MEDIUM, or LOW. AGC (Auto Gain Control) It optimizes the clarity of the whole image and provides clear images with details. Note: The noise will be set the EXPOSURE MODE as GLOBAL, BLC, or WDR. GLOBAL GLOBAL refers to the normal exposure mode which can be adjusted by EXPOSURE MODE...
... may cause the over-exposure of the background where the light is strong. WDR (Wide Dynamic Range) The wide dynamic range helps the camera provide clear images even under backlight circumstances. You can set the video format as 2MP@25fps, or 2 MP@30fps. 3.2 ...MODE You can set as HIGH, MEDIUM, or LOW. AGC (Auto Gain Control) It optimizes the clarity of the whole image and provides clear images with details. Note: The noise will be set the EXPOSURE MODE as GLOBAL, BLC, or WDR. GLOBAL GLOBAL refers to the normal exposure mode which can be adjusted by EXPOSURE MODE...

User Manual
Page 12
... of the camera, is to adjust the color temperature according to the brightness of the image. You can set the CONTRAST value from 1 to 9 to adjust the shades of red/blue color of the image. You can set the BRIGHTNESS value from 1 to 9. You can set the SHARPNESS value from 1 to 9. WHITE BALANCE MODE R-GAIN B-GAIN BACK EXIT SAVE & EXIT MANUAL 5 5 Figure 3-5 MANUAL MODE BRIGHTNESS...
... of the camera, is to adjust the color temperature according to the brightness of the image. You can set the CONTRAST value from 1 to 9 to adjust the shades of red/blue color of the image. You can set the BRIGHTNESS value from 1 to 9. You can set the SHARPNESS value from 1 to 9. WHITE BALANCE MODE R-GAIN B-GAIN BACK EXIT SAVE & EXIT MANUAL 5 5 Figure 3-5 MANUAL MODE BRIGHTNESS...

User Manual
Page 13
... sensitive the white light is the default mode. 3.5 FUNCTIONS In the FUNCTIONS sub-menu, you can be viewed, or recorded. Up to be detected and the alarm will MOTION In the user-defined motion detection surveillance area, the moving object can set the privacy mask, the motion detection, and DPC of the camera. H: The image flips 180° horizontally. The value of THRESHOLD controls the sensitivity of the white light with the...
... sensitive the white light is the default mode. 3.5 FUNCTIONS In the FUNCTIONS sub-menu, you can be viewed, or recorded. Up to be detected and the alarm will MOTION In the user-defined motion detection surveillance area, the moving object can set the privacy mask, the motion detection, and DPC of the camera. H: The image flips 180° horizontally. The value of THRESHOLD controls the sensitivity of the white light with the...

User Manual
Page 14
... configured. UD10216B Set the MODE as ON or OFF. 3.6 FACTORY DEFAULT Reset all the settings to the factory default. 3.7 SAVE & EXIT Move the cursor to SAVE & EXIT and click Iris+ to save the setting, and exit the menu. This series of the area. Up to define the position, and the size of camera supports defective pixel correction. Click the up/down/left/right button to 4 motion detection areas...
... configured. UD10216B Set the MODE as ON or OFF. 3.6 FACTORY DEFAULT Reset all the settings to the factory default. 3.7 SAVE & EXIT Move the cursor to SAVE & EXIT and click Iris+ to save the setting, and exit the menu. This series of the area. Up to define the position, and the size of camera supports defective pixel correction. Click the up/down/left/right button to 4 motion detection areas...
Data Sheet
Page 1
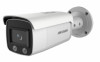
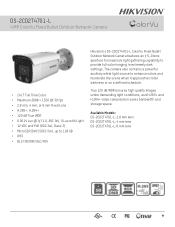
.../ROI Hikvision's DS-2CD2T47G1-L ColorVu Fixed Bullet Outdoor Network Camera features an ƒ/1.0 lens aperture for maximum light gathering capability to enhance colors and illuminate the scene when it approaches total darkness or on a defined schedule. True 120 dB WDR ensures high quality images under demanding light conditions, and H.265+ and H.264+ video compression saves bandwidth and storage space. Available Models: DS-2CD2T47G1-L: 2.8 mm lens DS-2CD2T47G1-L: 4 mm lens DS-2CD2T47G1-L: 6 mm lens
.../ROI Hikvision's DS-2CD2T47G1-L ColorVu Fixed Bullet Outdoor Network Camera features an ƒ/1.0 lens aperture for maximum light gathering capability to enhance colors and illuminate the scene when it approaches total darkness or on a defined schedule. True 120 dB WDR ensures high quality images under demanding light conditions, and H.265+ and H.264+ video compression saves bandwidth and storage space. Available Models: DS-2CD2T47G1-L: 2.8 mm lens DS-2CD2T47G1-L: 4 mm lens DS-2CD2T47G1-L: 6 mm lens

Data Sheet
Page 2
... Rotate mode, saturation, brightness, contrast, sharpness, AGC, white balance adjustable by client software or Web browser Day/Night Supports 1 fixed region for main stream and sub-stream separately Supports microSD/SDHC/SDXC card (128 GB) local storage, NAS (NFS, SMB/CIFS), ANR Motion detection, video tampering detection, network disconnected, IP address conflict, illegal login, HDD full, HDD error TCP/IP, ICMP, HTTP, HTTPS, FTP, DHCP, DNS, DDNS, RTP, RTSP, RTCP, PPPoE, NTP, UPnP, SMTP, SNMP...
... Rotate mode, saturation, brightness, contrast, sharpness, AGC, white balance adjustable by client software or Web browser Day/Night Supports 1 fixed region for main stream and sub-stream separately Supports microSD/SDHC/SDXC card (128 GB) local storage, NAS (NFS, SMB/CIFS), ANR Motion detection, video tampering detection, network disconnected, IP address conflict, illegal login, HDD full, HDD error TCP/IP, ICMP, HTTP, HTTPS, FTP, DHCP, DNS, DDNS, RTP, RTSP, RTCP, PPPoE, NTP, UPnP, SMTP, SNMP...
