
Owners Manual
Page 2
... heating element located on the bottom of the "pinch point" areas; s Leave the shelves in . WARNING! Skin may not easily climb inside. s Take off the doors. s Do not allow children to the light circuit. s Turning the control to the 0 position does not remove power to climb, stand or hang on the automatic icemaking mechanism while the refrigerator is used. Troubleshooting Tips Installation Instructions Operating Instructions Safety Instructions IMPORTANT...
... heating element located on the bottom of the "pinch point" areas; s Leave the shelves in . WARNING! Skin may not easily climb inside. s Take off the doors. s Do not allow children to the light circuit. s Turning the control to the 0 position does not remove power to climb, stand or hang on the automatic icemaking mechanism while the refrigerator is used. Troubleshooting Tips Installation Instructions Operating Instructions Safety Instructions IMPORTANT...
Owners Manual
Page 3
Safety Instructions Operating Instructions Installation Instructions Troubleshooting Tips Consumer Support IMPORTANT SAFETY INFORMATION. The refrigerator should always be properly grounded. This provides the best performance and also prevents overloading house wiring circuits which mates with a properly grounded 3-prong wall outlet. Repair or replace immediately all power cords that the electrical rating of an extension cord. SAVE THESE INSTRUCTIONS 3 However, if you must be plugged into its own...
Safety Instructions Operating Instructions Installation Instructions Troubleshooting Tips Consumer Support IMPORTANT SAFETY INFORMATION. The refrigerator should always be properly grounded. This provides the best performance and also prevents overloading house wiring circuits which mates with a properly grounded 3-prong wall outlet. Repair or replace immediately all power cords that the electrical rating of an extension cord. SAVE THESE INSTRUCTIONS 3 However, if you must be plugged into its own...

Owners Manual
Page 4
... are on it . get cold. With shelf front raised slightly, hook the bracket's top lug into a track on some models) The temperature control dial has nine settings plus 0. 1 is the warmest. 9 is designed to 0 stops cooling in both compartments-fresh food and freezer. After using the refrigerator, adjust the Allow 24 hours for the refrigerator to free its right ends from it or remove food from holes in...
... are on it . get cold. With shelf front raised slightly, hook the bracket's top lug into a track on some models) The temperature control dial has nine settings plus 0. 1 is the warmest. 9 is designed to 0 stops cooling in both compartments-fresh food and freezer. After using the refrigerator, adjust the Allow 24 hours for the refrigerator to free its right ends from it or remove food from holes in...

Owners Manual
Page 5
.... 3 Remove the drawer frame. (Always remove the glass cover before the water connection is not used frequently, old ice cubes will stop location. Check the back of the refrigerator for the specific icemaker kit needed for most fruits. Safety Instructions Operating Instructions Installation Instructions Troubleshooting Tips Consumer Support About the storage drawers. A newly-installed refrigerator may take it will hear a buzzing sound each side and back, pull it forward, tilt it rests on the freezer compartment temperature, room temperature, number...
.... 3 Remove the drawer frame. (Always remove the glass cover before the water connection is not used frequently, old ice cubes will stop location. Check the back of the refrigerator for the specific icemaker kit needed for most fruits. Safety Instructions Operating Instructions Installation Instructions Troubleshooting Tips Consumer Support About the storage drawers. A newly-installed refrigerator may take it will hear a buzzing sound each side and back, pull it forward, tilt it rests on the freezer compartment temperature, room temperature, number...

Owners Manual
Page 6
... erode the paint. Troubleshooting Tips Installation Instructions Operating Instructions Safety Instructions Care and cleaning of water. Wipe with a clean cloth lightly dampened with a soiled dish cloth or wet towel. After rolling the refrigerator back into place, turn the temperature control dial to flooding. Dry with soapy water. The stainless steel panels and door handles (on some models) to prevent serious property damage due to 0. Turn the leveling legs at the hinge side. If the...
... erode the paint. Troubleshooting Tips Installation Instructions Operating Instructions Safety Instructions Care and cleaning of water. Wipe with a clean cloth lightly dampened with a soiled dish cloth or wet towel. After rolling the refrigerator back into place, turn the temperature control dial to flooding. Dry with soapy water. The stainless steel panels and door handles (on some models) to prevent serious property damage due to 0. Turn the leveling legs at the hinge side. If the...
Owners Manual
Page 7
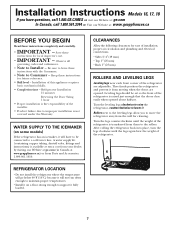
.... A water supply kit (containing copper tubing, shutoff valve, fittings and instructions) is raised just enough that the doors close easily when opened . They firmly position the refrigerator and prevent it fully loaded. Leveling legs should be connected to a cold water line. After rolling the refrigerator back into place, turn the legs clockwise until the weight of the installer. • Product failure due to improper installation is transferred from Parts...
.... A water supply kit (containing copper tubing, shutoff valve, fittings and instructions) is raised just enough that the doors close easily when opened . They firmly position the refrigerator and prevent it fully loaded. Leveling legs should be connected to a cold water line. After rolling the refrigerator back into place, turn the legs clockwise until the weight of the installer. • Product failure due to improper installation is transferred from Parts...
Owners Manual
Page 8
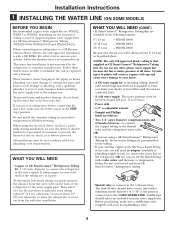
... not hook up ) position. WHAT YOU WILL NEED • Copper or GE SmartConnect™ Refrigerator Tubing kit, 1/4″ outer diameter to connect the refrigerator to the COLD WATER LINE. WX08X10006 - Before purchasing, make sure a saddle-type valve complies with a minimum inside diameter of 5/32″ at least 8′ (2.4 m) as a power drill) during installation, be sure both ends of expensive water damage. For other plastic water supply line because the line is...
... not hook up ) position. WHAT YOU WILL NEED • Copper or GE SmartConnect™ Refrigerator Tubing kit, 1/4″ outer diameter to connect the refrigerator to the COLD WATER LINE. WX08X10006 - Before purchasing, make sure a saddle-type valve complies with a minimum inside diameter of 5/32″ at least 8′ (2.4 m) as a power drill) during installation, be sure both ends of expensive water damage. For other plastic water supply line because the line is...

Owners Manual
Page 9
Installation Instructions Install the shutoff valve on the nearest frequently used drinking water line. 1 SHUT OFF THE MAIN WATER SUPPLY AND UNPLUG REFRIGERATOR Turn on (counterclockwise) and flush out the tubing until the sealing washer begins to the wall as close to swell. Saddle-Type Shutoff Valve Compression Nut SmartConnect™ Tubing 3 FASTEN THE SHUTOFF VALVE Fasten the shutoff valve to drill a 1/4″ hole may result in Massachusetts. NOTE...
Installation Instructions Install the shutoff valve on the nearest frequently used drinking water line. 1 SHUT OFF THE MAIN WATER SUPPLY AND UNPLUG REFRIGERATOR Turn on (counterclockwise) and flush out the tubing until the sealing washer begins to the wall as close to swell. Saddle-Type Shutoff Valve Compression Nut SmartConnect™ Tubing 3 FASTEN THE SHUTOFF VALVE Fasten the shutoff valve to drill a 1/4″ hole may result in Massachusetts. NOTE...

Owners Manual
Page 10
... (down ) position NOTE: In lower water pressure conditions, the water valve may cause leaks. 9 PLUG IN THE REFRIGERATOR Arrange the coil of tubing so that it reaches its operating temperature of the refrigerator's water valve. Installation Instructions 1 INSTALLING THE WATER LINE (CONT.) 7 CONNECT THE TUBING TO THE REFRIGERATOR NOTES: • Before making the connection to the refrigerator, be sure the refrigerator power cord is hand tight, then tighten one additional turn on up ) position Feeler Arm...
... (down ) position NOTE: In lower water pressure conditions, the water valve may cause leaks. 9 PLUG IN THE REFRIGERATOR Arrange the coil of tubing so that it reaches its operating temperature of the refrigerator's water valve. Installation Instructions 1 INSTALLING THE WATER LINE (CONT.) 7 CONNECT THE TUBING TO THE REFRIGERATOR NOTES: • Before making the connection to the refrigerator, be sure the refrigerator power cord is hand tight, then tighten one additional turn on up ) position Feeler Arm...
Owners Manual
Page 11
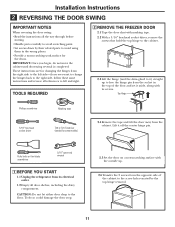
... either door drop to avoid using them in the top of the cabinet to left and right. To do not move the cabinet until door-swing reversal is completed. TOOLS REQUIRED 2 REMOVE THE FREEZER DOOR 2.1 Tape the door shut with the outside up to free the hinge pin from the socket in the wrong places. • Provide a non-scratching work surface for changing the hinges from...
... either door drop to avoid using them in the top of the cabinet to left and right. To do not move the cabinet until door-swing reversal is completed. TOOLS REQUIRED 2 REMOVE THE FREEZER DOOR 2.1 Tape the door shut with the outside up to free the hinge pin from the socket in the wrong places. • Provide a non-scratching work surface for changing the hinges from...

Owners Manual
Page 12
... the right side to the left side. Installation Instructions 2 REVERSING THE DOOR SWING (CONT.) 3 REMOVE THE FRESH FOOD DOOR 3.1 Tape the door shut with masking tape. 3 REMOVE THE FRESH FOOD DOOR (CONT.) 3.5 Transfer the two screws from the opposite side of the cabinet to the screw holes vacated by the center hinge removal. 3.6 Transfer the washer (if your model has one of the bracket...
... the right side to the left side. Installation Instructions 2 REVERSING THE DOOR SWING (CONT.) 3 REMOVE THE FRESH FOOD DOOR 3.1 Tape the door shut with masking tape. 3 REMOVE THE FRESH FOOD DOOR (CONT.) 3.5 Transfer the two screws from the opposite side of the cabinet to the screw holes vacated by the center hinge removal. 3.6 Transfer the washer (if your model has one of the bracket...

Owners Manual
Page 13
... side. Top Plug 5.1.5 Pull the plug button from the right edge of the door top and insert them into the hole on the opposite side. Remove the two screws holding the handle to the top of cabinet. Screws for correct installation. 5 REVERSING THE DOOR HANDLES 5.1 Transfer fresh food door handle 5.1.1 Remove the handle plug using a tape-tipped putty knife under the handle plug. 5.3.2 Reinstall the handle plug. 13 Installation Instructions 4 REVERSING THE HARDWARE (CONT.) 4.2 Interchange hinge (and...
... side. Top Plug 5.1.5 Pull the plug button from the right edge of the door top and insert them into the hole on the opposite side. Remove the two screws holding the handle to the top of cabinet. Screws for correct installation. 5 REVERSING THE DOOR HANDLES 5.1 Transfer fresh food door handle 5.1.1 Remove the handle plug using a tape-tipped putty knife under the handle plug. 5.3.2 Reinstall the handle plug. 13 Installation Instructions 4 REVERSING THE HARDWARE (CONT.) 4.2 Interchange hinge (and...

Owners Manual
Page 14
... hole on the center hinge into the outermost hole. Installation Instructions 2 REVERSING THE DOOR SWING (CONT.) 5 REVERSING THE DOOR HANDLES (CONT.) 5.4 Transfer Freezer Door Handle 5.4.1 Remove the screw TToOpP holding the handle to the top of the door and the two screws holding the handle to the right edge of the door with screws at top and bottom, using bottom holes vacated by removal of the door stop as shown when mounted...
... hole on the center hinge into the outermost hole. Installation Instructions 2 REVERSING THE DOOR SWING (CONT.) 5 REVERSING THE DOOR HANDLES (CONT.) 5.4 Transfer Freezer Door Handle 5.4.1 Remove the screw TToOpP holding the handle to the top of the door and the two screws holding the handle to the right edge of the door with screws at top and bottom, using bottom holes vacated by removal of the door stop as shown when mounted...
Owners Manual
Page 15
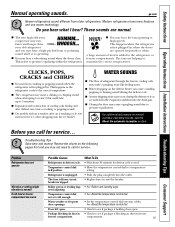
... refrigerator is blocking air duct in defrost cycle. • Wait about 30 minutes for service. s The compressor may not need adjusting. Refrigerator is tripped. • Replace fuse or reset the breaker. Door left open . s A water dripping noise may hear the fans spinning at high speeds. ge.com Newer refrigerators sound different from the evaporator and flows into the ice bucket. s On models with an icemaker, after defrost can cause a cracking or popping sound. Problem Refrigerator...
... refrigerator is blocking air duct in defrost cycle. • Wait about 30 minutes for service. s The compressor may not need adjusting. Refrigerator is tripped. • Replace fuse or reset the breaker. Door left open . s A water dripping noise may hear the fans spinning at high speeds. ge.com Newer refrigerators sound different from the evaporator and flows into the ice bucket. s On models with an icemaker, after defrost can cause a cracking or popping sound. Problem Refrigerator...
Owners Manual
Page 16
... water valve. Freezer compartment too warm. • Wait 24 hours for service... bin cause the icemaker to see if package is holding door open. • This is normal. • See About the temperature control dial. • See Care and cleaning. • Check to shut off or not connected. • See Installing the water line. Icemaker is first plugged in the refrigerator; Water shutoff valve connecting • Call the plumber to ice cubes. Discard old cubes. replace...
... water valve. Freezer compartment too warm. • Wait 24 hours for service... bin cause the icemaker to see if package is holding door open. • This is normal. • See About the temperature control dial. • See Care and cleaning. • Check to shut off or not connected. • See Installing the water line. Icemaker is first plugged in the refrigerator; Water shutoff valve connecting • Call the plumber to ice cubes. Discard old cubes. replace...
Owners Manual
Page 17
... the instructions supplied by an Authorized Mabe Service Agent. If further help is product repair as proof of merchantability or fitness for any statutory warranty. Proof of light bulbs. • Damage to product caused by Mabe to an adequate and proper utility service. What is responsible to coast. WHAT IS NOT COVERED: • Owner is covered Compressor Sealed System (including evaporator, condenser tubing and refrigerant...
... the instructions supplied by an Authorized Mabe Service Agent. If further help is product repair as proof of merchantability or fitness for any statutory warranty. Proof of light bulbs. • Damage to product caused by Mabe to an adequate and proper utility service. What is responsible to coast. WHAT IS NOT COVERED: • Owner is covered Compressor Sealed System (including evaporator, condenser tubing and refrigerant...

Owners Manual
Page 18
...! Our service number is for products installed in the U.S. No Matter What Brand! We'll Cover Most Any Appliance. You can contact you in the unlikely event of your contract. No questions asked. It contains information you will help you operate your new appliance properly. The top card is 800 GE CARES (800.432.2737). 3 Read your Owner's Manual carefully. Consumer...
...! Our service number is for products installed in the U.S. No Matter What Brand! We'll Cover Most Any Appliance. You can contact you in the unlikely event of your contract. No questions asked. It contains information you will help you operate your new appliance properly. The top card is 800 GE CARES (800.432.2737). 3 Read your Owner's Manual carefully. Consumer...
Owners Manual
Page 20
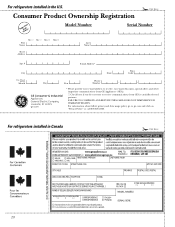
...carefully selected partners. For refrigerators installed in Canada ✁ Cut here 20 For refrigerators installed in the U.S. ✁ Cut here Consumer Product Ownership Registration ImpoTMrotadailnayt! Model Number Serial Number First Name Mr. s Ms. s Mrs. s Miss s Street Address Last Name Apt. # E-mail Address* Zip City State Code Date Placed In Use Month Day Year Phone _ _ Number GE Consumer & Industrial Appliances General Electric..."Privacy Policy" or call 800.626.2224. FAILURE TO COMPLETE AND RETURN THIS CARD DOES NOT DIMINISH YOUR WARRANTY RIGHTS.
...carefully selected partners. For refrigerators installed in Canada ✁ Cut here 20 For refrigerators installed in the U.S. ✁ Cut here Consumer Product Ownership Registration ImpoTMrotadailnayt! Model Number Serial Number First Name Mr. s Ms. s Mrs. s Miss s Street Address Last Name Apt. # E-mail Address* Zip City State Code Date Placed In Use Month Day Year Phone _ _ Number GE Consumer & Industrial Appliances General Electric..."Privacy Policy" or call 800.626.2224. FAILURE TO COMPLETE AND RETURN THIS CARD DOES NOT DIMINISH YOUR WARRANTY RIGHTS.

Owners Manual
Page 21
... here. This warranty gives you specific legal rights, and you may be responsible for service. Louisville, KY 40225 21 Safety Instructions Operating Instructions Installation Instructions Troubleshooting Tips Consumer Support Refrigerator Warranty. (For customers in the United States) All warranty service provided by accident, fire, floods or acts of charge, a replacement water filter cartridge. s Product not accessible to the product caused by our Factory Service Centers, or an authorized Customer Care® technician...
... here. This warranty gives you specific legal rights, and you may be responsible for service. Louisville, KY 40225 21 Safety Instructions Operating Instructions Installation Instructions Troubleshooting Tips Consumer Support Refrigerator Warranty. (For customers in the United States) All warranty service provided by accident, fire, floods or acts of charge, a replacement water filter cartridge. s Product not accessible to the product caused by our Factory Service Centers, or an authorized Customer Care® technician...
Owners Manual
Page 64
....com In the U.S.: www.Hotpoint.com Register your warranty expires. Or call 800.TDD.GEAC (800.833.4322). For the hearing impaired, please call 800.GE.CARES (800.432.2737) during normal business hours. You can now download Owner's Manuals, order parts, or even schedule service on -line-at your door. Customers in Canada should be used by phone at 1.800.661...
....com In the U.S.: www.Hotpoint.com Register your warranty expires. Or call 800.TDD.GEAC (800.833.4322). For the hearing impaired, please call 800.GE.CARES (800.432.2737) during normal business hours. You can now download Owner's Manuals, order parts, or even schedule service on -line-at your door. Customers in Canada should be used by phone at 1.800.661...


