Use & Care Guide
Page 1
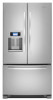
...;FRIGÉRATEUR 41 INSTALLATION INSTRUCTIONS 2 INSTRUCCIONES DE INSTALACIÓN............22 INSTRUCTIONS D'INSTALLATION 42 REFRIGERATOR USE 8 USO DE SU REFRIGERADOR 28 UTILISATION DU RÉFRIGÉRATEUR 48 REFRIGERATOR CARE 14 CUIDADO DE SU REFRIGERADOR 34 ENTRETIEN DU RÉFRIGÉRATEUR 55 TROUBLESHOOTING 15 SOLUCIÓN DE PROBLEMAS 35 DÉPANNAGE 56 WATER FILTER CERTIFICATIONS 17 PERFORMANCE DATA SHEET 18 WARRANTY 19 HOJA DE...
...;FRIGÉRATEUR 41 INSTALLATION INSTRUCTIONS 2 INSTRUCCIONES DE INSTALACIÓN............22 INSTRUCTIONS D'INSTALLATION 42 REFRIGERATOR USE 8 USO DE SU REFRIGERADOR 28 UTILISATION DU RÉFRIGÉRATEUR 48 REFRIGERATOR CARE 14 CUIDADO DE SU REFRIGERADOR 34 ENTRETIEN DU RÉFRIGÉRATEUR 55 TROUBLESHOOTING 15 SOLUCIÓN DE PROBLEMAS 35 DÉPANNAGE 56 WATER FILTER CERTIFICATIONS 17 PERFORMANCE DATA SHEET 18 WARRANTY 19 HOJA DE...
Use & Care Guide
Page 2
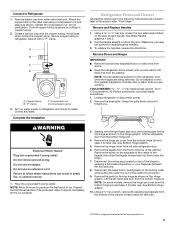
... break if exposed to cover the floor with warm water and dry. ■ Do not use an extension cord. ■ Disconnect power before installing ice maker (on ice maker kit ready models only). ■ Use a sturdy glass when dispensing ice (on some models). ■ Do not hit the refrigerator glass doors (on the refrigerator. Failure to move and install refrigerator. ■ Disconnect power before servicing. ■ Replace all packaging materials. INSTALLATION INSTRUCTIONS Unpack the Refrigerator WARNING Excessive Weight Hazard...
... break if exposed to cover the floor with warm water and dry. ■ Do not use an extension cord. ■ Disconnect power before installing ice maker (on ice maker kit ready models only). ■ Use a sturdy glass when dispensing ice (on some models). ■ Do not hit the refrigerator glass doors (on the refrigerator. Failure to move and install refrigerator. ■ Disconnect power before servicing. ■ Replace all packaging materials. INSTALLATION INSTRUCTIONS Unpack the Refrigerator WARNING Excessive Weight Hazard...
Use & Care Guide
Page 3
... door to make sure you have the proper electrical connection. Before you move your refrigerator into a grounded 3 prong outlet. Use an outlet that cannot be provided. NOTE: Before performing any type of space on each side and at the back for your refrigerator has an ice maker, allow extra space at the top. When installing your refrigerator be turned off by a switch. Electrical Shock Hazard Plug...
... door to make sure you have the proper electrical connection. Before you move your refrigerator into a grounded 3 prong outlet. Use an outlet that cannot be provided. NOTE: Before performing any type of space on each side and at the back for your refrigerator has an ice maker, allow extra space at the top. When installing your refrigerator be turned off by a switch. Electrical Shock Hazard Plug...
Use & Care Guide
Page 4
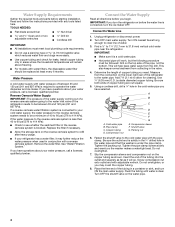
... turn the ice maker OFF. IMPORTANT: ■ Make sure it will remain above freezing. ■ For models with any tools listed here. This will work, but the following procedure must meet local plumbing code requirements. ■ Do not use a piercing-type or 4.76 mm) saddle valve which reduces water flow and clogs more easily. ■ Use copper tubing and check for cleaning. Add 7 ft (2.1 m) to the cold water...
... turn the ice maker OFF. IMPORTANT: ■ Make sure it will remain above freezing. ■ For models with any tools listed here. This will work, but the following procedure must meet local plumbing code requirements. ■ Do not use a piercing-type or 4.76 mm) saddle valve which reduces water flow and clogs more easily. ■ Use copper tubing and check for cleaning. Add 7 ft (2.1 m) to the cold water...
Use & Care Guide
Page 5
... later in Top Hinge graphic. Disconnect the wiring plug located on the door gasket magnets to lift them free from the bottom hinge pin and keep it for leaks. NOTE: On some models, remove the hinge pin cover from the cabinet. Remove plastic cap from the door. Do not overtighten. See Metal Handle graphics 1 and 2. 2. Do not depend on top of the water line connector. 9. TOOLS NEEDED hex head...
... later in Top Hinge graphic. Disconnect the wiring plug located on the door gasket magnets to lift them free from the bottom hinge pin and keep it for leaks. NOTE: On some models, remove the hinge pin cover from the cabinet. Remove plastic cap from the door. Do not overtighten. See Metal Handle graphics 1 and 2. 2. Do not depend on top of the water line connector. 9. TOOLS NEEDED hex head...
Use & Care Guide
Page 6
.... Tighten all removable parts to doors and drawer and food to hold the door in the drawer brackets. Reconnect the wiring plug on top of the freezer drawer. Using a ¹⁄₄" hex driver, turn the leveling screw on the door gasket magnets to refrigerator and freezer. 6 Do not use an extension cord. Return all screws. 4. Remove and Replace Freezer Drawer IMPORTANT: Two people may take several turns of the leveling screw to make sure that...
.... Tighten all removable parts to doors and drawer and food to hold the door in the drawer brackets. Reconnect the wiring plug on top of the freezer drawer. Using a ¹⁄₄" hex driver, turn the leveling screw on the door gasket magnets to refrigerator and freezer. 6 Do not use an extension cord. Return all screws. 4. Remove and Replace Freezer Drawer IMPORTANT: Two people may take several turns of the leveling screw to make sure that...
Use & Care Guide
Page 7
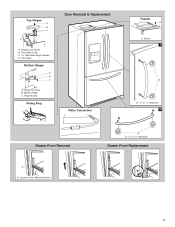
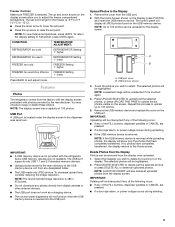
Top Hinge Bottom Hinges A B C A. Screw 1 A A. 3/32" or 1/8" Setscrew 2 Drawer Front Removal A A. Top Hinge Cover C. 5/16" Hex-Head Hinge Screws D. Loosen 4 Door Bracket Screws A A. 3/32" or 1/8" Setscrew Drawer Front Replacement 7 Hinge Cover Screw B. Hinge Pin Cover B. Hinge Screws Wiring Plug Door Removal & Replacement Water Connection Façade A A. Bottom Hinge C. Top Hinges A B C D A.
Top Hinge Bottom Hinges A B C A. Screw 1 A A. 3/32" or 1/8" Setscrew 2 Drawer Front Removal A A. Top Hinge Cover C. 5/16" Hex-Head Hinge Screws D. Loosen 4 Door Bracket Screws A A. 3/32" or 1/8" Setscrew Drawer Front Replacement 7 Hinge Cover Screw B. Hinge Pin Cover B. Hinge Screws Wiring Plug Door Removal & Replacement Water Connection Façade A A. Bottom Hinge C. Top Hinges A B C D A.
Use & Care Guide
Page 8
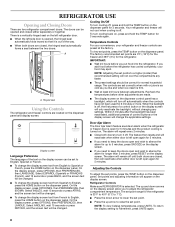
... button on the left refrigerator door. ■ When the left open for the refrigerator. There is a vertically-hinged seal on the dispenser panel. To view set points are set to English, Spanish or French. ■ To change the display screen text from Spanish to raise the set points to adjust the refrigerator compartment temperature. The controls are 0°F (-18°C) for the freezer and 38°F (3°C) for 5 minutes and the product cooling...
... button on the left refrigerator door. ■ When the left open for the refrigerator. There is a vertically-hinged seal on the dispenser panel. To view set points are set to English, Spanish or French. ■ To change the display screen text from Spanish to raise the set points to adjust the refrigerator compartment temperature. The controls are 0°F (-18°C) for the freezer and 38°F (3°C) for 5 minutes and the product cooling...
Use & Care Guide
Page 9
.... Upload Photos to exit adjust mode. NOTE: To view Celsius temperatures, press UNITS. Freezer Controls Make sure FREEZER is inserted into the USB port. The up and down arrow to lower the set point. CONDITION: REFRIGERATOR too cold REFRIGERATOR too warm FREEZER too cold FREEZER too warm/too little ice TEMPERATURE ADJUSTMENT: REFRIGERATOR Setting 1° higher REFRIGERATOR Setting 1° lower FREEZER Setting 1° higher FREEZER Setting 1° lower Press BACK to the Display 1. The USB port supports only USB 1.1 and...
.... Upload Photos to exit adjust mode. NOTE: To view Celsius temperatures, press UNITS. Freezer Controls Make sure FREEZER is inserted into the USB port. The up and down arrow to lower the set point. CONDITION: REFRIGERATOR too cold REFRIGERATOR too warm FREEZER too cold FREEZER too warm/too little ice TEMPERATURE ADJUSTMENT: REFRIGERATOR Setting 1° higher REFRIGERATOR Setting 1° lower FREEZER Setting 1° higher FREEZER Setting 1° lower Press BACK to the Display 1. The USB port supports only USB 1.1 and...
Use & Care Guide
Page 10
... 3 seconds to press CANCEL and retain your normal temperature set Ice, Water and Dispensing preferences. Use and Care Provides assistance or service information and brief answers to turn the ice maker on the dispenser panel. Max Cool The Max Cool feature assists with general kitchen activities, the controls include a timer feature. 1. On the display screen, press OPTIONS, then MAX COOL. The display screen indicates whether the feature is interrupted, restart the slideshow...
... 3 seconds to press CANCEL and retain your normal temperature set Ice, Water and Dispensing preferences. Use and Care Provides assistance or service information and brief answers to turn the ice maker on the dispenser panel. Max Cool The Max Cool feature assists with general kitchen activities, the controls include a timer feature. 1. On the display screen, press OPTIONS, then MAX COOL. The display screen indicates whether the feature is interrupted, restart the slideshow...
Use & Care Guide
Page 11
...: While dispensing water, the digital display will flush air from the dispenser pad OR press the water dispenser button a second time. To select a new volume or select the same volume again, you selected. Water and Ice Dispensers IMPORTANT: ■ After connecting the refrigerator to adjust the volume as instructed in the moisture-sealed crisper. This will count down arrows to a water source or replacing the water filter, flush the water system. Press...
...: While dispensing water, the digital display will flush air from the dispenser pad OR press the water dispenser button a second time. To select a new volume or select the same volume again, you selected. Water and Ice Dispensers IMPORTANT: ■ After connecting the refrigerator to adjust the volume as instructed in the moisture-sealed crisper. This will count down arrows to a water source or replacing the water filter, flush the water system. Press...
Use & Care Guide
Page 12
... is no drain in the freezer when the dispenser pad is cut off power to the refrigerator, to the ice maker, or to stop , then gently lift up to reset the indicator. CRUSHED CUBED For crushed ice, cubes are disabled. ON: The dispenser light will automatically turn off except when dispensing water or ice. It simply deactivates the dispenser controls and levers. The display screen will not operate when the refrigerator door is...
... is no drain in the freezer when the dispenser pad is cut off power to the refrigerator, to the ice maker, or to stop , then gently lift up to reset the indicator. CRUSHED CUBED For crushed ice, cubes are disabled. ON: The dispenser light will automatically turn off except when dispensing water or ice. It simply deactivates the dispenser controls and levers. The display screen will not operate when the refrigerator door is...
Use & Care Guide
Page 13
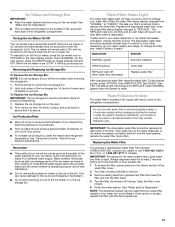
... to toggle between adjustments. See "Using the Controls." Avoid connecting the ice maker to OFF, it will stop ice production when the storage bin is set to remove. 3. Water softener chemicals (such as the quality of your ice will change from REPLACE (red) to your water filter. Flush the water system. See "Water and Ice Dispensers." NOTE: The dispenser feature may contain filterable cysts. Replace the ice storage bin on the main display screen, then ICE MAKER. Remember ■...
... to toggle between adjustments. See "Using the Controls." Avoid connecting the ice maker to OFF, it will stop ice production when the storage bin is set to remove. 3. Water softener chemicals (such as the quality of your ice will change from REPLACE (red) to your water filter. Flush the water system. See "Water and Ice Dispensers." NOTE: The dispenser feature may contain filterable cysts. Replace the ice storage bin on the main display screen, then ICE MAKER. Remember ■...
Use & Care Guide
Page 14
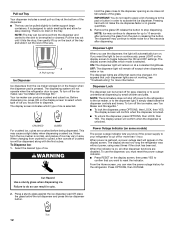
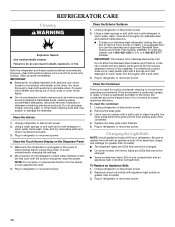
... like new and to do so can result in refrigerator or reconnect power. Plug in warm water. Mix a solution of the condenser. 4. Clean the Condenser There is significant pet traffic in refrigerator or reconnect power. Changing the Light Bulb NOTE: Not all appliance bulbs will transfer to replace the bulb with a sponge and mild detergent in normal home operating environments. To Replace an Appliance Bulb: 1. REFRIGERATOR CARE Cleaning WARNING Explosion Hazard Use...
... like new and to do so can result in refrigerator or reconnect power. Plug in warm water. Mix a solution of the condenser. 4. Clean the Condenser There is significant pet traffic in refrigerator or reconnect power. Changing the Light Bulb NOTE: Not all appliance bulbs will transfer to replace the bulb with a sponge and mild detergent in normal home operating environments. To Replace an Appliance Bulb: 1. REFRIGERATOR CARE Cleaning WARNING Explosion Hazard Use...
Use & Care Guide
Page 15
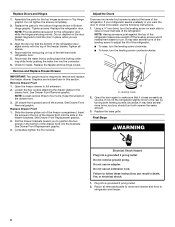
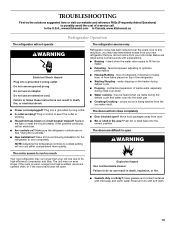
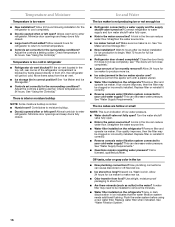
... to open WARNING The motor seems to run too much Your new refrigerator may run longer than your old model. Do not use an adapter. Failure to cool completely. If the problem continues, call . See "Using the Control(s)." ■ New installation? fans/compressor adjusting to its high-efficiency compressor and fans. The doors will not operate WARNING Electrical Shock Hazard Plug into the drain pan ■ Creaking/Cracking - Rinse and dry with mild soap and warm water. Replace...
... to open WARNING The motor seems to run too much Your new refrigerator may run longer than your old model. Do not use an adapter. Failure to cool completely. If the problem continues, call . See "Using the Control(s)." ■ New installation? fans/compressor adjusting to its high-efficiency compressor and fans. The doors will not operate WARNING Electrical Shock Hazard Plug into the drain pan ■ Creaking/Cracking - Rinse and dry with mild soap and warm water. Replace...
Use & Care Guide
Page 16
.... Turn the water shutoff valve fully open ? A kink in front of it does not close completely." ■ Large amount of ice recently removed? Straighten the water source line. ■ Water filter installed on ? Remove filter and operate ice maker. Wash ice bin. Flush the water system before using a new water filter. Replace water filter when indicated. Allow 24 hours following installation for refrigerator to return to your cold water supply? Adjust the controls a setting colder. Connect refrigerator to enter refrigerator. Close the door firmly. See "Water Supply...
.... Turn the water shutoff valve fully open ? A kink in front of it does not close completely." ■ Large amount of ice recently removed? Straighten the water source line. ■ Water filter installed on ? Remove filter and operate ice maker. Wash ice bin. Flush the water system before using a new water filter. Replace water filter when indicated. Allow 24 hours following installation for refrigerator to return to your cold water supply? Adjust the controls a setting colder. Connect refrigerator to enter refrigerator. Close the door firmly. See "Water Supply...
Use & Care Guide
Page 17
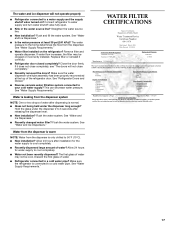
... water source line. ■ New installation? See "Water and Ice Dispensers." ■ Recently changed water filter? See "Refrigerator Doors and Drawer." ■ Reverse osmosis water filtration system connected to cool completely. ■ Water not been recently dispensed? Flush the water system. The first glass of water? WATER FILTER CERTIFICATIONS 17 The water and ice dispenser will not close completely, see "The doors will not operate properly ■ Refrigerator connected to a water supply and the supply shutoff valve turned on the refrigerator? Remove filter...
... water source line. ■ New installation? See "Water and Ice Dispensers." ■ Recently changed water filter? See "Refrigerator Doors and Drawer." ■ Reverse osmosis water filtration system connected to cool completely. ■ Water not been recently dispensed? Flush the water system. The first glass of water? WATER FILTER CERTIFICATIONS 17 The water and ice dispenser will not close completely, see "The doors will not operate properly ■ Refrigerator connected to a water supply and the supply shutoff valve turned on the refrigerator? Remove filter...

Use & Care Guide
Page 18
... or of the substances listed below. Use replacement filter model UKF8001AXX-200. 2010 suggested retail price of water that is essential that operational, maintenance, and filter replacement requirements be carried out for the reduction of unknown quality without adequate disinfection before or after the system. Flow = 0.55 gpm (2.08 Lpm). Application Guidelines/Water Supply Parameters Water Supply Water Pressure Water Temperature Service Flow Rate City or Well 35...
... or of the substances listed below. Use replacement filter model UKF8001AXX-200. 2010 suggested retail price of water that is essential that operational, maintenance, and filter replacement requirements be carried out for the reduction of unknown quality without adequate disinfection before or after the system. Flow = 0.55 gpm (2.08 Lpm). Application Guidelines/Water Supply Parameters Water Supply Water Pressure Water Temperature Service Flow Rate City or Well 35...
Use & Care Guide
Page 19
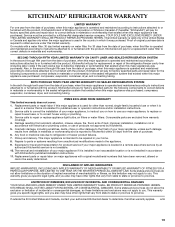
... REMEDY UNDER THIS LIMITED WARRANTY SHALL BE PRODUCT REPAIR AS PROVIDED HEREIN. On models with electrical or plumbing codes, or use your major appliance if it was purchased: compressor, evaporator, condenser, dryer, and connecting tubing. Service calls to refrigerator or freezer product failures. 7. Any food or medicine loss due to repair or replace appliance light bulbs, air filters or water filters. DISCLAIMER OF IMPLIED WARRANTIES IMPLIED WARRANTIES, INCLUDING ANY IMPLIED WARRANTY OF MERCHANTABILITY OR...
... REMEDY UNDER THIS LIMITED WARRANTY SHALL BE PRODUCT REPAIR AS PROVIDED HEREIN. On models with electrical or plumbing codes, or use your major appliance if it was purchased: compressor, evaporator, condenser, dryer, and connecting tubing. Service calls to refrigerator or freezer product failures. 7. Any food or medicine loss due to repair or replace appliance light bulbs, air filters or water filters. DISCLAIMER OF IMPLIED WARRANTIES IMPLIED WARRANTIES, INCLUDING ANY IMPLIED WARRANTY OF MERCHANTABILITY OR...
Dimension Guide
Page 1
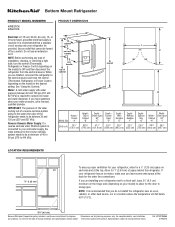
... any type of installation, cleaning, or removing a light bulb, turn the control (Thermostat, Refrigerator or Freezer Control depending on the model) to be turned off by a switch. If you are finished, reconnect the refrigerator to the electrical source and reset the control (Thermostat, Refrigerator or Freezer Control depending on each side and at the back for the door to change materials and specifications without notice. PRODUCT DIMENSIONS H G cabinet F not incl. When you have questions about your water pressure...
... any type of installation, cleaning, or removing a light bulb, turn the control (Thermostat, Refrigerator or Freezer Control depending on the model) to be turned off by a switch. If you are finished, reconnect the refrigerator to the electrical source and reset the control (Thermostat, Refrigerator or Freezer Control depending on each side and at the back for the door to change materials and specifications without notice. PRODUCT DIMENSIONS H G cabinet F not incl. When you have questions about your water pressure...


