
Owners Manual
Page 5
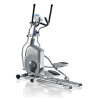
Parts Item Qty Description 1 1 Frame 2 2 Pedal Mount Plate 3 1 Rear Stabilizer 4 1 Front Stabilizer 5 1 Console Mast 6 1 Transport Handle 7 2 Rail 8 1 Right Pedal 9 1 Left Pedal 10 1 Right Leg 11 1 Left Leg 12 1 Upper Right Handlebar Arm Item Qty 13 1 14 1 15 1 16 1 17 1 18 1 19 1 20 1 21 1 22 1 23 1 Description Upper Left Handlebar Arm Lower Left Handlebar Arm Lower Right Handlebar Arm Static Handlebar Console Water Bottle Brace Power Cord Water Bottle Holder Arm Pivot Rod Manual Pack Hardware Card 5
Parts Item Qty Description 1 1 Frame 2 2 Pedal Mount Plate 3 1 Rear Stabilizer 4 1 Front Stabilizer 5 1 Console Mast 6 1 Transport Handle 7 2 Rail 8 1 Right Pedal 9 1 Left Pedal 10 1 Right Leg 11 1 Left Leg 12 1 Upper Right Handlebar Arm Item Qty 13 1 14 1 15 1 16 1 17 1 18 1 19 1 20 1 21 1 22 1 23 1 Description Upper Left Handlebar Arm Lower Left Handlebar Arm Lower Right Handlebar Arm Static Handlebar Console Water Bottle Brace Power Cord Water Bottle Holder Arm Pivot Rod Manual Pack Hardware Card 5

Owners Manual
Page 19
Do not use or put the machine into service until the machine has been fully assembled and inspected for correct performance in accordance with the Owner's Manual. 19 Connect Power Cord to Frame Assembly Final Inspection Inspect your machine to ensure that all fasteners are tight and components are properly assembled. 13.
Do not use or put the machine into service until the machine has been fully assembled and inspected for correct performance in accordance with the Owner's Manual. 19 Connect Power Cord to Frame Assembly Final Inspection Inspect your machine to ensure that all fasteners are tight and components are properly assembled. 13.

Owners Manual
Page 34
...done. Check for loose, broken, damaged, or worn parts. Daily Monthly Weekly Before each use the machine if any of electrical shock, always unplug the power cord and wait 5 minutes before cleaning, maintaining or repairing this machine. NOTICE: Do not clean with a damp cloth. Worn or damaged components must be replaced... equipment removed from service until the repair is made. If you would like additional information, please refer to our Web site at www.nautilus.com/prop65 To reduce the risk of these conditions exist. Do not use , inspect for smooth roller operation.
...done. Check for loose, broken, damaged, or worn parts. Daily Monthly Weekly Before each use the machine if any of electrical shock, always unplug the power cord and wait 5 minutes before cleaning, maintaining or repairing this machine. NOTICE: Do not clean with a damp cloth. Worn or damaged components must be replaced... equipment removed from service until the repair is made. If you would like additional information, please refer to our Web site at www.nautilus.com/prop65 To reduce the risk of these conditions exist. Do not use , inspect for smooth roller operation.

Owners Manual
Page 35
Injury to you must level your workout area is level. Remove the power cord. 2. Carefully lower the machine into position. 4. Push the machine into position. 35 Level the Machine If your machine. Turn the leveling bolts below the Rear Stabilizer until the machine is uneven, you or damage to lift the machine onto the transport wheels. 3. Use the Transport Handle to the machine can occur. 1. Moving the Machine Do not move the machine without aid.
Injury to you must level your workout area is level. Remove the power cord. 2. Carefully lower the machine into position. 4. Push the machine into position. 35 Level the Machine If your machine. Turn the leveling bolts below the Rear Stabilizer until the machine is uneven, you or damage to lift the machine onto the transport wheels. 3. Use the Transport Handle to the machine can occur. 1. Moving the Machine Do not move the machine without aid.
