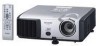
PG-F212X-L | PG-F262X | PG-F312X | PG-F317X Brochure
Page 1
PG-F317X, PG-F312X, PG-F262X, PG-F212X-L XGA Conference/Classroom Data-Video Projectors NOW with Built-in Closed Caption Sharp High Performance DLP® Projectors with BrilliantColor™ Technology offer Vibrant Color Reproduction, Exceptional Compatibility and Reliability for Corporate and Educational Applications
PG-F212X-L | PG-F262X | PG-F312X | PG-F317X Brochure
Page 2
...-Life High-Performance DLP Picture With DLP technology, the projectors maintain a uniform color reproduction capability for extended periods. This provides a seamless, finely detailed picture. High-Resolution Seamless Image Comparison DLP Aperture Ratio 90% (PG-F317X / F312X / F262X / F212X-L) Aperture Ratio 90%90% 2200:1 High-Contrast, High-Quality Image By utilizing the DLP optical system and Sharp's optical technology...
PG-F212X-L | PG-F262X | PG-F312X | PG-F317X Brochure
Page 3
...remain focused on the screen without distractions of functions may be performed with the projector remote control to aid your subject. Quick Start It only takes approximately 3 seconds at start up and down. Note: PG-F317X also includes RJ-45 LAN terminal (not shown in solving problems with... Power Off Switching Direct Power Off lets users immediately unplug and move the projector. DVI-I and D-sub terminals (in conjunction with black and white text for easy readability. • RJ-45 Network Connector (PG-F317X only) for remote access by using the room's primary power switch in...
PG-F212X-L | PG-F262X | PG-F312X | PG-F317X Brochure
Page 4
... are trademarks of Sharp ER 24-hour turnaround Express Repair. 90-day lamp warranty. AN-C600WCC: Hard-Shell Wheeled Storage Case; Specifications Models PG-F312X / PG-F317X PG-F262X PG-F212X-L Display device 0.55" DLP® chip x 1 Resolution XGA (1,024 x 768...) Brightness 3,000 ANSI lumens 2,600 ANSI lumens 2,400 ANSI lumens Contrast ratio 2,200:1 F number F2.5-2.6 Lens Zoom Manual, x1.15 (f=20.4-23.5 mm) Focus Manual Picture size 40" to 300" Projector...
PG-F312X, PG-F262X, PG-F212X Operation Manual
Page 2
Model No.: Serial No.: ii IMPORTANT • For your assistance in reporting the loss or theft of your Projector, please record the Model and Serial Number located on the bottom of the projector and retain this information. • Before recycling the packaging, please ensure that you have checked the contents of the carton thoroughly against the list of "Supplied accessories" on page 10.
PG-F312X, PG-F262X, PG-F212X Operation Manual
Page 5
... this equipment. Do not stare into the beam of your purchase. 2. See bottom of the parts, service and labor warranty applicable to your new SHARP Projector, using the projector, please read this product to rain or moisture. DO NOT REMOVE SCREWS EXCEPT SPECIFIED USER SERVICE SCREW. REFER SERVICING TO QUALIFIED SERVICE PERSONNEL. Introduction...
PG-F312X, PG-F262X, PG-F212X Operation Manual
Page 6
... frequency energy and, if not installed and used with the device. ONLY Caution Concerning Lamp Replacement See "Replacing the Lamp" on the picture screen. This SHARP projector uses a DLP® chip. ONLY WARNING: This is likely to cause harmful interference, in inactive dots on page 52. For disposal or recycling information, please contact...
PG-F312X, PG-F262X, PG-F212X Operation Manual
Page 7
...Lamp Setting Reset Standard 0 0 0 0 0 1 On Off Bright SEL./ADJ. Example: "Picture" screen menu for setting up and operating the projector. Introduction How to Read this step On-screen display 38 Info ........Indicates safeguards for using the buttons on the model. ENTER END Button used in...8226; This operation can connect and operate all models in this operation manual, the illustration and the screen display are slightly different, depending on the projector. 1 Press MENU/HELP. • The "Picture" menu screen for the selected input mode is displayed. 2 Press Q or O and ...
PG-F312X, PG-F262X, PG-F212X Operation Manual
Page 8
... the Background Image ........ 44 Selecting the Setup Guide 44 Reversing/Inverting Projected Images 44 Selecting the On-screen Display Language 44 Adjusting the Projector Function ("PRJ - Contents Preparing Introduction How to Read this Operation Manual .... 3 Contents 4 IMPORTANT SAFEGUARDS 6 How to Access the PDF...12 Inserting the Batteries 14 Usable Range 15 Quick Start Quick Start 16 Setup and Projection 16 Setup Setting up the Projector 18 Setting up the Projector 18 Standard Setup (Front Projection) ....... 18 Ceiling-mount Setup 18 Projection (PRJ) Mode 19 Screen Size and ...
PG-F312X, PG-F262X, PG-F212X Operation Manual
Page 9
Introduction Troubleshooting with the "Help" Menu 48 Utilizing the "Help" Menu Functions .... 48 Reference Appendix Maintenance 49 Maintenance Indicators 50 Regarding the Lamp 52 Lamp 52 Caution Concerning the Lamp 52 Replacing the Lamp 52 Removing and Installing the Lamp Unit 53 Resetting the Lamp Timer 54 Storing the Projector 55 How to Use the Storage Case 55 Connecting Pin Assignments 56 RS-232C Specifications and Commands 58 Computer Compatibility Chart 63 Troubleshooting 64 For SHARP Assistance 66 Specifications 67 Dimensions 68 Index 69 5
PG-F312X, PG-F262X, PG-F212X Operation Manual
Page 12
...176;F to 95°F (+5°C to +35°C). ■ The storage temperature of the projector is from -4°F to 140°F (-20°C to maintain high image quality, SHARP recommends that the intake vent and the exhaust vent are not blocked, plug the power cord back ...viewing difficult. Close the curtains and dim the lights when setting up your nearest Sharp Authorized Projector Dealer or Service Center for replacement. Warning about placing the projector in a high position ■ When placing the projector in a high position, make certain it is used for long hours will return...
PG-F312X, PG-F262X, PG-F212X Operation Manual
Page 13
... on page 50 for the country you unplug the power cord from the Internet (http://www.adobe.com). Introduction Caution regarding usage of the projector ■ If you are included in the CD-ROM. If the temperature continues to it. ■ If the power cord is unplugged ...Operation Manuals PDF operation manuals in several languages are not to access the pro- jector manuals. Refer to install Adobe® Reader® on the projector will blink, and after a 60-second cooling-off , the temperature warn- Info • The cooling fan regulates the internal temperature, and its ...
PG-F312X, PG-F262X, PG-F212X Operation Manual
Page 14
.... Optional accessories ■ Lamp unit ■ Ceiling-mount adaptor ■ Ceiling-mount unit ■ Remote receiver ■ 3 RCA to the wall outlet in your nearest Sharp Authorized Projector Dealer or Service Center. 10 Please check with your country. • Operation manual (this manual and CD-ROM ) Note • Codes in "< >" are Replacement...
PG-F312X, PG-F262X, PG-F212X Operation Manual
Page 15
... ECO+QUIET button For lowering the noise of the lens cap to the main pages in this operation manual where the topic is explained. Projector Top View Power indicator 25, 50 STANDBY/ON 25 button For turning the power on the menu. KEYSTONE 28 button For entering the Keystone... mode. Front View Zoom ring 26 For enlarging/ reducing the picture. ENTER button For setting 38 items selected or adjusted on and putting the projector into standby mode. Introduction Part Names and Functions Numbers in Z refer to attach or remove. 11 Push both sides of the cooling fan and...
PG-F312X, PG-F262X, PG-F212X Operation Manual
Page 16
... monitor. 22 S-VIDEO input terminal Terminal for connecting video equipment with an S-video terminal. 24 RS-232C terminal Terminal for controlling the projector using the supplied remote control as the computer mouse. 23 AUDIO 2 input terminal 22 VIDEO input terminal Terminal for using a computer. 34...21 terminal Terminal for computer RGB, component and DVI analog signals. Kensington Security Standard connector Using the Kensington Lock • This projector has a Kensington Security Standard connector for use with the USB terminal on how to use it to the audio input terminal....
PG-F312X, PG-F262X, PG-F212X Operation Manual
Page 17
...+QUIET button 32 For lowering the noise of the image. BREAK TIMER button 32 For displaying the break time. STANDBY button 25 For putting the projector into the standby mode. MAGNIFY buttons 33 For enlarging/reducing part of the cooling fan and extending the lamp life. 25 ON button For turning...
PG-F312X, PG-F262X, PG-F212X Operation Manual
Page 18
.... Please follow the precautions below. Caution • Danger of the batteries may cause them using the remote control for a long time. • Comply with this projector may cause old batteries to skin, therefore ensure you will not be using a cloth. • The batteries included with the rules (ordinance) of each local...
PG-F312X, PG-F262X, PG-F212X Operation Manual
Page 19
When using the remote control • Ensure that you do not drop it or expose it to control the projector within the ranges shown in the illustration. In this case, move the projector away from the remote control can be reflected off a screen for easy operation. How- 30° ever, the effective distance...
PG-F312X, PG-F262X, PG-F212X Operation Manual
Page 20
... 4 Focus ring 4 HEIGHT ADJUST lever 4 ENTER button 5 Adjustment buttons (P/R/O/Q) 5 KEYSTONE button 1. Setup and Projection In this section, connection of the projector When connecting equipment other than a computer, see the page described below for each step. Quick Start This section shows the basic operation... (projector connecting with the computer). Place the projector facing a wall or a screen _P. 18 2. Remove the lens cap and turn the projector on On the projector On the remote control _P. 25 16 For details, see...
PG-F312X, PG-F262X, PG-F212X Operation Manual
Page 21
... on , the Setup Guide appears. (When "Setup Guide" is displayed to "On". Adjust the projected image with the Setup Guide 1 After the projector turns on the projector, the INPUT list appears. Select the INPUT mode Select the "COMPUTER" using Keystone Correction. Turn the power off Press STANDBY/ON on the... projector or STANDBY on 8. See page 44.) 2 Follow the steps in the Setup Guide and adjust the focus, picture size, and height (angle). 3 After ...