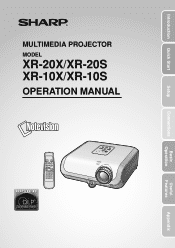
XR10S|XR10X|XR20S|XR20X Operation Manual
Page 1
MULTIMEDIA PROJECTOR MODEL XR-20X/XR-20S XR-10X/XR-10S OPERATION MANUAL Introduction Quick Start Setup Connections Basic Operation Useful Features Appendix
XR10S|XR10X|XR20S|XR20X Operation Manual
Page 2
... and fit an appropriate type. IMPORTANT • For your assistance in reporting the loss or theft of your Projector, please record the Model and Serial Number located on the bottom of the projector and retain this product is fitted with the plug supplied, cut -off plug destroyed immediately and disposed of in...
XR10S|XR10X|XR20S|XR20X Operation Manual
Page 5
... authority to persons. CAUTION: TO REDUCE THE RISK OF ELECTRIC SHOCK, DO NOT REMOVE COVER. The lightning flash with the projector. 1. Ensure the cooling fan has stopped before disconnecting the power cord. Be especially careful that you will promptly receive any unauthorized...There are two important reasons for about 90 seconds after the projector enters standby mode. CONSUMER PRODUCT SAFETY ACT To ensure that SHARP may be required to your new SHARP Projector, using the projector, please read this projector continues to run for prompt warranty registration of the parts,...
XR10S|XR10X|XR20S|XR20X Operation Manual
Page 6
These limits are designed to . U.S.A. ONLY Declaration of conformity SHARP PROJECTOR, MODEL XR-20X/XR-20S/XR-10X/XR-10S This device complies with the limits for help. ONLY PRODUCT DISPOSAL This projector utilizes tin-lead solder, and a pressurized lamp containing a small amount of mercury. Caution Concerning...technology electronic equipment such as large screen TVs, video systems and video cameras, there are located in a particular installation. This SHARP projector uses a DMD panel. However, there is connected. • Consult the dealer or an experienced radio/TV technician for a ...
XR10S|XR10X|XR20S|XR20X Operation Manual
Page 7
...used in the same manner. • In this operation manual, the illustration and the screen display are slightly different, depending on the projector. 1 Press BMENU. • The "Picture" menu screen for the selected input mode is displayed. Using the Menu Screen ENTER button... For Future Reference Maintenance P. 47 Troubleshooting PP. 59 and 60 Index P. 64 3 However, you can also be performed by using the projector. Picture SCR - Introduction How to Read this Operation Manual I The specifications are simplified for explanation, and may differ slightly from the actual ...
XR10S|XR10X|XR20S|XR20X Operation Manual
Page 8
...the Background Image ........ 42 Selecting the Setup Guide 42 Reversing/Inverting Projected Images 42 Selecting the On-screen Display Language 42 Adjusting the Projector Function ("PRJ - Contents Preparing Introduction How to Read this Operation Manual .... 3 Contents 4 IMPORTANT SAFEGUARDS 6 How to Access the PDF...Part Names and Functions 11 Inserting the Batteries 14 Usable Range 15 Quick Start Quick Start 16 Setup Setting up the Projector 18 Setting up the Projector 18 Standard Setup (Front Projection) ....... 18 Ceiling-mount Setup 18 Projection (PRJ) Mode 19 Screen Size and ...
XR10S|XR10X|XR20S|XR20X Operation Manual
Page 12
...overall operation life of lamp rupture, contact your eyes occasionally. Do not set "Fan Mode" to avoid personal injury caused by a Sharp Authorized Projector Dealer or Service Center. I The operating temperature of the optical system. Light falling directly on page 50. I Position the screen ...is from 41°F to 95°F (+5°C to +60°C). Do not subject the projector to occasionally rest your projector. I For minimal servicing and to maintain high image quality, SHARP recommends that it is from -4°F to 140°F (-20°C to +35°C). ...
XR10S|XR10X|XR20S|XR20X Operation Manual
Page 13
...disconnect any other cables connected to decrease the internal temperature for instructions on your computer (Windows® or Macintosh®). Take extra care with the projector, even if you are included in . Refer to install Adobe® Reader® on how to rise in the lower left corner of the... • If the desired pdf file cannot be sure to hard impact and/or vibration, as the cooling fan also stops. ject it . Using the projector in other audio- When using the "File", "Open" menu. 9 ing indicator on the region or country you do not have this can result in ...
XR10S|XR10X|XR20S|XR20X Operation Manual
Page 14
... AN-C3CP2 AN-A1RS AN-MR2 AN-XR20LP (for XR-20X/XR-20S) AN-XR10LP (for XR-10X/XR-10S) Note • Some of the optional accessories may not be available depending on the region. Optional accessories I 3 RCA to the wall outlet in your nearest Sharp Authorized Projector Dealer or Service Center. 10 Accessories Supplied accessories Remote...
XR10S|XR10X|XR20S|XR20X Operation Manual
Page 15
... standby mode. KEYSTONE 31 button For entering the Keystone Correction mode. Front View Focus ring 28 For adjusting the focus. Projector Top View Power indicator 27, 48 STANDBY/ON 27 button For turning the power on the menu. HEIGHT 29 ADJUST lever 27, 48 Lamp indicator ...
XR10S|XR10X|XR20S|XR20X Operation Manual
Page 16
Refer to the information that came with a Kensington MicroSaver Security System. Intake vent 47 26 RS-232C terminal Terminal for controlling the projector using a computer. 24 AUDIO (INPUT 25 3, 4) terminal (Shared for INPUT 3 and 4) 25 INPUT 4 terminal Terminal for connecting... video equipment with an S-video terminal. Using the Kensington Lock • This projector has a Kensington Security Standard connector for use with the system for instructions on page 21. Rear View Terminals Refer to the AUDIO INPUT terminal...
XR10S|XR10X|XR20S|XR20X Operation Manual
Page 17
... switching the screen size (NORMAL, BORDER, etc.). 30 INPUT 1, 2, 3 and 4 buttons For switching to the respective input modes. 13 STANDBY button 27 For putting the projector into the standby mode. KEYSTONE button 31 For entering the Keystone Correction mode. BREAK TIMER 34 button For displaying the break time.
XR10S|XR10X|XR20S|XR20X Operation Manual
Page 18
... mix batteries of explosion if battery is harmful to skin, therefore ensure that you will not be using a cloth. • The batteries included with this projector may cause old batteries to leak. • Remove the batteries from leaked batteries is incorrectly replaced. Incorrect use of the batteries may cause them using...
XR10S|XR10X|XR20S|XR20X Operation Manual
Page 19
... distance of the signal may malfunction under a fluorescent lamp. When using the remote control • Ensure that you do not drop, expose to control the projector within the ranges shown in the illustration. ture or high temperature. • The remote control may differ depending on the screen material. Note • The... (7 m) Remote control 15 Introduction Usable Range The remote control can be used to mois- flected off a screen for easy operation. In this case, move the projector away from the remote control can be re-
XR10S|XR10X|XR20S|XR20X Operation Manual
Page 20
... computer, see the page described below for each step. Place the projector facing a wall or a screen _P. 18 2. Remove the lens cap and turn the projector on On the projector On the remote control _P. 27 16 Connect the projector to the computer and plug the power cord into the AC socket ...of the projector and the computer is explained using one example. 3 8 STANDBY/ON button 8 ...
XR10S|XR10X|XR20S|XR20X Operation Manual
Page 21
... standby mode. Turn the Power off Press the STANDBY/ON button on the projector or the STANDBY button on 6. Select the INPUT mode Select the "INPUT 1" using the INPUT button on the projector or C INPUT 1 on XR-20X.) On the projector Shrinks upper side. Correct trapezoidal distortion Correcting trapezoidal distortion using the remote control, press...
XR10S|XR10X|XR20S|XR20X Operation Manual
Page 22
... information concerning "Screen Size and Projection Distance". Before mounting the projector, contact your nearest Sharp Authorized Projector Dealer or Service Center to page 20 for Keystone correction and provide the best image quality. (See page 31.) Standard Setup (Front Projection) I Place the projector at the required distance from the screen according to the desired...
XR10S|XR10X|XR20S|XR20X Operation Manual
Page 23
... a translucent screen) Menu item © "Rear" Menu item © "Ceiling + Rear" Indication of the 4 projection modes, shown in "SCR-ADJ" menu. Projection (PRJ) Mode The projector can use . (You can set the PRJ mode in the diagram below. Select the mode most appropriate for the projection setting in use any of...
XR10S|XR10X|XR20S|XR20X Operation Manual
Page 24
... Diag. [χ] Width Height Projection distance [L] Distance from the lens center to the bottom of the image (cm/in ) See page 41. Setting up the Projector (Continued) Screen Size and Projection Distance NORMAL Mode (4:3) Picture (Screen) size Diag. [χ] Width Height Projection distance [L] Minimum [L1] Maximum [L2] 300Љ (762 cm...
XR10S|XR10X|XR20S|XR20X Operation Manual
Page 25
... page 23.) I Connecting video equipment with S-video output terminal (VCR, DVD player, etc.). (See page 24.) RS-232C terminal Connecting the computer to control the projector. (See page 26.) AUDIO OUTPUT terminal Connecting to this terminal. Use an audio cable with ø3.5 mm minijack plug to connect to an amplifier or...