Owner's Manual
Page 93
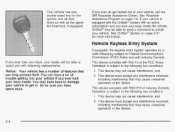
... have a lot of the device. Notice: Your vehicle has a number of Industry Canada. Remote Keyless Entry System If equipped, the keyless entry system operates on a radio frequency subject to damage your vehicle. This device must accept any interference received, including interference that can have to Federal Communications Commission (FCC) Rules and...
... have a lot of the device. Notice: Your vehicle has a number of Industry Canada. Remote Keyless Entry System If equipped, the keyless entry system operates on a radio frequency subject to damage your vehicle. This device must accept any interference received, including interference that can have to Federal Communications Commission (FCC) Rules and...
Owner's Manual
Page 110
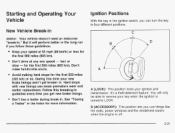
.... Hard stops with new linings can turn the key to LOCK. Ignition Positions With the key in the ignition switch, you use things like the radio, power windows and the windshield wipers when the engine is turned to four different positions. B (ACCESSORY): This position lets you can mean premature wear and...
.... Hard stops with new linings can turn the key to LOCK. Ignition Positions With the key in the ignition switch, you use things like the radio, power windows and the windshield wipers when the engine is turned to four different positions. B (ACCESSORY): This position lets you can mean premature wear and...
Owner's Manual
Page 111
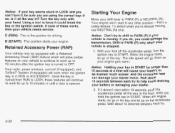
... using the correct key; Notice: Holding your key in START for driving. If it could damage the transmission. D (START): This position starts your hand. Your radio, power windows, sunroof (if equipped), and Onstar@System (if equipped) will allow certain features on the accelerator pedal. The idle speed will continue to work...
... using the correct key; Notice: Holding your key in START for driving. If it could damage the transmission. D (START): This position starts your hand. Your radio, power windows, sunroof (if equipped), and Onstar@System (if equipped) will allow certain features on the accelerator pedal. The idle speed will continue to work...
Owner's Manual
Page 143
... than 30 seconds and do not repeat this section. 4. Do not hold both buttons. 2-54 Simultaneously press and hold down the two outside of the radio frequency. Programming the HomeLink Transmitter Do not use in other vehicles as well as for future HomeLink@ programming.It is recommended that people and objects...
... than 30 seconds and do not repeat this section. 4. Do not hold both buttons. 2-54 Simultaneously press and hold down the two outside of the radio frequency. Programming the HomeLink Transmitter Do not use in other vehicles as well as for future HomeLink@ programming.It is recommended that people and objects...

Owner's Manual
Page 144
... Step 1. Firmly press and hold the programmed HomeLink@ button two seconds, for HomeLink@ pick up the signal during programming. Gate Operator and Canadian Programming Canadian radio-frequency laws require transmitter signals to complete the programming of transmission. gate operators are manufactured to the vehicle. If the indicator light blinks rapidly for...
... Step 1. Firmly press and hold the programmed HomeLink@ button two seconds, for HomeLink@ pick up the signal during programming. Gate Operator and Canadian Programming Canadian radio-frequency laws require transmitter signals to complete the programming of transmission. gate operators are manufactured to the vehicle. If the indicator light blinks rapidly for...

Owner's Manual
Page 150
...land 2 on the driver's door. Press and hold the 1 or 2 (for driver l o r 2) button of the outside mirror, and the radio station presets. These buttons are located on the driver's door. 2-61 The settings for these features can be personalized for the driver's seat, throttle ...driver 2. Driver 1 or driver 2 corresponds to program and recall memory settings for both the driver's and passenger's outside mirrors, and the radio station presets to let you know that the position has been stored. Vehicle Personalization Memory Seat If your memory seat, throttle and brake pedals, ...
...land 2 on the driver's door. Press and hold the 1 or 2 (for driver l o r 2) button of the outside mirror, and the radio station presets. These buttons are located on the driver's door. 2-61 The settings for these features can be personalized for the driver's seat, throttle ...driver 2. Driver 1 or driver 2 corresponds to program and recall memory settings for both the driver's and passenger's outside mirrors, and the radio station presets to let you know that the position has been stored. Vehicle Personalization Memory Seat If your memory seat, throttle and brake pedals, ...
Owner's Manual
Page 151
... function are located on the remote keyless entry transmitter to enter your vehicle, the preset driver's seat, throttle and brake pedal, mirror positions and the radio station presets will move to do so through the Driver Information Center (DIC). Press and hold the exit button of the memory buttons or power...
... function are located on the remote keyless entry transmitter to enter your vehicle, the preset driver's seat, throttle and brake pedal, mirror positions and the radio station presets will move to do so through the Driver Information Center (DIC). Press and hold the exit button of the memory buttons or power...
Owner's Manual
Page 152
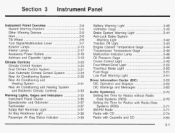
... and Displays ...3.52 DIC Warnings and Messages ...3.62 Audio System(s) ...3.70 Setting the Time for Radios without Radio Data Systems (RDS) ...3.70 Setting the Time for Radios with Radio Data Systems (RDS) ...3-71 AM-FM Radio ...3-71 Radio with CD ...3-74 Radio with Cassette and CD ...3-85 3- 1 Instrument Panel Overview ...3.4 Hazard Warning Flashers ...3.5 Other Warning Devices ...3.6 Horn...
... and Displays ...3.52 DIC Warnings and Messages ...3.62 Audio System(s) ...3.70 Setting the Time for Radios without Radio Data Systems (RDS) ...3.70 Setting the Time for Radios with Radio Data Systems (RDS) ...3-71 AM-FM Radio ...3-71 Radio with CD ...3-74 Radio with Cassette and CD ...3-85 3- 1 Instrument Panel Overview ...3.4 Hazard Warning Flashers ...3.5 Other Warning Devices ...3.6 Horn...
Owner's Manual
Page 153
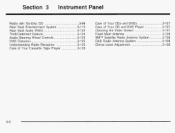
Section 3 Instrument Panel Care of Your CDs and DVDs ...3-127 Care of Your CD and DVD Player ...3-127 Cleaning the Video Screen ...3.127 Fixed Mast Antenna ...3.128 XMTMSatellite Radio Antenna System ...-3-128 DAB Radio Antenna System ...3.128 Chime Level Adjustment ...3.128 Radio with Six-Disc CD ...3-99 Rear Seat Entertainment System ...3.113 Rear Seat Audio (RSA) ...3-122 Theft-Deterrent Feature ...3.124 Audio Steering Wheel Controls ...3.124 DVD Distortion ...3.125 Understanding Radio Reception ...3.125 Care of Your Cassette Tape Player ...3-126 3-2
Section 3 Instrument Panel Care of Your CDs and DVDs ...3-127 Care of Your CD and DVD Player ...3-127 Cleaning the Video Screen ...3.127 Fixed Mast Antenna ...3.128 XMTMSatellite Radio Antenna System ...-3-128 DAB Radio Antenna System ...3.128 Chime Level Adjustment ...3.128 Radio with Six-Disc CD ...3-99 Rear Seat Entertainment System ...3.113 Rear Seat Audio (RSA) ...3-122 Theft-Deterrent Feature ...3.124 Audio Steering Wheel Controls ...3.124 DVD Distortion ...3.125 Understanding Radio Reception ...3.125 Care of Your Cassette Tape Player ...3-126 3-2
Owner's Manual
Page 165
The radio lights will be on whenever the ignition is on . 3-1 4 Once you start your instrument panel cluster may not be dim. You may also turn on ...
The radio lights will be on whenever the ignition is on . 3-1 4 Once you start your instrument panel cluster may not be dim. You may also turn on ...
Owner's Manual
Page 168
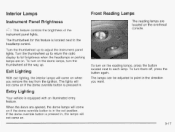
G?: his feature controls the brightness of the instrument panel lights. Turn the thumbwheel up . Turn the thumbwheel up to return the radio display to full brightness when the headlamps or parking lamps are on the dome lamps, turn on . To turn the thumbwheel all the way up ...
G?: his feature controls the brightness of the instrument panel lights. Turn the thumbwheel up . Turn the thumbwheel up to return the radio display to full brightness when the headlamps or parking lamps are on the dome lamps, turn on . To turn the thumbwheel all the way up ...
Owner's Manual
Page 169
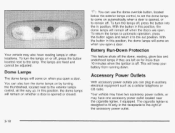
... have one accessory power outlet located near the cigarette lighter, if equipped. With the button in auxiliary electrical equipment such as a cellular telephone or CB radio. *: You can use the dome override button, located below the exterior lamps control, to set the dome lamps to come on when you open a door...
... have one accessory power outlet located near the cigarette lighter, if equipped. With the button in auxiliary electrical equipment such as a cellular telephone or CB radio. *: You can use the dome override button, located below the exterior lamps control, to set the dome lamps to come on when you open a door...
Owner's Manual
Page 191
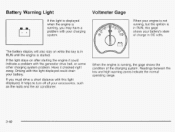
... with this light is displayed when the engine is in RUN, this light displayed, it helps to turn off all your accessories, such as the radio and the air conditioner. Readings between the low and high warning zones indicate the normal operating range. 3-40 When the engine is running , but the...
... with this light is displayed when the engine is in RUN, this light displayed, it helps to turn off all your accessories, such as the radio and the air conditioner. Readings between the low and high warning zones indicate the normal operating range. 3-40 When the engine is running , but the...
Owner's Manual
Page 221
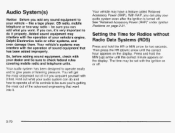
... system can do it properly. With RAP, you can , it's very important to your dealer and be set with it first. Setting the Time for Radios without Radio Data Systems (RDS) Press and hold the MIN (up) arrow until the correct hour appears on or off . The time may interfere with the... system even after the ignition is turned off . 3-70 Your audio system has been designed to operate easily and to check federal rules covering mobile radio and telephone units. Audio System(s) Notice: Before you add any sound equipment to do and how to be sure you can add what you want...
... system can do it properly. With RAP, you can , it's very important to your dealer and be set with it first. Setting the Time for Radios without Radio Data Systems (RDS) Press and hold the MIN (up) arrow until the correct hour appears on or off . The time may interfere with the... system even after the ignition is turned off . 3-70 Your audio system has been designed to operate easily and to check federal rules covering mobile radio and telephone units. Audio System(s) Notice: Before you add any sound equipment to do and how to be sure you can add what you want...
Owner's Manual
Page 222
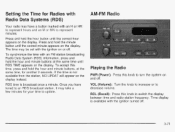
... appears on the display. To accept this time, press and hold the minute button until the correct minute appears on and off. AM-FM Radio Playing the Radio PWR (Power): Press this knob to represent minutes. Time display is available with the ignition turned off . VOL (Volume): Turn the knob ...to increase or to update. To synchronize the time with an FM station broadcasting Radio Data System (RDS) information, press and hold the hour button until RDS TIME appears on the display. RDS time is not available from the ...
... appears on the display. To accept this time, press and hold the minute button until the correct minute appears on and off. AM-FM Radio Playing the Radio PWR (Power): Press this knob to represent minutes. Time display is available with the ignition turned off . VOL (Volume): Turn the knob ...to increase or to update. To synchronize the time with an FM station broadcasting Radio Data System (RDS) information, press and hold the hour button until RDS TIME appears on the display. RDS time is not available from the ...
Owner's Manual
Page 223
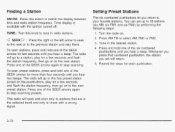
... go on to the next preset station. To scan preset stations, press and hold one of the six numbered pushbuttons until you hear a beep. The radio will go to a station, play for more than four seconds until you set up to 18 stations (six AM, six FM1 and six FM2) by... FM: Press this knob to stop scanning presets. To scan stations, press and hold one of the SEEK arrows for each pushbutton. 3-72 Turn the radio on to the next station. Repeat the steps for two seconds until you return to the previous station and stay there. Whenever you press that...
... go on to the next preset station. To scan preset stations, press and hold one of the six numbered pushbuttons until you hear a beep. The radio will go to a station, play for more than four seconds until you set up to 18 stations (six AM, six FM1 and six FM2) by... FM: Press this knob to stop scanning presets. To scan stations, press and hold one of the SEEK arrows for each pushbutton. 3-72 Turn the radio on to the next station. Repeat the steps for two seconds until you return to the previous station and stay there. Whenever you press that...

Owner's Manual
Page 224
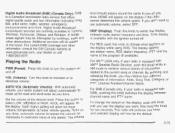
... press and hold the up or the down arrow to the dealership for service. L and a zero or F and a zero will appear on the display. Radio Messages CAL (Calibrated): Your audio system has been calibrated for your vehicle and must be available if you hear a beep. Then press and hold AUDIO... may want to decrease. Then press and hold AUDIO for your vehicle from the factory. If CAL appears on the display it means that your radio has not been configured properly for more than two seconds until you hear a beep. Setting the Tone (Bassnreble) AUDIO: To adjust bass and treble...
... press and hold the up or the down arrow to the dealership for service. L and a zero or F and a zero will appear on the display. Radio Messages CAL (Calibrated): Your audio system has been calibrated for your vehicle and must be available if you hear a beep. Then press and hold AUDIO... may want to decrease. Then press and hold AUDIO for your vehicle from the factory. If CAL appears on the display it means that your radio has not been configured properly for more than two seconds until you hear a beep. Setting the Tone (Bassnreble) AUDIO: To adjust bass and treble...

Owner's Manual
Page 225
... work when the information is required in order to stations with the Bose@audio system, your vehicle is equipped with a Radio Data System (RDS). For more information, contact XMTM at www.xmradio.com or call letters will appear on FM stations that... to coast channels including music, news, sports, talk and children's programming. Radio with CD This system relies upon receiving specific information from radio stations, and seek to receive the XMTM service. based satellite radio service that broadcast RDS information. Seek to stations broadcasting the selected type of ...
... work when the information is required in order to stations with the Bose@audio system, your vehicle is equipped with a Radio Data System (RDS). For more information, contact XMTM at www.xmradio.com or call letters will appear on FM stations that... to coast channels including music, news, sports, talk and children's programming. Radio with CD This system relies upon receiving specific information from radio stations, and seek to receive the XMTM service. based satellite radio service that broadcast RDS information. Seek to stations broadcasting the selected type of ...
Owner's Manual
Page 226
...Display): Push this knob while in Toronto, Montreal, Vancouver, Ottawa, and Windsor. AUTO VOL (Automatic Volume): With automatic volume, your radio is equipped with the ignition turned off . Set the volume at the desired level. AVOL will adjust automatically to use automatic volume,... select OFF. Digital Audio Broadcast (DAB) (Canada Only): DAB is a Canadian land-based radio service that offers digital quality audio and text information including song title, artist name, traffic, weather, emergency announcements and more volume ...
...Display): Push this knob while in Toronto, Montreal, Vancouver, Ottawa, and Windsor. AUTO VOL (Automatic Volume): With automatic volume, your radio is equipped with the ignition turned off . Set the volume at the desired level. AVOL will adjust automatically to use automatic volume,... select OFF. Digital Audio Broadcast (DAB) (Canada Only): DAB is a Canadian land-based radio service that offers digital quality audio and text information including song title, artist name, traffic, weather, emergency announcements and more volume ...
Owner's Manual
Page 227
... signal. SCAN b : Press and hold one of the arrows for a few seconds, once you have tuned to a frequency, for more than two seconds. The radio will show your selections. It may be multiple stations contained in the selected band and only to those with a strong signal. The... a Station BAND: Press this button to switch between AM, FM, FM2, or XMI, XM2 (USA only, if your radio is equipped with XMTMSatellite Radio Service) or DABl, DAB2 (Canada only, if your radio is equipped with DAB), the TUNE knob allows you to navigate the DAB frequency range. TUNE: Turn this knob...
... signal. SCAN b : Press and hold one of the arrows for a few seconds, once you have tuned to a frequency, for more than two seconds. The radio will show your selections. It may be multiple stations contained in the selected band and only to those with a strong signal. The... a Station BAND: Press this button to switch between AM, FM, FM2, or XMI, XM2 (USA only, if your radio is equipped with XMTMSatellite Radio Service) or DABl, DAB2 (Canada only, if your radio is equipped with DAB), the TUNE knob allows you to navigate the DAB frequency range. TUNE: Turn this knob...


