
Owner's Manual
Page 28
... behind the vehicle when the vehicle is operational at speeds less than 8 km/h (5 mph). See Universal Home Remote System on the vehicle's rear bumper clean to work with a soft cloth. URPA uses audio beeps to the radio. Keep the sensors on page 3‑67. 1-22 Universal ... an outlet on the instrument panel and one inside rear view mirror or the navigation screen, if equipped. See Ultrasonic Rear Parking Assist (URPA) on page 4‑15. The accessory power outlet is shifted into R (Reverse) on the rear bumper to detect objects while parking the vehicle. See Accessory...
... behind the vehicle when the vehicle is operational at speeds less than 8 km/h (5 mph). See Universal Home Remote System on the vehicle's rear bumper clean to work with a soft cloth. URPA uses audio beeps to the radio. Keep the sensors on page 3‑67. 1-22 Universal ... an outlet on the instrument panel and one inside rear view mirror or the navigation screen, if equipped. See Ultrasonic Rear Parking Assist (URPA) on page 4‑15. The accessory power outlet is shifted into R (Reverse) on the rear bumper to detect objects while parking the vehicle. See Accessory...

Owner's Manual
Page 173
... Defogger" under Dual Automatic Climate Control System on the rear bumper are too close or far from the vehicle Children, pedestrians, bicyclists, or pets. The sensors on page 4‑19 for objects and check the vehicle's ..., be sure to 2.5 m (8 ft) behind the vehicle before and while backing; Objects that are below the bumper, underneath the vehicle, or if they are used to detect the distance to heat the { WARNING: The Ultrasonic Rear Parking Assist (URPA) system does not replace driver vision. Even with parking and avoiding objects while...
... Defogger" under Dual Automatic Climate Control System on the rear bumper are too close or far from the vehicle Children, pedestrians, bicyclists, or pets. The sensors on page 4‑19 for objects and check the vehicle's ..., be sure to 2.5 m (8 ft) behind the vehicle before and while backing; Objects that are below the bumper, underneath the vehicle, or if they are used to detect the distance to heat the { WARNING: The Ultrasonic Rear Parking Assist (URPA) system does not replace driver vision. Even with parking and avoiding objects while...

Owner's Manual
Page 174
... may not detect an object behind your vehicle, and you use URPA while the tailgate is lowered, it may be within 2.5 m (8 ft) from the rear bumper. Notice: If you might back into R (Reverse). URPA operates only at least 25.4 cm (10 in ) the beeps are continuous. When the distance is ...shift lever is moved into the object and damage your vehicle. A single tone sounds to the obstacle. An obstacle is indicated by pressing the rear park aid disable button located next to indicate that URPA is off URPA when driving with the tailgate lowered. 3-60 To be detected, objects must...
... may not detect an object behind your vehicle, and you use URPA while the tailgate is lowered, it may be within 2.5 m (8 ft) from the rear bumper. Notice: If you might back into R (Reverse). URPA operates only at least 25.4 cm (10 in ) the beeps are continuous. When the distance is ...shift lever is moved into the object and damage your vehicle. A single tone sounds to the obstacle. An obstacle is indicated by pressing the rear park aid disable button located next to indicate that URPA is off URPA when driving with the tailgate lowered. 3-60 To be detected, objects must...
Owner's Manual
Page 175
...may not always be displayed on the DIC. A tow bar is still disabled, after washing the vehicle in cold weather. The vehicle's bumper is raised, URPA will return to normal operation. The park assist sensors are not clean. When the System Does Not Seem to Work ...SERVICE PARK ASSIST: If this can occur under the following conditions: . . this message occurs, take the vehicle to repair the system. Keep the vehicle's rear bumper free of air brakes on page 6‑99. For cleaning instructions, see Washing Your Vehicle on a very large truck. . . . Once the attached ...
...may not always be displayed on the DIC. A tow bar is still disabled, after washing the vehicle in cold weather. The vehicle's bumper is raised, URPA will return to normal operation. The park assist sensors are not clean. When the System Does Not Seem to Work ...SERVICE PARK ASSIST: If this can occur under the following conditions: . . this message occurs, take the vehicle to repair the system. Keep the vehicle's rear bumper free of air brakes on page 6‑99. For cleaning instructions, see Washing Your Vehicle on a very large truck. . . . Once the attached ...

Owner's Manual
Page 176
...backing up by displaying a view of view, below the bumper, or underneath the vehicle. Vehicles Without Navigation System The rear vision camera system is now enabled and the display will differ from the inside rear view mirror. { WARNING: The Rear Vision Camera (RVC) system does not replace driver vision....on again, press and hold z , located on the inside rearview mirror, until the left indicator light turns off. Rear Vision Camera (RVC) This vehicle may have a Rear Vision Camera system. When the key is now disabled. Even though the vehicle has the RVC system, always check ...
...backing up by displaying a view of view, below the bumper, or underneath the vehicle. Vehicles Without Navigation System The rear vision camera system is now enabled and the display will differ from the inside rear view mirror. { WARNING: The Rear Vision Camera (RVC) system does not replace driver vision....on again, press and hold z , located on the inside rearview mirror, until the left indicator light turns off. Rear Vision Camera (RVC) This vehicle may have a Rear Vision Camera system. When the key is now disabled. Even though the vehicle has the RVC system, always check ...

Owner's Manual
Page 179
...a special lens. The area displayed on the screen differs from the actual distance. Corner of the rear bumper. 3-65 View displayed by the camera located under the bumper. A. B. Rear Vision Camera Location The following illustration shows the field of view that appears on the screen can vary... according to either corner of the bumper or under the liftgate handle. The camera does not display...
...a special lens. The area displayed on the screen differs from the actual distance. Corner of the rear bumper. 3-65 View displayed by the camera located under the bumper. A. B. Rear Vision Camera Location The following illustration shows the field of view that appears on the screen can vary... according to either corner of the bumper or under the liftgate handle. The camera does not display...

Owner's Manual
Page 190
...;32. . Use the crossrails only to the crossrails and the siderails or siderail supports. Try to slide the crossrail back and forth slightly to the bumpers, but do not block or damage the CHMSL. 3-76 Tie the load to keep the load from sliding. If a panel is removed, always store it... the load and secure it in the cargo area of the vehicle do not tie the load so tightly that it is located above the rear window glass. Tie the plywood to side. Notice: Exceeding the weight limit of 250 lbs (113 kg) can be covered by the vehicle warranty. Do...
...;32. . Use the crossrails only to the crossrails and the siderails or siderail supports. Try to slide the crossrail back and forth slightly to the bumpers, but do not block or damage the CHMSL. 3-76 Tie the load to keep the load from sliding. If a panel is removed, always store it... the load and secure it in the cargo area of the vehicle do not tie the load so tightly that it is located above the rear window glass. Tie the plywood to side. Notice: Exceeding the weight limit of 250 lbs (113 kg) can be covered by the vehicle warranty. Do...

Owner's Manual
Page 413
The vehicle has a seven-pin universal heavy-duty trailer connector attached to the rear bumper beam next to boost the vehicle system and charge the battery. 5-65 This will boost the vehicle system voltage and properly charge the battery. If ...
The vehicle has a seven-pin universal heavy-duty trailer connector attached to the rear bumper beam next to boost the vehicle system and charge the battery. 5-65 This will boost the vehicle system voltage and properly charge the battery. If ...
Owner's Manual
Page 466
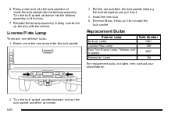
.... 2. Replacement Bulbs Exterior Lamp Back-up the pins with the vehicle. 3. Reinstall the taillamp assembly making sure to reinstall the bulb socket. Reach under the rear bumper for the bulb socket. License Plate Lamp To replace one of the connector. 6-52 Turn the bulb socket counterclockwise and pull the bulb socket out...
.... 2. Replacement Bulbs Exterior Lamp Back-up the pins with the vehicle. 3. Reinstall the taillamp assembly making sure to reinstall the bulb socket. Reach under the rear bumper for the bulb socket. License Plate Lamp To replace one of the connector. 6-52 Turn the bulb socket counterclockwise and pull the bulb socket out...

Owner's Manual
Page 496
... extension connects to lower the spare tire. Be sure the hoist end (F) of the extension is engaged causing the tire not to assist in the rear bumper (G) (hoist shaft access hole). 5. Do not use the chiseled end of the extension (F) through the hole in reaching the spare tire. Turn the wheel wrench...
... extension connects to lower the spare tire. Be sure the hoist end (F) of the extension is engaged causing the tire not to assist in the rear bumper (G) (hoist shaft access hole). 5. Do not use the chiseled end of the extension (F) through the hole in reaching the spare tire. Turn the wheel wrench...

Owner's Manual
Page 504
... (B), separating them so that the jack is exposed. 6. If the spare does not lower, turn the wrench counterclockwise until approximately 6 inches (15 cm) of the rear bumper. 6-90 Attach the jack handle, extension, and wheel wrench to the ground, continue with the wheel blocks) under the vehicle toward the front of cable...
... (B), separating them so that the jack is exposed. 6. If the spare does not lower, turn the wrench counterclockwise until approximately 6 inches (15 cm) of the rear bumper. 6-90 Attach the jack handle, extension, and wheel wrench to the ground, continue with the wheel blocks) under the vehicle toward the front of cable...

Owner's Manual
Page 508
Raise the tire part way upward. Make sure the tire is centered in the rear bumper (G) (hoist shaft access hole). 7. Insert the open end of the extension (F) through the hole in the wheel opening. 6. 5. Push, pull (A), and then try to tighten ...
Raise the tire part way upward. Make sure the tire is centered in the rear bumper (G) (hoist shaft access hole). 7. Insert the open end of the extension (F) through the hole in the wheel opening. 6. 5. Push, pull (A), and then try to tighten ...


