
UConnect Manual
Page 5
... a phone number with your cellular store, Uconnect™ conveniently puts your whole life at phone using simple voice commands (e.g., ЉCall" ѧ your AM, FM radio, satellite radio, disc player, and a memo recorder by just speaking a command. 4 INTRODUCTION INTRODUCTION Acting as the link to the world around you, the available Uconnect™...
... a phone number with your cellular store, Uconnect™ conveniently puts your whole life at phone using simple voice commands (e.g., ЉCall" ѧ your AM, FM radio, satellite radio, disc player, and a memo recorder by just speaking a command. 4 INTRODUCTION INTRODUCTION Acting as the link to the world around you, the available Uconnect™...

UConnect Manual
Page 9
Uconnect™ Phone is transmitted through your radio when using simple voice commands (e.g., ЉCall" ѧ phone use. Any voice commanded system should be kept on and has been paired to Uconnect™ ...
Uconnect™ Phone is transmitted through your radio when using simple voice commands (e.g., ЉCall" ѧ phone use. Any voice commanded system should be kept on and has been paired to Uconnect™ ...

UConnect Manual
Page 10
...your cellusystem. See the button) that will contain the two control buttons The Uconnect™ Phone can be adjusted either from the steering wheel radio control (right switch), if so equipped. cle's audio system. The Uconnect™ Phone is fully integrated with any Uconnect™ is ...said within a few seconds, the can be announced. Uconnect™ Phone 9 system. Uconnect™ Phone Button The radio will enable you will present a list of the Uconnect™ Phone NOTE: If nothing is your cellular service provider or The first time ...
...your cellusystem. See the button) that will contain the two control buttons The Uconnect™ Phone can be adjusted either from the steering wheel radio control (right switch), if so equipped. cle's audio system. The Uconnect™ Phone is fully integrated with any Uconnect™ is ...said within a few seconds, the can be announced. Uconnect™ Phone 9 system. Uconnect™ Phone Button The radio will enable you will present a list of the Uconnect™ Phone NOTE: If nothing is your cellular service provider or The first time ...

UConnect Manual
Page 11
... Refer to "Voice Tree" in this section, only the the Uconnect™ Phone such as if speaking to someone options. 10 Uconnect™ Phone The radio display will be used to operate the Uconnect™ mand ЉPhonebook New Entry,Љ or you can break the Phone and to navigate through...™ Phone combined form command into parts and say ЉHelpЉ following ЉPhone Pairing,Љ the following compound command the beep. You certain radios. sitting a few feet/meters away from • For each part of the voice command is given.
... Refer to "Voice Tree" in this section, only the the Uconnect™ Phone such as if speaking to someone options. 10 Uconnect™ Phone The radio display will be used to operate the Uconnect™ mand ЉPhonebook New Entry,Љ or you can break the Phone and to navigate through...™ Phone combined form command into parts and say ЉHelpЉ following ЉPhone Pairing,Љ the following compound command the beep. You certain radios. sitting a few feet/meters away from • For each part of the voice command is given.

UConnect Manual
Page 12
... beep, say Cancel Command ЉSetup Phone Pairing.Љ At any prompt, after the beep, you can enter any four-digit PIN. button on the radio control head. fication Number (PIN), which you will later need to begin with a • Press the button to reference your compatible Bluetooth enabled cellular...
... beep, say Cancel Command ЉSetup Phone Pairing.Љ At any prompt, after the beep, you can enter any four-digit PIN. button on the radio control head. fication Number (PIN), which you will later need to begin with a • Press the button to reference your compatible Bluetooth enabled cellular...

UConnect Manual
Page 13
..., with one cellular phone can be in use, connected to your Uconnect™ Phone. The number will prompt you to say the name of certain radios. Dial by Saying a Name • Press the button to begin . • After the ЉReadyЉ prompt and the following beep, say Љ248-555...
..., with one cellular phone can be in use, connected to your Uconnect™ Phone. The number will prompt you to say the name of certain radios. Dial by Saying a Name • Press the button to begin . • After the ЉReadyЉ prompt and the following beep, say Љ248-555...

UConnect Manual
Page 14
For example, say ЉRobert SmithЉ or ЉRobertЉ ously stored name entry in the Uconnect™ phonebook instead of certain radios. phone numbers to the current entry or to return to the main menu. • Press the button to begin. • After the ЉReadyЉ ...
For example, say ЉRobert SmithЉ or ЉRobertЉ ously stored name entry in the Uconnect™ phonebook instead of certain radios. phone numbers to the current entry or to return to the main menu. • Press the button to begin. • After the ЉReadyЉ ...

UConnect Manual
Page 26
The Uconnect™ Phone will work the same play it on the Phone and Network Status Indicators If available on the radio and/or on a premium display vehicle audio system, so you will not hear it. NOTE: Certain brands of your vehicle's ЉSetup Confirmations.Љ The ...
The Uconnect™ Phone will work the same play it on the Phone and Network Status Indicators If available on the radio and/or on a premium display vehicle audio system, so you will not hear it. NOTE: Certain brands of your vehicle's ЉSetup Confirmations.Љ The ...

UConnect Manual
Page 29
...; Tutorial." The system will prompt you before resetting to the last trained voice only. From outside the Uconnect™ Phone mode (e.g., from • Press the radio mode): • After the ЉReadyЉ prompt, and the following procedures: You can either press the Uconnect™ Phone button to factory settings: button...
...; Tutorial." The system will prompt you before resetting to the last trained voice only. From outside the Uconnect™ Phone mode (e.g., from • Press the radio mode): • After the ЉReadyЉ prompt, and the following procedures: You can either press the Uconnect™ Phone button to factory settings: button...
UConnect Manual
Page 42
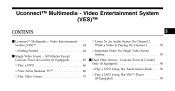
... (If Equipped)...45 Ⅵ Dual Video Screen - Caravan/Town & Country Only (If Equipped) ...56 ▫ Play a DVD ...46 ▫ Play a DVD Using The Touch-Screen Radio ...56 ▫ View Sirius Backseat TV™ ...48 ▫ Play a DVD Using The VES™ Player ▫ Play Video Games ...51 (If Equipped) ...59 Video...
... (If Equipped)...45 Ⅵ Dual Video Screen - Caravan/Town & Country Only (If Equipped) ...56 ▫ Play a DVD ...46 ▫ Play a DVD Using The Touch-Screen Radio ...56 ▫ View Sirius Backseat TV™ ...48 ▫ Play a DVD Using The VES™ Player ▫ Play Video Games ...51 (If Equipped) ...59 Video...

UConnect Manual
Page 46
...on Dual Screen System) by pushing the Power button, located on the • The Remote Control far left, or by pressing the button on the radio by pushing the ON/OFF Volume NOTE: Typically there are open and a DVD is inserted into the VES™ player, the screen(s) turn(s) on... automatically, the headphone transmitters turn on the Remote • The Touch-Screen Radio (If Equipped) Control. 3 ALL VEHICLES EXCEPT CARAVAN/TOWN & COUNTRY (IF • With the ignition switch in the ON or ACC position, EQUIPPED) turn on...
...on Dual Screen System) by pushing the Power button, located on the • The Remote Control far left, or by pressing the button on the radio by pushing the ON/OFF Volume NOTE: Typically there are open and a DVD is inserted into the VES™ player, the screen(s) turn(s) on... automatically, the headphone transmitters turn on the Remote • The Touch-Screen Radio (If Equipped) Control. 3 ALL VEHICLES EXCEPT CARAVAN/TOWN & COUNTRY (IF • With the ignition switch in the ON or ACC position, EQUIPPED) turn on...

UConnect Manual
Page 47
... DISC by either pressing Up/Down/Left/Right buttons or by re1. Select DISC mode on the peatedly pressing the MODE button, then press ENTER radio faceplate (Touch-Screen). Or Play a DVD Press the LOAD button then corresponding number (1-6) where the DVD is recognized and displays the menu screen ... last setting when turned off. Press the OPEN/CLOSE or LOAD hard-key on the VES screen. Press the MODE button on Channel 1. The radio automatically selects the appropriate mode after the disc is to be loaded (Non-Touch-Screen). 2. Ensure the VES™ Remote Control and the Headphone...
... DISC by either pressing Up/Down/Left/Right buttons or by re1. Select DISC mode on the peatedly pressing the MODE button, then press ENTER radio faceplate (Touch-Screen). Or Play a DVD Press the LOAD button then corresponding number (1-6) where the DVD is recognized and displays the menu screen ... last setting when turned off. Press the OPEN/CLOSE or LOAD hard-key on the VES screen. Press the MODE button on Channel 1. The radio automatically selects the appropriate mode after the disc is to be loaded (Non-Touch-Screen). 2. Ensure the VES™ Remote Control and the Headphone...

UConnect Manual
Page 48
Touch the Rear VES soft-key to display the Rear VES Controls screen. 3. Uconnect™ Multimedia - If a channel list appears on the radio faceplate. 2. Video Entertainment System (VES)™ 47 Using the Touch-Screen Radio controls 1. Touch the 1 soft-key and then the DISC soft-key in the MEDIA column. Rear VES soft-key. To exit touch the back arrow soft-key at the top left of the screen, touch the HIDE LIST soft-key to display the Rear VES Controls. Press the MENU hard-key on the right side of the screen. 3 Select Channel/Screen 1 and DISC in the MEDIA column.
Touch the Rear VES soft-key to display the Rear VES Controls screen. 3. Uconnect™ Multimedia - If a channel list appears on the radio faceplate. 2. Video Entertainment System (VES)™ 47 Using the Touch-Screen Radio controls 1. Touch the 1 soft-key and then the DISC soft-key in the MEDIA column. Rear VES soft-key. To exit touch the back arrow soft-key at the top left of the screen, touch the HIDE LIST soft-key to display the Rear VES Controls. Press the MENU hard-key on the right side of the screen. 3 Select Channel/Screen 1 and DISC in the MEDIA column.

UConnect Manual
Page 49
... Control. 48 Uconnect™ Multimedia - Video Entertainment System (VES)™ NOTE: View SIRIUS Backseat TV™ • To view a DVD on the radio faceplate, then touch the DISC Channel 1. tab soft-key and then the VIEW VIDEO soft-key. Using the Remote Control • Viewing a DVD on ...the Touch-Screen radio screen is on hard-key, on the radio press the RADIO/MEDIA Ensure the Remote Control and Headphone switch is 1. not available in all states/provinces, and the vehicle must ...
... Control. 48 Uconnect™ Multimedia - Video Entertainment System (VES)™ NOTE: View SIRIUS Backseat TV™ • To view a DVD on the radio faceplate, then touch the DISC Channel 1. tab soft-key and then the VIEW VIDEO soft-key. Using the Remote Control • Viewing a DVD on ...the Touch-Screen radio screen is on hard-key, on the radio press the RADIO/MEDIA Ensure the Remote Control and Headphone switch is 1. not available in all states/provinces, and the vehicle must ...

UConnect Manual
Page 50
Press the MENU hard-key on the VES screen NOTE: The VES™ system will retain the last setting when turned off. Touch the Rear VES soft-key to display the Rear VES Controls screen 3 Select TV mode on the radio faceplate. 2. Uconnect™ Multimedia - Video Entertainment System (VES)™ 49 Using the Touch-Screen Radio controls 1. If a channel list appears on the right side of the screen, touch the HIDE LIST soft-key to display the Rear VES Controls. Rear VES soft-key.
Press the MENU hard-key on the VES screen NOTE: The VES™ system will retain the last setting when turned off. Touch the Rear VES soft-key to display the Rear VES Controls screen 3 Select TV mode on the radio faceplate. 2. Uconnect™ Multimedia - Video Entertainment System (VES)™ 49 Using the Touch-Screen Radio controls 1. If a channel list appears on the right side of the screen, touch the HIDE LIST soft-key to display the Rear VES Controls. Rear VES soft-key.

UConnect Manual
Page 51
To exit touch the back arrow soft-key at • To view SIRIUS Backseat TV ™ on the radio press the RADIO/MEDIA hard-key, on the Touch-Screen radio screen is not available in the PARK position for vehicles with automatic transmission. touch the TV tab soft-key and then the VIEW... VIDEO soft-key. • Viewing a SIRIUS Backseat TV ™ on the radio faceplate, then the top left of the screen. In vehicles with manual transmission the parking brake must be engaged. • SIRIUS Backseat TV™ is...
To exit touch the back arrow soft-key at • To view SIRIUS Backseat TV ™ on the radio press the RADIO/MEDIA hard-key, on the Touch-Screen radio screen is not available in the PARK position for vehicles with automatic transmission. touch the TV tab soft-key and then the VIEW... VIDEO soft-key. • Viewing a SIRIUS Backseat TV ™ on the radio faceplate, then the top left of the screen. In vehicles with manual transmission the parking brake must be engaged. • SIRIUS Backseat TV™ is...

UConnect Manual
Page 53
Using the Touch-Screen Radio controls 1. While looking at the video screen, highlight VES AUX 1 or 2 (depending which AUX input the gaming console is displayed, press the HIDE LIST soft-... hard-key on the VES screen. Rear VES soft-key. 52 Uconnect™ Multimedia - Video Entertainment System (VES)™ 2. Select Ves AUX1 mode on the radio faceplate. 2.
Using the Touch-Screen Radio controls 1. While looking at the video screen, highlight VES AUX 1 or 2 (depending which AUX input the gaming console is displayed, press the HIDE LIST soft-... hard-key on the VES screen. Rear VES soft-key. 52 Uconnect™ Multimedia - Video Entertainment System (VES)™ 2. Select Ves AUX1 mode on the radio faceplate. 2.

UConnect Manual
Page 55
If a channel list is displayed, press the HIDE LIST soft-key to display the Rear VES Controls. Rear VES soft-key. Press the MENU hard-key on the VES screen Using the Touch-Screen Radio controls 1. Touch the Rear VES soft-key to display the Rear VES Controls screen. Select FM mode on the radio faceplate. 54 Uconnect™ Multimedia - Video Entertainment System (VES)™ 2.
If a channel list is displayed, press the HIDE LIST soft-key to display the Rear VES Controls. Rear VES soft-key. Press the MENU hard-key on the VES screen Using the Touch-Screen Radio controls 1. Touch the Rear VES soft-key to display the Rear VES Controls screen. Select FM mode on the radio faceplate. 54 Uconnect™ Multimedia - Video Entertainment System (VES)™ 2.

UConnect Manual
Page 57
...two different ways to operate the features of the Video Entertainment System (VES)™. 4. either pressing Up/Down/Left/Right buttons or by radio faceplate (Touch-Screen). Insert the DVD with the label facing up. automatically selects the appropriate mode after the disc is on •... the MODE button on the 2. 56 Uconnect™ Multimedia - Video Entertainment System (VES)™ DUAL VIDEO SCREEN - Play a DVD using the Touch-Screen Radio 1. Press the OPEN/CLOSE or LOAD hard-key on the Remote Control. 1. While looking at Screen 1 or 2, highlight DISC by re2. To watch a...
...two different ways to operate the features of the Video Entertainment System (VES)™. 4. either pressing Up/Down/Left/Right buttons or by radio faceplate (Touch-Screen). Insert the DVD with the label facing up. automatically selects the appropriate mode after the disc is on •... the MODE button on the 2. 56 Uconnect™ Multimedia - Video Entertainment System (VES)™ DUAL VIDEO SCREEN - Play a DVD using the Touch-Screen Radio 1. Press the OPEN/CLOSE or LOAD hard-key on the Remote Control. 1. While looking at Screen 1 or 2, highlight DISC by re2. To watch a...

UConnect Manual
Page 58
Uconnect™ Multimedia - Rear VES soft-key. Video Entertainment System (VES)™ 57 Using the Touch-Screen Radio controls 1. Press the MENU hard-key on the right side of the screen. • The VES™ will retain the last setting when turned off. ... Rear VES soft-key to display the Rear VES Controls screen. 3 Select DISC mode on the VES screen. If a channel list is shown on the radio faceplate. 2.
Uconnect™ Multimedia - Rear VES soft-key. Video Entertainment System (VES)™ 57 Using the Touch-Screen Radio controls 1. Press the MENU hard-key on the right side of the screen. • The VES™ will retain the last setting when turned off. ... Rear VES soft-key to display the Rear VES Controls screen. 3 Select DISC mode on the VES screen. If a channel list is shown on the radio faceplate. 2.


