
Owners Manual
Page 11
......Features ...KIPASS (Kawasaki's Intelligent Proximity Activation Start System) Spare FOB ...Ignition Switch ...Right Handlebar Switches...Left Handlebar Switches ...Grip Warmer...Headlight Aiming Adjuster Knob ...Accessory Socket/Connectors ...24 24 28 29 42 45 46 64 65 66 81 87 102 104 110 111 113 115 116 TABLE OF CONTENTS SAFETY INFORMATION ...Read Owner's Manual ...Training ...Daily Checks and Periodic Maintenance ...Loading and Accessories Information...Passenger...
......Features ...KIPASS (Kawasaki's Intelligent Proximity Activation Start System) Spare FOB ...Ignition Switch ...Right Handlebar Switches...Left Handlebar Switches ...Grip Warmer...Headlight Aiming Adjuster Knob ...Accessory Socket/Connectors ...24 24 28 29 42 45 46 64 65 66 81 87 102 104 110 111 113 115 116 TABLE OF CONTENTS SAFETY INFORMATION ...Read Owner's Manual ...Training ...Daily Checks and Periodic Maintenance ...Loading and Accessories Information...Passenger...
Owners Manual
Page 12
Anti-lock Brake System (ABS) ...Stopping the Engine...Stopping the Motorcycle in an Emergency ...Parking ...Kawasaki TRaction Control (KTRC). MAINTENANCE AND ADJUSTMENT Daily Checks ...Periodic Maintenance...Engine Oil ...Final Gear Case Oil...Coolant...Air Cleaner ...Throttle Control System ...Idle Speed ...Clutch ...Brakes ...Brake Light Switches...Suspension System ... 154 155 158 159 160 161 166 168 171 176 180 183 186 208 211 212 213 215 217 Break-In ...Starting the Engine ...Jump Starting ...Moving Off...Shifting Gears ... 119 119 120 120...
Anti-lock Brake System (ABS) ...Stopping the Engine...Stopping the Motorcycle in an Emergency ...Parking ...Kawasaki TRaction Control (KTRC). MAINTENANCE AND ADJUSTMENT Daily Checks ...Periodic Maintenance...Engine Oil ...Final Gear Case Oil...Coolant...Air Cleaner ...Throttle Control System ...Idle Speed ...Clutch ...Brakes ...Brake Light Switches...Suspension System ... 154 155 158 159 160 161 166 168 171 176 180 183 186 208 211 212 213 215 217 Break-In ...Starting the Engine ...Jump Starting ...Moving Off...Shifting Gears ... 119 119 120 120...

Owners Manual
Page 13
Front Fork ...Rear Shock Absorber ...Setting Tables ...Wheels ...Battery...Headlight ...Fuses ...General Lubrication...Cleaning Your Motorcycle ... 217 219 221 225 228 240 241 244 245 General Precautions ...Washing Your Motorcycle ...APPENDIX ...Storage ...Troubleshooting Guide...Your Warranty/Owner Satisfaction ...Reporting Safety Defects ...Environmental Protection ...MAINTENANCE RECORD ... 245 247 251 251 254 259 265 266 267
Front Fork ...Rear Shock Absorber ...Setting Tables ...Wheels ...Battery...Headlight ...Fuses ...General Lubrication...Cleaning Your Motorcycle ... 217 219 221 225 228 240 241 244 245 General Precautions ...Washing Your Motorcycle ...APPENDIX ...Storage ...Troubleshooting Guide...Your Warranty/Owner Satisfaction ...Reporting Safety Defects ...Environmental Protection ...MAINTENANCE RECORD ... 245 247 251 251 254 259 265 266 267

Owners Manual
Page 17
... that impairs the performance of gravity. 16 SAFETY INFORMATION 4. Instruct any lighting components, road clearance, banking capability (i.e., lean angle), control operation, wheel travel, front fork movement, Baggage should also be carried as low as possible to changes in motion) and adjust as possible (not while the motorcycle is designed for light items, and overloading can affect handling due to...
... that impairs the performance of gravity. 16 SAFETY INFORMATION 4. Instruct any lighting components, road clearance, banking capability (i.e., lean angle), control operation, wheel travel, front fork movement, Baggage should also be carried as low as possible to changes in motion) and adjust as possible (not while the motorcycle is designed for light items, and overloading can affect handling due to...

Owners Manual
Page 22
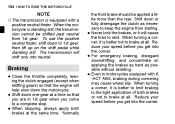
... dry and restores them to control vehicle speed and less on the throttle to normal operating performance. Carefully ride at a slow speed and apply the brakes several times to help control vehicle speed by closing the throttle so that there is also reduced in Wet Conditions Select Correct Gear Speeds Use Both Front and Rear Brakes Ride Prudently Braking performance is power to avoid skidding the rear wheel from too rapid acceleration...
... dry and restores them to control vehicle speed and less on the throttle to normal operating performance. Carefully ride at a slow speed and apply the brakes several times to help control vehicle speed by closing the throttle so that there is also reduced in Wet Conditions Select Correct Gear Speeds Use Both Front and Rear Brakes Ride Prudently Braking performance is power to avoid skidding the rear wheel from too rapid acceleration...

Owners Manual
Page 24
... upper level line. Steering To avoid engine seizure and resulting loss of control. Have sufficient fuel for safe riding. Engine Oil Coolant Tires Electrical Equipment Fuel Miscellaneous SAFETY INFORMATION 23 see that the handlebars turns freely but has no play. Make sure that the headlight, tail/brake light, turn signals, horn, etc., all safety related parts are correctly adjusted and functioning properly. Check to the proper pressure, and check the wheel balance.
... upper level line. Steering To avoid engine seizure and resulting loss of control. Have sufficient fuel for safe riding. Engine Oil Coolant Tires Electrical Equipment Fuel Miscellaneous SAFETY INFORMATION 23 see that the handlebars turns freely but has no play. Make sure that the headlight, tail/brake light, turn signals, horn, etc., all safety related parts are correctly adjusted and functioning properly. Check to the proper pressure, and check the wheel balance.

Owners Manual
Page 44
GENERAL INFORMATION 43 1. 2. 3. 4. 5. 6. 7. 8. 9. Side Stand 10. 11. 12. 13. 14. 17. 18. 19. 20. 21. 22. Shift Pedal Idle Adjusting Screw Coolant Reserve Tank Brake Caliper Brake Disc Front Fork Rebound Damping Force Adjuster 16. Air Cleaner Intake Headlight Turn Signal Lights Spark Plugs Air Cleaner Fuel Tank Seat Seat Lock Tool Kit Compartment Rear Carrier Tail/Brake Light License Plate Light Final Gear Case Spring Preload Adjuster 15.
GENERAL INFORMATION 43 1. 2. 3. 4. 5. 6. 7. 8. 9. Side Stand 10. 11. 12. 13. 14. 17. 18. 19. 20. 21. 22. Shift Pedal Idle Adjusting Screw Coolant Reserve Tank Brake Caliper Brake Disc Front Fork Rebound Damping Force Adjuster 16. Air Cleaner Intake Headlight Turn Signal Lights Spark Plugs Air Cleaner Fuel Tank Seat Seat Lock Tool Kit Compartment Rear Carrier Tail/Brake Light License Plate Light Final Gear Case Spring Preload Adjuster 15.

Owners Manual
Page 45
Battery 4. Swingarm 12. Rear Shock Absorber 9. Muffler Fuse Boxes 3. Fuel Tank Cap 5. Rear Brake Pedal 8. 44 GENERAL INFORMATION 1. Saddlebag (Accessory) 2. Rear Brake Light Switch 10. Windshield 6. Brake Fluid Reservoir (Rear) 13. Oil Level Inspection Window 7. Center Stand 11.
Battery 4. Swingarm 12. Rear Shock Absorber 9. Muffler Fuse Boxes 3. Fuel Tank Cap 5. Rear Brake Pedal 8. 44 GENERAL INFORMATION 1. Saddlebag (Accessory) 2. Rear Brake Light Switch 10. Windshield 6. Brake Fluid Reservoir (Rear) 13. Oil Level Inspection Window 7. Center Stand 11.

Owners Manual
Page 46
... A/B) When the ignition switch is turned on, "Kawasaki" is displayed for three seconds, then the multifunction meter turns to operational mode. Gear Position Indicator 9. Battery Voltage - Clock 13. Upper Meter Button 4. Fuel Gauge 11. K-ACT ABS Mode Indicator (Mode 1/2) 12. Multifunction Meter 2. Lower Meter Button 5. Speedometer 6. Tire Air Pressure - Fuel Economy Assistance Indicator 14. GENERAL INFORMATION 45 Meter Instruments 1. Coolant Temperature Gauge 7. Multifunction Display - Tachometer 3. Average Mileage/Current Mileage/Cruising Range...
... A/B) When the ignition switch is turned on, "Kawasaki" is displayed for three seconds, then the multifunction meter turns to operational mode. Gear Position Indicator 9. Battery Voltage - Clock 13. Upper Meter Button 4. Fuel Gauge 11. K-ACT ABS Mode Indicator (Mode 1/2) 12. Multifunction Meter 2. Lower Meter Button 5. Speedometer 6. Tire Air Pressure - Fuel Economy Assistance Indicator 14. GENERAL INFORMATION 45 Meter Instruments 1. Coolant Temperature Gauge 7. Multifunction Display - Tachometer 3. Average Mileage/Current Mileage/Cruising Range...

Owners Manual
Page 81
...windshield when switching the ignition to the bottom position. finish the adjustment, push the up• To per meter button when both the hour and minute displays blink. • • WARNING Windshield movement can trap the hands and fingers and cause injury. Turn the key knob to "OFF" again to move correctly. the lower... the cursor to ad• Push just the hour or minute digits. 80 GENERAL INFORMATION ○When NOTE the engine starts, the windshield moves to the set position automatically. ○If the key knob is turned to "ON" soon after setting the language.
...windshield when switching the ignition to the bottom position. finish the adjustment, push the up• To per meter button when both the hour and minute displays blink. • • WARNING Windshield movement can trap the hands and fingers and cause injury. Turn the key knob to "OFF" again to move correctly. the lower... the cursor to ad• Push just the hour or minute digits. 80 GENERAL INFORMATION ○When NOTE the engine starts, the windshield moves to the set position automatically. ○If the key knob is turned to "ON" soon after setting the language.

Owners Manual
Page 107
... lights NOTE are on when the starter button is at the "ON" position for an extended time with the engine stopped, or the battery may become totally discharged. The headlight Never operate the ignition switch while riding the motorcycle; 106 GENERAL INFORMATION WARNING Turning the ignition switch to the "OFF" position while riding the motorcycle shuts down the entire electrical system (headlight, brake light, turn signal light, etc) and the engine...
... lights NOTE are on when the starter button is at the "ON" position for an extended time with the engine stopped, or the battery may become totally discharged. The headlight Never operate the ignition switch while riding the motorcycle; 106 GENERAL INFORMATION WARNING Turning the ignition switch to the "OFF" position while riding the motorcycle shuts down the entire electrical system (headlight, brake light, turn signal light, etc) and the engine...

Owners Manual
Page 114
... caught. Windshield Windshield up or down ... To lower the temperature, turn the dial towards "LO." Electric Windshield Adjusting Button NOTICE Make sure all body parts, clothing... or other objects are not near the movable parts of temperature settings. To raise the temperature, turn the dial towards "HI." A. When moving the windshield up ...Windshield down as the arrow mark, push and hold the adjusting button. GENERAL INFORMATION 113 Windshield height can be changed by electric windshield...
... caught. Windshield Windshield up or down ... To lower the temperature, turn the dial towards "LO." Electric Windshield Adjusting Button NOTICE Make sure all body parts, clothing... or other objects are not near the movable parts of temperature settings. To raise the temperature, turn the dial towards "HI." A. When moving the windshield up ...Windshield down as the arrow mark, push and hold the adjusting button. GENERAL INFORMATION 113 Windshield height can be changed by electric windshield...

Owners Manual
Page 143
... top • Set by pushing the electric windshield • Turn the key knob to "OFF." • adjusting button (see Electric Windshield Adjusting Button in the Left Handlebar Switches section). Turn the knobs to the bottom position. Knobs When the ignition switch is turned to the "OFF" position, the windshield automatically moves to adjust the intake position of windshield. WARNING Windshield movement can trap the hands and fingers...
... top • Set by pushing the electric windshield • Turn the key knob to "OFF." • adjusting button (see Electric Windshield Adjusting Button in the Left Handlebar Switches section). Turn the knobs to the bottom position. Knobs When the ignition switch is turned to the "OFF" position, the windshield automatically moves to adjust the intake position of windshield. WARNING Windshield movement can trap the hands and fingers...
Owners Manual
Page 155
... in motorcycles equipped with a NOTE positive neutral finder. To use the positive neutral finder, shift down the motorcycle. When turning a corner, it will shift only into the corner. Reduce your speed before you get into neutral. • • • Braking the throttle completely, leav• Close ing the clutch engaged (except when shifting gears) so that the engine will help slow down to...
... in motorcycles equipped with a NOTE positive neutral finder. To use the positive neutral finder, shift down the motorcycle. When turning a corner, it will shift only into the corner. Reduce your speed before you get into neutral. • • • Braking the throttle completely, leav• Close ing the clutch engaged (except when shifting gears) so that the engine will help slow down to...

Owners Manual
Page 176
Odometer Reading (*B) × 1 000 km (× 1 000 mile) ○ Spark plugs Chassis parts Condition of brake master cylinder and caliper Brake pad wear (*C) Brake light switch operation Suspension system Steering play Steering stem bearings Electrical system :1 :1 :2 :1 :4 See 1 6 12 18 24 Page (0.6) (3.8) (7.6) (11.4) (15.2) : every 48 000 km (30 000 mile) - 214 215 - - - - - MAINTENANCE AND ADJUSTMENT 175 year (*A) Items Rubber parts of bolts, nuts and fasteners :1 - -
Odometer Reading (*B) × 1 000 km (× 1 000 mile) ○ Spark plugs Chassis parts Condition of brake master cylinder and caliper Brake pad wear (*C) Brake light switch operation Suspension system Steering play Steering stem bearings Electrical system :1 :1 :2 :1 :4 See 1 6 12 18 24 Page (0.6) (3.8) (7.6) (11.4) (15.2) : every 48 000 km (30 000 mile) - 214 215 - - - - - MAINTENANCE AND ADJUSTMENT 175 year (*A) Items Rubber parts of bolts, nuts and fasteners :1 - -

Owners Manual
Page 188
MAINTENANCE AND ADJUSTMENT 187 WARNING Windshield movement can be removed by pushing the center pin into the quick rivet, and when installing it, pull the center pin fully up first, and then push into the center pin after inserting it. Quick Rivet ○The inner cover uses the quick rivet. ...A. The quick rivet can trap the hands and fingers and cause injury. When the ignition switch is turned to the "OFF" position, the windshield automatically moves to "OFF." •...
MAINTENANCE AND ADJUSTMENT 187 WARNING Windshield movement can be removed by pushing the center pin into the quick rivet, and when installing it, pull the center pin fully up first, and then push into the center pin after inserting it. Quick Rivet ○The inner cover uses the quick rivet. ...A. The quick rivet can trap the hands and fingers and cause injury. When the ignition switch is turned to the "OFF" position, the windshield automatically moves to "OFF." •...

Owners Manual
Page 204
MAINTENANCE AND ADJUSTMENT 203 WARNING Windshield movement can trap the hands and fingers and cause injury. the tabs of the inner cover into • Insert the inside of the upper fairing. A. When the ignition switch is turned to the "OFF" position, the windshield automatically moves to "OFF." Keep hands and fingers away from the windshield when switching the ignition to the bottom position. Connectors the key knob to "ON" position. • Turn the windshield position to top by • Set pushing the electric windshield adjusting button.
MAINTENANCE AND ADJUSTMENT 203 WARNING Windshield movement can trap the hands and fingers and cause injury. the tabs of the inner cover into • Insert the inside of the upper fairing. A. When the ignition switch is turned to the "OFF" position, the windshield automatically moves to "OFF." Keep hands and fingers away from the windshield when switching the ignition to the bottom position. Connectors the key knob to "ON" position. • Turn the windshield position to top by • Set pushing the electric windshield adjusting button.

Owners Manual
Page 216
Lining Thickness C. 1 mm (0.04 in .) Brake Light Switch Inspection the ignition switch on. • Turn brake light should be done by an authorized Kawasaki dealer. Front Brake Pads B. Pad replacement should go on when • The the front brake is less than 1 mm (0.04 in.), replace both pads in the caliper as a set. Lining Thickness C. 1 mm (0.04 in .) Brake Light Switches A. MAINTENANCE AND ADJUSTMENT 215 thickness of either pad lining is applied. Rear Brake Pads B. A.
Lining Thickness C. 1 mm (0.04 in .) Brake Light Switch Inspection the ignition switch on. • Turn brake light should be done by an authorized Kawasaki dealer. Front Brake Pads B. Pad replacement should go on when • The the front brake is less than 1 mm (0.04 in.), replace both pads in the caliper as a set. Lining Thickness C. 1 mm (0.04 in .) Brake Light Switches A. MAINTENANCE AND ADJUSTMENT 215 thickness of either pad lining is applied. Rear Brake Pads B. A.

Owners Manual
Page 247
... fire. Gasoline, brake fluid, clutch fluid, and coolant will damage the finish of debris or flammable material in conditions that allow debris or flammable material to inspecting for build-up of painted and plastic surfaces: wash them off immediately. 246 MAINTENANCE AND ADJUSTMENT WARNING Build-up of debris or flammable materials. sure the engine and exhaust are • Be cool before washing. Avoid wire...
... fire. Gasoline, brake fluid, clutch fluid, and coolant will damage the finish of debris or flammable material in conditions that allow debris or flammable material to inspecting for build-up of painted and plastic surfaces: wash them off immediately. 246 MAINTENANCE AND ADJUSTMENT WARNING Build-up of debris or flammable materials. sure the engine and exhaust are • Be cool before washing. Avoid wire...

Owners Manual
Page 258
... start after a refresh charge, if the starter motor stops rotating the engine properly the battery may be something wrong with a new one of the • Inspect same amperage. case of slow blinking of the turn signal lights, low volume of the correct capacity and specifications. Have the battery inspected by an authorized Kawasaki dealer. If not, shift the trans• Make mission into neutral...
... start after a refresh charge, if the starter motor stops rotating the engine properly the battery may be something wrong with a new one of the • Inspect same amperage. case of slow blinking of the turn signal lights, low volume of the correct capacity and specifications. Have the battery inspected by an authorized Kawasaki dealer. If not, shift the trans• Make mission into neutral...