Owners Manual
Page 10
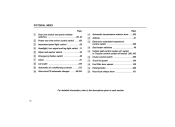
viii PICTORIAL INDEX Page 1 2 3 4 5 6 7 8 9 10 Page 11 12 13 Door lock switch and power window switches ...28, 42 Power rear view mirror control switch ...128 Instrument panel light control ...69 Headlight, turn signal and fog light switch 31 Wiper and washer switch ...36 Emergency flasher switch ...48 ...
viii PICTORIAL INDEX Page 1 2 3 4 5 6 7 8 9 10 Page 11 12 13 Door lock switch and power window switches ...28, 42 Power rear view mirror control switch ...128 Instrument panel light control ...69 Headlight, turn signal and fog light switch 31 Wiper and washer switch ...36 Emergency flasher switch ...48 ...
Owners Manual
Page 20
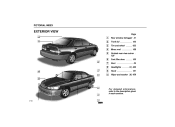
xviii PICTORIAL INDEX EXTERIOR VIEW Page 1 2 3 4 5 6 7 8 Rear window defogger 41 Trunk lid ...103 Tire and wheel ...423 Moon roof ...108 Outside rear view mirror . 126 Fuel filler door ...105 Door ...24 Headlights ...31, 462 Hood ...101 Wiper and washer 36, 459 PE026 9 10 For detailed information, refer to the description given in each section.
xviii PICTORIAL INDEX EXTERIOR VIEW Page 1 2 3 4 5 6 7 8 Rear window defogger 41 Trunk lid ...103 Tire and wheel ...423 Moon roof ...108 Outside rear view mirror . 126 Fuel filler door ...105 Door ...24 Headlights ...31, 462 Hood ...101 Wiper and washer 36, 459 PE026 9 10 For detailed information, refer to the description given in each section.
Owners Manual
Page 52
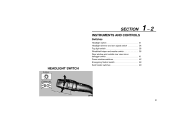
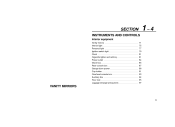
SECTION INSTRUMENTS AND CONTROLS Switches Headlight switch ...Headlight dimmer and turn signal switch ...Fog light switch ...Windshield wiper and washer switch ...Rear window and outside rear view mirror defogger switch ...Power window switches ...Emergency flasher switch ...Seat heater switches ...31 34 36 36 41 42 48 49 1-2 HEADLIGHT SWITCH 12E001-1 31
SECTION INSTRUMENTS AND CONTROLS Switches Headlight switch ...Headlight dimmer and turn signal switch ...Fog light switch ...Windshield wiper and washer switch ...Rear window and outside rear view mirror defogger switch ...Power window switches ...Emergency flasher switch ...Seat heater switches ...31 34 36 36 41 42 48 49 1-2 HEADLIGHT SWITCH 12E001-1 31
Owners Manual
Page 62
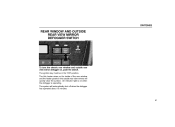
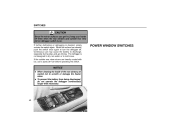
SWITCHES REAR WINDOW AND OUTSIDE REAR VIEW MIRROR DEFOGGER SWITCH 12E043 To turn the electric rear window and outside rear view mirrors will automatically shut off when the defogger has operated about 15 minutes. 41 The ignition key must be in the outside rear view mirror defogger on, push the switch. The system will quickly clear the surface. An indicator light is on the inside of the rear window and the heater panels in the "ON" position. The thin heater wires on when the defogger is operating.
SWITCHES REAR WINDOW AND OUTSIDE REAR VIEW MIRROR DEFOGGER SWITCH 12E043 To turn the electric rear window and outside rear view mirrors will automatically shut off when the defogger has operated about 15 minutes. 41 The ignition key must be in the outside rear view mirror defogger on, push the switch. The system will quickly clear the surface. An indicator light is on the inside of the rear window and the heater panels in the "ON" position. The thin heater wires on when the defogger is operating.
Owners Manual
Page 63
...snow. When the surface has cleared, push the switch once again to turn the defogger off them when the rear window and outside rear view mirrors are heavily coated with ice, use may cause the battery to scratch or damage the heater wires. POWER WINDOW SWITCHES NOTICE D When cleaning ...the inside of the rear window, be careful not to discharge, especially during stop-and-go driving. If the outside rear view mirror defogger switch is on. Continuous use a spray de-icer before operating the switch. D To prevent the battery from being discharged, do not operate the...
...snow. When the surface has cleared, push the switch once again to turn the defogger off them when the rear window and outside rear view mirrors are heavily coated with ice, use may cause the battery to scratch or damage the heater wires. POWER WINDOW SWITCHES NOTICE D When cleaning ...the inside of the rear window, be careful not to discharge, especially during stop-and-go driving. If the outside rear view mirror defogger switch is on. Continuous use a spray de-icer before operating the switch. D To prevent the battery from being discharged, do not operate the...
Owners Manual
Page 92
SECTION INSTRUMENTS AND CONTROLS Interior equipment Vanity mirrors ...Interior light ...Personal light ...Ignition switch light ...Clock ...Cigarette lighter and ashtray ...Power outlet ...Glove box ...Rear console box ...Garage door opener ...Cup holder ...Overhead console box ...Auxiliary box ...Floor mat ...Luggage stowage precautions ...71 75 77 79 81 81 84 85 87 88 91 93 94 95 97 1-4 VANITY MIRRORS 71
SECTION INSTRUMENTS AND CONTROLS Interior equipment Vanity mirrors ...Interior light ...Personal light ...Ignition switch light ...Clock ...Cigarette lighter and ashtray ...Power outlet ...Glove box ...Rear console box ...Garage door opener ...Cup holder ...Overhead console box ...Auxiliary box ...Floor mat ...Luggage stowage precautions ...71 75 77 79 81 81 84 85 87 88 91 93 94 95 97 1-4 VANITY MIRRORS 71
Owners Manual
Page 94
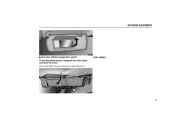
INTERIOR EQUIPMENT 14E047 "Sun visor without garage door opener To use the vanity mirrors, swing the sun visor down and open the cover. Sun visors 14E062 73 The vanity lights come on when you open the cover.
INTERIOR EQUIPMENT 14E047 "Sun visor without garage door opener To use the vanity mirrors, swing the sun visor down and open the cover. Sun visors 14E062 73 The vanity lights come on when you open the cover.
Owners Manual
Page 95
To block out glare coming obliquely from behind you, pull out an extension plate from the front , swing the sun visor down. CAUTION Do not pull out the extension plate when the visor is in the position 1. INTERIOR EQUIPMENT 1 2 3 To block out glare from the inside rear view mirror and obstruct the rear view. 74 To block out glare from the side, remove the sun visor from the hook and swing it to the side. It can cover the inside of the sun visor.
To block out glare coming obliquely from behind you, pull out an extension plate from the front , swing the sun visor down. CAUTION Do not pull out the extension plate when the visor is in the position 1. INTERIOR EQUIPMENT 1 2 3 To block out glare from the inside rear view mirror and obstruct the rear view. 74 To block out glare from the side, remove the sun visor from the hook and swing it to the side. It can cover the inside of the sun visor.
Owners Manual
Page 134
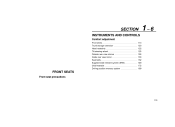
SECTION INSTRUMENTS AND CONTROLS Comfort adjustment Front seats ...Trunk storage extension ...Head restraints ...Tilt steering wheel ...Outside rear view mirrors ...Inside rear view mirror ...Seat belts ...Supplemental restraint system (SRS) ...Child restraint ...Driving position memory system ...113 120 122 125 126 130 132 148 172 199 1-6 FRONT SEATS Front seat precautions 113
SECTION INSTRUMENTS AND CONTROLS Comfort adjustment Front seats ...Trunk storage extension ...Head restraints ...Tilt steering wheel ...Outside rear view mirrors ...Inside rear view mirror ...Seat belts ...Supplemental restraint system (SRS) ...Child restraint ...Driving position memory system ...113 120 122 125 126 130 132 148 172 199 1-6 FRONT SEATS Front seat precautions 113
Owners Manual
Page 147
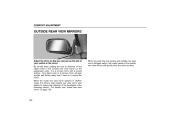
...the driver's side outside rear view mirror on page 130. For details, see the side of the following vehicle. When you can just see "Inside rear view mirror" on the passenger's side. COMFORT ADJUSTMENT OUTSIDE REAR VIEW MIRRORS 16E197 Adjust the mirror so that you push the rear ...window and outside rear view mirror defogger switch, the heater panels in the outside rear view mirrors will look smaller and farther away...
...the driver's side outside rear view mirror on page 130. For details, see the side of the following vehicle. When you can just see "Inside rear view mirror" on the passenger's side. COMFORT ADJUSTMENT OUTSIDE REAR VIEW MIRRORS 16E197 Adjust the mirror so that you push the rear ...window and outside rear view mirror defogger switch, the heater panels in the outside rear view mirrors will look smaller and farther away...
Owners Manual
Page 148
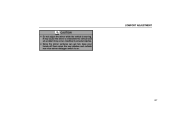
It may cause the driver to mishandle the vehicle and an accident may occur, resulting in personal injuries. COMFORT ADJUSTMENT CAUTION D Do not adjust the mirror while the vehicle is on. 127 D Since the mirror surfaces can get hot, keep your hands off them when the rear window and outside rear view mirror defogger switch is moving.
It may cause the driver to mishandle the vehicle and an accident may occur, resulting in personal injuries. COMFORT ADJUSTMENT CAUTION D Do not adjust the mirror while the vehicle is on. 127 D Since the mirror surfaces can get hot, keep your hands off them when the rear window and outside rear view mirror defogger switch is moving.
Owners Manual
Page 149
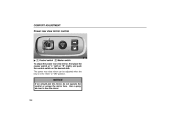
The power rear view mirror can be adjusted when the key is in the "ACC" or "ON" position. Use a spray de-icer to free the mirror. 128 NOTICE If ice should jam the mirror, do not operate the control or scrape the mirror face. COMFORT ADJUSTMENT Power rear view mirror control 16E011 " 1 Control switch 2 Master switch To adjust the power rear view mirror, first place the master switch at "L" (left) or "R" (right), and push the control switch on the desired side.
The power rear view mirror can be adjusted when the key is in the "ACC" or "ON" position. Use a spray de-icer to free the mirror. 128 NOTICE If ice should jam the mirror, do not operate the control or scrape the mirror face. COMFORT ADJUSTMENT Power rear view mirror control 16E011 " 1 Control switch 2 Master switch To adjust the power rear view mirror, first place the master switch at "L" (left) or "R" (right), and push the control switch on the desired side.
Owners Manual
Page 150
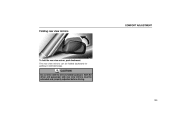
The rear view mirrors can be extended and properly adjusted before driving. 129 Both the driver and passenger side rear view mirrors must be folded backward for parking in restricted areas. CAUTION Do not drive with the mirrors folded backward. COMFORT ADJUSTMENT Folding rear view mirrors 16E198 To fold the rear view mirror, push backward.
The rear view mirrors can be extended and properly adjusted before driving. 129 Both the driver and passenger side rear view mirrors must be folded backward for parking in restricted areas. CAUTION Do not drive with the mirrors folded backward. COMFORT ADJUSTMENT Folding rear view mirrors 16E198 To fold the rear view mirror, push backward.
Owners Manual
Page 152
...the "AUTO" mode. When the ignition key is moving. Pushing the switch changes the mode between "AUTO" and "DAY". "AUTO" mode: If the mirror detects light from the headlights of the vehicle behind you can just see the rear of your vehicle in response to the detection of headlights.... CAUTION Do not adjust the mirror while the vehicle is inserted and turned on when the "AUTO" mode is normal. COMFORT ADJUSTMENT Adjust the mirror so that you , the mirror surface darkens slightly to reduce the reflected light. It may cause the driver...
...the "AUTO" mode. When the ignition key is moving. Pushing the switch changes the mode between "AUTO" and "DAY". "AUTO" mode: If the mirror detects light from the headlights of the vehicle behind you can just see the rear of your vehicle in response to the detection of headlights.... CAUTION Do not adjust the mirror while the vehicle is inserted and turned on when the "AUTO" mode is normal. COMFORT ADJUSTMENT Adjust the mirror so that you , the mirror surface darkens slightly to reduce the reflected light. It may cause the driver...
Owners Manual
Page 220
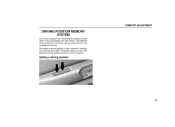
Two different driving position profiles can be done when the ignition key is in the "ON" position and the selector lever is in the computer's memory can memorize the positions of the driver's seat and outside rear view mirrors. Recording a driving position in the "P" position. Setting a driving position 16E047 199 COMFORT ADJUSTMENT DRIVING POSITION MEMORY SYSTEM The micro computer can only be entered into the computer's memory.
Two different driving position profiles can be done when the ignition key is in the "ON" position and the selector lever is in the computer's memory can memorize the positions of the driver's seat and outside rear view mirrors. Recording a driving position in the "P" position. Setting a driving position 16E047 199 COMFORT ADJUSTMENT DRIVING POSITION MEMORY SYSTEM The micro computer can only be entered into the computer's memory.
Owners Manual
Page 221
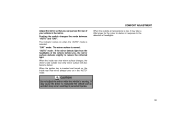
... the desired position. 2. While pushing the "SET" button, push button "1" or "2" until the signal beeps. To set . Adjust the driver's seat and outside rear view mirrors to first activate the memorized position, then make the desired changes and perform step 2 above. 200
... the desired position. 2. While pushing the "SET" button, push button "1" or "2" until the signal beeps. To set . Adjust the driver's seat and outside rear view mirrors to first activate the memorized position, then make the desired changes and perform step 2 above. 200
Owners Manual
Page 297
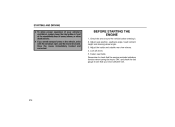
... seat position, seatback angle, head restraint height and steering wheel angle. 3. Have the cause immediately located and corrected. Adjust the inside and outside rear view mirrors. 4. STARTING AND DRIVING D To allow proper operation of snow, leaves, or other obstructions. Lock all doors. 5.
... seat position, seatback angle, head restraint height and steering wheel angle. 3. Have the cause immediately located and corrected. Adjust the inside and outside rear view mirrors. 4. STARTING AND DRIVING D To allow proper operation of snow, leaves, or other obstructions. Lock all doors. 5.

Owners Manual
Page 348
... all fixing bolts of the towing ball and bracket after approximately 1000 km (600 miles) of wiring and relays for your rear view mirrors conform to the total trailer weight. Pre-towing safety check D Check that your vehicle remains level when a loaded or unloaded trailer is...suspension or other possible causes. Trailer lights D Trailer lights must comply with any federal, state/provincial or local regulation. Break-in schedule D Lexus recommends that your trailer. Adjust the tire pressure to the recommended cold tire pressure indicated below: Tire pressure, kPa (kgf/cm2 or bar, ...
... all fixing bolts of the towing ball and bracket after approximately 1000 km (600 miles) of wiring and relays for your rear view mirrors conform to the total trailer weight. Pre-towing safety check D Check that your vehicle remains level when a loaded or unloaded trailer is...suspension or other possible causes. Trailer lights D Trailer lights must comply with any federal, state/provincial or local regulation. Break-in schedule D Lexus recommends that your trailer. Adjust the tire pressure to the recommended cold tire pressure indicated below: Tire pressure, kPa (kgf/cm2 or bar, ...

Owners Manual
Page 463
...36 TAIL POWER -OUTLET OBD FOG 10 15 7.5 15 442 ELECTRICAL COMPONENTS No. 28 29 FUSE WIPER MIRROR -HEATER AMPERE 25 10 CIRCUIT Windshield wipers and washer Outside rear view mirror defogger Cruise control system, Anti-lock brake system, Shift lock system, Theft deterrent system, Electronic modulated suspension,...panel lights, Glove box light Emergency flashers, Turn signal lights Audio system Cigarette lighter, Clock, SRS Rear window defogger, Outside rear view mirror defogger Power window, Electronic moon roof, Power seat system No circuit Spare fuse 38 DOOR 25 30 ECU-IG 15 39 40 41 42...
...36 TAIL POWER -OUTLET OBD FOG 10 15 7.5 15 442 ELECTRICAL COMPONENTS No. 28 29 FUSE WIPER MIRROR -HEATER AMPERE 25 10 CIRCUIT Windshield wipers and washer Outside rear view mirror defogger Cruise control system, Anti-lock brake system, Shift lock system, Theft deterrent system, Electronic modulated suspension,...panel lights, Glove box light Emergency flashers, Turn signal lights Audio system Cigarette lighter, Clock, SRS Rear window defogger, Outside rear view mirror defogger Power window, Electronic moon roof, Power seat system No circuit Spare fuse 38 DOOR 25 30 ECU-IG 15 39 40 41 42...
