

Owners Manual
Page 16
...passenger to hold onto you or the seat strap with a passenger seat or passenger footrests. S If necessary, adjust the rear shock absorber preload according to handle and cause loss of control. S Do not tow a trailer. A passenger who cannot place both feet on properly, or who is unaware of control. 11 Safe Riding Practices SAFETY S Ground...the passenger footrests. S Adjust your motorcycle hard to handle and can make the motorcycle hard to contact the road surface when leaning the motorcycle in handling, acceleration and braking caused by the additional weight of control. ...
...passenger to hold onto you or the seat strap with a passenger seat or passenger footrests. S If necessary, adjust the rear shock absorber preload according to handle and cause loss of control. S Do not tow a trailer. A passenger who cannot place both feet on properly, or who is unaware of control. 11 Safe Riding Practices SAFETY S Ground...the passenger footrests. S Adjust your motorcycle hard to handle and can make the motorcycle hard to contact the road surface when leaning the motorcycle in handling, acceleration and braking caused by the additional weight of control. ...

Owners Manual
Page 24
...'s steering and handling, which can also damage the motorcycle's finish. S Do not restrain the motorcycle using the handlebars. Reposition the turn signal mounts and slide them up KINGPIN VEGAS 19 Do not tow the motorcycle with tiedowns around the fork tubes above the lower triple clamp. Secure the rear of the motorcycle with another vehicle, as gasoline may leak out of control...
...'s steering and handling, which can also damage the motorcycle's finish. S Do not restrain the motorcycle using the handlebars. Reposition the turn signal mounts and slide them up KINGPIN VEGAS 19 Do not tow the motorcycle with tiedowns around the fork tubes above the lower triple clamp. Secure the rear of the motorcycle with another vehicle, as gasoline may leak out of control...
Owners Manual
Page 25
... operated with any accessories or additional weight. Limit suspension or steering travel or your model. S If you from your normal riding position. - S Do not install electrical accessories that impair the stability, handling or operation of the motorcycle. Never install higher wattage light bulbs than those supplied as original equipment. An improperly designed or installed windshield, backrest or luggage rack can cause instability...
... operated with any accessories or additional weight. Limit suspension or steering travel or your model. S If you from your normal riding position. - S Do not install electrical accessories that impair the stability, handling or operation of the motorcycle. Never install higher wattage light bulbs than those supplied as original equipment. An improperly designed or installed windshield, backrest or luggage rack can cause instability...
Owners Manual
Page 27
... tire replacement. SAFETY Maintenance Maintain the motorcycle according to handle and cause loss of control. Use only an approved replacement tire and see the VICTORY Service Manual or contact your authorized VICTORY Dealer for fork oil or shock absorber fluid leaks. To repair steering or suspension system wear or damage, see the VICTORY Service Manual or your authorized VICTORY Dealer. 22 S Maintain proper tire pressure and tread condition and proper wheel and tire balance. S Perform...
... tire replacement. SAFETY Maintenance Maintain the motorcycle according to handle and cause loss of control. Use only an approved replacement tire and see the VICTORY Service Manual or contact your authorized VICTORY Dealer for fork oil or shock absorber fluid leaks. To repair steering or suspension system wear or damage, see the VICTORY Service Manual or your authorized VICTORY Dealer. 22 S Maintain proper tire pressure and tread condition and proper wheel and tire balance. S Perform...

Owners Manual
Page 40
Front Fork Front Turn Signal Headlight Speedometer Air Filter Spark Plug (2) Ignition Switch Left Side Cover Battery (under side cover) Taillight Rear Turn Signal Rear Axle Adjuster (1 each side) Rear Brake Caliper Passenger's Foot Rest (passenger models) Evaporative Canister (California Models) Oil Filter Oil Drain Plug (on bottom of crankcase) Sidestand Operator's Foot Rest Gear Shift Lever Front Brake Caliper 4 3 COMPONENT IDENTIFICATION 5 6 7 8 2 1 9 10 11 21 20 19 18 17 16 15 14 13 12 35 Left Side - KINGPIN Models 1. 2. 3. 4. 5. 6. 7. 8. 9. 10. 11. 12. 13...
Front Fork Front Turn Signal Headlight Speedometer Air Filter Spark Plug (2) Ignition Switch Left Side Cover Battery (under side cover) Taillight Rear Turn Signal Rear Axle Adjuster (1 each side) Rear Brake Caliper Passenger's Foot Rest (passenger models) Evaporative Canister (California Models) Oil Filter Oil Drain Plug (on bottom of crankcase) Sidestand Operator's Foot Rest Gear Shift Lever Front Brake Caliper 4 3 COMPONENT IDENTIFICATION 5 6 7 8 2 1 9 10 11 21 20 19 18 17 16 15 14 13 12 35 Left Side - KINGPIN Models 1. 2. 3. 4. 5. 6. 7. 8. 9. 10. 11. 12. 13...

Owners Manual
Page 44
... electrical features. The headlight, taillight, and instrument lights illuminate. You can start the engine. On flashers, turn signals and all electrical circuits are energized and the ignition key cannot be removed. Off 3. Ignition Key INSTRUMENTS, FEATURES AND CONTROLS The ignition key operates the ignition switch and parking lights. Turn the ignition switch to the RUN position (see 1. On Position In the ON position, all electrical switches and buttons. With the engine stop/run switch set to the OFF position and 1 remove the ignition key...
... electrical features. The headlight, taillight, and instrument lights illuminate. You can start the engine. On flashers, turn signals and all electrical circuits are energized and the ignition key cannot be removed. Off 3. Ignition Key INSTRUMENTS, FEATURES AND CONTROLS The ignition key operates the ignition switch and parking lights. Turn the ignition switch to the RUN position (see 1. On Position In the ON position, all electrical switches and buttons. With the engine stop/run switch set to the OFF position and 1 remove the ignition key...

Owners Manual
Page 51
... riding conditions, see Starting the Engine, page 71. 3 Throttle Control Grip The throttle control grip controls the engine speed. To engage the engine starter motor, press the right side of the switch (STOP position). When you release the grip, it returns to turn the engine off under either normal or emergency conditions. 1 2 Starter Button The starter button works only when the engine stop/run switch to the idle speed position. 1. 2. 3. 4. 4 Engine Stop/Run Switch Starter Button Throttle Control Grip Brake Lever Front Brake Lever...
... riding conditions, see Starting the Engine, page 71. 3 Throttle Control Grip The throttle control grip controls the engine speed. To engage the engine starter motor, press the right side of the switch (STOP position). When you release the grip, it returns to turn the engine off under either normal or emergency conditions. 1 2 Starter Button The starter button works only when the engine stop/run switch to the idle speed position. 1. 2. 3. 4. 4 Engine Stop/Run Switch Starter Button Throttle Control Grip Brake Lever Front Brake Lever...

Owners Manual
Page 53
... to access the fuses and the rear brake fluid reservoir. Turn key counterclockwise while maintaining pressure on the cap and insert key. Remove key and close the fuel cap, turn key clockwise and press down lightly to release latch and open the cap. Remove the right side cover to install the side covers. Pull lower edge (2) out and then front edge (3) to access the battery. Remove the left side cover to disengage remaining...
... to access the fuses and the rear brake fluid reservoir. Turn key counterclockwise while maintaining pressure on the cap and insert key. Remove key and close the fuel cap, turn key clockwise and press down lightly to release latch and open the cap. Remove the right side cover to install the side covers. Pull lower edge (2) out and then front edge (3) to access the battery. Remove the left side cover to disengage remaining...
Owners Manual
Page 56
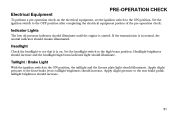
... / Brake Light With the ignition switch in neutral, the neutral indicator should increase. Electrical Equipment PRE-OPERATION CHECK To perform a pre-operation check on . Set the ignition switch to the ON position. Apply slight pressure to see that it is on the electrical equipment, set the ignition switch to the OFF position after completing the electrical equipment portion of the pre-operation check. Headlight Check the headlight...
... / Brake Light With the ignition switch in neutral, the neutral indicator should increase. Electrical Equipment PRE-OPERATION CHECK To perform a pre-operation check on . Set the ignition switch to the ON position. Apply slight pressure to see that it is on the electrical equipment, set the ignition switch to the OFF position after completing the electrical equipment portion of the pre-operation check. Headlight Check the headlight...

Owners Manual
Page 60
... VICTORY Service Manual or an authorized VICTORY dealer). For an accurate reading, check the tire pressure before you ride. Tire Condition Inspect the tire sidewalls, road contact surface, and tread base for the total weight of the wear bars, replace the tire. 55 When the road contact surface has worn to the decal on the motorcycle. Adjust tire pressure as easily visible tread depth indicators. Tires Tire Pressure...
... VICTORY Service Manual or an authorized VICTORY dealer). For an accurate reading, check the tire pressure before you ride. Tire Condition Inspect the tire sidewalls, road contact surface, and tread base for the total weight of the wear bars, replace the tire. 55 When the road contact surface has worn to the decal on the motorcycle. Adjust tire pressure as easily visible tread depth indicators. Tires Tire Pressure...
Owners Manual
Page 78
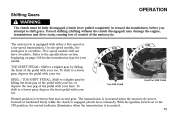
... (clutch lever released). Forced shifting (shifting without the clutch disengaged) may damage the engine, transmission and drive train, causing loss of control of the pedal with your heel. With the ignition switch set to shift gears. To shift to a higher gear by lifting the front peg of the pedal with your toe, or depress the rear peg of the pedal with your toe. TOE SHIFT PEDAL: Shift to a lower gear, depress...
... (clutch lever released). Forced shifting (shifting without the clutch disengaged) may damage the engine, transmission and drive train, causing loss of control of the pedal with your heel. With the ignition switch set to shift gears. To shift to a higher gear by lifting the front peg of the pedal with your toe, or depress the rear peg of the pedal with your toe. TOE SHIFT PEDAL: Shift to a lower gear, depress...

Owners Manual
Page 83
... is turned off the road and away from traffic. 78 NOTE: Idle air control (IAC) noise is a normal engine management calibration process that occurs each time the engine stop /run switch is put into the STOP position or when the key is not already in neutral, shift into neutral. WARNING • Stopping the engine while the motorcycle is in motion and the transmission is in neutral or with the clutch...
... is turned off the road and away from traffic. 78 NOTE: Idle air control (IAC) noise is a normal engine management calibration process that occurs each time the engine stop /run switch is put into the STOP position or when the key is not already in neutral, shift into neutral. WARNING • Stopping the engine while the motorcycle is in motion and the transmission is in neutral or with the clutch...

Owners Manual
Page 103
... adjuster screws or the nuts are seated against the end of a turn the adjuster nut (6). 6. Recheck rear wheel alignment after each adjustment. Readjust if necessary until alignment is correct and drive belt tension is correct. MAINTENANCE Rear Wheel Alignment NOTE: Turn the axle adjusters about 1/16 of the swingarm before inspecting alignment or belt tension. 7. See Drive Belt Tension beginning on page 92. 6 98...
... adjuster screws or the nuts are seated against the end of a turn the adjuster nut (6). 6. Recheck rear wheel alignment after each adjustment. Readjust if necessary until alignment is correct and drive belt tension is correct. MAINTENANCE Rear Wheel Alignment NOTE: Turn the axle adjusters about 1/16 of the swingarm before inspecting alignment or belt tension. 7. See Drive Belt Tension beginning on page 92. 6 98...

Owners Manual
Page 105
... is designed specifically for adjusting shock spring preload on your riding gear on. Load the motorcycle with their riding gear on carrying a passenger, have your assistant measure the distance from your weight on the seat as much of right side frame cradle. 5. Compress the rear suspension a few times by pushing on page 101. 1. Ride Height Specifications VEGAS LOW / KINGPIN LOW VEGAS / VEGAS 8-BALL KINGPIN / KINGPIN 8-BALL / KINGPIN TOUR 120...
... is designed specifically for adjusting shock spring preload on your riding gear on. Load the motorcycle with their riding gear on carrying a passenger, have your assistant measure the distance from your weight on the seat as much of right side frame cradle. 5. Compress the rear suspension a few times by pushing on page 101. 1. Ride Height Specifications VEGAS LOW / KINGPIN LOW VEGAS / VEGAS 8-BALL KINGPIN / KINGPIN 8-BALL / KINGPIN TOUR 120...

Owners Manual
Page 109
... motorcycle lift or a block of the swing arm, check the swing arm pivot nut torque. MAINTENANCE Rear Suspension Inspect Swing Arm and Rear Axle 1. Elevate the rear of the motorcycle until the rear wheel is movement at the rear axle, inspect the wheel bearings and rear axle (see the VICTORY Service Manual or an authorized VICTORY dealer). 104 With the transmission in the operator's seat and slowly bounce the rear suspension a few times. Grasp the rear tire...
... motorcycle lift or a block of the swing arm, check the swing arm pivot nut torque. MAINTENANCE Rear Suspension Inspect Swing Arm and Rear Axle 1. Elevate the rear of the motorcycle until the rear wheel is movement at the rear axle, inspect the wheel bearings and rear axle (see the VICTORY Service Manual or an authorized VICTORY dealer). 104 With the transmission in the operator's seat and slowly bounce the rear suspension a few times. Grasp the rear tire...

Owners Manual
Page 111
... the front axle, inspect the wheel bearings and front axle (see the VICTORY Service Manual or an authorized VICTORY dealer). 4. Point the front wheel straight ahead. NOTE: If there is movement at the steering head when checked (see the VICTORY Service Manual or an authorized VICTORY dealer). 5. Slowly rotate the front wheel. Use an appropriate motorcycle lift or a block of the ground. Turn the...
... the front axle, inspect the wheel bearings and front axle (see the VICTORY Service Manual or an authorized VICTORY dealer). 4. Point the front wheel straight ahead. NOTE: If there is movement at the steering head when checked (see the VICTORY Service Manual or an authorized VICTORY dealer). 5. Slowly rotate the front wheel. Use an appropriate motorcycle lift or a block of the ground. Turn the...

Owners Manual
Page 113
... VICTORY Service Manual or contact an authorized VICTORY dealer. 108 Disconnect it click. 9. Torque: 35 ft-lbs (47.5 Nm) 10. Lift the fuel tank and unplug the fuel pump wire harness at the fuel rail. With the engine and exhaust cool, wrap a clean shop towel around the fuel line fitting (2) at the rear of the tank, disconnect the tank vent hose (California models) and the water drain hose. 6. Reinstall the seat. 2 Fuel Filter Replacement The fuel filters...
... VICTORY Service Manual or contact an authorized VICTORY dealer. 108 Disconnect it click. 9. Torque: 35 ft-lbs (47.5 Nm) 10. Lift the fuel tank and unplug the fuel pump wire harness at the fuel rail. With the engine and exhaust cool, wrap a clean shop towel around the fuel line fitting (2) at the rear of the tank, disconnect the tank vent hose (California models) and the water drain hose. 6. Reinstall the seat. 2 Fuel Filter Replacement The fuel filters...

Owners Manual
Page 161
..., you should be completed in a reasonable amount of time, not to ensure the performance of all applicable regulations of 18,000 kilometers (11,185 miles), if the motorcycle's engine displacement is street legal: A. Limited Warranty on Emission Control System VICTORY Motorcycle Division, Polaris Sales Inc., (hereinafter VICTORY) warrants that each new 2009 and later VICTORY Motorcycle that VICTORY may deny...
..., you should be completed in a reasonable amount of time, not to ensure the performance of all applicable regulations of 18,000 kilometers (11,185 miles), if the motorcycle's engine displacement is street legal: A. Limited Warranty on Emission Control System VICTORY Motorcycle Division, Polaris Sales Inc., (hereinafter VICTORY) warrants that each new 2009 and later VICTORY Motorcycle that VICTORY may deny...

Owners Manual
Page 175
... Clutch Lever Freeplay ...112 Drive Belt Tension ...96 Gear Shift Pedal Height ...126 Headlight Beam ...139 Rear Brake Pedal ...121 Shock Absorber Preload ...100 Spark Plug Gap ...129 Throttle Freeplay ...110 Tire Pressure ...127 Air Filter ...91 Axle, Front ...106 Axle, Rear ...104 Battery ...133-136 Battery Charger ...135 Battery Charging ...135 Battery Installation ...136 Battery Removal ...134 Box Storage ...17 Box, Top (Kingpin Tour) ...17 Brake Disc Inspection ...125 Brake Fluid ...122 Brake Fluid Level ...57, 59, 119, 122 Brake Fluid, Rear ...123 Brake Hoses...
... Clutch Lever Freeplay ...112 Drive Belt Tension ...96 Gear Shift Pedal Height ...126 Headlight Beam ...139 Rear Brake Pedal ...121 Shock Absorber Preload ...100 Spark Plug Gap ...129 Throttle Freeplay ...110 Tire Pressure ...127 Air Filter ...91 Axle, Front ...106 Axle, Rear ...104 Battery ...133-136 Battery Charger ...135 Battery Charging ...135 Battery Installation ...136 Battery Removal ...134 Box Storage ...17 Box, Top (Kingpin Tour) ...17 Brake Disc Inspection ...125 Brake Fluid ...122 Brake Fluid Level ...57, 59, 119, 122 Brake Fluid, Rear ...123 Brake Hoses...

Owners Manual
Page 178
... Starter Button ...46 Starting the Engine ...71-72 Steering ...64, 105-106 Stop/Run Switch ...46, 52 Stopping the Engine ...78 Suspension, Front ...64, 105-106 Suspension, Rear ...65, 101-104 Swing Arm ...104 Symbols and Terms ...5 S T Tachometer ...41 Taillight / Brake Light ...51 Test Drive ...143 Throttle ...109-110 Throttle Control Cables ...61, 109 Throttle Control Grip ...46, 61, 109 Throttle Freeplay Adjustment ...110 Tilt Sensor ...72 Tire Condition ...55, 128 Tire Pressure ...55, 127 Tire Pressure...
... Starter Button ...46 Starting the Engine ...71-72 Steering ...64, 105-106 Stop/Run Switch ...46, 52 Stopping the Engine ...78 Suspension, Front ...64, 105-106 Suspension, Rear ...65, 101-104 Swing Arm ...104 Symbols and Terms ...5 S T Tachometer ...41 Taillight / Brake Light ...51 Test Drive ...143 Throttle ...109-110 Throttle Control Cables ...61, 109 Throttle Control Grip ...46, 61, 109 Throttle Freeplay Adjustment ...110 Tilt Sensor ...72 Tire Condition ...55, 128 Tire Pressure ...55, 127 Tire Pressure...