

Owners Manual
Page 1
Interactive Digital Display Owner's Manual
Interactive Digital Display Owner's Manual
Owners Manual
Page 4
Table of Contents Welcome ...4 Quick Start Guide ...5 Interactive Digital Display ...7 General Information ...9 Display Keys ...10 Maps/Trails ...15 Phone ...18 GPS Settings ...21 System Settings ...27 Media ...35 Diagnostics ...37 PIDD For Snowmobiles...38 General Snowmobile PIDD Information ...38 Initialization Process ...39 Left Hand Controls ...40 Vehicle Settings ...35 Detonation Elimination Technology ...50 Engine Overheat Indicators ...51 Bluetooth ...52 Before Connecting ...52...
Table of Contents Welcome ...4 Quick Start Guide ...5 Interactive Digital Display ...7 General Information ...9 Display Keys ...10 Maps/Trails ...15 Phone ...18 GPS Settings ...21 System Settings ...27 Media ...35 Diagnostics ...37 PIDD For Snowmobiles...38 General Snowmobile PIDD Information ...38 Initialization Process ...39 Left Hand Controls ...40 Vehicle Settings ...35 Detonation Elimination Technology ...50 Engine Overheat Indicators ...51 Bluetooth ...52 Before Connecting ...52...
Owners Manual
Page 5
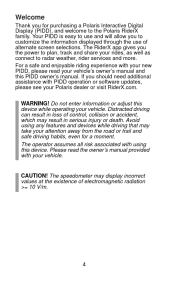
... to the Polaris RiderX family. Distracted driving can result in loss of control, collision or accident, which may display incorrect values at the existence of alternate screen selections. The operator assumes all risk associated with using any features and devices while driving that may take your vehicle. If you for a moment. WARNING! Please read your vehicle's owner's manual and this PIDD owner's manual. CAUTION! Welcome...
... to the Polaris RiderX family. Distracted driving can result in loss of control, collision or accident, which may display incorrect values at the existence of alternate screen selections. The operator assumes all risk associated with using any features and devices while driving that may take your vehicle. If you for a moment. WARNING! Please read your vehicle's owner's manual and this PIDD owner's manual. CAUTION! Welcome...
Owners Manual
Page 6
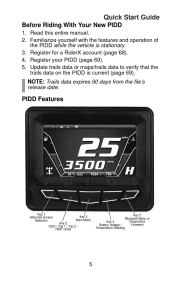
... data on the PIDD is stationary. 3. Familiarize yourself with the features and operation of the PIDD while the vehicle is current (page 69). PIDD Features Key 1 Alternate Screen Selection Key 3 Main Menu Key 2 ODO / Trip 1 / Trip 2 / TRIP / ENG Key 5 Bluetooth Menu or Diagnostics Key 4 if present Battery Voltage / Temperature Reading 5 Quick Start Guide Before Riding With Your New PIDD 1. Register for a RiderX account...
... data on the PIDD is stationary. 3. Familiarize yourself with the features and operation of the PIDD while the vehicle is current (page 69). PIDD Features Key 1 Alternate Screen Selection Key 3 Main Menu Key 2 ODO / Trip 1 / Trip 2 / TRIP / ENG Key 5 Bluetooth Menu or Diagnostics Key 4 if present Battery Voltage / Temperature Reading 5 Quick Start Guide Before Riding With Your New PIDD 1. Register for a RiderX account...
Owners Manual
Page 7
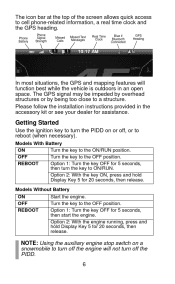
... vehicle is outdoors in the accessory kit or see your dealer for 5 seconds, then turn the PIDD on a snowmobile to cell phone-related information, a real time clock and the GPS heading. Option 2: With the key ON, press and hold Display Key 5 for 5 seconds, then start the engine. NOTE: Using the auxiliary engine stop switch on or off, or to ON/RUN. Models With Battery ON Turn...
... vehicle is outdoors in the accessory kit or see your dealer for 5 seconds, then turn the PIDD on a snowmobile to cell phone-related information, a real time clock and the GPS heading. Option 2: With the key ON, press and hold Display Key 5 for 5 seconds, then start the engine. NOTE: Using the auxiliary engine stop switch on or off, or to ON/RUN. Models With Battery ON Turn...

Owners Manual
Page 8
..., longitude and elevation). Mark and save waypoints and tracks. Performance View the speedometer, tachometer, dual trip meters, odometer. Security (Snowmobiles) If security is not required. Riding Conditions View the clock, change display settings. Calibration is enabled, lock your vehicle using a security code. Interactive Digital Display The PIDD features a 4.3-inch high resolution full color LCD display that provides access to view battery strength and signal strength).
..., longitude and elevation). Mark and save waypoints and tracks. Performance View the speedometer, tachometer, dual trip meters, odometer. Security (Snowmobiles) If security is not required. Riding Conditions View the clock, change display settings. Calibration is enabled, lock your vehicle using a security code. Interactive Digital Display The PIDD features a 4.3-inch high resolution full color LCD display that provides access to view battery strength and signal strength).

Owners Manual
Page 9
... all times. Update the PIDD every 90 days or more often (especially before long trips) to ensure the most recent trails data is not performed within 90 days, a notification screen displays. NOTE: Trails data expires 90 days from the file's release date. Polaris makes no warranty as an... aid and should not be used for the life of the vehicle. Software Upgrades Update software for any purpose requiring...
... all times. Update the PIDD every 90 days or more often (especially before long trips) to ensure the most recent trails data is not performed within 90 days, a notification screen displays. NOTE: Trails data expires 90 days from the file's release date. Polaris makes no warranty as an... aid and should not be used for the life of the vehicle. Software Upgrades Update software for any purpose requiring...
Owners Manual
Page 10
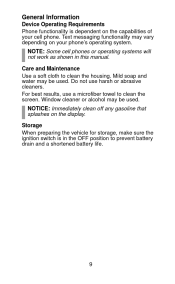
...Maintenance Use a soft cloth to clean the screen. Mild soap and water may vary depending on your cell phone. NOTICE: Immediately clean off any gasoline that splashes on the capabilities of your phone's operating system. Storage When preparing the vehicle for storage, make sure the ignition switch is dependent on the display.... NOTE: Some cell phones or operating systems will not work as shown in the OFF position to prevent battery drain and a shortened battery life. 9 Do...
...Maintenance Use a soft cloth to clean the screen. Mild soap and water may vary depending on your cell phone. NOTICE: Immediately clean off any gasoline that splashes on the capabilities of your phone's operating system. Storage When preparing the vehicle for storage, make sure the ignition switch is dependent on the display.... NOTE: Some cell phones or operating systems will not work as shown in the OFF position to prevent battery drain and a shortened battery life. 9 Do...
Owners Manual
Page 39
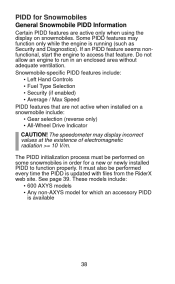
... include: • Gear selection (reverse only) • All-Wheel Drive Indicator CAUTION! These models include: • 600 AXYS models • Any non-AXYS model for Snowmobiles General Snowmobile PIDD Information Certain PIDD features are not active when installed on snowmobiles. Some PIDD features may display incorrect values at the existence of electromagnetic radiation >= 10 V/m. PIDD for which an accessory PIDD is available...
... include: • Gear selection (reverse only) • All-Wheel Drive Indicator CAUTION! These models include: • 600 AXYS models • Any non-AXYS model for Snowmobiles General Snowmobile PIDD Information Certain PIDD features are not active when installed on snowmobiles. Some PIDD features may display incorrect values at the existence of electromagnetic radiation >= 10 V/m. PIDD for which an accessory PIDD is available...
Owners Manual
Page 44
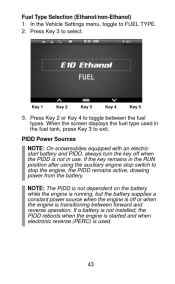
.... 2. Key 1 Key 2 Key 3 Key 4 Key 5 3. If the key remains in the fuel tank, press Key 3 to exit. When the screen displays the fuel type used . 43 If a battery is not installed, the PIDD reboots when the engine is started and when electronic reverse (PERC) is not in use. Fuel Type Selection (Ethanol/non-Ethanol) 1. PIDD Power Sources NOTE: On snowmobiles equipped with an electric start battery and PIDD, always turn...
.... 2. Key 1 Key 2 Key 3 Key 4 Key 5 3. If the key remains in the fuel tank, press Key 3 to exit. When the screen displays the fuel type used . 43 If a battery is not installed, the PIDD reboots when the engine is started and when electronic reverse (PERC) is not in use. Fuel Type Selection (Ethanol/non-Ethanol) 1. PIDD Power Sources NOTE: On snowmobiles equipped with an electric start battery and PIDD, always turn...
Owners Manual
Page 46
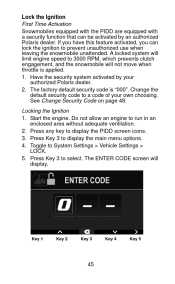
.... Press Key 3 to display the main menu options. 4. If you have this feature activated, you can be activated by your own choosing. The factory default security code is applied. 1. Change the default security code to a code of your authorized Polaris dealer. 2. The ENTER CODE screen will not move when throttle is "000". Locking the Ignition 1. Press Key 3 to select. Start the engine. Lock the Ignition First Time Activation Snowmobiles...
.... Press Key 3 to display the main menu options. 4. If you have this feature activated, you can be activated by your own choosing. The factory default security code is applied. 1. Change the default security code to a code of your authorized Polaris dealer. 2. The ENTER CODE screen will not move when throttle is "000". Locking the Ignition 1. Press Key 3 to select. Start the engine. Lock the Ignition First Time Activation Snowmobiles...

Owners Manual
Page 47
The ignition is not accepted, a BAD CODE screen will display. 8. If the code is locked. Key 1 Key 2 Key 3 Key 4 Key 5 46 6. When the code is accepted, the "locked" symbol and ENTER CODE screen displays. Press Key 2 or Key 4 to each digit. 7. Press Key 5 to toggle to enter the current 3-digit security code. Follow the prompts and re-enter the current security code.
The ignition is not accepted, a BAD CODE screen will display. 8. If the code is locked. Key 1 Key 2 Key 3 Key 4 Key 5 46 6. When the code is accepted, the "locked" symbol and ENTER CODE screen displays. Press Key 2 or Key 4 to each digit. 7. Press Key 5 to toggle to enter the current 3-digit security code. Follow the prompts and re-enter the current security code.

Owners Manual
Page 55
Your phone settings may need to be discoverable to open Bluetooth Settings. 2. After 5 seconds the display will start searching for devices. When the display opens Bluetooth Settings it becomes discoverable to display. 54 Key 1 Key 2 Key 3 Key 4 Key 5 NOTE: Devices must be changed to allow notifications and missed calls and text messages to other Bluetooth devices. Bluetooth Settings 1. With the phone main menu screen displayed, press Key 4 to show up in the list.
Your phone settings may need to be discoverable to open Bluetooth Settings. 2. After 5 seconds the display will start searching for devices. When the display opens Bluetooth Settings it becomes discoverable to display. 54 Key 1 Key 2 Key 3 Key 4 Key 5 NOTE: Devices must be changed to allow notifications and missed calls and text messages to other Bluetooth devices. Bluetooth Settings 1. With the phone main menu screen displayed, press Key 4 to show up in the list.

Owners Manual
Page 69
...can be registered to the same RiderX account. On the vehicle, turn the ignition key to RiderX.com. 2. The engine does not have a RiderX account, go to the ON/RUN position. The PIDD Connect Bluetooth Adapter should appear as "Polaris the last 4 digits of the page. 3. Register for a free account. ...and verify that the connection status bar indicates the phone is visible, select it to connect your smartphone to provide trail data for multiple devices. 68 Scroll down and complete the online form to the adapter. 5. Open your phone's Bluetooth menu and make your phone....
...can be registered to the same RiderX account. On the vehicle, turn the ignition key to RiderX.com. 2. The engine does not have a RiderX account, go to the ON/RUN position. The PIDD Connect Bluetooth Adapter should appear as "Polaris the last 4 digits of the page. 3. Register for a free account. ...and verify that the connection status bar indicates the phone is visible, select it to connect your smartphone to provide trail data for multiple devices. 68 Scroll down and complete the online form to the adapter. 5. Open your phone's Bluetooth menu and make your phone....

Owners Manual
Page 70
... charge the vehicle's battery (if equipped). For future reference, a condensed version of the entire update process is outlined in the Systems Info display on the PIDD) (see page 33) 1. Register an PIDD (Rider or Dealer) Be prepared to provide the following information when registering an PIDD: • The vehicle's Vehicle Identification Number (VIN) (see the vehicle's owner's manual for...
... charge the vehicle's battery (if equipped). For future reference, a condensed version of the entire update process is outlined in the Systems Info display on the PIDD) (see page 33) 1. Register an PIDD (Rider or Dealer) Be prepared to provide the following information when registering an PIDD: • The vehicle's Vehicle Identification Number (VIN) (see the vehicle's owner's manual for...

Owners Manual
Page 77
... Release the PIDD key. 5. Return to page 73 and perform steps 13-24 of the page. Continue to hold any PIDD key while turning the ignition key to Polaris.com (Select your vehicle. 4. is no longer displayed. Delete the formerly downloaded (corrupt) files from the USB drive.... Return to RiderX.com and download new files. Manual PIDD Update Use this procedure only in the event of the page.) 76 Turn the ignition key...
... Release the PIDD key. 5. Return to page 73 and perform steps 13-24 of the page. Continue to hold any PIDD key while turning the ignition key to Polaris.com (Select your vehicle. 4. is no longer displayed. Delete the formerly downloaded (corrupt) files from the USB drive.... Return to RiderX.com and download new files. Manual PIDD Update Use this procedure only in the event of the page.) 76 Turn the ignition key...

Owners Manual
Page 79
... Arrow) Save to computer (Choose Save, not Run) Confirm update (Key 5: Green Arrow) Install USB drive to computer IDD reboots Extract files and copy to USB drive Remove USB drive Install USB drive to vehicle connector Verify update in SYSTEM INFO Turn key to ON/RUN (Start engine if no battery) Verify update in MAPS/TRAILS display Navigate to SYSTEM INFO Initialize (Snowmobiles only) 78...
... Arrow) Save to computer (Choose Save, not Run) Confirm update (Key 5: Green Arrow) Install USB drive to computer IDD reboots Extract files and copy to USB drive Remove USB drive Install USB drive to vehicle connector Verify update in SYSTEM INFO Turn key to ON/RUN (Start engine if no battery) Verify update in MAPS/TRAILS display Navigate to SYSTEM INFO Initialize (Snowmobiles only) 78...

Owners Manual
Page 81
... (GMT offset) and daylight savings mode is a locked GPS signal. See page 32. A: Refer to switch between Day/Night mode. A: Option 1: While viewing the main menu screen, press Key 1 to Bluetooth on the display for your authorized Polaris dealer to have the code reset to the PIDD? GPS automatically sets the clock when there is correct for my snowmobile...
... (GMT offset) and daylight savings mode is a locked GPS signal. See page 32. A: Refer to switch between Day/Night mode. A: Option 1: While viewing the main menu screen, press Key 1 to Bluetooth on the display for your authorized Polaris dealer to have the code reset to the PIDD? GPS automatically sets the clock when there is correct for my snowmobile...

Owners Manual
Page 82
... and holding KEY 5 for at least 10 seconds. 5. Verify downloaded files are cleared from RIDER X website. 3. Plug USB drive into bootloader mode. Troubleshooting Screen Locked "Frozen": 1. IMPORTANT: Formatting the flash drive will go into USB port. 6. Turn off PIDD with key switch (disconnect battery power or turn on PIDD....screen, release the key button. 8. The PIDD will erase all of its contents. 1. Re-download latest update files from drive. 4. Press and hold any key on keypad and then turn off engine if applicable) and wait for 20 seconds. Remove flash drive and ...
... and holding KEY 5 for at least 10 seconds. 5. Verify downloaded files are cleared from RIDER X website. 3. Plug USB drive into bootloader mode. Troubleshooting Screen Locked "Frozen": 1. IMPORTANT: Formatting the flash drive will go into USB port. 6. Turn off PIDD with key switch (disconnect battery power or turn on PIDD....screen, release the key button. 8. The PIDD will erase all of its contents. 1. Re-download latest update files from drive. 4. Press and hold any key on keypad and then turn off engine if applicable) and wait for 20 seconds. Remove flash drive and ...

Owners Manual
Page 84
... (DOP values are ok, antenna is normal during the first 30 to 90 seconds after several days. 2. The antenna is either not powered, defective, or there is functional, but antenna has not yet acquired satellites. 1. If these are all zeros) CAN communication link between antenna and display is a CAN communication link wiring issue. GPS antenna not communicated with display (DOP window greyed...
... (DOP values are ok, antenna is normal during the first 30 to 90 seconds after several days. 2. The antenna is either not powered, defective, or there is functional, but antenna has not yet acquired satellites. 1. If these are all zeros) CAN communication link between antenna and display is a CAN communication link wiring issue. GPS antenna not communicated with display (DOP window greyed...