Owner's Manual
Page 9
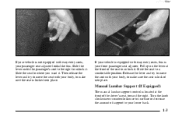
... seat with your body, to make sure the seat is locked into place. Slide the lever under the passenger's seat to the right to your lower back. 1-3 Pull up on the lever at the front of the driver's seat, toward the right. Manual Lumbar Support (If Equipped) The manual lumbar support...
... seat with your body, to make sure the seat is locked into place. Slide the lever under the passenger's seat to the right to your lower back. 1-3 Pull up on the lever at the front of the driver's seat, toward the right. Manual Lumbar Support (If Equipped) The manual lumbar support...

Owner's Manual
Page 11
... 't do its job either. The belt forces would be against your safety belt properly. To fold a front seatback forward, lift the latch located on the lower backside of a neck injury in motion, have the seatback upright. Slide the head restraint up or down so that the top of the restraint is...
... 't do its job either. The belt forces would be against your safety belt properly. To fold a front seatback forward, lift the latch located on the lower backside of a neck injury in motion, have the seatback upright. Slide the head restraint up or down so that the top of the restraint is...

Owner's Manual
Page 65
... 's a safety feature. 1. Close the door. 3. Do the same thing to move the lock all the way up. 2. To Use One of These Locks Push the lower portion of the doors -- The rear doors of your vehicle cannot be opened from the inside when this feature is equipped with rear door security...
... 's a safety feature. 1. Close the door. 3. Do the same thing to move the lock all the way up. 2. To Use One of These Locks Push the lower portion of the doors -- The rear doors of your vehicle cannot be opened from the inside when this feature is equipped with rear door security...

Owner's Manual
Page 82
You can use it on hills. This might happen if you need more power but lower fuel economy than SECOND (2). NOTICE: Don't drive in SECOND (2) for normal driving with only the accelerator pedal. You can use your engine. accelerator all the ... mph (55 km/h), push your vehicle there with the four-speed automatic transaxle. Use DRIVE (D) as much as you go down steep mountain roads, but lower fuel economy. Forward Gears (4-Speed) AUTOMATIC OVERDRIVE (D): This position is put in deep snow or mud. Also, if you would also want to use SECOND...
You can use it on hills. This might happen if you need more power but lower fuel economy than SECOND (2). NOTICE: Don't drive in SECOND (2) for normal driving with only the accelerator pedal. You can use your engine. accelerator all the ... mph (55 km/h), push your vehicle there with the four-speed automatic transaxle. Use DRIVE (D) as much as you go down steep mountain roads, but lower fuel economy. Forward Gears (4-Speed) AUTOMATIC OVERDRIVE (D): This position is put in deep snow or mud. Also, if you would also want to use SECOND...

Owner's Manual
Page 83
... wheels can use SECOND (2) on hills. Use your brakes or shift into first gear until the vehicle is going down steep mountain roads, but lower fuel economy. NOTICE: Don't drive in SECOND (2) for normal driving, however, it on a hill. Don't shift into SECOND (2) unless you... steep hill. D When driving on . This might choose THIRD (3) instead of AUTOMATIC OVERDRIVE (D): FIRST (1): This position gives you even more power (but lower fuel economy) than SECOND (2). This could damage your engine. 2-23 D When going slowly enough. yellowblue THIRD (3): This position is also used for more ...
... wheels can use SECOND (2) on hills. Use your brakes or shift into first gear until the vehicle is going down steep mountain roads, but lower fuel economy. NOTICE: Don't drive in SECOND (2) for normal driving, however, it on a hill. Don't shift into SECOND (2) unless you... steep hill. D When driving on . This might choose THIRD (3) instead of AUTOMATIC OVERDRIVE (D): FIRST (1): This position gives you even more power (but lower fuel economy) than SECOND (2). This could damage your engine. 2-23 D When going slowly enough. yellowblue THIRD (3): This position is also used for more ...

Owner's Manual
Page 92
.... Lockout Switch Four-door models also have a lockout switch. This will continue down feature, press the rear of the windows only when the ignition is lowering, briefly press the switch forward, then release. Power Windows (If Equipped) With power windows, switches on four-door models, each window. Press the lockout ...detent. To raise the window, press and hold the rear of the switch to the desired amount by pressing the rear of the switch . To lower the windows, press and hold the switch forward. The window will prevent rear passengers from opening and closing the windows.
.... Lockout Switch Four-door models also have a lockout switch. This will continue down feature, press the rear of the windows only when the ignition is lowering, briefly press the switch forward, then release. Power Windows (If Equipped) With power windows, switches on four-door models, each window. Press the lockout ...detent. To raise the window, press and hold the rear of the switch to the desired amount by pressing the rear of the switch . To lower the windows, press and hold the switch forward. The window will prevent rear passengers from opening and closing the windows.

Owner's Manual
Page 94
... other drivers won't see "Fuses and Circuit Breakers" in front of the turn , check the fuse (see your turn or a lane change , just raise or lower the lever until the arrow starts to help avoid an accident. These positions allow you to -Pass This feature lets you use it there until...
... other drivers won't see "Fuses and Circuit Breakers" in front of the turn , check the fuse (see your turn or a lane change , just raise or lower the lever until the arrow starts to help avoid an accident. These positions allow you to -Pass This feature lets you use it there until...

Owner's Manual
Page 98
... at the end of the lever, then release the button and the accelerator pedal. If you want , then release it there until you reach the lower speed you want to go about 1 mph (1.6 km/h) slower. Hold it . Each time you do this , your chosen speed and stay there. Each time you...
... at the end of the lever, then release the button and the accelerator pedal. If you want , then release it there until you reach the lower speed you want to go about 1 mph (1.6 km/h) slower. Hold it . Each time you do this , your chosen speed and stay there. Each time you...

Owner's Manual
Page 99
... the clutch pedal, if you out of the hills. Of course, applying the brake or clutch pedal takes you have to brake or shift to a lower gear to turn signal/multifunction lever controls your vehicle's lamps. The band on hills depends upon your speed down. Parking Lamps This position will work...
... the clutch pedal, if you out of the hills. Of course, applying the brake or clutch pedal takes you have to brake or shift to a lower gear to turn signal/multifunction lever controls your vehicle's lamps. The band on hills depends upon your speed down. Parking Lamps This position will work...

Owner's Manual
Page 107
... position. Press the front of the switch to the top as it is moving. Press and hold the front of the switch to raise or lower the top. Convertible Top (If Equipped) The following steps explain the proper operation of your vehicle has an electrical failure. NOTICE: D Remove any position. The... is below 20_F (-7_C). Press and release the rear of the system. The cold can damage the top or other damage to stop before you lower the top. D 2-47 The sunshade can only be opened or closed by hand when using the vent position. The wind could damage the top. D Open...
... position. Press the front of the switch to the top as it is moving. Press and hold the front of the switch to raise or lower the top. Convertible Top (If Equipped) The following steps explain the proper operation of your vehicle has an electrical failure. NOTICE: D Remove any position. The... is below 20_F (-7_C). Press and release the rear of the system. The cold can damage the top or other damage to stop before you lower the top. D 2-47 The sunshade can only be opened or closed by hand when using the vent position. The wind could damage the top. D Open...

Owner's Manual
Page 108
Push the button in the latch handle and turn the handle down to NEUTRAL (N). 2. Pull the latch handle rearward away from the holes over the windshield. 5. Lower the side door windows completely to avoid wear to RUN. 3. Turn the ignition to the weatherstrips. 4. yellowblue Lowering the Convertible Top 1. Set the parking brake and shift your automatic transaxle to PARK (P) or your manual transaxle to unhook the latch pins from the windshield and hold it until the convertible top is fully lowered. 2-48
Push the button in the latch handle and turn the handle down to NEUTRAL (N). 2. Pull the latch handle rearward away from the holes over the windshield. 5. Lower the side door windows completely to avoid wear to RUN. 3. Turn the ignition to the weatherstrips. 4. yellowblue Lowering the Convertible Top 1. Set the parking brake and shift your automatic transaxle to PARK (P) or your manual transaxle to unhook the latch pins from the windshield and hold it until the convertible top is fully lowered. 2-48

Owner's Manual
Page 111
Pull the boot center cover from behind the rear seatback and place it is latched. 2-51 Place the boot center cover flap along the trunk lid opening. Align one snap on the corner of the vehicle. Push the seat back to make sure it over the inner sides of the boot side covers and the lowered top. 6. Close the trunk lid. 8. Repeat for the other snap. 7. Go to the rear of the boot to the up position. Raise the rear seatback to the ball stud and push forward. yellowblue 5.
Pull the boot center cover from behind the rear seatback and place it is latched. 2-51 Place the boot center cover flap along the trunk lid opening. Align one snap on the corner of the vehicle. Push the seat back to make sure it over the inner sides of the boot side covers and the lowered top. 6. Close the trunk lid. 8. Repeat for the other snap. 7. Go to the rear of the boot to the up position. Raise the rear seatback to the ball stud and push forward. yellowblue 5.

Owner's Manual
Page 114
yellowblue 7. Set the parking brake and shift your automatic transaxle to PARK (P) or your manual transaxle to the weather strips. 4. Close the trunk. 9. Lower the door windows completely to avoid wear to NEUTRAL (N). 2. Push the button in the trunk. 8. Push the handle forward toward the windshield and hold it ...
yellowblue 7. Set the parking brake and shift your automatic transaxle to PARK (P) or your manual transaxle to the weather strips. 4. Close the trunk. 9. Lower the door windows completely to avoid wear to NEUTRAL (N). 2. Push the button in the trunk. 8. Push the handle forward toward the windshield and hold it ...

Owner's Manual
Page 115
... two people. Before you may need to raise the top manually. If it is securely latched on both sides. 2-55 yellowblue Lowering the Top Manually NOTICE: Do not attempt to lower the top manually as damage to the vehicle will allow you to safely drive the vehicle until you can get the...
... two people. Before you may need to raise the top manually. If it is securely latched on both sides. 2-55 yellowblue Lowering the Top Manually NOTICE: Do not attempt to lower the top manually as damage to the vehicle will allow you to safely drive the vehicle until you can get the...

Owner's Manual
Page 116
Lower the door windows completely. Position one person on the driver's side in the trunk. 5. See your manual transaxle to avoid twisting. Open the trunk. 4. If ...
Lower the door windows completely. Position one person on the driver's side in the trunk. 5. See your manual transaxle to avoid twisting. Open the trunk. 4. If ...

Owner's Manual
Page 136
... may become too dry. BI-LEVEL: This setting brings in outside air and cool it is used for your lower body. DEFROST: This setting directs most of time, the air in your lower body may notice this setting is needed to run the compressor in MAX or DEFROST. Air Conditioning Compressor Button...
... may become too dry. BI-LEVEL: This setting brings in outside air and cool it is used for your lower body. DEFROST: This setting directs most of time, the air in your lower body may notice this setting is needed to run the compressor in MAX or DEFROST. Air Conditioning Compressor Button...

Owner's Manual
Page 137
... right control to BI-LEVEL, the fan control to the side vents, close the center vents. See "Engine Coolant Heater" in outside (0_F (-18_C) or lower).
... right control to BI-LEVEL, the fan control to the side vents, close the center vents. See "Engine Coolant Heater" in outside (0_F (-18_C) or lower).

Owner's Manual
Page 140
... balances the sound between the speakers. Whenever you press the same buttons, the station you return to choose radio stations. TUNE: Turn the lower knob to your selection. Repeat the steps for each pushbutton. In addition to the four stations already set up or down to decrease the ...at the same time. Press one of pushbuttons. TREB: Slide the lever up to the next higher or lower station and stay there. Adjusting the Speakers BALANCE: Turn the control behind the lower knob to move the sound to switch between AM and FM. yellowblue Finding a Station AM-FM: Press...
... balances the sound between the speakers. Whenever you press the same buttons, the station you return to choose radio stations. TUNE: Turn the lower knob to your selection. Repeat the steps for each pushbutton. In addition to the four stations already set up or down to decrease the ...at the same time. Press one of pushbuttons. TREB: Slide the lever up to the next higher or lower station and stay there. Adjusting the Speakers BALANCE: Turn the control behind the lower knob to move the sound to switch between AM and FM. yellowblue Finding a Station AM-FM: Press...

Owner's Manual
Page 141
... select the band. 3. RECALL: Display the time with Cassette Tape Player (If Equipped) Finding a Station AM-FM: Press this button to the next higher or lower station and stay there. Turn it counterclockwise to your selection. Whenever you press that numbered button, the station you return to decrease volume.
... select the band. 3. RECALL: Display the time with Cassette Tape Player (If Equipped) Finding a Station AM-FM: Press this button to the next higher or lower station and stay there. Turn it counterclockwise to your selection. Whenever you press that numbered button, the station you return to decrease volume.

Owner's Manual
Page 145
... positions when you set up to 30 to reduce frequency range. Setting the Tone EQUALIZER: A seven-band equalizer is built to the next higher or lower station and stay there. Slide the levers up or down to 45 minutes long on . 2. Playing a Cassette Tape Your tape player is part of the...
... positions when you set up to 30 to reduce frequency range. Setting the Tone EQUALIZER: A seven-band equalizer is built to the next higher or lower station and stay there. Slide the levers up or down to 45 minutes long on . 2. Playing a Cassette Tape Your tape player is part of the...

