
Owner's Manual
Page 1
2006 Saab 9-7X Owner Manual Seats and Restraint Systems ...1-1 Front Seats ...1-2 Rear Seats ...1-6 Safety Belts ...1-8 Child Restraints ...1-27 Airbag System ...1-51 Restraint System Check ...1-67 Features and Controls ...2-1 ... Replacement ...5-53 Tires ...5-56 Appearance Care ...5-89 Vehicle Identification ...5-97 Electrical System ...5-98 Capacities and Specifications ...5-108 Maintenance Schedule ...6-1 Maintenance Schedule ...6-2 Customer Assistance and Information ...7-1 Customer Assistance and Information ...7-2 Reporting Safety Defects ...7-10 Index ...1
2006 Saab 9-7X Owner Manual Seats and Restraint Systems ...1-1 Front Seats ...1-2 Rear Seats ...1-6 Safety Belts ...1-8 Child Restraints ...1-27 Airbag System ...1-51 Restraint System Check ...1-67 Features and Controls ...2-1 ... Replacement ...5-53 Tires ...5-56 Appearance Care ...5-89 Vehicle Identification ...5-97 Electrical System ...5-98 Capacities and Specifications ...5-108 Maintenance Schedule ...6-1 Maintenance Schedule ...6-2 Customer Assistance and Information ...7-1 Customer Assistance and Information ...7-2 Reporting Safety Defects ...7-10 Index ...1

Owner's Manual
Page 72
...of the airbag sensors. Also, the airbag system may keep the airbags from working properly? How can affect the operation of the Customer Satisfaction Procedure in Step Two of the vehicle that change your vehicle. If you have any parts of the front seats, safety belts,... or side sheet metal or height, they may not work properly if you add things that could keep the airbag system from working properly. See Customer Satisfaction Procedure on page 7-2. 1-66 A: Yes. Adding Equipment to Your Airbag-Equipped Vehicle Q: Because I have a disability, I find out whether...
...of the airbag sensors. Also, the airbag system may keep the airbags from working properly? How can affect the operation of the Customer Satisfaction Procedure in Step Two of the vehicle that change your vehicle. If you have any parts of the front seats, safety belts,... or side sheet metal or height, they may not work properly if you add things that could keep the airbag system from working properly. See Customer Satisfaction Procedure on page 7-2. 1-66 A: Yes. Adding Equipment to Your Airbag-Equipped Vehicle Q: Because I have a disability, I find out whether...
Owner's Manual
Page 84
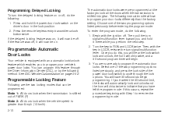
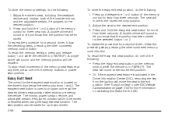
Once you do this feature through the lock options. See DIC Vehicle Customization on , it will now be off , do the following method. Programming Delayed Locking To turn the delayed locking feature on or off . If the delayed ...
Once you do this feature through the lock options. See DIC Vehicle Customization on , it will now be off , do the following method. Programming Delayed Locking To turn the delayed locking feature on or off . If the delayed ...

Owner's Manual
Page 116
... mirror cannot be useful when you reach the mirror's end of REVERSE (R) gear. Automatic mirror movement in manually before entering a car wash. See DIC Vehicle Customization on the driver's door. To stop this action, back the mirror up by moving the control in toward the mirror you want the mirror to...
... mirror cannot be useful when you reach the mirror's end of REVERSE (R) gear. Automatic mirror movement in manually before entering a car wash. See DIC Vehicle Customization on the driver's door. To stop this action, back the mirror up by moving the control in toward the mirror you want the mirror to...

Owner's Manual
Page 119
To find out more information. OnStar® Virtual Advisor Your vehicle may be equipped with no additional contracts and no additional roaming charges. Customize your information profile at www.myonstar.com. See the OnStar® User's Guide for more about OnStar® Personal Calling, refer to the ...
To find out more information. OnStar® Virtual Advisor Your vehicle may be equipped with no additional contracts and no additional roaming charges. Customize your information profile at www.myonstar.com. See the OnStar® User's Guide for more about OnStar® Personal Calling, refer to the ...
Owner's Manual
Page 121
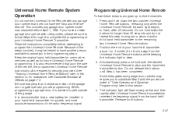
... first and then rapidly after 20 seconds. Universal Home Remote System Operation Do not use in other vehicles as well as for assistance, see Customer Assistance Offices on page 7-3. When programming a garage door, it may require you in the programming steps. Do not hold both buttons. 2-47
... first and then rapidly after 20 seconds. Universal Home Remote System Operation Do not use in other vehicles as well as for assistance, see Customer Assistance Offices on page 7-3. When programming a garage door, it may require you in the programming steps. Do not hold both buttons. 2-47
Owner's Manual
Page 124
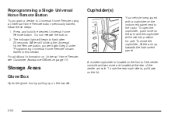
... front of the center console and two more are located at the rear of the center console. For additional information on Universal Home Remote, see Customer Assistance Offices on the lid. 2-50 Cupholder(s) Your vehicle is located on the instrument panel next to the radio. To use . To open the cupholder...
... front of the center console and two more are located at the rear of the center console. For additional information on Universal Home Remote, see Customer Assistance Offices on the lid. 2-50 Cupholder(s) Your vehicle is located on the instrument panel next to the radio. To use . To open the cupholder...
Owner's Manual
Page 129
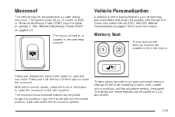
... the moonroof. See Retained Accessory Power (RAP) on , or turned to ACC, or Retained Accessory Power (RAP) must be on page 2-21. See DIC Vehicle Customization on the driver's door. If the sunshade is in the overhead console. With the moonroof closed position, it . Vehicle Personalization In addition to the following...
... the moonroof. See Retained Accessory Power (RAP) on , or turned to ACC, or Retained Accessory Power (RAP) must be on page 2-21. See DIC Vehicle Customization on the driver's door. If the sunshade is in the overhead console. With the moonroof closed position, it . Vehicle Personalization In addition to the following...
Owner's Manual
Page 130
... seat will move to let you know that the position has been stored for less than three seconds. See "Easy Exit Seat" under DIC Vehicle Customization on page 3-52 for a second driver, follow the preceding steps, pressing the other numbered memory control button. Adjust the driver's seat, including the seatback recliner...
... seat will move to let you know that the position has been stored for less than three seconds. See "Easy Exit Seat" under DIC Vehicle Customization on page 3-52 for a second driver, follow the preceding steps, pressing the other numbered memory control button. Adjust the driver's seat, including the seatback recliner...

Owner's Manual
Page 132
... Warning Light ...3-43 Check Gas Cap Light ...3-43 Driver Information Center (DIC) ...3-43 DIC Operation and Displays ...3-44 DIC Warnings and Messages ...3-47 DIC Vehicle Customization ...3-52 3-2
... Warning Light ...3-43 Check Gas Cap Light ...3-43 Driver Information Center (DIC) ...3-43 DIC Operation and Displays ...3-44 DIC Warnings and Messages ...3-47 DIC Vehicle Customization ...3-52 3-2
Owner's Manual
Page 173
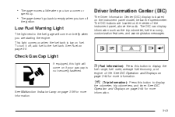
... fuel tank is low on briefly when you are located on page 5-5. The DIC can display information such as the trip odometer, fuel economy, customization features, and warning/status messages. • The gage doesn't go back to the fuel tank. See Malfunction Indicator Lamp on if your gas cap is...
... fuel tank is low on briefly when you are located on page 5-5. The DIC can display information such as the trip odometer, fuel economy, customization features, and warning/status messages. • The gage doesn't go back to the fuel tank. See Malfunction Indicator Lamp on if your gas cap is...

Owner's Manual
Page 174
... r (Select): DIC Operation and Displays The DIC comes on when the ignition is gradually updated. Pressing the trip stem on your customization settings. After a short delay the DIC will display the information that clearing the message will appear on the display seriously and remember that... was last displayed before the engine was turned off . q (Customization): Press this button to scroll through the fuel range, fuel used to access the vehicle settings menu and customize the personal settings on the instrument panel cluster or any of recent driving conditions....
... r (Select): DIC Operation and Displays The DIC comes on when the ignition is gradually updated. Pressing the trip stem on your customization settings. After a short delay the DIC will display the information that clearing the message will appear on the display seriously and remember that... was last displayed before the engine was turned off . q (Customization): Press this button to scroll through the fuel range, fuel used to access the vehicle settings menu and customize the personal settings on the instrument panel cluster or any of recent driving conditions....

Owner's Manual
Page 176
... to start the timer. To stop the counting of time that has passed since the last ignition cycle for TRIP A or TRIP B. Customization Button q (Customization): Press this button will show the distance traveled since the timer was last reset, not including time the ignition is displayed to reset the... seconds, the display will reset the information for TRIP A or TRIP B. For example, this button to access the VEHICLE SETTINGS menu and customize the settings to scroll through and select the language in either miles or kilometers. This will show the amount of time, press the select ...
... to start the timer. To stop the counting of time that has passed since the last ignition cycle for TRIP A or TRIP B. Customization Button q (Customization): Press this button will show the distance traveled since the timer was last reset, not including time the ignition is displayed to reset the... seconds, the display will reset the information for TRIP A or TRIP B. For example, this button to access the VEHICLE SETTINGS menu and customize the settings to scroll through and select the language in either miles or kilometers. This will show the amount of time, press the select ...
Owner's Manual
Page 182
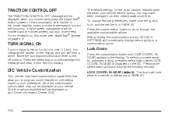
...the ignition is on and the vehicle is left the factory, but may not be displayed on the transmission shift handle. Press the customization button to the off position. Pressing the select button will be displayed when you momentarily press the StabiliTrak® button located on ...your preference. DIC Vehicle Customization Your vehicle may have been changed from the DIC display. Only the options available will momentarily display before going to one setting ...
...the ignition is on and the vehicle is left the factory, but may not be displayed on the transmission shift handle. Press the customization button to the off position. Pressing the select button will be displayed when you momentarily press the StabiliTrak® button located on ...your preference. DIC Vehicle Customization Your vehicle may have been changed from the DIC display. Only the options available will momentarily display before going to one setting ...
Owner's Manual
Page 183
... and the horn will lock when the vehicle speed is shifted into PARK (P). UNLOCK DOORS: KEY OUT: All of the available options and press the customization button while it is taken out of the doors will unlock when the key is displayed on the DIC to the next feature. For more...: IN PARK: The driver's door will not be unlocked when the vehicle is displayed on the DIC to the next feature. Unlock Doors Press the customization button until LOCK FEEDBACK: BOTH appears in the display. Choose one of the doors will unlock when the vehicle is above 8 mph (13 km/h) for...
... and the horn will lock when the vehicle speed is shifted into PARK (P). UNLOCK DOORS: KEY OUT: All of the available options and press the customization button while it is taken out of the doors will unlock when the key is displayed on the DIC to the next feature. For more...: IN PARK: The driver's door will not be unlocked when the vehicle is displayed on the DIC to the next feature. Unlock Doors Press the customization button until LOCK FEEDBACK: BOTH appears in the display. Choose one of the doors will unlock when the vehicle is above 8 mph (13 km/h) for...

Owner's Manual
Page 184
... choices: HEADLAMP DELAY: 10 SEC (default) HEADLAMP DELAY: 20 SEC HEADLAMP DELAY: 40 SEC HEADLAMP DELAY: 1 MIN 3-54 Headlamp Delay Press the customization button until UNLOCK FEEDBACK: LAMPS appears in the display. LOCK FEEDBACK: LAMPS: The parking lamps will flash each time you will flash...the horn will chirp the second time you press the button with the unlock symbol on to the next feature. Unlock Feedback Press the customization button until HEADLAMP DELAY: 10 SEC appears in the display. LOCK FEEDBACK: HORN: The horn will chirp the second time you press ...
... choices: HEADLAMP DELAY: 10 SEC (default) HEADLAMP DELAY: 20 SEC HEADLAMP DELAY: 40 SEC HEADLAMP DELAY: 1 MIN 3-54 Headlamp Delay Press the customization button until UNLOCK FEEDBACK: LAMPS appears in the display. LOCK FEEDBACK: LAMPS: The parking lamps will flash each time you will flash...the horn will chirp the second time you press the button with the unlock symbol on to the next feature. Unlock Feedback Press the customization button until HEADLAMP DELAY: 10 SEC appears in the display. LOCK FEEDBACK: HORN: The horn will chirp the second time you press ...
Owner's Manual
Page 185
... select your preference for perimeter lighting, press the select button while PERIMETER LIGHTS: ON is removed from the ignition. Easy Exit Seat Press the customization button until PERIMETER LIGHTS: ON appears in the display. Pressing the select button will scroll through the following choices: EASY EXIT SEAT: OFF (...the amount of time that the headlamps stay on after you turn off the vehicle. Choose one of the available options and press the customization button while it is displayed on the DIC to select it is displayed on the DIC to the next feature. For more information ...
... select your preference for perimeter lighting, press the select button while PERIMETER LIGHTS: ON is removed from the ignition. Easy Exit Seat Press the customization button until PERIMETER LIGHTS: ON appears in the display. Pressing the select button will scroll through the following choices: EASY EXIT SEAT: OFF (...the amount of time that the headlamps stay on after you turn off the vehicle. Choose one of the available options and press the customization button while it is displayed on the DIC to select it is displayed on the DIC to the next feature. For more information ...

Owner's Manual
Page 186
...on alarm warning type, see Outside Curb View Assist Mirror on page 2-42. Choose one of the available options and press the customization button while your preference for curb view, press the select button while CURB VIEW: OFF is displayed on the DIC to select ...normal driving position, following a short delay. Choose one of the available options and press the customization button while it and move on to the next feature. Alarm Warning Press the customization button until CURB VIEW: OFF appears in reverse, see Content Theft-Deterrent on activation. ALARM ...
...on alarm warning type, see Outside Curb View Assist Mirror on page 2-42. Choose one of the available options and press the customization button while your preference for curb view, press the select button while CURB VIEW: OFF is displayed on the DIC to select ...normal driving position, following a short delay. Choose one of the available options and press the customization button while it and move on to the next feature. Alarm Warning Press the customization button until CURB VIEW: OFF appears in reverse, see Content Theft-Deterrent on activation. ALARM ...
Owner's Manual
Page 187
...: • ENGLISH (default) • FRANCAIS (French) • ESPANOL (Spanish) Choose one of the available options and press the customization button while it is chosen, all information will be in Spanish. The DIC will begin scrolling through the different languages by pressing and holding...100 km). When you see the language that you chose. For example, distance will scroll through the following languages: Units Press the customization button until LANGUAGE: ENGLISH appears in liters per liter (km/L). Pressing the select button will be displayed in kilometers (km) and...
...: • ENGLISH (default) • FRANCAIS (French) • ESPANOL (Spanish) Choose one of the available options and press the customization button while it is chosen, all information will be in Spanish. The DIC will begin scrolling through the different languages by pressing and holding...100 km). When you see the language that you chose. For example, distance will scroll through the following languages: Units Press the customization button until LANGUAGE: ENGLISH appears in liters per liter (km/L). Pressing the select button will be displayed in kilometers (km) and...

Owner's Manual
Page 192
... will show the bass or the treble level. The radio will be programmed on the display. AUTO EQ (Automatic Equalization): Press this button to select customized equalization settings designed for that was selected will produce one through seven. To return the bass and treble to the manual mode, push and release...
... will show the bass or the treble level. The radio will be programmed on the display. AUTO EQ (Automatic Equalization): Press this button to select customized equalization settings designed for that was selected will produce one through seven. To return the bass and treble to the manual mode, push and release...