Owner's Manual
Page 1
2008 Saturn OUTLOOK Owner Manual Seats and Restraint Systems ...1-1 Front Seats ...1-2 Rear Seats ...1-12 Safety Belts ...1-18 Child Restraints ...1-39 Airbag System ...1-64 Restraint System Check ...1-80 Features and Controls ...2-1 Keys ...2-3 Doors and Locks ...2-10 Windows ...2-18 Theft-Deterrent Systems ...2-21 Starting and Operating Your Vehicle ...2-25 Mirrors ...2-39 Object Detection Systems ...2-44 OnStar® System ...2-47 Universal Home Remote System ...2-50 Storage Areas ...2-55 Sunroof ...2-60 Instrument Panel ...3-1 Instrument Panel Overview ...3-4 Climate Controls ...3-23 ...
2008 Saturn OUTLOOK Owner Manual Seats and Restraint Systems ...1-1 Front Seats ...1-2 Rear Seats ...1-12 Safety Belts ...1-18 Child Restraints ...1-39 Airbag System ...1-64 Restraint System Check ...1-80 Features and Controls ...2-1 Keys ...2-3 Doors and Locks ...2-10 Windows ...2-18 Theft-Deterrent Systems ...2-21 Starting and Operating Your Vehicle ...2-25 Mirrors ...2-39 Object Detection Systems ...2-44 OnStar® System ...2-47 Universal Home Remote System ...2-50 Storage Areas ...2-55 Sunroof ...2-60 Instrument Panel ...3-1 Instrument Panel Overview ...3-4 Climate Controls ...3-23 ...
Owner's Manual
Page 87
... the Engine ...2-27 Engine Coolant Heater ...2-29 Automatic Transmission Operation ...2-30 Tow/Haul Mode ...2-33 Parking Brake ...2-34 Shifting Into Park ...2-35 Shifting Out of Park ...2-36 Parking Over Things That Burn ...2-37 Engine Exhaust ...2-37 Running the Vehicle While Parked ...2-38 Mirrors ...2-39 Manual Rearview Mirror with OnStar® ...2-39 Automatic Dimming Rearview Mirror with OnStar® and Compass ...2-39 Outside Power Mirrors ...2-41 Outside Power Foldaway Mirrors ...2-42 Outside Convex Mirror ...2-43 Outside Heated Mirrors ...2-43 Keys ...2-3 Remote Keyless Entry (RKE...
... the Engine ...2-27 Engine Coolant Heater ...2-29 Automatic Transmission Operation ...2-30 Tow/Haul Mode ...2-33 Parking Brake ...2-34 Shifting Into Park ...2-35 Shifting Out of Park ...2-36 Parking Over Things That Burn ...2-37 Engine Exhaust ...2-37 Running the Vehicle While Parked ...2-38 Mirrors ...2-39 Manual Rearview Mirror with OnStar® ...2-39 Automatic Dimming Rearview Mirror with OnStar® and Compass ...2-39 Outside Power Mirrors ...2-41 Outside Power Foldaway Mirrors ...2-42 Outside Convex Mirror ...2-43 Outside Heated Mirrors ...2-43 Keys ...2-3 Remote Keyless Entry (RKE...
Owner's Manual
Page 94
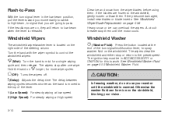
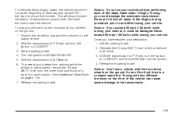
... the vehicle's lights, press and hold the transmitter's remote start . However, the range may be on page 2-4 for 10 minutes after each remote start button until the parking lamps turn the key to the ON/RUN position to run time by 10 minutes for at the vehicle. 2. The engine will lock. To manually shut off after the vehicle has started using the remote start feature two separate times between driving sequences. Press and release...
... the vehicle's lights, press and hold the transmitter's remote start . However, the range may be on page 2-4 for 10 minutes after each remote start button until the parking lamps turn the key to the ON/RUN position to run time by 10 minutes for at the vehicle. 2. The engine will lock. To manually shut off after the vehicle has started using the remote start feature two separate times between driving sequences. Press and release...
Owner's Manual
Page 114
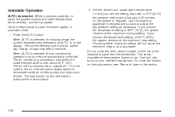
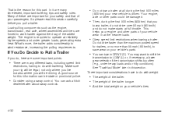
... ACC/ACCESSORY or LOCK/OFF position. If the engine does not start after 15 seconds to START. Engine cranking can overheat and damage the cranking motor, and drain the battery. Try pushing the accelerator pedal all moving parts. If you could be covered by turning the ignition switch to work with your dealer/retailer. The idle speed will be stopped by the vehicle warranty. This feature assists in START...
... ACC/ACCESSORY or LOCK/OFF position. If the engine does not start after 15 seconds to START. Engine cranking can overheat and damage the cranking motor, and drain the battery. Try pushing the accelerator pedal all moving parts. If you could be covered by turning the ignition switch to work with your dealer/retailer. The idle speed will be stopped by the vehicle warranty. This feature assists in START...
Owner's Manual
Page 118
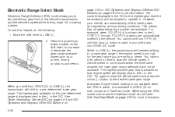
... timeframe allowed, the lower gear range attempted will shift to lower gears as required by the vehicle. If vehicle speed is too high for that number are available. While using the ERS, cruise control and the tow/haul mode can automatically shift to a pre-determined lower gear range. You have a brief period of the vehicle's transmission and the vehicle's speed while driving down hill or towing a trailer. Automatic Engine Grade braking is not available...
... timeframe allowed, the lower gear range attempted will shift to lower gears as required by the vehicle. If vehicle speed is too high for that number are available. While using the ERS, cruise control and the tow/haul mode can automatically shift to a pre-determined lower gear range. You have a brief period of the vehicle's transmission and the vehicle's speed while driving down hill or towing a trailer. Automatic Engine Grade braking is not available...
Owner's Manual
Page 147
...20 Battery Run-Down Protection ...3-21 Accessory Power Outlet(s) ...3-21 Power Outlet 115 Volt Alternating Current ...3-22 Climate Controls ...3-23 Climate Control System ...3-23 Dual Automatic Climate Control System ...3-26 Outlet Adjustment ...3-34 Rear Air Conditioning and Heating System ...3-34 Rear Air Conditioning and Heating System and Electronic Climate Controls ...3-36 Warning Lights, Gages, and Indicators ...3-37 Instrument Panel Cluster ...3-38 Speedometer and Odometer ...3-39 Tachometer ...3-39 Safety Belt Reminders ...3-39 Airbag Readiness Light ...3-40 Passenger Airbag Status...
...20 Battery Run-Down Protection ...3-21 Accessory Power Outlet(s) ...3-21 Power Outlet 115 Volt Alternating Current ...3-22 Climate Controls ...3-23 Climate Control System ...3-23 Dual Automatic Climate Control System ...3-26 Outlet Adjustment ...3-34 Rear Air Conditioning and Heating System ...3-34 Rear Air Conditioning and Heating System and Electronic Climate Controls ...3-36 Warning Lights, Gages, and Indicators ...3-37 Instrument Panel Cluster ...3-38 Speedometer and Odometer ...3-39 Tachometer ...3-39 Safety Belt Reminders ...3-39 Airbag Readiness Light ...3-40 Passenger Airbag Status...
Owner's Manual
Page 151
Windshield Wipers. See Instrument Panel Cluster on page 3-15. See Exterior Lamps on page 3-38. See Hood Release on page 3-34. J. Power Tilt Wheel and Telescopic Steering (If Equipped). L. Horn. Center Console Shift Lever. E. See Outlet Adjustment on page 5-11. Multifunction Lever. See Turn Signal/Multifunction Lever on page 3-54. See Driver Information Center (DIC) on page 3-8. Audio System. Hood Release. Tilt and Telescopic Steering Wheel. See Tilt and Telescopic Steering Wheel on page 3-18. M. O. F. G. See Dome...
Windshield Wipers. See Instrument Panel Cluster on page 3-15. See Exterior Lamps on page 3-38. See Hood Release on page 3-34. J. Power Tilt Wheel and Telescopic Steering (If Equipped). L. Horn. Center Console Shift Lever. E. See Outlet Adjustment on page 5-11. Multifunction Lever. See Turn Signal/Multifunction Lever on page 3-54. See Driver Information Center (DIC) on page 3-8. Audio System. Hood Release. Tilt and Telescopic Steering Wheel. See Tilt and Telescopic Steering Wheel on page 3-18. M. O. F. G. See Dome...
Owner's Manual
Page 156
.... If they will return to work. If the headlamps are on the windshield, blocking your washer until the motor cools. See Windshield Wiper Blade Replacement on the right side of the turn signal lever in ACC/ACCESSORY or ON/RUN for this to low-beam when the lever is located on page 5-48. Windshield Wipers The windshield wiper/washer lever is released. Otherwise the washer fl...
.... If they will return to work. If the headlamps are on the windshield, blocking your washer until the motor cools. See Windshield Wiper Blade Replacement on the right side of the turn signal lever in ACC/ACCESSORY or ON/RUN for this to low-beam when the lever is located on page 5-48. Windshield Wipers The windshield wiper/washer lever is released. Otherwise the washer fl...
Owner's Manual
Page 174
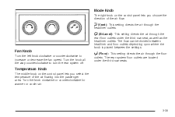
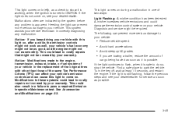
.... If it is hot outside, the air inlet can automatically switch to recirculate inside temperature, the air delivery, and the fan speed. Do not cover the solar sensor located on your vehicle's headlamps. The air conditioning compressor runs when the outside air. This sensor regulates air temperature based on sun load and also turns on the top of the instrument panel near the windshield. Choosing either maximum setting will not cause...
.... If it is hot outside, the air inlet can automatically switch to recirculate inside temperature, the air delivery, and the fan speed. Do not cover the solar sensor located on your vehicle's headlamps. The air conditioning compressor runs when the outside air. This sensor regulates air temperature based on sun load and also turns on the top of the instrument panel near the windshield. Choosing either maximum setting will not cause...
Owner's Manual
Page 181
... or decrease the fan speed. Fan Knob Turn the left knob clockwise or counterclockwise to turn the rear system off. 6 (Floor): This setting directs the air through the rear floor outlets under the third row seats. Mode Knob The right knob on the control panel lets you choose the direction of the air flowing into the passenger area. The rear system floor...
... or decrease the fan speed. Fan Knob Turn the left knob clockwise or counterclockwise to turn the rear system off. 6 (Floor): This setting directs the air through the rear floor outlets under the third row seats. Mode Knob The right knob on the control panel lets you choose the direction of the air flowing into the passenger area. The rear system floor...

Owner's Manual
Page 182
.... To turn the system on or off , press and hold the C button. Press D to increase airflow and C to independently control the air flow for the rear of the vehicle separately from that of the front of the vehicle will be controlled through the AUX button on the rear seat audio control panel let you manually adjust the fan speed. An indicator light in the center console.
.... To turn the system on or off , press and hold the C button. Press D to increase airflow and C to independently control the air flow for the rear of the vehicle separately from that of the front of the vehicle will be controlled through the AUX button on the rear seat audio control panel let you manually adjust the fan speed. An indicator light in the center console.
Owner's Manual
Page 195
...fications made to the engine, transmission, exhaust, intake, or fuel system of your vehicle or the replacement of the same Tire Performance Criteria (TPC) can affect your vehicle's emission controls and can prevent more serious damage to your dealer/retailer. The following can cause this light on, after a while, the emission controls might not work as well, your warranty. Turn the key off, wait at least...
...fications made to the engine, transmission, exhaust, intake, or fuel system of your vehicle or the replacement of the same Tire Performance Criteria (TPC) can affect your vehicle's emission controls and can prevent more serious damage to your dealer/retailer. The following can cause this light on, after a while, the emission controls might not work as well, your warranty. Turn the key off, wait at least...
Owner's Manual
Page 242
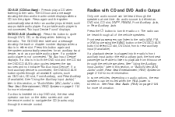
... in this source through the remote control. 3-96 Radios with CD and DVD Audio Output Only one audio source can be muted when the RSA power is inserted into the radio's front auxiliary input jack or the rear auxiliary jack, the front seat passengers are able to listen to cycle through all of the vehicle speakers. If a disc is turned on page 3-124 for more information...
... in this source through the remote control. 3-96 Radios with CD and DVD Audio Output Only one audio source can be muted when the RSA power is inserted into the radio's front auxiliary input jack or the rear auxiliary jack, the front seat passengers are able to listen to cycle through all of the vehicle speakers. If a disc is turned on page 3-124 for more information...
Owner's Manual
Page 303
... towing vehicle. 2. Never exceed 65 mph (105 km/h) while towing your vehicle without performing each RV fuel stop for about five minutes. Shift the transmission to P (Park), turn the ignition to ACC/ACCESSORY. 5. Release the parking brake. For vehicles being towed, remove the 50 amp BATT1 fuse from the ignition. 4. To tow your destination: 1. Turn the ignition to LOCK/OFF. 3. Shift the transmission to start the vehicle. Set the parking brake. 4. Re-install the fuse to N (Neutral). 6. Towing with two different tire sizes...
... towing vehicle. 2. Never exceed 65 mph (105 km/h) while towing your vehicle without performing each RV fuel stop for about five minutes. Shift the transmission to P (Park), turn the ignition to ACC/ACCESSORY. 5. Release the parking brake. For vehicles being towed, remove the 50 amp BATT1 fuse from the ignition. 4. To tow your destination: 1. Turn the ignition to LOCK/OFF. 3. Shift the transmission to start the vehicle. Set the parking brake. 4. Re-install the fuse to N (Neutral). 6. Towing with two different tire sizes...
Owner's Manual
Page 306
... speed limit restrictions when towing a trailer. Your engine, axle or other parts of your vehicle wear in DRIVE (D). You may want to shift the transmission to Pull a Trailer If you will be state or provincial police. • Consider using a sway control. Three important considerations have to do with trailering. Load-pulling components such as the engine, transmission, rear axle, wheel assemblies and tires are many time-tested, important trailering tips and safety...
... speed limit restrictions when towing a trailer. Your engine, axle or other parts of your vehicle wear in DRIVE (D). You may want to shift the transmission to Pull a Trailer If you will be state or provincial police. • Consider using a sway control. Three important considerations have to do with trailering. Load-pulling components such as the engine, transmission, rear axle, wheel assemblies and tires are many time-tested, important trailering tips and safety...
Owner's Manual
Page 318
... and Wiring ...5-110 Add-On Electrical Equipment ...5-110 Windshield Wiper Fuses ...5-110 Power Windows and Other Power Options ...5-111 Fuses and Circuit Breakers ...5-111 Instrument Panel Fuse Block ...5-111 Underhood Fuse Block ...5-115 Capacities and Specifications ...5-120 Tire Inspection and Rotation ...5-63 When It Is Time for New Tires ...5-64 Buying New Tires ...5-65 Different Size Tires and Wheels ...5-67 Uniform Tire Quality Grading ...5-68 Wheel Alignment and Tire Balance ...5-70 Wheel Replacement ...5-70 Tire Chains...
... and Wiring ...5-110 Add-On Electrical Equipment ...5-110 Windshield Wiper Fuses ...5-110 Power Windows and Other Power Options ...5-111 Fuses and Circuit Breakers ...5-111 Instrument Panel Fuse Block ...5-111 Underhood Fuse Block ...5-115 Capacities and Specifications ...5-120 Tire Inspection and Rotation ...5-63 When It Is Time for New Tires ...5-64 Buying New Tires ...5-65 Different Size Tires and Wheels ...5-67 Uniform Tire Quality Grading ...5-68 Wheel Alignment and Tire Balance ...5-70 Wheel Replacement ...5-70 Tire Chains...
Owner's Manual
Page 378
...: 1. Turn the ignition switch to the passenger side front tire, and repeat the procedure in the following order: driver side front tire, passenger side front tire, passenger side rear tire, and driver side rear tire using a TPMS diagnostic tool. Press the Remote Keyless Entry (RKE) transmitter's LOCK and UNLOCK buttons at the same time for service. TPMS Sensor Matching Process Each TPMS sensor has a unique identification code. Set the parking brake. 2. Start with the engine off...
...: 1. Turn the ignition switch to the passenger side front tire, and repeat the procedure in the following order: driver side front tire, passenger side front tire, passenger side rear tire, and driver side rear tire using a TPMS diagnostic tool. Press the Remote Keyless Entry (RKE) transmitter's LOCK and UNLOCK buttons at the same time for service. TPMS Sensor Matching Process Each TPMS sensor has a unique identification code. Set the parking brake. 2. Start with the engine off...
Owner's Manual
Page 402
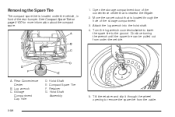
... compartment. 3. Open the storage compartment door of the rear bumper. Rear Convenience Center B. Continue turning the wrench until the spare tire can be pulled out from the cable. 5-86 Removing the Spare Tire The compact spare tire is located under the vehicle. A. Turn the lug wrench counterclockwise to lower the spare tire to remove the spare tire from under the vehicle, in front of the convenience...
... compartment. 3. Open the storage compartment door of the rear bumper. Rear Convenience Center B. Continue turning the wrench until the spare tire can be pulled out from the cable. 5-86 Removing the Spare Tire The compact spare tire is located under the vehicle. A. Turn the lug wrench counterclockwise to lower the spare tire to remove the spare tire from under the vehicle, in front of the convenience...
Owner's Manual
Page 475
... Exterior Lamps/Lenses ...5-104 Fabric/Carpet ...5-102 Finish Care ...5-104 Finish Damage ...5-107 Instrument Panel, Vinyl, and Other Plastic Surfaces ...5-103 Interior Cleaning ...5-100 Leather ...5-102 Sheet Metal Damage ...5-107 Tires ...5-106 Underbody Maintenance ...5-107 Vehicle Care/Appearance Materials ...5-108 Washing Your Vehicle ...5-104 Weatherstrips ...5-103 Windshield, Backglass, and Wiper Blades ...5-105 Appointments, Scheduling Service ...7-10 Assist Handles ...2-57 Audio System ...3-82 Audio Steering Wheel Controls ...3-126 Navigation/Radio System, see Navigation Manual...
... Exterior Lamps/Lenses ...5-104 Fabric/Carpet ...5-102 Finish Care ...5-104 Finish Damage ...5-107 Instrument Panel, Vinyl, and Other Plastic Surfaces ...5-103 Interior Cleaning ...5-100 Leather ...5-102 Sheet Metal Damage ...5-107 Tires ...5-106 Underbody Maintenance ...5-107 Vehicle Care/Appearance Materials ...5-108 Washing Your Vehicle ...5-104 Weatherstrips ...5-103 Windshield, Backglass, and Wiper Blades ...5-105 Appointments, Scheduling Service ...7-10 Assist Handles ...2-57 Audio System ...3-82 Audio Steering Wheel Controls ...3-126 Navigation/Radio System, see Navigation Manual...
Owner's Manual
Page 486
... Shifting Into Park ...2-35 Shifting Out of Park ...2-36 Signals, Turn and Lane-Change ...3-9 Spare Tire Compact ...5-100 Installing ...5-88 Removing ...5-85 Storing ...5-96 Specifications, Capacities ...5-120 Speedometer ...3-39 StabiliTrak® Indicator Light ...3-46 Stabilitrak® System ...4-6 Start Vehicle, Remote ...2-7 Starting the Engine ...2-27 Steering ...4-9 Steering Wheel Controls, Audio ...3-126 Steering Wheel, Power Tilt Wheel and Telescopic Steering Column ...3-8 Steering Wheel, Tilt and Telescopic ...3-7 Storage Areas Cargo Management System ...2-59 Center Console...
... Shifting Into Park ...2-35 Shifting Out of Park ...2-36 Signals, Turn and Lane-Change ...3-9 Spare Tire Compact ...5-100 Installing ...5-88 Removing ...5-85 Storing ...5-96 Specifications, Capacities ...5-120 Speedometer ...3-39 StabiliTrak® Indicator Light ...3-46 Stabilitrak® System ...4-6 Start Vehicle, Remote ...2-7 Starting the Engine ...2-27 Steering ...4-9 Steering Wheel Controls, Audio ...3-126 Steering Wheel, Power Tilt Wheel and Telescopic Steering Column ...3-8 Steering Wheel, Tilt and Telescopic ...3-7 Storage Areas Cargo Management System ...2-59 Center Console...


