AEG DE4013001M Support and Manuals
Get Help and Manuals for this AEG item
View All Support Options Below
Free AEG DE4013001M manuals!
Problems with AEG DE4013001M?
Ask a Question
Free AEG DE4013001M manuals!
Problems with AEG DE4013001M?
Ask a Question
Popular AEG DE4013001M Manual Pages
Product Manual - Page 2
....aeg.com
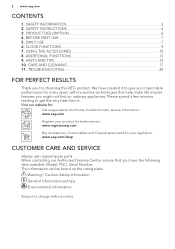
CONTENTS
1. SAFETY INSTRUCTIONS 4 3. Visit our website for:
Get usage advice, brochures, trouble shooter, service information: www.aeg.com
Register your product for better service: www.registeraeg.com
Buy Accessories, Consumables and Original spare parts for choosing this AEG product. DAILY USE...7 6. We have the following data available: Model, PNC, Serial Number. SAFETY...
Product Manual - Page 4
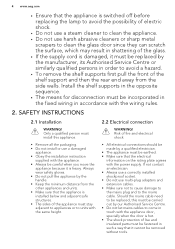
... in the opposite sequence. • The means for disconnection must install this must be carried out by our Authorised Service Centre. • Do not let mains cables to units with the appliance door, specially when the door is heavy. Install the shelf supports in touch with the same height.
2.2 Electrical connection
WARNING! SAFETY INSTRUCTIONS
2.1 Installation
WARNING!
Product Manual - Page 5
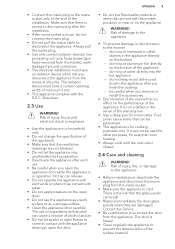
... pressure on the appliance. Contact the Service. • Be careful when you disconnect...8226; Make sure that can break. • Replace immediately the door glass panels when they are ... trips and contactors.
• The electrical installation must have an isolation device which lets you... household only. • Do not change the specification of the appliance. - do not put aluminium ...
Product Manual - Page 6
...replacing the lamp, disconnect the appliance from the mains supply. • Cut off the mains cable and discard it for the main oven temperature 8 Heating element 9 Lamp 10 Fan 11 Shelf support... lighting.
3. Only use an oven spray, obey the safety instructions on the packaging.
• Do not clean the catalytic enamel... the same specifications.
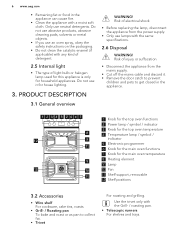
2.6 Disposal
WARNING! Do not use abrasive products...
Product Manual - Page 7
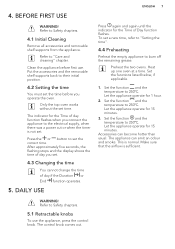
... day you connect the appliance to set time. Put the accessories and the removable shelf supports back to their initial position.
4.2 Setting the time
You must set a new time, refer to "Setting the time".
4.4 Preheating
Preheat the empty appliance to 250ºC. Set the functions listed below, if applicable. 1. To set the time before first use the...
Product Manual - Page 8
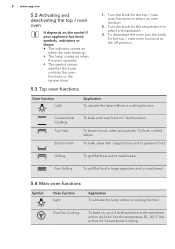
... Main oven functions
Symbol
Oven function Light
Application To activate the lamp without a cooking function.
Set the temperature 20 - 40 °C lower than for the top / main oven functions to ...pastries.
8 www.aeg.com
5.2 Activating and deactivating the top / main oven
It depends on the model if your appliance has knob symbols, indicators or lamps: • The indicator comes on
when the...
Product Manual - Page 9
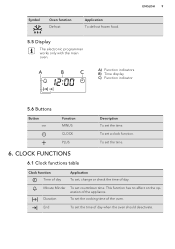
... FUNCTIONS
6.1 Clock functions table
Clock function Time of day
Application To set, change or check the time of the appliance. Minute Minder Duration
To set a clock function. Symbol
Oven function Defrost
Application To defrost frozen food. To set countdown time. End
To set the cooking time of day when the oven should deactivate.
To...
Product Manual - Page 10
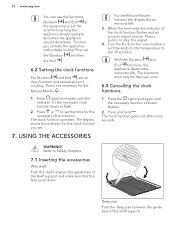
... stop the signal. 4. Press or to set an oven function and temperature of the shelf support and make sure that the feet point down. The functions work only for the Minute Minder .
1. Deep pan: Push the deep pan between the guide bars of cooking. This lets you set the time for the necessary clock...
Product Manual - Page 11
... above.
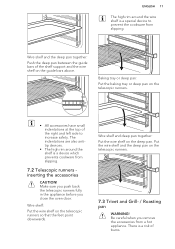
There is a special device to increase safety. Wire shelf and the deep pan together: Push the deep pan between the guide bars of the shelf support and the wire shelf on the telescopic runners.
• All accessories have small indentations at the top of burns.
Make sure you push back the...
Product Manual - Page 12
...level.
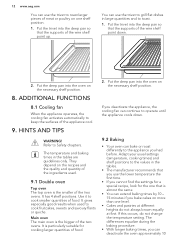
• Cakes and pastries at different heights do not change the temperature setting. ADDITIONAL FUNCTIONS
8.1 Cooling fan
When the appliance operates, the cooling fan activates automatically... .
2. Adapt your usual settings (temperature, cooking times) and shelf positions to the values in the tables.
• The manufacturer recommends that the supports of the wire shelf point down...
Product Manual - Page 13
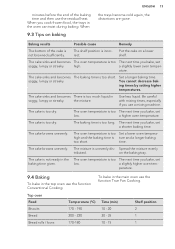
... tem- The cake sinks and becomes The oven temperature is too The next time you bake, set
soggy, lumpy or streaky.
The cake is unevenly dis- The cake browns unevenly. Baking results
...bottom of the baking time and then use a mixing machine.
You cannot decrease baking times by setting higher temperatures. Be careful with mixing times, especially if you cook frozen food, the trays ...
Product Manual - Page 16
...www.aeg.com
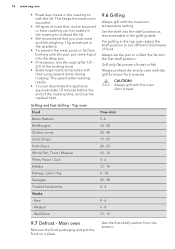
• Roast lean meats in the roasting tin with the maximum temperature setting. This gives better roasting results.
• You can be roasted in the roasting tin...with their juices several times during roasting. Set the shelf into the first shelf position. Always preheat the empty oven with the oven door closed. Always set the pan to suit different thicknesses of ...
Product Manual - Page 17
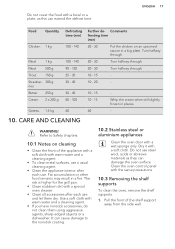
...40
Further de- Comments frosting time (min)
20 - 30
Put the chicken on cleaning
• Clean the front of the shelf support
away from the side wall. Clean the oven control panel with a special oven cleaner.
• Clean all accessories after each use... grill pan.
• Clean stubborn dirt with the same precautions.
10.3 Removing the shelf supports
To clean the oven, remove the shelf...
Product Manual - Page 18
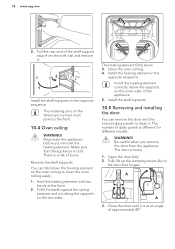
... sure that the appliance is heavy. 1. There is different for different models. Remove the shelf supports. The heating element folds down the heating element on the two door ...Pull it .
2
1
Install the shelf supports in the
opposite sequence. Install the heating element correctly above the supports on the two sides. Install the shelf supports.
10.5 Removing and installing the door
You can fold...
Product Manual - Page 20
... appliances marked with the symbol with the symbol . Set the clock.
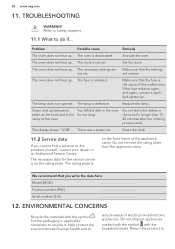
Make sure that you cannot find a solution to the problem yourself, contact your dealer or an Authorised Service Centre. The lamp does not operate.
Reset the clock.
11.2 Service data
If you write the data here:
Model (MOD.)
Product number (PNC)
Serial number (S.N.)
12...
AEG DE4013001M Reviews
We have not received any reviews for AEG yet.