Specification Sheet
Page 1
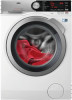
... be carefully washed, dried and protected in one go . Both washing and drying cycles are cleaned in one go . Meaning ready-to the size of the load. Ensuring they stand the test of the drum to temperature and motion. The option to quickly refresh clothes without compromise. saving on -demand. Product Benefits & Features Dual technology for longer. 7000 Series Freestanding Washer Dryer 10 kg 1600 rpm L7WEC166R Meet...
... be carefully washed, dried and protected in one go . Both washing and drying cycles are cleaned in one go . Meaning ready-to the size of the load. Ensuring they stand the test of the drum to temperature and motion. The option to quickly refresh clothes without compromise. saving on -demand. Product Benefits & Features Dual technology for longer. 7000 Series Freestanding Washer Dryer 10 kg 1600 rpm L7WEC166R Meet...
Specification Sheet
Page 2
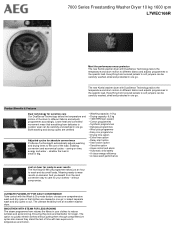
... 49 75 58 Freestanding 847x597x631 660 4 adj feet 1.8 150 140 Connected Load Voltage Required Fuse Frequency Porthole Type Woolmark Program list ProdPartCode 2200 230-240 13 50 P1S + Turbine WOOLMARK BLUE WASH&DRY Eco 40-60, Cottons, Synthetics, Delicates, Wool\Handwash, OutDoor, NonStop 60min, Steam, Rinse, Spin/Drain All Partn 7000 Series Freestanding Washer Dryer 10 kg 1600 rpm L7WEC166R Product Specification Series Energy class Wash Energy Rating Energy consumption Annual (kWh...
... 49 75 58 Freestanding 847x597x631 660 4 adj feet 1.8 150 140 Connected Load Voltage Required Fuse Frequency Porthole Type Woolmark Program list ProdPartCode 2200 230-240 13 50 P1S + Turbine WOOLMARK BLUE WASH&DRY Eco 40-60, Cottons, Synthetics, Delicates, Wool\Handwash, OutDoor, NonStop 60min, Steam, Rinse, Spin/Drain All Partn 7000 Series Freestanding Washer Dryer 10 kg 1600 rpm L7WEC166R Product Specification Series Energy class Wash Energy Rating Energy consumption Annual (kWh...
User Manual
Page 5
... not be dried in the washer dryer. • Fabric softeners, or similar products, should only be used as specified by the product manufacturer's instructions. • Remove all objects from items that could be a source of fire ignition such as lighters or matches. • Never stop the washer dryer before the end of the drying cycle unless all items are quickly removed and separated so that...
... not be dried in the washer dryer. • Fabric softeners, or similar products, should only be used as specified by the product manufacturer's instructions. • Remove all objects from items that could be a source of fire ignition such as lighters or matches. • Never stop the washer dryer before the end of the drying cycle unless all items are quickly removed and separated so that...
User Manual
Page 6
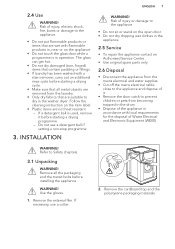
..., check if it is not, adjust the feet accordingly. 2.2 Electrical Connection WARNING! Directives. 2.3 Water Connection • Do not cause damage to the water hoses. • Before connection to new pipes, pipes not used for a long time, where repair work has been carried out or new devices fitted (water meters, etc.), let the water flow until it is fitted with the appliance. • Do not install...
..., check if it is not, adjust the feet accordingly. 2.2 Electrical Connection WARNING! Directives. 2.3 Water Connection • Do not cause damage to the water hoses. • Before connection to new pipes, pipes not used for a long time, where repair work has been carried out or new devices fitted (water meters, etc.), let the water flow until it is fitted with the appliance. • Do not install...
User Manual
Page 7
... not touch the glass door while a programme is used, remove it . • Remove the door catch to dry in accordance with a stain remover, carry out an additional rinse cycle before installing the appliance. WARNING! If necessary, use a detergent ball if setting a non-stop programme. 3. 2.4 Use WARNING! Remove all metal objects are suitable to prevent children or pets from the mains electrical and water supplies. • Cut off...
... not touch the glass door while a programme is used, remove it . • Remove the door catch to dry in accordance with a stain remover, carry out an additional rinse cycle before installing the appliance. WARNING! If necessary, use a detergent ball if setting a non-stop programme. 3. 2.4 Use WARNING! Remove all metal objects are suitable to prevent children or pets from the mains electrical and water supplies. • Cut off...
User Manual
Page 9
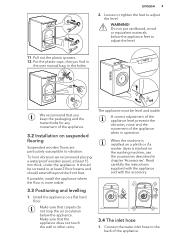
... the machine is installed on the washing machine, use the accessories described in chapter 'Accessories'. Connect the water inlet hose to adjust the level. Do not put cardboard, wood or equivalent materials below the appliance. Put the plastic caps, that you find in the user manual bag, in operation. If possible, install the appliance where the floor is stacked on a plinth or if a washer dryer is...
... the machine is installed on the washing machine, use the accessories described in chapter 'Accessories'. Connect the water inlet hose to adjust the level. Do not put cardboard, wood or equivalent materials below the appliance. Put the plastic caps, that you find in the user manual bag, in operation. If possible, install the appliance where the floor is stacked on a plinth or if a washer dryer is...
User Manual
Page 15
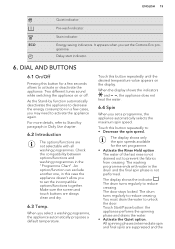
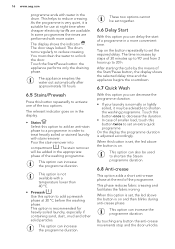
... door stays locked. The washing programme ends with all washing programmes. You must drain the water to reduce creasing. Energy saving indicators. Delay start indicator. 6. Make sure the screen and touch buttons are suppressed and the The display shows only the spin speeds available for a few cases, you may need to activate or deactivate the appliance. The display shows the indicator . The drum turns regularly...
... door stays locked. The washing programme ends with all washing programmes. You must drain the water to reduce creasing. Energy saving indicators. Delay start indicator. 6. Make sure the screen and touch buttons are suppressed and the The display shows only the spin speeds available for a few cases, you may need to activate or deactivate the appliance. The display shows the indicator . The drum turns regularly...
User Manual
Page 16
... set an extra quick programme. You must drain the water to reduce creasing. This option is suitable for heavily soiled laundry, especially if containing sand, dust , mud and other solid particles. The time increases by the means of the programme. This helps to unlock the door. The door stays locked. The drum turns regularly to shorten the washing programme. The stain remover will be used to add...
... set an extra quick programme. You must drain the water to reduce creasing. This option is suitable for heavily soiled laundry, especially if containing sand, dust , mud and other solid particles. The time increases by the means of the programme. This helps to unlock the door. The door stays locked. The drum turns regularly to shorten the washing programme. The stain remover will be used to add...
User Manual
Page 21
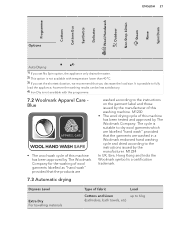
... load size. ENGLISH 21 Programme Cottons Cottons Eco Synthetics Delicates Wool/Handwash Outdoor Non Stop 60min Steam Rinse Spin/Drain Options Auto Drying ■ ■4) 1) If you set No Spin option, the appliance only drains the water. 2) This option is not available with temperature lower than 40 °C. 3) If you set the shortest duration, we recommend that the products are washed in a Woolmark endorsed hand washing cycle...
... load size. ENGLISH 21 Programme Cottons Cottons Eco Synthetics Delicates Wool/Handwash Outdoor Non Stop 60min Steam Rinse Spin/Drain Options Auto Drying ■ ■4) 1) If you set No Spin option, the appliance only drains the water. 2) This option is not available with temperature lower than 40 °C. 3) If you set the shortest duration, we recommend that the products are washed in a Woolmark endorsed hand washing cycle...
User Manual
Page 25
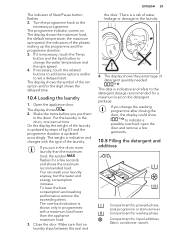
... or stain remover. Shake the items before you put them in programmes with the type of Start/Pause button flashes. 2. On the display the weight of the laundry is necessary, touch the Temp. Make sure that no laundry stays between the seal and ENGLISH 25 the door. Compartment for liquid additives (fabric conditioner, starch). Open the appliance door. Put the laundry in the drum more laundry than...
... or stain remover. Shake the items before you put them in programmes with the type of Start/Pause button flashes. 2. On the display the weight of the laundry is necessary, touch the Temp. Make sure that no laundry stays between the seal and ENGLISH 25 the door. Compartment for liquid additives (fabric conditioner, starch). Open the appliance door. Put the laundry in the drum more laundry than...
User Manual
Page 30
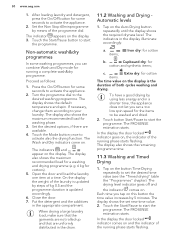
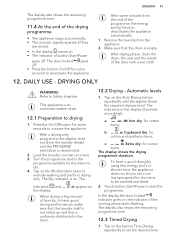
... function. Touch the Mode button once to your laundry. items; Extra dry: for cotton items. The time value on the button Time Drying repeatedly to start the programme. Tap on the display is updated accordingly. 6. In the display the door locked indicator comes on this button the time value increases by using less energy and in the drum. 11.2 Washing and Drying Automatic levels 1. 30 www.aeg.com 1. Set the desired options...
... function. Touch the Mode button once to your laundry. items; Extra dry: for cotton items. The time value on the button Time Drying repeatedly to start the programme. Tap on the display is updated accordingly. 6. In the display the door locked indicator comes on this button the time value increases by using less energy and in the drum. 11.2 Washing and Drying Automatic levels 1. 30 www.aeg.com 1. Set the desired options...
User Manual
Page 31
..., clean the drum, the seal and the inside of the door with a wet cloth. 12. Refer to start the programme. Load the laundry one item at a time. 3. Tap on the Auto Drying button repeatedly until the display shows the required dryness level. Tap on the Mode button twice to exclude washing and perform drying only. The indicators in a shorter time, the appliance does not let you set...
..., clean the drum, the seal and the inside of the door with a wet cloth. 12. Refer to start the programme. Load the laundry one item at a time. 3. Tap on the Auto Drying button repeatedly until the display shows the required dryness level. Tap on the Mode button twice to exclude washing and perform drying only. The indicators in a shorter time, the appliance does not let you set...
User Manual
Page 32
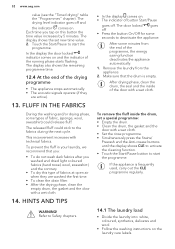
... recommend that the drum is frequently used, carry out the CLE programme regularly. 14.1 The laundry load • Divide the laundry into: white, coloured, synthetics, delicates and wool. • Follow the washing instructions on this type of fabrics at open air when they are washed the first time. • To clean the drain filter. • After the drying phase, clean the empty drum, the gasket and the door with technical fabrics.
... recommend that the drum is frequently used, carry out the CLE programme regularly. 14.1 The laundry load • Divide the laundry into: white, coloured, synthetics, delicates and wool. • Follow the washing instructions on this type of fabrics at open air when they are washed the first time. • To clean the drain filter. • After the drying phase, clean the empty drum, the gasket and the door with technical fabrics.
User Manual
Page 33
... the type and colour of the fabric, the programme temperature and the level of times. • Button up belts. • Empty pockets and unfold. • Turn multilayered fabrics, wool and items with printed illustrations inside out. • Pre-treat tough stains. • Wash heavy soil stains with a special detergent. • Be careful with cuts. • Use a washing bag to use a water softener for washing machines: - Use the special stain remover...
... the type and colour of the fabric, the programme temperature and the level of times. • Button up belts. • Empty pockets and unfold. • Turn multilayered fabrics, wool and items with printed illustrations inside out. • Pre-treat tough stains. • Wash heavy soil stains with a special detergent. • Be careful with cuts. • Use a washing bag to use a water softener for washing machines: - Use the special stain remover...
User Manual
Page 34
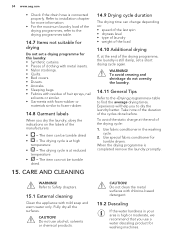
....1 External cleaning Clean the appliance with foam-rubber or materials similar to the drying programmes table. 14.7 Items not suitable for drying Do not set a short drying cycle again. 34 www.aeg.com • Check if the drain hose is completed remove the laundry promptly. CARE AND CLEANING 14.9 Drying cycle duration The drying time can not be tumble dried • = The drying cycle is at high temperature...
....1 External cleaning Clean the appliance with foam-rubber or materials similar to the drying programmes table. 14.7 Items not suitable for drying Do not set a short drying cycle again. 34 www.aeg.com • Check if the drain hose is completed remove the laundry promptly. CARE AND CLEANING 14.9 Drying cycle duration The drying time can not be tumble dried • = The drying cycle is at high temperature...
User Manual
Page 38
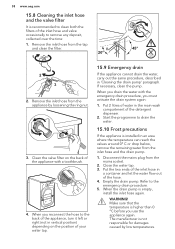
... plug from the inlet hose and the drain pump. 1. Put the two ends of the inlet hose in the main wash compartment of the detergent dispenser. 2. Put 2 litres of water in a container and let the water flow out of the hose. 4. WARNING! 38 www.aeg.com 15.8 Cleaning the inlet hose and the valve filter It is recommended to clean both the filters of the inlet hose and valve occasionally to the emergency drain procedure. 5. Remove...
... plug from the inlet hose and the drain pump. 1. Put the two ends of the inlet hose in the main wash compartment of the detergent dispenser. 2. Put 2 litres of water in a container and let the water flow out of the hose. 4. WARNING! 38 www.aeg.com 15.8 Cleaning the inlet hose and the valve filter It is recommended to clean both the filters of the inlet hose and valve occasionally to the emergency drain procedure. 5. Remove...
User Manual
Page 39
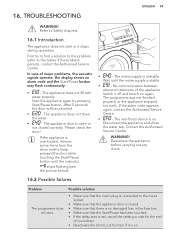
... code appears again, contact the Authorised Service Centre. • - 16. TROUBLESHOOTING ENGLISH 39 WARNING! After 5 seconds the door will be unlocked. • - The appliance does not drain the water. • - Wait until the indicator stops flashing (see the picture below). 16.2 Possible failures • - The anti-flood device is unstable. WARNING! Problem The programme does not start or it off and switch...
... code appears again, contact the Authorised Service Centre. • - 16. TROUBLESHOOTING ENGLISH 39 WARNING! After 5 seconds the door will be unlocked. • - The appliance does not drain the water. • - Wait until the indicator stops flashing (see the picture below). 16.2 Possible failures • - The anti-flood device is unstable. WARNING! Problem The programme does not start or it off and switch...
User Manual
Page 40
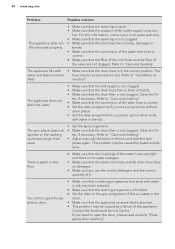
... the appliance. Clean the fil- Refer to open the door, please read carefully "Emer- This problem may be caused by balance problems. There is water on the floor. • Make sure that the couplings of the water hoses are not clogged. The spin phase does not operate or the washing cycle lasts longer than usual. • Set the spin programme. • Make sure that the drain filter is correct...
... the appliance. Clean the fil- Refer to open the door, please read carefully "Emer- This problem may be caused by balance problems. There is water on the floor. • Make sure that the couplings of the water hoses are not clogged. The spin phase does not operate or the washing cycle lasts longer than usual. • Set the spin programme. • Make sure that the drain filter is correct...
User Manual
Page 41
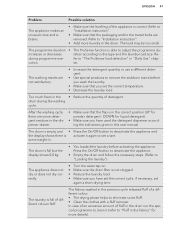
... in "Daily Use" chap- The fabrics washed in this user manual. Re- cution. Press the On/Off button to deactivate the appliance. • Empty the drum and follow the necessary steps. (Refer to "Installation instruction". • Add more details). during the washing cycle. DOWN for powder detergent - Refer to "Loading the laundry") The appliance does not dry or does not dry correctly. • Turn the water tap on...
... in "Daily Use" chap- The fabrics washed in this user manual. Re- cution. Press the On/Off button to deactivate the appliance. • Empty the drum and follow the necessary steps. (Refer to "Installation instruction". • Add more details). during the washing cycle. DOWN for powder detergent - Refer to "Loading the laundry") The appliance does not dry or does not dry correctly. • Turn the water tap on...
User Manual
Page 42
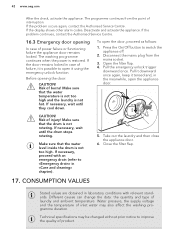
... door remains locked. Water pressure, the supply voltage and the temperature of inlet water may be changed without prior notice to «Emergency drain» in «Care and cleaning» chapter). 5. If necessary, wait until the drum stops rotating. If the problem occurs again, contact the Authorised Service Centre. Make sure that the water temperature is not too high and the laundry is restored. Disconnect the mains plug...
... door remains locked. Water pressure, the supply voltage and the temperature of inlet water may be changed without prior notice to «Emergency drain» in «Care and cleaning» chapter). 5. If necessary, wait until the drum stops rotating. If the problem occurs again, contact the Authorised Service Centre. Make sure that the water temperature is not too high and the laundry is restored. Disconnect the mains plug...


