
User's Manual
Page 7
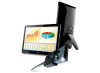
Setup Contents in Box QSG CD Manual Carry Case (Option) USB Cable 7
Setup Contents in Box QSG CD Manual Carry Case (Option) USB Cable 7

User's Manual
Page 10
... computer should detect the USB Monitor automatically. Note: Some computers may not provide enough power to the LCD monitor from one end of the USB cable to the LCD monitor and the end of Monitor to Connect PC/Laptop: Important!! If so, connect the other USB connector on the Y end of... the cable into another USB on page 16 to configure your USB Monitor. Follow the procedure described starting on your computer To protect the equipment, always turn...
... computer should detect the USB Monitor automatically. Note: Some computers may not provide enough power to the LCD monitor from one end of the USB cable to the LCD monitor and the end of Monitor to Connect PC/Laptop: Important!! If so, connect the other USB connector on the Y end of... the cable into another USB on page 16 to configure your USB Monitor. Follow the procedure described starting on your computer To protect the equipment, always turn...

User's Manual
Page 12
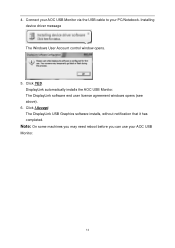
The DisplayLink USB Graphics software installs, without notification that it has completed. DisplayLink will be shown on the taskbar. The Windows User Account control window opens. 5. Click I Accept. Connect your AOC USB Monitor via the USB cable to your AOC USB Monitor. 12 Click YES. Note: On some machines you may need reboot before you can use your PC/Notebook. Installing device driver message will automatically install the AOC USB Monitor. The DisplayLink software end user license agreement windows opens (see above). 6. 4.
The DisplayLink USB Graphics software installs, without notification that it has completed. DisplayLink will be shown on the taskbar. The Windows User Account control window opens. 5. Click I Accept. Connect your AOC USB Monitor via the USB cable to your AOC USB Monitor. 12 Click YES. Note: On some machines you may need reboot before you can use your PC/Notebook. Installing device driver message will automatically install the AOC USB Monitor. The DisplayLink software end user license agreement windows opens (see above). 6. 4.
User's Manual
Page 14
Installing device driver message The Windows User Account control window opens. 5. Click I Accept. The DisplayLink USB Graphics software installs, without notification that it has completed. Note: On some machines you may need reboot before you can use your PC/Notebook. The DisplayLink software end user license agreement windows opens (see above). 6. Click YES. 4. Connect your AOC USB Monitor via the USB cable to your AOC USB Monitor. 14 DisplayLink automatically installs the AOC USB Monitor.
Installing device driver message The Windows User Account control window opens. 5. Click I Accept. The DisplayLink USB Graphics software installs, without notification that it has completed. Note: On some machines you may need reboot before you can use your PC/Notebook. The DisplayLink software end user license agreement windows opens (see above). 6. Click YES. 4. Connect your AOC USB Monitor via the USB cable to your AOC USB Monitor. 14 DisplayLink automatically installs the AOC USB Monitor.

User's Manual
Page 15
Click I Accept. DisplayLink core software and DisplayLink Graphics installs. Note: The screen may flash or go black during the installation. 15 Windows installs the AOC USB Monitor device. Double click on Setup.exe. The following message (or similar) will be seen. The Windows User Account Control window opens (if ... The screen may flash or go black during the installation. 3. DO NOT connect USB Monitor to your PC/Notebook before the software install. 1. Connect your AOC USB Monitor via the USB cable to your PC/Notebook. For Microsoft® Windows® XP Important!!
Click I Accept. DisplayLink core software and DisplayLink Graphics installs. Note: The screen may flash or go black during the installation. 15 Windows installs the AOC USB Monitor device. Double click on Setup.exe. The following message (or similar) will be seen. The Windows User Account Control window opens (if ... The screen may flash or go black during the installation. 3. DO NOT connect USB Monitor to your PC/Notebook before the software install. 1. Connect your AOC USB Monitor via the USB cable to your PC/Notebook. For Microsoft® Windows® XP Important!!

User's Manual
Page 17
...1. For Microsoft® Windows® 7 only, you can select OFF by pressing the Windows key ( ) + P, and then selecting "Computer only". Remove the USB cable from the computer and monitor. For Microsoft® Windows vista® and Windows® XP, you can use harsh chemical products to wipe the screen...tray of the monitor - Cleaning the LCD Monitor Please follow the guidelines below . Never spray liquids directly onto the LCD screen or use the AOC USB LCD monitor in mirror mode or extended mode. To Control the Display You can turn the monitor OFF by right-Clicking the " " ...
...1. For Microsoft® Windows® 7 only, you can select OFF by pressing the Windows key ( ) + P, and then selecting "Computer only". Remove the USB cable from the computer and monitor. For Microsoft® Windows vista® and Windows® XP, you can use harsh chemical products to wipe the screen...tray of the monitor - Cleaning the LCD Monitor Please follow the guidelines below . Never spray liquids directly onto the LCD screen or use the AOC USB LCD monitor in mirror mode or extended mode. To Control the Display You can turn the monitor OFF by right-Clicking the " " ...
User's Manual
Page 22
...in your computer User's Manual. Check the condition of the USB cable. The screen is blank, although the computer power is on Make sure the USB cable is on Check the connectors. The computer may also want to contact AOC should any occur. Move the mouse to the monitor Disconnect and reconnect... the USB cable again. It also describes how to consult with a clean cloth. ...
...in your computer User's Manual. Check the condition of the USB cable. The screen is blank, although the computer power is on Make sure the USB cable is on Check the connectors. The computer may also want to contact AOC should any occur. Move the mouse to the monitor Disconnect and reconnect... the USB cable again. It also describes how to consult with a clean cloth. ...

User's Manual
Page 24
... guarantee that to which can radiate radio frequency energy, and if not installed and used in order to comply with the emission limits. Shielded interface cables and AC power cord, if any radio or TV interference caused by unauthorized modification to this equipment does cause harmful interference to radio or television...
... guarantee that to which can radiate radio frequency energy, and if not installed and used in order to comply with the emission limits. Shielded interface cables and AC power cord, if any radio or TV interference caused by unauthorized modification to this equipment does cause harmful interference to radio or television...

Service Manual
Page 6
...® Windows® XP and Microsoft® Windows Vista® Right-click the " "icon in mirror mode or extended mode. Operating Instructions 3.1 Connecting the Monitor Cable Connections In Rear of your computer. 3.2 Control the Display You can select OFF by pressing the Windows key ( ) + P, and then selecting "Computer only". If .... Note: Some computers may vary depending on your Windows ® desktop to the computer. - For Microsoft® Windows® 7 only, you can use the AOC USB LCD monitor in the system tray of Monitor to Connect PC/Laptop: Important!!
...® Windows® XP and Microsoft® Windows Vista® Right-click the " "icon in mirror mode or extended mode. Operating Instructions 3.1 Connecting the Monitor Cable Connections In Rear of your computer. 3.2 Control the Display You can select OFF by pressing the Windows key ( ) + P, and then selecting "Computer only". If .... Note: Some computers may vary depending on your Windows ® desktop to the computer. - For Microsoft® Windows® 7 only, you can use the AOC USB LCD monitor in the system tray of Monitor to Connect PC/Laptop: Important!!

Service Manual
Page 7
Open screen resolution 2. The default setting for details on . If the auto-pivot is on each option. Remove the USB cable from the computer and monitor. 3.3 Setting the USB Monitor Follow this procedure to on again. 7 Set the display options. Refer ...a menu (and cycle through it is rotated between portrait and landscape position. To control the behavior of an attached AOC USB monitor, it ) to switch mode. ) + P to display 3.4 new technology The AOC e1649Fwu monitor supports an auto-pivot function to manually rotate the display. the " " icon in the system tray. 2.
Open screen resolution 2. The default setting for details on . If the auto-pivot is on each option. Remove the USB cable from the computer and monitor. 3.3 Setting the USB Monitor Follow this procedure to on again. 7 Set the display options. Refer ...a menu (and cycle through it is rotated between portrait and landscape position. To control the behavior of an attached AOC USB monitor, it ) to switch mode. ) + P to display 3.4 new technology The AOC e1649Fwu monitor supports an auto-pivot function to manually rotate the display. the " " icon in the system tray. 2.

Service Manual
Page 22
NG Turn on the Power "On/Off" switch OK Check the LED indicate is tightened? NG Check the AC power OK Replace the converter board NG Replace main board and check connections NG Replace key board and check connections 22 7.2 Trouble Shooting 1.No Power No power Check power cable is OK? OK NG Re-plug the power cable Check Power "On/Off" is "On"?
NG Turn on the Power "On/Off" switch OK Check the LED indicate is tightened? NG Check the AC power OK Replace the converter board NG Replace main board and check connections NG Replace key board and check connections 22 7.2 Trouble Shooting 1.No Power No power Check power cable is OK? OK NG Re-plug the power cable Check Power "On/Off" is "On"?

Service Manual
Page 23
OK Replace the converter board NG Replace the main board and connection NG Check the LVDS/FFC cable or panel NG Replace the key board NG Replace the main board OK The end OK The end OK Replace the LVDS/FFC cable or panel 23 2. No Video (Power LED Blue) No Video (Power LED Blue) Press the power button is OK?
OK Replace the converter board NG Replace the main board and connection NG Check the LVDS/FFC cable or panel NG Replace the key board NG Replace the main board OK The end OK The end OK Replace the LVDS/FFC cable or panel 23 2. No Video (Power LED Blue) No Video (Power LED Blue) Press the power button is OK?

Service Manual
Page 24
NG Replace the main board OK The end OK The end OK The end OK Check the signal cable and the PC NG OK The end NG Replace the panel OK 24 3. DIM DIM (image overlap, focus or flicker) Reset in factory mode NG Set to the optimal frequency, select the recommended frequency NG Readjust the phase and pixel clock in the user mode NG Pull out signal cable and check "Self Test Feature Check" is ok?
NG Replace the main board OK The end OK The end OK The end OK Check the signal cable and the PC NG OK The end NG Replace the panel OK 24 3. DIM DIM (image overlap, focus or flicker) Reset in factory mode NG Set to the optimal frequency, select the recommended frequency NG Readjust the phase and pixel clock in the user mode NG Pull out signal cable and check "Self Test Feature Check" is ok?

Service Manual
Page 25
NG OK NG Replace the signal cable or PC Replace the main board 25 Color is not optimal Color is not optimal Miss color Color shift Replace the signal cable NG OK The end Reset the factory mode NG In the user mode, set the" color settings" until customer satisfy Pull out the signal cable and check the screen color display is normal? 4.
NG OK NG Replace the signal cable or PC Replace the main board 25 Color is not optimal Color is not optimal Miss color Color shift Replace the signal cable NG OK The end Reset the factory mode NG In the user mode, set the" color settings" until customer satisfy Pull out the signal cable and check the screen color display is normal? 4.

Service Manual
Page 30
... type A+A 1000mm FFC CABLE 40PIN 210mm 0.5mm HARNESS 6P-6P 130mm FQE111052I SCREW SCREW 3x8 SCREW 3x6 LCD B156XW02 V603(H/W:0A) WJ AUO MAIN_FRAME MAIN_FRAME COVER e1649Fwu_BEZEL REAR COVER COVER e1649Fwu_STAND e1649Fwu_STAND HINGE_15.6" CARTON LABEL BARCODE 1 E1649FWU ID LABEL E1649FWU FRENCH LABEL E1649FWU POP LABEL e1649Fwu QSG EPS EPS ARTWORK CARTON E1649FWU EPE COVER RPOTECT BAG...
... type A+A 1000mm FFC CABLE 40PIN 210mm 0.5mm HARNESS 6P-6P 130mm FQE111052I SCREW SCREW 3x8 SCREW 3x6 LCD B156XW02 V603(H/W:0A) WJ AUO MAIN_FRAME MAIN_FRAME COVER e1649Fwu_BEZEL REAR COVER COVER e1649Fwu_STAND e1649Fwu_STAND HINGE_15.6" CARTON LABEL BARCODE 1 E1649FWU ID LABEL E1649FWU FRENCH LABEL E1649FWU POP LABEL e1649Fwu QSG EPS EPS ARTWORK CARTON E1649FWU EPE COVER RPOTECT BAG...

