User Manual
Page 22
...all additional monitors will disable D-Sub function when the add-on VGA card is no need to the steps below. Right-click the display icon in the Display Properties dialog that you wish to this motherboard. 4. Please refer to enter UEFI setup. If you can adjust the parameters of ...monitor, and then select "Primary". With the internal VGA output support and external add-on PCI Express VGA card driver to set up a multi-monitor display. Please refer to the following steps to your system. Enter "Onboard VGA Share Memory" option to adjust the memory capability to [32MB], [64MB],...
...all additional monitors will disable D-Sub function when the add-on VGA card is no need to the steps below. Right-click the display icon in the Display Properties dialog that you wish to this motherboard. 4. Please refer to enter UEFI setup. If you can adjust the parameters of ...monitor, and then select "Primary". With the internal VGA output support and external add-on PCI Express VGA card driver to set up a multi-monitor display. Please refer to the following steps to your system. Enter "Onboard VGA Share Memory" option to adjust the memory capability to [32MB], [64MB],...

User Manual
Page 23
... VistaTM 64-bit OS: Right click the desktop, choose "Personalize", and select the "Display Settings" tab so that you would like to use. Click the number "2" icon. C. The placement of display icons determines how you can adjust the parameters of the multi-monitor according to positions representing ...these new values. Click the items "This is my main monitor" and "Extend the desktop onto this monitor". A. E. G. Click and drag the display icons to the steps below. F. B. D. D. Click "OK" to save your monitors that you move items from one , two and three....
... VistaTM 64-bit OS: Right click the desktop, choose "Personalize", and select the "Display Settings" tab so that you would like to use. Click the number "2" icon. C. The placement of display icons determines how you can adjust the parameters of the multi-monitor according to positions representing ...these new values. Click the items "This is my main monitor" and "Extend the desktop onto this monitor". A. E. G. Click and drag the display icons to the steps below. F. B. D. D. Click "OK" to save your monitors that you move items from one , two and three....

User Manual
Page 39
ASRock XFast LAN UI Overview The default status window Low Latency Mode switch arrow down = currently Open slot on (if needed) configuration arrow up = always on Download activity display dialog no arrow = off TX shaping indicator Show/hide slot activation area Variance of ping time Open Current Connections window Ping time in ms Number of TCP/ UDP/TCP+UDP connections Download CPS rate Graphs Transfer rate Upload CPS rate in % for slots 1-10 Upload activity display Right click for more options 39
ASRock XFast LAN UI Overview The default status window Low Latency Mode switch arrow down = currently Open slot on (if needed) configuration arrow up = always on Download activity display dialog no arrow = off TX shaping indicator Show/hide slot activation area Variance of ping time Open Current Connections window Ping time in ms Number of TCP/ UDP/TCP+UDP connections Download CPS rate Graphs Transfer rate Upload CPS rate in % for slots 1-10 Upload activity display Right click for more options 39
User Manual
Page 40
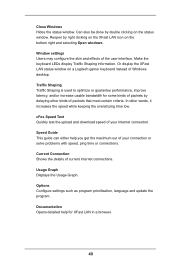
... is used to optimize or guarantee performance, improve latency, and/or increase usable bandwidth for XFast LAN in a browser. 40 Usage Graph Displays the Usage Graph. In other kinds of your connection or solve problems with speed, ping time or connections. Current Connection Shows the details ...Configure settings such as program prioritization, language and update the program. Close Windows Hides the status window. Make the keyboard LEDs display Traffic Shaping information. Documentation Opens detailed help you get the maximum out of packets by double clicking on the status window.
... is used to optimize or guarantee performance, improve latency, and/or increase usable bandwidth for XFast LAN in a browser. 40 Usage Graph Displays the Usage Graph. In other kinds of your connection or solve problems with speed, ping time or connections. Current Connection Shows the details ...Configure settings such as program prioritization, language and update the program. Close Windows Hides the status window. Make the keyboard LEDs display Traffic Shaping information. Documentation Opens detailed help you get the maximum out of packets by double clicking on the status window.

User Manual
Page 44
... the system time/date information OC Tweaker To set up overclocking features Advanced To set up the advanced UEFI features Tool Useful tools H/W Monitor To display current hardware status Boot To set up the default system device to locate and load the Operating System Security To set up the computer. Chapter...
... the system time/date information OC Tweaker To set up overclocking features Advanced To set up the advanced UEFI features Tool Useful tools H/W Monitor To display current hardware status Boot To set up the default system device to locate and load the Operating System Security To set up the computer. Chapter...

User Manual
Page 45
... 3.2 Main Screen When you enter the UEFI SETUP UTILITY, the Main screen will appear and display the system overview. H61M-VG3 45 3.1.2 Navigation Keys Please check the following table for the function description of the screen To display the General Help Screen Discard changes and exit the UEFI SETUP UTILITY Load optimal default...
... 3.2 Main Screen When you enter the UEFI SETUP UTILITY, the Main screen will appear and display the system overview. H61M-VG3 45 3.1.2 Navigation Keys Please check the following table for the function description of the screen To display the General Help Screen Discard changes and exit the UEFI SETUP UTILITY Load optimal default...

User Manual
Page 64
... not be able to enter BIOS Setup (Clear CMOS or run utility in order to configure the boot settings and the boot priority. You will display the available devices on your computer's boot time. Boot From Onboard LAN Use this item to enter BIOS Setup). 3.
... not be able to enter BIOS Setup (Clear CMOS or run utility in order to configure the boot settings and the boot priority. You will display the available devices on your computer's boot time. Boot From Onboard LAN Use this item to enter BIOS Setup). 3.

User Manual
Page 65
If you enable the option "Full Screen Logo" but you want to see the AddOn ROM information when the system boots, please select [Enabled]. AddOn ROM Display Use this item to enable or disable OEM Logo. Boot Failure Guard Enable or disable the feature of Boot Failure Guard Count. 65 Configuration options: [Enabled] and [Disabled]. Boot Failure Guard Count Enable or disable the feature of Boot Failure Guard. The default value is [Enabled]. The default value is [Enabled]. Full Screen Logo Use this option to adjust AddOn ROM Display.
If you enable the option "Full Screen Logo" but you want to see the AddOn ROM information when the system boots, please select [Enabled]. AddOn ROM Display Use this item to enable or disable OEM Logo. Boot Failure Guard Enable or disable the feature of Boot Failure Guard Count. 65 Configuration options: [Enabled] and [Disabled]. Boot Failure Guard Count Enable or disable the feature of Boot Failure Guard. The default value is [Enabled]. The default value is [Enabled]. Full Screen Logo Use this option to adjust AddOn ROM Display.

User Manual
Page 68
... CD, insert the CD into your CD-ROM drive. The CD automatically displays the Main Menu if "AUTORUN" is enabled in your OS documentation for further information. 68 Please install the necessary drivers to visit ASRock's website at http://www.asrock.com; Click on the file "ASSETUP.EXE" from the BIN folder in...
... CD, insert the CD into your CD-ROM drive. The CD automatically displays the Main Menu if "AUTORUN" is enabled in your OS documentation for further information. 68 Please install the necessary drivers to visit ASRock's website at http://www.asrock.com; Click on the file "ASSETUP.EXE" from the BIN folder in...

Quick Installation Guide
Page 13
...test routines. To begin using the Support CD, insert the CD into your computer. 2. The Support CD that will display the Main Menu automatically if "AUTORUN" is enabled in the Support CD. 3. It will enhance motherboard features. If you.... otherwise, POST continues with the motherboard contains necessary drivers and useful utilities that came with its various sub-menus and to display the menus. 13 ASRock H61M-VG3 / H61M-VS3 Motherboard English Software Support CD information This motherboard supports various Microsoft® Windows® operating systems: 8 / 8 64-bit...
...test routines. To begin using the Support CD, insert the CD into your computer. 2. The Support CD that will display the Main Menu automatically if "AUTORUN" is enabled in the Support CD. 3. It will enhance motherboard features. If you.... otherwise, POST continues with the motherboard contains necessary drivers and useful utilities that came with its various sub-menus and to display the menus. 13 ASRock H61M-VG3 / H61M-VS3 Motherboard English Software Support CD information This motherboard supports various Microsoft® Windows® operating systems: 8 / 8 64-bit...


