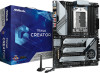
RAID Installation Guide
Page 1
AMD RAID Installation Guide 1. AMD Windows RAID Installation Guide 16 1 AMD BIOS RAID Installation Guide ...2 1.1 Introduction to RAID...2 1.2 RAID Configurations Precautions 4 1.3 Legacy RAID ROM Configuration 5 1.4 UEFI RAID Configuration ...11 2.
RAID Installation Guide
Page 2
...improve data access and storage since the disk array management software will direct all applications to RAID mode by using the onboard FastBuild BIOS utility under BIOS environment. 1. RAID 0 (Data Striping) RAID 0 is a method combining two or more hard disk drives into one logical unit...function can start to use the onboard RAID Option ROM Utility to configure RAID. 1.1 Introduction to a second drive. AMD BIOS RAID Installation Guide AMD BIOS RAID Installation Guide is called data striping that copies and maintains an identical image of Independent Disks", which is called data ...
RAID Installation Guide
Page 5
... "SATA Mode" option to exit. Click to save to . To create a new array, press on the "Create Array" option. *Be sure to enter the RAID BIOS setup utility. B. When the appropriate prompt appears during POST, press to delete the existing disk arrays before creating a new array. 5 B. STEP 1: Set up UEFI A. 1.3 Legacy...
RAID Installation Guide
Page 7
When completed, you will see the new array on the main screen. Press to proceed. Select a caching mode and press to exit the RAID BIOS utility. 7 Press to confirm and then press to return to the previous screen.
Quick Installation Guide
Page 5
... M2_2 DDR4_D2 (64 bit, 288-pin module) DDR4_D1 (64 bit, 288-pin module) DDR4_C2 (64 bit, 288-pin module) DDR4_C1 (64 bit, 288-pin module) TRX40 CREATOR DDR4_A1 (64 bit, 288-pin module) DDR4_A2 (64 bit, 288-pin module) DDR4_B1 (64 bit, 288-pin module) DDR4_B2 (64 bit, 288-pin module) ATXPWR1... BIOS ATX12V2 _FB1 ON OFF PS2 Keyboard /Mouse USB 3.2 Gen1 T: USB1 B: USB2 MOS_PROCHOT1 M2_WIFI_1 CLRC BTN1 Top: Central/Bass LINE IN Center: REAR SPK Bottom: Optical ...
Quick Installation Guide
Page 7
... Ports 7 10G LAN RJ-45 Port 15 USB 3.2 Gen1 Ports (USB32G1_1_2) (AQUANTIA® AQC107)*** 16 BIOS Flashback Button 8 USB 3.2 Gen2x2 Type-C Port * If you use a 2-channel speaker, please connect the speaker's plug into "Front Speaker Jack". I/O Panel 1 TRX40 Creator 24 35 6 7 16 15 14 13 12 11 10 9 8 No. Description No. Audio Output...
Quick Installation Guide
Page 11
TRX40 Creator Chapter 1 Introduction Thank you are using. ASRock website http://www.asrock.com. 1.1 Package Contents • ASRock TRX40 Creator Motherboard (ATX Form Factor) • ASRock TRX40 Creator Quick Installation Guide • ASRock TRX40 Creator Support CD • 4 x Serial ATA (SATA) Data Cables (Optional) • 1 x ASRock SLI_HB_Bridge_3S Card (Optional) • 1 x ASRock WiFi 2.4/5 GHz Antenna (Optional) • 3 x Screws for M.2 Sockets (Optional) • 3 x Standoffs for purchasing ASRock TRX40 Creator motherboard, a reliable...
Quick Installation Guide
Page 14
...) • 4 x USB 3.2 Gen1 Ports (Supports ESD Protection) • 2 x RJ-45 LAN Ports with LED (ACT/LINK LED and SPEED LED) • 1 x Clear CMOS Button • 1 x BIOS Flashback Button • HD Audio Jacks: Rear Speaker / Central / Line in / Front Speaker / Microphone (Gold Audio Jacks) Storage • 8 x SATA3 6.0 Gb/s Connectors, support RAID (RAID...
Quick Installation Guide
Page 16
... Hardware Monitor OS Certifications • AMI UEFI Legal BIOS with GUI support • Supports "Plug and Play" • ACPI 5.1 compliance wake up events • Supports jumperfree • SMBIOS 2.3 support • CPU, CPU VDDCR_SOC, DRAM,...EuP ready power supply is required) * For detailed product information, please visit our website: http://www.asrock.com Please realize that there is a certain risk involved with overclocking, including adjusting the setting in the BIOS, applying Untied Overclocking Technology, or using third-party overclocking tools. It should be done at your system...
Quick Installation Guide
Page 33
...) Reset Button allows users to quickly turn on/off your own risk and expense. This function is workable only when you power off the system. TRX40 Creator 2.6 Smart Switches The motherboard has five smart switches: Power Button, Reset Button, Clear CMOS Button, CPU Xtreme OC Switch and...
Quick Installation Guide
Page 34
.... 3. Then turn on the system. 6. Wait until the LED stops blinking, indicating that BIOS flashing has been completed. *If the LED light turns solid green, this means that you to the motherboard. Extract BIOS file from ASRock's website : http://www.asrock.com. 2. Then the LED starts to power on the power supply's AC switch...
Quick Installation Guide
Page 151
TRX40 Creator 무선 LAN I/O • Intel® 802.11ax WiFi 모듈 • IEEE 802.11a/b/g/n/ax 2.4/5 GHz WiFi6 802.11ax (2.4Gbps 2 ( 송신 ) x 2 2 개 • ...;트 4 개 (ESD LED 장착 RJ-45 LAN 포트 2 개 (ACT/LINK LED 및 SPEED LED) • Clear CMOS 버튼 1 개 • BIOS 1 개 • HD • SATA3 6.0 Gb/s 커넥터 8개가 RAID(RAID 0, RAID 1 및 RAID 10), NCQ, AHCI • M 키 유형 2260/2280...
Quick Installation Guide
Page 160
ON OFF 한 국 어 1.4 5 CMOS CPU Xtreme OC BIOS PWRBTN1) (1 20 RSTBTN1) (1 21 CMOS CLRCBTN1) (3 13 Clear CMOS CMOS CPU Xtreme OC 스위치 (MOS_PROCHOT1) (1 1 PROCHOT CPU Extreme OC PROCHOT = 꺼짐 (CPU Extreme OC CPU 156
Quick Installation Guide
Page 161
BIOS 3 LED 8. TRX40 Creator BIOS BIOS_FB1) (3 16 BIOS BIOS ASRock BIOS CPUY 없이도 BIOS USB BIOS 1. BIOS 4 creative.rom X USB 5. 24 AC 6. 이제 USB USB BIOS 7. BIOS 파일을 USB USB FAT32 3. LED BIOS LED BIOS USB USB BIOS 한국어 USB BIOS 157 ASRock BIOS http://www.asrock.com. 2.
Quick Installation Guide
Page 175
TRX40 Creator BIOS BIOS_FB1) ʢp.3ɺNo. 16 BIOS BIOS ASRock BIOS Flashback CPU BIOS USB BIOS Flashback 1. BIOS ϑΝΠϧΛ USB USB FAT32 3. BIOS 4 creative.rom X: USB 5. 24 AC 6. ࣍ʹɺUSB υϥΠϒΛ USB BIOS Flashback 7. ASRock BIOS http://www.asrock.com. 2. BIOS Flashback 3 LED 8. LED BIOS LED LED BIOS Flashback USB υϥΠϒ͕ USB BIOS Flashback 日本語 USB BIOS Flashback ϙʔτ 171
Quick Installation Guide
Page 179
TRX40 Creator • 1 x USB 3.2 Gen2x2 C 20 Gb/s)(支持 ESD 4 x USB 3.2 Gen1 ESD 2 x RJ-45 LAN LED(ACT/LINK LED 和 SPEED LED) • 1 x 清除 CMOS 按钮 • 1 x BIOS • 8 x SATA3 6.0 Gb/s RAID (RAID 0、RAID 1 和 RAID 10)、NCQ、AHCI • 2 x Hyper M.2 插槽(M2_1...
Quick Installation Guide
Page 185
简体中文 TRX40 Creator 1.4 CMOS 按钮、CPU Xtreme OC 开关和 BIOS PWRBTN1) (见第 1 页,第 20 个) RSTBTN1) (见第 1 页,第 21 个) 清除 CMOS 按钮 (...
Quick Installation Guide
Page 186
简体中文 BIOS BIOS_FB1) (见第 3 页,第 16 个) BIOS BIOS。 借助 ASRock BIOS CPU BIOS USB BIOS 1. 从 ASRock BIOS 文件:http://www.asrock.com。 2. 将 BIOS USB USB FAT32。 3 BIOS 文件。 4 creative.rom X USB 5. 将 24 6. 然后将 USB USB BIOS 7. 按住 BIOS LED 8. 等待 LED BIOS LED BIOS USB USB BIOS USB BIOS 182
Quick Installation Guide
Page 199
繁體中文 TRX40 Creator 1.4 CMOS 按鈕、CPU Xtreme OC 開關及 BIOS Flashback 按鈕。 PWRBTN1 1 20) RSTBTN1 1 21) 清除 CMOS 按鈕 (CLRCBTN1 3 13) 清除 CMOS CMOS 值。 CPU Xtreme OC 開關 (MOS_PROCHOT1 1 1) ON OFF PROCHOT = ON CPU Extreme OC 模式) PROCHOT = OFF (啟用 CPU Extreme OC 模式) CPU 195
Quick Installation Guide
Page 200
...; BIOS Flashback BIOS。 ASRock BIOS Flashback BIOS CPU USB BIOS Flashback 1. 從 ASRock BIOS 檔案:http://www.asrock.com。 2. 將 BIOS USB USB FAT32。 3. 從 zip BIOS 檔案。 4 creative.rom X: USB 5. 將 24 pin AC 6. 接著將 USB USB BIOS Flashback 7. 按住 BIOS Flashback LED 8. 等到 LED BIOS LED BIOS Flashback USB USB BIOS Flashback USB BIOS...