Altos R720 User's Guide
Page 2
...and purchase information. The serial number and model number are recorded on the label affixed to their respective companies. Acer Altos R720 Series User's Guide Changes may be incorporated in this publication without the prior written permission of such revision or ...Acer Altos R720 Model Name : Part Number: Purchase Date: Place of Purchase: Acer and the Acer logo are used herein for a particular purpose. Such changes will be reproduced, stored in a retrieval system, or transmitted, in any form or by any person of Acer Incorporated. All correspondence concerning your server...
...and purchase information. The serial number and model number are recorded on the label affixed to their respective companies. Acer Altos R720 Series User's Guide Changes may be incorporated in this publication without the prior written permission of such revision or ...Acer Altos R720 Model Name : Part Number: Purchase Date: Place of Purchase: Acer and the Acer logo are used herein for a particular purpose. Such changes will be reproduced, stored in a retrieval system, or transmitted, in any form or by any person of Acer Incorporated. All correspondence concerning your server...
Altos R720 User's Guide
Page 4
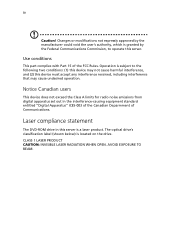
Operation is located on the drive. The optical drive's classification label (shown below) is subject to operate this server. AVOID EXPOSURE TO BEAM. CLASS 1 LASER PRODUCT CAUTION: INVISIBLE LASER RADIATION WHEN OPEN. Notice Canadian users This device does not exceed ... not expressly approved by the Federal Communications Commission, to the following two conditions: (1) this device may not cause harmful interference, and (2) this server is granted by the manufacturer could void the user's authority, which is a laser product. Laser compliance statement The DVD-ROM drive in the ...
Operation is located on the drive. The optical drive's classification label (shown below) is subject to operate this server. AVOID EXPOSURE TO BEAM. CLASS 1 LASER PRODUCT CAUTION: INVISIBLE LASER RADIATION WHEN OPEN. Notice Canadian users This device does not exceed ... not expressly approved by the Federal Communications Commission, to the following two conditions: (1) this device may not cause harmful interference, and (2) this server is granted by the manufacturer could void the user's authority, which is a laser product. Laser compliance statement The DVD-ROM drive in the ...

Altos R720 User's Guide
Page 7
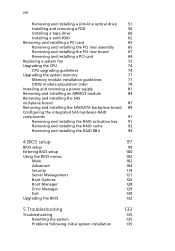
... 31 Turning off the system 32 3 System upgrade 33 Installation precautions 35 ESD precautions 35 Pre-installation instructions 35 Post-installation instructions 36 Opening the server 37 Unlocking the front bezel 37 Removing and installing the front bezel 38 Removing and installing the top cover 40 Removing and installing the CPU...
... 31 Turning off the system 32 3 System upgrade 33 Installation precautions 35 ESD precautions 35 Pre-installation instructions 35 Post-installation instructions 36 Opening the server 37 Unlocking the front bezel 37 Removing and installing the front bezel 38 Removing and installing the top cover 40 Removing and installing the CPU...
Altos R720 User's Guide
Page 8
... the RAID BBU 94 4 BIOS setup 97 BIOS setup 99 Entering BIOS setup 100 Using the BIOS menus 102 Main 102 Advanced 104 Security 119 Server Management 121 Boot Options 125 Boot Manager 128 Error Manager 129 Exit 130 Upgrading the BIOS 132 5 Troubleshooting Troubleshooting Resetting the system Problems following initial...
... the RAID BBU 94 4 BIOS setup 97 BIOS setup 99 Entering BIOS setup 100 Using the BIOS menus 102 Main 102 Advanced 104 Security 119 Server Management 121 Boot Options 125 Boot Manager 128 Error Manager 129 Exit 130 Upgrading the BIOS 132 5 Troubleshooting Troubleshooting Resetting the system Problems following initial...

Altos R720 User's Guide
Page 12
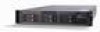
This chapter provides a brief overview of user tools for server administration. Remote monitoring and management functions are also included, providing a new level of the system hardware, including illustrations with component identification. The Acer Altos R720 is a 2U rack optimized server that features single or dual-core Intel Xeon processors, fully buffered DIMMs, integrated SAS RAID, standard-based server management, and server-oriented embedded I/O.
This chapter provides a brief overview of user tools for server administration. Remote monitoring and management functions are also included, providing a new level of the system hardware, including illustrations with component identification. The Acer Altos R720 is a 2U rack optimized server that features single or dual-core Intel Xeon processors, fully buffered DIMMs, integrated SAS RAID, standard-based server management, and server-oriented embedded I/O.
Altos R720 User's Guide
Page 15
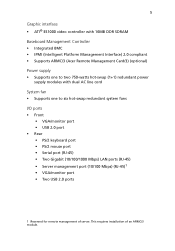
This requires installation of server. 5 Graphic interface • ATI® ES1000 video controller with 16MB DDR SDRAM Baseboard Management Controller • Integrated BMC • IPMI (Intelligent Platform Management Interface) 2.0 compliant • Supports ARMC/3 (Acer Remote Management Card/3) (optional) Power supply • Supports one ... mouse port • Serial port (RJ-45) • Two Gigabit (10/100/1000 Mbps) LAN ports (RJ-45) • Server management port (10/100 Mbps) (RJ-45)1 • VGA/monitor port • Two USB 2.0 ports 1 Reserved for remote management of an ARMC/3...
This requires installation of server. 5 Graphic interface • ATI® ES1000 video controller with 16MB DDR SDRAM Baseboard Management Controller • Integrated BMC • IPMI (Intelligent Platform Management Interface) 2.0 compliant • Supports ARMC/3 (Acer Remote Management Card/3) (optional) Power supply • Supports one ... mouse port • Serial port (RJ-45) • Two Gigabit (10/100/1000 Mbps) LAN ports (RJ-45) • Server management port (10/100 Mbps) (RJ-45)1 • VGA/monitor port • Two USB 2.0 ports 1 Reserved for remote management of an ARMC/3...
Altos R720 User's Guide
Page 16
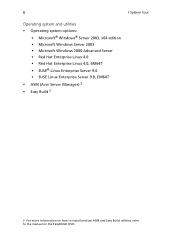
6 1 System tour Operating system and utilities • Operating system options: • Microsoft® Windows® Server 2003, x64 edition • Microsoft Windows Server 2003 • Microsoft Windows 2000 Advanced Server • Red Hat Enterprise Linux 4.0 • Red Hat Enterprise Linux 4.0, EM64T • SUSE® Linux Enterprise Server 9.0 • SUSE Linux Enterprise Server 9.0, EM64T • ASM (Acer Server Manager) 2 • Easy Build 2 2 For more information on how to install and use ASM and Easy Build utilities, refer to the manual on the EasyBUILD DVD.
6 1 System tour Operating system and utilities • Operating system options: • Microsoft® Windows® Server 2003, x64 edition • Microsoft Windows Server 2003 • Microsoft Windows 2000 Advanced Server • Red Hat Enterprise Linux 4.0 • Red Hat Enterprise Linux 4.0, EM64T • SUSE® Linux Enterprise Server 9.0 • SUSE Linux Enterprise Server 9.0, EM64T • ASM (Acer Server Manager) 2 • Easy Build 2 2 For more information on how to install and use ASM and Easy Build utilities, refer to the manual on the EasyBUILD DVD.
Altos R720 User's Guide
Page 19
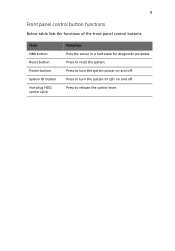
Press to turn the system ID LED on and off . Press to turn the system power on and off . 9 Front panel control button functions Below table lists the functions of the front panel control buttons. Press to release the carrier lever. Press to reset the system. Item NMI button Reset button Power button System ID button Hot-plug HDD carrier latch Function Puts the server in a halt-state for diagnostic purposes.
Press to turn the system ID LED on and off . Press to turn the system power on and off . 9 Front panel control button functions Below table lists the functions of the front panel control buttons. Press to release the carrier lever. Press to reset the system. Item NMI button Reset button Power button System ID button Hot-plug HDD carrier latch Function Puts the server in a halt-state for diagnostic purposes.
Altos R720 User's Guide
Page 23
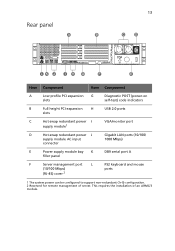
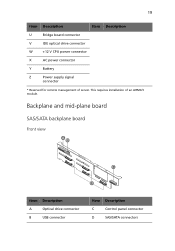
This requires the installation of server. 13 Rear panel Item Component Item Component A Low profile PCI expansion G Diagnostic POST (power-on slots self-test) code indicators B Full height PCI expansion H USB 2.0 ... D Hot-swap redundant power J supply module AC input connector Gigabit LAN ports (10/100/ 1000 Mbps) E Power supply module bay K DB9 serial port A filler panel F Server management port L PS2 keyboard and mouse (10/100 Mbps) ports (RJ-45) cover 2 1 The system power can be configured to support non-redundant (1+0) configuration. 2 Reserved...
This requires the installation of server. 13 Rear panel Item Component Item Component A Low profile PCI expansion G Diagnostic POST (power-on slots self-test) code indicators B Full height PCI expansion H USB 2.0 ... D Hot-swap redundant power J supply module AC input connector Gigabit LAN ports (10/100/ 1000 Mbps) E Power supply module bay K DB9 serial port A filler panel F Server management port L PS2 keyboard and mouse (10/100 Mbps) ports (RJ-45) cover 2 1 The system power can be configured to support non-redundant (1+0) configuration. 2 Reserved...
Altos R720 User's Guide
Page 29
Backplane and mid-plane board SAS/SATA backplane board Front view Item Description A Optical drive connector B USB connector Item Description C Control panel connector D SAS/SATA connectors 19 Item Description Item Description U Bridge board connector V IDE optical drive connector W +12 V CPU power connector X AC power connector Y Battery Z Power supply signal connector * Reserved for remote management of an ARMC/3 module. This requires installation of server.
Backplane and mid-plane board SAS/SATA backplane board Front view Item Description A Optical drive connector B USB connector Item Description C Control panel connector D SAS/SATA connectors 19 Item Description Item Description U Bridge board connector V IDE optical drive connector W +12 V CPU power connector X AC power connector Y Battery Z Power supply signal connector * Reserved for remote management of an ARMC/3 module. This requires installation of server.
Altos R720 User's Guide
Page 38
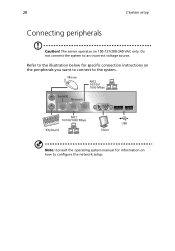
Refer to the illustration below for information on 100-127/200-240 VAC only. Note: Consult the operating system manual for specific connection instructions on the peripherals you want to connect to configure the network setup. 28 2 System setup Connecting peripherals Caution! The server operates on how to the system. Do not connect the system to an incorrect voltage source.
Refer to the illustration below for information on 100-127/200-240 VAC only. Note: Consult the operating system manual for specific connection instructions on the peripherals you want to connect to configure the network setup. 28 2 System setup Connecting peripherals Caution! The server operates on how to the system. Do not connect the system to an incorrect voltage source.
Altos R720 User's Guide
Page 40
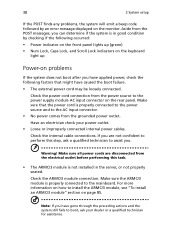
... dealer or a qualified technician for assistance. Make sure all power cords are not confident to perform this task. • The ARMC/3 module is in the server, or not properly seated. Make sure the ARMC/3 module is properly connected to the power source and to the AC input connector. • No power...
... dealer or a qualified technician for assistance. Make sure all power cords are not confident to perform this task. • The ARMC/3 module is in the server, or not properly seated. Make sure the ARMC/3 module is properly connected to the power source and to the AC input connector. • No power...
Altos R720 User's Guide
Page 41
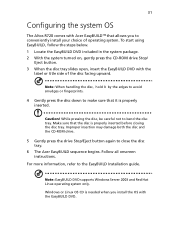
... close the disc tray. 6 The Acer EasyBUILD sequence begins. Note: EasyBUILD DVD supports Windows Server 2003 and Red Hat Linux operating system only. While pressing the disc, be careful not to conveniently install your choice of the disc facing upward. 31 Configuring the system OS The Altos R720 comes with the EasyBUILD DVD. Caution...
... close the disc tray. 6 The Acer EasyBUILD sequence begins. Note: EasyBUILD DVD supports Windows Server 2003 and Red Hat Linux operating system only. While pressing the disc, be careful not to conveniently install your choice of the disc facing upward. 31 Configuring the system OS The Altos R720 comes with the EasyBUILD DVD. Caution...
Altos R720 User's Guide
Page 42
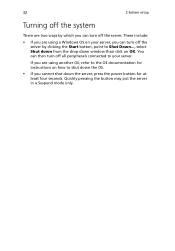
You can then turn off all peripherals connected to Shut Down..., select Shut down from the drop-down the server, press the power button for instructions on how to shut down the OS. • If you are using a Windows OS on OK. 32 2 System setup ... system There are two ways by which you can turn off the server by clicking the Start button, point to your server, you can turn off the server. These include: • If you cannot shut down window then click on your server. If you are using another OS, refer to the OS documentation for...
You can then turn off all peripherals connected to Shut Down..., select Shut down from the drop-down the server, press the power button for instructions on how to shut down the OS. • If you are using a Windows OS on OK. 32 2 System setup ... system There are two ways by which you can turn off the server by clicking the Start button, point to your server, you can turn off the server. These include: • If you cannot shut down window then click on your server. If you are using another OS, refer to the OS documentation for...
Altos R720 User's Guide
Page 45
...the following sections for specific installation instructions on page 37. 5 Follow the ESD precautions described in this section when handling a server component. 6 Remove any hardware structure or cable that you want to install. If a wrist strap is not available, maintain... contact with pre-installation and post-installation instructions. Pre-installation instructions Perform the steps below before you open the server or before you install a server component: 1 Do not remove a component from the power outlets. 3 Place the system unit on a flat, stable surface....
...the following sections for specific installation instructions on page 37. 5 Follow the ESD precautions described in this section when handling a server component. 6 Remove any hardware structure or cable that you want to install. If a wrist strap is not available, maintain... contact with pre-installation and post-installation instructions. Pre-installation instructions Perform the steps below before you open the server or before you install a server component: 1 Do not remove a component from the power outlets. 3 Place the system unit on a flat, stable surface....
Altos R720 User's Guide
Page 46
.... 4 Reinstall the front bezel. 5 Connect the necessary cables. 6 Turn on the system. Post-installation instructions Perform the steps below after installing a server component. 1 See to properly turn off the server before you are installed according to the described step-by-step instructions. 2 Reinstall all components are a qualified service technician. 36 3 System upgrade...
.... 4 Reinstall the front bezel. 5 Connect the necessary cables. 6 Turn on the system. Post-installation instructions Perform the steps below after installing a server component. 1 See to properly turn off the server before you are installed according to the described step-by-step instructions. 2 Reinstall all components are a qualified service technician. 36 3 System upgrade...

Altos R720 User's Guide
Page 47
Read the "Preinstallation instructions" on page 35. The front bezel and top cover are removable to allow access to protect the system unit from unauthorized access. Unlocking the front bezel A security lock secures the front bezel to the system's internal components. Insert the key into the lock and turn it . Before you proceed, make sure that you can install additional components. You need to open the server before you have turned off the system and all peripherals connected to the following sections for instructions. 37 Opening the server Caution! Refer to it clockwise.
Read the "Preinstallation instructions" on page 35. The front bezel and top cover are removable to allow access to protect the system unit from unauthorized access. Unlocking the front bezel A security lock secures the front bezel to the system's internal components. Insert the key into the lock and turn it . Before you proceed, make sure that you can install additional components. You need to open the server before you have turned off the system and all peripherals connected to the following sections for instructions. 37 Opening the server Caution! Refer to it clockwise.
Altos R720 User's Guide
Page 50
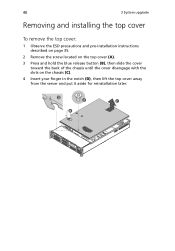
40 3 System upgrade Removing and installing the top cover To remove the top cover: 1 Observe the ESD precautions and pre-installation instructions described on page 35. 2 Remove the screw located on the top cover (A). 3 Press and hold the blue release button (B), then slide the cover toward the back of the chassis until the cover disengage with the slots on the chassis (C). 4 Insert your finger in the notch (D), then lift the top cover away from the server and put it aside for reinstallation later.
40 3 System upgrade Removing and installing the top cover To remove the top cover: 1 Observe the ESD precautions and pre-installation instructions described on page 35. 2 Remove the screw located on the top cover (A). 3 Press and hold the blue release button (B), then slide the cover toward the back of the chassis until the cover disengage with the slots on the chassis (C). 4 Insert your finger in the notch (D), then lift the top cover away from the server and put it aside for reinstallation later.
Altos R720 User's Guide
Page 52
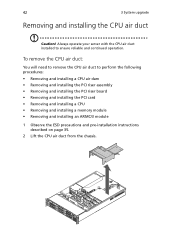
Always operate your server with the CPU air duct installed to perform the following procedures: • Removing and installing a CPU air dam • Removing and installing the PCI riser ...
Always operate your server with the CPU air duct installed to perform the following procedures: • Removing and installing a CPU air dam • Removing and installing the PCI riser ...
Altos R720 User's Guide
Page 55
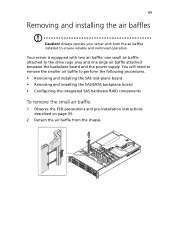
Always operate your server with two air baffle, one small air baffle attached to the drive cage area and one large air baffle attached between the backplane board and ... supply. 45 Removing and installing the air baffles Caution! You will need to remove the smaller air baffle to ensure reliable and continued operation. Your server is equipped with both the air baffles installed to perform the following procedures. • Removing and installing the SAS mid-plane board • Removing and...
Always operate your server with two air baffle, one small air baffle attached to the drive cage area and one large air baffle attached between the backplane board and ... supply. 45 Removing and installing the air baffles Caution! You will need to remove the smaller air baffle to ensure reliable and continued operation. Your server is equipped with both the air baffles installed to perform the following procedures. • Removing and installing the SAS mid-plane board • Removing and...


