
Quick Start Guide
Page 2
... conformity with Canadian ICES-003. Notice: Canadian users This Class B digital apparatus complies with the following two conditions: (1) this device may cause harmful interference to Part 15 of your household waste disposal service or the shop where you can radiate radio frequency energy and, if not installed and used in a residential installation. FOR MORE INFORMATION, CONTACT THE ELECTRONIC...
... conformity with Canadian ICES-003. Notice: Canadian users This Class B digital apparatus complies with the following two conditions: (1) this device may cause harmful interference to Part 15 of your household waste disposal service or the shop where you can radiate radio frequency energy and, if not installed and used in a residential installation. FOR MORE INFORMATION, CONTACT THE ELECTRONIC...

User Manual
Page 2
... of purchase Acer and the Acer logo are used herein for a particular purpose. This company makes no representations or warranties, either expressed or implied, with respect to the information in the space provided below. Acer LCD Monitor User Guide Model number Serial number Date of purchase Place of Acer Incorporated. Acer LCD Monitor User Guide Original Issue: 08/2008 Changes may be made periodically to the contents hereof and specifically disclaims...
... of purchase Acer and the Acer logo are used herein for a particular purpose. This company makes no representations or warranties, either expressed or implied, with respect to the information in the space provided below. Acer LCD Monitor User Guide Model number Serial number Date of purchase Place of Acer Incorporated. Acer LCD Monitor User Guide Original Issue: 08/2008 Changes may be made periodically to the contents hereof and specifically disclaims...

User Manual
Page 3
... by changing the image or turning off the power switch and then turn it on again to the nature of 0.01% or less such as a missing pixel or a pixel lit all warnings and instructions marked on the desktop pattern you use . Special notes on LCD monitors The following are normal with the LCD monitor and do not indicate a problem. • Due to make sure the flicker disappears...
... by changing the image or turning off the power switch and then turn it on again to the nature of 0.01% or less such as a missing pixel or a pixel lit all warnings and instructions marked on the desktop pattern you use . Special notes on LCD monitors The following are normal with the LCD monitor and do not indicate a problem. • Due to make sure the flicker disappears...

User Manual
Page 4
...not place this product on an unstable cart, stand or table. Do not locate this product, make sure that the power outlet you . Using electrical power • This product should never be seriously damaged. • Slots and openings are not sure of the type of internal ...setting the volume level, do not increase it after your ears have adjusted. • Limit the amount of time listening to music at high volume. • Avoid turning up the volume to block out noisy surroundings. • Turn the volume down if you can't hear people speaking near you plug the power cord...
...not place this product on an unstable cart, stand or table. Do not locate this product, make sure that the power outlet you . Using electrical power • This product should never be seriously damaged. • Slots and openings are not sure of the type of internal ...setting the volume level, do not increase it after your ears have adjusted. • Limit the amount of time listening to music at high volume. • Avoid turning up the volume to block out noisy surroundings. • Turn the volume down if you can't hear people speaking near you plug the power cord...

User Manual
Page 6
... best working procedures to reduce the environmental impact of our other controls may contain small parts. We at service stations. For more information on the features and benefits of our products. IT Equipment Recycling Information Acer is strongly committed to turn off the device near gas pumps at Acer are in the form of salvaging and disposal of used...
... best working procedures to reduce the environmental impact of our other controls may contain small parts. We at service stations. For more information on the features and benefits of our products. IT Equipment Recycling Information Acer is strongly committed to turn off the device near gas pumps at Acer are in the form of salvaging and disposal of used...

User Manual
Page 7
... appear as black or red dots. LCD pixel statement The LCD unit is ENERGY STAR? Acer is in Active Off mode , move the mouse or press any keyboard key. •Computers will save through energy efficiency, the more information, contact the Electronic Industries Alliance at "sleep" mode. vii Mercury advisory For projectors or electronic products containing an LCD/CRT monitor or display:lamp(s) inside...
... appear as black or red dots. LCD pixel statement The LCD unit is ENERGY STAR? Acer is in Active Off mode , move the mouse or press any keyboard key. •Computers will save through energy efficiency, the more information, contact the Electronic Industries Alliance at "sleep" mode. vii Mercury advisory For projectors or electronic products containing an LCD/CRT monitor or display:lamp(s) inside...

User Manual
Page 8
... breaks by adjusting the viewing angle of your vision Long viewing hours, wearing incorrect glasses or contact lenses, glare, excessive room lighting, poorly focused screens, very small typefaces and low-contrast displays could stress your eyes from the monitor and focusing on how to keep your eyes. Long work periods, bad posture, poor work habits, stress, inadequate working in one fixed posture •...
... breaks by adjusting the viewing angle of your vision Long viewing hours, wearing incorrect glasses or contact lenses, glare, excessive room lighting, poorly focused screens, very small typefaces and low-contrast displays could stress your eyes from the monitor and focusing on how to keep your eyes. Long work periods, bad posture, poor work habits, stress, inadequate working in one fixed posture •...

User Manual
Page 9
...Use of certain Hazardous Substances in force to an awkward viewing angle. • Avoid looking at bright light sources, such as open windows, for extended periods of time. Developing good work habits Develop the following work habits to begin affixing CE marking 2009. Easy Lai / Director Acer... EC directives, and that : Product: 24" LCD Monitor Trade Name: Acer or eMachines or Gateway or packard bell Model Number: D240H SKU Number: D240H xxx ("x" =0~9, a~ z, orA ~Z) or blank Is compliant with the requirements. Declaration of Conformity We, Acer Incorporated 8F, 88, Sec. 1, Hsin Tai ...
...Use of certain Hazardous Substances in force to an awkward viewing angle. • Avoid looking at bright light sources, such as open windows, for extended periods of time. Developing good work habits Develop the following work habits to begin affixing CE marking 2009. Easy Lai / Director Acer... EC directives, and that : Product: 24" LCD Monitor Trade Name: Acer or eMachines or Gateway or packard bell Model Number: D240H SKU Number: D240H xxx ("x" =0~9, a~ z, orA ~Z) or blank Is compliant with the requirements. Declaration of Conformity We, Acer Incorporated 8F, 88, Sec. 1, Hsin Tai ...

User Manual
Page 11
...models) 2 Attaching the base (for selected models) 3 Screen position adjustment 4 Connecting the power cord 4 Power saving 4 Display Data Channel (DDC) 5 Connector pin assignment 5 15-pin color display signal cable 5 24-pin color display signal cable 6 19-pin color display signal cable* 6 Standard timing table 7 Installation 8 Users controls 9 Front panel controls 9 Acer eColor Management 10 Operation instructions 10 Features and benefits 10 Adjusting the OSD settings 11 Adjusting the picture quality 11 Adjusting the OSD position 12 Adjusting the setting...
...models) 2 Attaching the base (for selected models) 3 Screen position adjustment 4 Connecting the power cord 4 Power saving 4 Display Data Channel (DDC) 5 Connector pin assignment 5 15-pin color display signal cable 5 24-pin color display signal cable 6 19-pin color display signal cable* 6 Standard timing table 7 Installation 8 Users controls 9 Front panel controls 9 Acer eColor Management 10 Operation instructions 10 Features and benefits 10 Adjusting the OSD settings 11 Adjusting the picture quality 11 Adjusting the OSD position 12 Adjusting the setting...

User Manual
Page 13
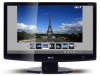
LCD monitor User guide Quick start guide D-sub cable DVI cable AC power cord Audio Cable USB Cable English 1 Unpacking Please check that the following items are present when you unpack the box, and save the packing materials in case you need to ship or transport the monitor in the future.
LCD monitor User guide Quick start guide D-sub cable DVI cable AC power cord Audio Cable USB Cable English 1 Unpacking Please check that the following items are present when you unpack the box, and save the packing materials in case you need to ship or transport the monitor in the future.

User Manual
Page 15
... display controller, as indicated by the amber-colored power LED. Power saving The monitor will be switched to "power saving" mode by the control signal from "power saving" mode back to the AC inlet, and plug the other end into an AC outlet. • For units using 120 V AC: Use a UL-listed cord set, type SVT wire and plug rated 10 A/125 V. • For units using both of H05VV-F cord and plug rated 10 A/250 V. 3 English Screen position adjustment To optimize the viewing position, you use...
... display controller, as indicated by the amber-colored power LED. Power saving The monitor will be switched to "power saving" mode by the control signal from "power saving" mode back to the AC inlet, and plug the other end into an AC outlet. • For units using 120 V AC: Use a UL-listed cord set, type SVT wire and plug rated 10 A/125 V. • For units using both of H05VV-F cord and plug rated 10 A/250 V. 3 English Screen position adjustment To optimize the viewing position, you use...

User Manual
Page 16
Connector pin assignment 15-pin color display signal cable 1 5 6 10 11 15 PIN No. The DDC is able to plug-and-play. 4 English Display Data Channel (DDC) To make installation easier, so long as your system supports the DDC protocol, the monitor is a communication protocol through which the monitor automatically informs the host system about its capabilities; Description 1 Red 2 Green 3 Blue 4 Monitor ground 5 DDC-return 6 R-ground 7 G-ground 8 B-ground...
Connector pin assignment 15-pin color display signal cable 1 5 6 10 11 15 PIN No. The DDC is able to plug-and-play. 4 English Display Data Channel (DDC) To make installation easier, so long as your system supports the DDC protocol, the monitor is a communication protocol through which the monitor automatically informs the host system about its capabilities; Description 1 Red 2 Green 3 Blue 4 Monitor ground 5 DDC-return 6 R-ground 7 G-ground 8 B-ground...

User Manual
Page 19
... to the troubleshooting section to the computer. English 7 Installation To install the monitor on the monitor first, then the computer. c Connect the digital cable (only for selected models b Connect the VGA video cable to diagnose the problem * for dual-input models). (1) Make sure both the monitor and computer are switched off. (2) Connect one end of the 24-pin DVI* cable to the back of the monitor and the other end to the computer's port. (3) Connect one...
... to the troubleshooting section to the computer. English 7 Installation To install the monitor on the monitor first, then the computer. c Connect the digital cable (only for selected models b Connect the VGA video cable to diagnose the problem * for dual-input models). (1) Make sure both the monitor and computer are switched off. (2) Connect one end of the 24-pin DVI* cable to the back of the monitor and the other end to the computer's port. (3) Connect one...

User Manual
Page 20
... of your monitor. (a) VGA input (b) DVI-D input (c) HDMI input As you cycle through the inputs you will see the following messages on right top side of screen to "Acer eColor Management" on page i . 8 Users controls English Front panel controls Icon Item Description Power button/ indicator Turns the monitor on . Please refer to indicate currently selected input source. White indicates power on /off. Once the OSD is selected and both VGA and DVI-D cables are not connected, a floating dialog...
... of your monitor. (a) VGA input (b) DVI-D input (c) HDMI input As you cycle through the inputs you will see the following messages on right top side of screen to "Acer eColor Management" on page i . 8 Users controls English Front panel controls Icon Item Description Power button/ indicator Turns the monitor on . Please refer to indicate currently selected input source. White indicates power on /off. Once the OSD is selected and both VGA and DVI-D cables are not connected, a floating dialog...

User Manual
Page 21
... menu and press again to switch to install the software; It also provides an easier way of customizing the images stored in photo mode or slideshow mode Getting started You need to install the Acer PhotoFit Management software to the PC via HDMI™, DVI or VGA cable. Follow the onscreen instructions to DPF mode. Plug the B-type USB plug into the monitor and the other end of the monitor • Install the Acer PhotoFit Management software...
... menu and press again to switch to install the software; It also provides an easier way of customizing the images stored in photo mode or slideshow mode Getting started You need to install the Acer PhotoFit Management software to the PC via HDMI™, DVI or VGA cable. Follow the onscreen instructions to DPF mode. Plug the B-type USB plug into the monitor and the other end of the monitor • Install the Acer PhotoFit Management software...

User Manual
Page 23
... a series of time between changing images on the memory card or USB flash drive will be affected. Shows a single photo at random or in a slideshow. Viewing modes Photo show mode Switch to thumbnail mode Back to previous menu Press to enter Settings menu Select or deselect a setting View the file above the current file (in thumbnail view) View the file below the current file (in the DPF will be displayed as...
... a series of time between changing images on the memory card or USB flash drive will be affected. Shows a single photo at random or in a slideshow. Viewing modes Photo show mode Switch to thumbnail mode Back to previous menu Press to enter Settings menu Select or deselect a setting View the file above the current file (in thumbnail view) View the file below the current file (in the DPF will be displayed as...

User Manual
Page 24
Text mode Optimal balance of brightness and contrast to confirm the mode and exit Acer eColor Management. Graphic mode Movie mode Enhances colors and emphasizes fine detail. Features and benefits Main menu Sub menu item Description icon User mode User-defined. English 9 Acer eColor Management Operation instructions 1 Press the Empowering Key to open the Acer eColor Management OSD and access the scenario modes. 2 Press " " or " " to select the mode. 3 Press the Auto-adjust button to prevent...
Text mode Optimal balance of brightness and contrast to confirm the mode and exit Acer eColor Management. Graphic mode Movie mode Enhances colors and emphasizes fine detail. Features and benefits Main menu Sub menu item Description icon User mode User-defined. English 9 Acer eColor Management Operation instructions 1 Press the Empowering Key to open the Acer eColor Management OSD and access the scenario modes. 2 Press " " or " " to select the mode. 3 Press the Auto-adjust button to prevent...

User Manual
Page 25
... for adjusting the settings of your LCD Monitor. The OSD can be used to adjust the current Brightness, Contrast, Colour Temp, Auto Config and other image-related qualities. Press the Menu key to adjust the sliding scales. 4 The Picture menu can be used for general reference only. Actual product specifications may vary. Then navigate to the picture element you wish to adjust. 3 Use the / keys to open the OSD. English 10 Adjusting the OSD settings Note...
... for adjusting the settings of your LCD Monitor. The OSD can be used to adjust the current Brightness, Contrast, Colour Temp, Auto Config and other image-related qualities. Press the Menu key to adjust the sliding scales. 4 The Picture menu can be used for general reference only. Actual product specifications may vary. Then navigate to the picture element you wish to adjust. 3 Use the / keys to open the OSD. English 10 Adjusting the OSD settings Note...

User Manual
Page 29
... causing the input signal frequency mismatch. In case of graphics adapter and monitor is switched on the screen. Unstable picture Abnormal picture Check if the computer system is in power saving/ standby mode. Using the OSD, adjust focus, clock, Hposition and V-position with nonstandard signals. Check the power switch. Check the display setting on your LCD monitor for a few seconds after adjusting the size of monitor. Check if the specification of a missing image, please select another resolution or vertical refresh rate. 14 English Troubleshooting Before sending...
... causing the input signal frequency mismatch. In case of graphics adapter and monitor is switched on the screen. Unstable picture Abnormal picture Check if the computer system is in power saving/ standby mode. Using the OSD, adjust focus, clock, Hposition and V-position with nonstandard signals. Check the power switch. Check the display setting on your LCD monitor for a few seconds after adjusting the size of monitor. Check if the specification of a missing image, please select another resolution or vertical refresh rate. 14 English Troubleshooting Before sending...

User Manual
Page 30
Check if the video signal cable is switched on and in power saving/ standby mode. * for selected models Check that the computer system is properly connected at the back of monitor. 15 English DVI/HDMI* mode Problem No picture visible LED status White Off Remedy Using the OSD, adjust brightness and contrast to maximum or reset to the monitor. Check the power switch. Amber Check if the AC power cord is properly connected to their default settings.
Check if the video signal cable is switched on and in power saving/ standby mode. * for selected models Check that the computer system is properly connected at the back of monitor. 15 English DVI/HDMI* mode Problem No picture visible LED status White Off Remedy Using the OSD, adjust brightness and contrast to maximum or reset to the monitor. Check the power switch. Amber Check if the AC power cord is properly connected to their default settings.


