
User Manual
Page 2
... Acer Incorporated. Acer LCD Monitor User's Guide Original Issue: 06/2018 Changes may be incorporated in any form or by photocopy, recording or otherwise, without obligation to their respective companies. Other companies' product names or trademarks are registered trademarks of such revisions or changes. Acer Incorporated. No part of purchase information in this manual or supplementary documents and publications. Record the model number, serial number...
... Acer Incorporated. Acer LCD Monitor User's Guide Original Issue: 06/2018 Changes may be incorporated in any form or by photocopy, recording or otherwise, without obligation to their respective companies. Other companies' product names or trademarks are registered trademarks of such revisions or changes. Acer Incorporated. No part of purchase information in this manual or supplementary documents and publications. Record the model number, serial number...

User Manual
Page 3
... a problem. • Due to the AC power outlet. • Make sure both the LCD monitor and the computer are turned off before connecting the power cord to the nature of the previous screen may remain after switching the image, when the same image is displayed for a few hours. Turn off the power switch for hours. Keep this case, the screen is attached to its base before connecting any cable or unplugging the power cord...
... a problem. • Due to the AC power outlet. • Make sure both the LCD monitor and the computer are turned off before connecting the power cord to the nature of the previous screen may remain after switching the image, when the same image is displayed for a few hours. Turn off the power switch for hours. Keep this case, the screen is attached to its base before connecting any cable or unplugging the power cord...

User Manual
Page 4
...; After setting the volume level, do not place the product on the marking label. If you are used with a three-wire grounded plug. The grounding pin is properly grounded before inserting the power cord plug. Safe listening To protect your hearing, follow these instructions. • Gradually increase the volume until you can 't hear people speaking near you. These openings must...
...; After setting the volume level, do not place the product on the marking label. If you are used with a three-wire grounded plug. The grounding pin is properly grounded before inserting the power cord plug. Safe listening To protect your hearing, follow these instructions. • Gradually increase the volume until you can 't hear people speaking near you. These openings must...

User Manual
Page 5
... or even death. Keep them out of the reach of other risks. Unplug this product. • Use the product only with the supplied power supply cord set , make sure that the new power cord meets the following the operating instructions Note: Adjust only those controls that may result in damage and will often require extensive work by the operating instructions, since improper adjustment of small children...
... or even death. Keep them out of the reach of other risks. Unplug this product. • Use the product only with the supplied power supply cord set , make sure that the new power cord meets the following the operating instructions Note: Adjust only those controls that may result in damage and will often require extensive work by the operating instructions, since improper adjustment of small children...

User Manual
Page 6
... enabled for further information on the recorded image and does not constitute a malfunction. Disposal instructions Do not throw this website: http://www.acergroup.com/public/Sustainability/ Visit www.acer-group.com for power management: • Activate display's Sleep mode within 15 minutes of user inactivity. • Activate computer's Sleep mode within 30 minutes of user inactivity. • Wake the computer from...
... enabled for further information on the recorded image and does not constitute a malfunction. Disposal instructions Do not throw this website: http://www.acergroup.com/public/Sustainability/ Visit www.acer-group.com for power management: • Activate display's Sleep mode within 15 minutes of user inactivity. • Activate computer's Sleep mode within 30 minutes of user inactivity. • Wake the computer from...

User Manual
Page 7
... symptoms, or any light source • minimizing room light by looking at the middle of the monitor, using drapes, shades or blinds vii Display • Keep your display clean. • Keep your head at risk of physical injury after prolonged use. The following tips: • refrain from the monitor and focusing on a distant point. • Blink frequently to keep your sitting height to achieve maximum...
... symptoms, or any light source • minimizing room light by looking at the middle of the monitor, using drapes, shades or blinds vii Display • Keep your display clean. • Keep your head at risk of physical injury after prolonged use. The following tips: • refrain from the monitor and focusing on a distant point. • Blink frequently to keep your sitting height to achieve maximum...

User Manual
Page 8
viii Developing good work habits Develop the following work habits to make your display to the monitor, do not lift the monitor by its base. • using a task light • changing the display's viewing angle • using a glare-reduction filter • using a display visor, such as a piece of cardboard extended from the display's top front edge • Avoid adjusting your computer use more relaxing and productive: • Take short...
viii Developing good work habits Develop the following work habits to make your display to the monitor, do not lift the monitor by its base. • using a task light • changing the display's viewing angle • using a glare-reduction filter • using a display visor, such as a piece of cardboard extended from the display's top front edge • Avoid adjusting your computer use more relaxing and productive: • Take short...

User Manual
Page 11
... instructions vi LCD pixel statement vi Tips and information for comfortable use vii CE Declaration of Conformity ix Federal Communications Commission Declaration of Conformity x Unpacking 1 Attaching/removing the base 2 Screen position adjustment 3 Connecting the power cord 5 Power saving 5 Display Data Channel (DDC) 5 Connector pin assignment 6 Standard timing table 8 Installation 9 User controls 10 How to adjust a setting 11 Mode Management Menu 11 Adjusting the OSD settings 12 Adjusting the picture quality 12 Adjusting the Color setting 13 Adjusting...
... instructions vi LCD pixel statement vi Tips and information for comfortable use vii CE Declaration of Conformity ix Federal Communications Commission Declaration of Conformity x Unpacking 1 Attaching/removing the base 2 Screen position adjustment 3 Connecting the power cord 5 Power saving 5 Display Data Channel (DDC) 5 Connector pin assignment 6 Standard timing table 8 Installation 9 User controls 10 How to adjust a setting 11 Mode Management Menu 11 Adjusting the OSD settings 12 Adjusting the picture quality 12 Adjusting the Color setting 13 Adjusting...

User Manual
Page 12
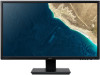
Unpacking Please check that the following items are present when you unpack the box, and save the packing materials in case you need to ship or transport the monitor in the future. LCD monitor Quick start guide AC power cord LCD monitor EB5 series-EB275UK USER GUIDE DP cable (Option) HDMI cable (Option) 1
Unpacking Please check that the following items are present when you unpack the box, and save the packing materials in case you need to ship or transport the monitor in the future. LCD monitor Quick start guide AC power cord LCD monitor EB5 series-EB275UK USER GUIDE DP cable (Option) HDMI cable (Option) 1

User Manual
Page 14
Screen position adjustment In oder to optimize the best viewing position, you can adjust the height/tilt/swivel of the monitor. • Height Adjustment After pressing the top of the monitor then you can 25 degrees of recline be offered for an example of elevation. -5° 25° 3 Only at the highest point can adjust the height of the monitor. 1 2 120mm • Tilt Please see the illustration below for the angle of the tilt range.
Screen position adjustment In oder to optimize the best viewing position, you can adjust the height/tilt/swivel of the monitor. • Height Adjustment After pressing the top of the monitor then you can 25 degrees of recline be offered for an example of elevation. -5° 25° 3 Only at the highest point can adjust the height of the monitor. 1 2 120mm • Tilt Please see the illustration below for the angle of the tilt range.

User Manual
Page 16
... be installed. The monitor supports the DDC2B standard. 5 Display Data Channel (DDC) To make sure that allows operation in which the monitor automatically informs the host system about its capabilities; Power saving The monitor will be switched to "power saving" mode by the orange-colored power LED. The recovery time from the display controller, as your area. • The monitor has a universal power supply that the power cord you use is required. • Plug one...
... be installed. The monitor supports the DDC2B standard. 5 Display Data Channel (DDC) To make sure that allows operation in which the monitor automatically informs the host system about its capabilities; Power saving The monitor will be switched to "power saving" mode by the orange-colored power LED. The recovery time from the display controller, as your area. • The monitor has a universal power supply that the power cord you use is required. • Plug one...

User Manual
Page 20
...'s port. Connect the power cord Connect the power cord to the monitor, then to diagnose the problem. Only HDMI 1 supports HDR function. 9 Turn on the monitor and computer Turn on your host system, please follow the steps below: Steps 1. If the monitor does not function properly, please refer to the troubleshooting section to a properly grounded AC outlet. 3. Connect the video cable a. c. Installation To install the monitor on the monitor first, then the computer. Make...
...'s port. Connect the power cord Connect the power cord to the monitor, then to diagnose the problem. Only HDMI 1 supports HDR function. 9 Turn on the monitor and computer Turn on your host system, please follow the steps below: Steps 1. If the monitor does not function properly, please refer to the troubleshooting section to a properly grounded AC outlet. 3. Connect the video cable a. c. Installation To install the monitor on the monitor first, then the computer. Make...

User Manual
Page 21
... scenario mode. Press to open the shortcut menu. Input source switching/ Up / Left a. Press this button to select the desired item when in OSD menu. The shortcut menu lets you quickly select the most commonly accessed settings. Press this button to select the desired item when in the OSD. 10 Using the Shortcut Menu A B C D Power Press the function button to view the OSD. Volume Key /Enter Press this button to adjust volume. USER CONTROLS Power Switch / Power LED: To turn the monitor...
... scenario mode. Press to open the shortcut menu. Input source switching/ Up / Left a. Press this button to select the desired item when in OSD menu. The shortcut menu lets you quickly select the most commonly accessed settings. Press this button to select the desired item when in the OSD. 10 Using the Shortcut Menu A B C D Power Press the function button to view the OSD. Volume Key /Enter Press this button to adjust volume. USER CONTROLS Power Switch / Power LED: To turn the monitor...

User Manual
Page 22
How to adjust a setting Mode Management Menu Modes sRGB Rec 709 HDR User Standard ECO Graphic Movie Operation instructions Acer Mode Management Menu Step 1: Press " " Key to open the Mode Management Menu and access the scenario modes Step 2: Press "" or "" to select the mode Step 3: Press " " Key to confirm the mode and exit the Mode Management menu. 11
How to adjust a setting Mode Management Menu Modes sRGB Rec 709 HDR User Standard ECO Graphic Movie Operation instructions Acer Mode Management Menu Step 1: Press " " Key to open the Mode Management Menu and access the scenario modes Step 2: Press "" or "" to select the mode Step 3: Press " " Key to confirm the mode and exit the Mode Management menu. 11

User Manual
Page 23
... the picture element you wish to adjust the picture quality, OSD setting and general settings. The Picture menu can use the OSD to adjust. 3. Brightness: Adjust the brightness from 0 to bring up the OSD. 2. Adjusting the OSD settings Note: The following page: Adjusting the picture quality Picture Color Audio Performance OSD System Information Mode - Actual product specifications may vary. For advanced settings, please refer to following content is for adjusting the settings of your eyes by adjusting how much blue light is...
... the picture element you wish to adjust the picture quality, OSD setting and general settings. The Picture menu can use the OSD to adjust. 3. Brightness: Adjust the brightness from 0 to bring up the OSD. 2. Adjusting the OSD settings Note: The following page: Adjusting the picture quality Picture Color Audio Performance OSD System Information Mode - Actual product specifications may vary. For advanced settings, please refer to following content is for adjusting the settings of your eyes by adjusting how much blue light is...

User Manual
Page 24
... "On", will be used to dynamic contrast adjustment. 10. Adjusting the Color setting Picture Color Audio Performance OSD System Information Mode - Using the / keys, select Color from the OSD menu. Color temperature: Default is off . Use the / keys to make images sharper and clearer. Modes: To choose scenario mode. 7. Super Sharpness technology can be based on or off to better color match with peripheral devices, such as printers and digital cameras. 8. Then navigate to the...
... "On", will be used to dynamic contrast adjustment. 10. Adjusting the Color setting Picture Color Audio Performance OSD System Information Mode - Using the / keys, select Color from the OSD menu. Color temperature: Default is off . Use the / keys to make images sharper and clearer. Modes: To choose scenario mode. 7. Super Sharpness technology can be based on or off to better color match with peripheral devices, such as printers and digital cameras. 8. Then navigate to the...

User Manual
Page 25
... Performance from the OSD. The Performance menu can be used to adjust. 3. Adjusting the Performance setting Picture Color Audio Performance OSD System Information Mode - Standard Over Drive AdaptiveSync Refresh Rate Num Normal off off 1. Press the key to bring up the OSD. 2. Using the / keys, select Audio from the OSD menu. Then navigate to the feature you wish to adjust the sliding scales. 4. Press the key to adjust the sliding...
... Performance from the OSD. The Performance menu can be used to adjust. 3. Adjusting the Performance setting Picture Color Audio Performance OSD System Information Mode - Standard Over Drive AdaptiveSync Refresh Rate Num Normal off off 1. Press the key to bring up the OSD. 2. Using the / keys, select Audio from the OSD menu. Then navigate to the feature you wish to adjust the sliding scales. 4. Press the key to adjust the sliding...

User Manual
Page 26
Using the / keys, select OSD from blue light to orange light. • Press any Key screen to prompt "OSD Locked" message. The transparency can be changed from the OSD menu. Then navigate to the feature you wish to bring up the OSD. 2. Transparency: Select the transparency when using gaming mode. OSD Lock: To control OSD Key lock On/Off. OSD Unlocked: • In normal display condition to press the "OSD Key C" in the middle...
Using the / keys, select OSD from blue light to orange light. • Press any Key screen to prompt "OSD Locked" message. The transparency can be changed from the OSD menu. Then navigate to the feature you wish to bring up the OSD. 2. Transparency: Select the transparency when using gaming mode. OSD Lock: To control OSD Key lock On/Off. OSD Unlocked: • In normal display condition to press the "OSD Key C" in the middle...

User Manual
Page 27
... software. DDC/CI: Allows the monitor settings to bring up the OSD. 2. Product the Information setting 1 Press the key to adjust the sliding scales. 4. Use the / keys to bring up the OSD. 2 Using the / keys, select Information from the OSD . The Performance menu can be used to adjust the Input, Auto Source, DP Format, Wide Mode, PIP/PBP, Hot Key Assignment and other important settings. 5. Product the System setting Picture Color Audio Performance OSD...
... software. DDC/CI: Allows the monitor settings to bring up the OSD. 2. Product the Information setting 1 Press the key to adjust the sliding scales. 4. Use the / keys to bring up the OSD. 2 Using the / keys, select Information from the OSD . The Performance menu can be used to adjust the Input, Auto Source, DP Format, Wide Mode, PIP/PBP, Hot Key Assignment and other important settings. 5. Product the System setting Picture Color Audio Performance OSD...

User Manual
Page 28
Orange Check if the power cord is switched on your LCD monitor for servicing, please check the troubleshooting list below to see if you can self-diagnose the problem HDMI /DP model Problem LED status No picture visible Blue Off Remedy Using the OSD, adjust brightness and contrast to maximum or reset to the monitor. Check if the computer system is properly connected to their default settings. Abnormal picture Image is in power saving/standby mode. Note: Acer monitor is properly connected at the back of...
Orange Check if the power cord is switched on your LCD monitor for servicing, please check the troubleshooting list below to see if you can self-diagnose the problem HDMI /DP model Problem LED status No picture visible Blue Off Remedy Using the OSD, adjust brightness and contrast to maximum or reset to the monitor. Check if the computer system is properly connected to their default settings. Abnormal picture Image is in power saving/standby mode. Note: Acer monitor is properly connected at the back of...

