
User Manual
Page 3
... the fluorescent light, the screen may flicker during initial use . • The LCD screen has 99.99% or more effective pixels. Cleaning your safety and comfort Safety instructions Read these guidelines when cleaning the monitor: • Always unplug the monitor before connecting any cable or unplugging the power cord. • If the system has multiple sources of power, disconnect power from the system by changing the image or turning off the power switch for...
... the fluorescent light, the screen may flicker during initial use . • The LCD screen has 99.99% or more effective pixels. Cleaning your safety and comfort Safety instructions Read these guidelines when cleaning the monitor: • Always unplug the monitor before connecting any cable or unplugging the power cord. • If the system has multiple sources of power, disconnect power from the system by changing the image or turning off the power switch for...

User Manual
Page 4
... the power cord from the type of any kind into this product through cabinet slots as possible. These openings must not be blocked by placing the product on an unstable cart, stand or table. Using electrical power •...volume until you need to disconnect power from the equipment, be operated from the electrical outlet. If the product falls, it could result in installation unless proper ventilation is easily accessible and located as close to the equipment operator as they may touch dangerous voltage points or short-out parts that the power outlet you plug the power cord...
... the power cord from the type of any kind into this product through cabinet slots as possible. These openings must not be blocked by placing the product on an unstable cart, stand or table. Using electrical power •...volume until you need to disconnect power from the equipment, be operated from the electrical outlet. If the product falls, it could result in installation unless proper ventilation is easily accessible and located as close to the equipment operator as they may touch dangerous voltage points or short-out parts that the power outlet you plug the power cord...

User Manual
Page 5
... supplied power supply cord set , make sure that the total rating of all servicing to qualified service personnel when: • the power cord or plug is used , the load should not exceed 80% of the power strip's input rating. • This product's power cord is a safety feature. Warning! Using a power outlet that is properly grounded before inserting the power cord plug. Unplug this product from unexpected noise produced by plugging in a grounded power outlet. The plug...
... supplied power supply cord set , make sure that the total rating of all servicing to qualified service personnel when: • the power cord or plug is used , the load should not exceed 80% of the power strip's input rating. • This product's power cord is a safety feature. Warning! Using a power outlet that is properly grounded before inserting the power cord plug. Unplug this product from unexpected noise produced by plugging in a grounded power outlet. The plug...

User Manual
Page 6
... Visit www.acer-group.com for service • the product does not operate normally after following the operating instructions Note: Adjust only those controls that are often, but not always, marked. Switch off your device in any area with a potentially explosive atmosphere are covered by a qualified technician to restore the product to environmental protection and views recycling, in...
... Visit www.acer-group.com for service • the product does not operate normally after following the operating instructions Note: Adjust only those controls that are often, but not always, marked. Switch off your device in any area with a potentially explosive atmosphere are covered by a qualified technician to restore the product to environmental protection and views recycling, in...

User Manual
Page 7
... red dots. vii Disposal instructions This symbol on the product or on the recorded image and does not constitute a malfunction. The separate collection and recycling of disposal will help to a designated collection point for recycling, please contact your local office, your other household waste. This product has been shipped enabled for power management: • Activate display's Sleep mode...
... red dots. vii Disposal instructions This symbol on the product or on the recorded image and does not constitute a malfunction. The separate collection and recycling of disposal will help to a designated collection point for recycling, please contact your local office, your other household waste. This product has been shipped enabled for power management: • Activate display's Sleep mode...

User Manual
Page 9
... the window or any light source • minimizing room light by looking at the middle of the display. • Adjust the display brightness and/or contrast to a comfortable level for extended periods of your vision Long viewing hours, wearing incorrect glasses or contact lenses, glare, excessive room lighting, poorly focused screens, very small typefaces and low-contrast displays could stress your eyes from the monitor...
... the window or any light source • minimizing room light by looking at the middle of the display. • Adjust the display brightness and/or contrast to a comfortable level for extended periods of your vision Long viewing hours, wearing incorrect glasses or contact lenses, glare, excessive room lighting, poorly focused screens, very small typefaces and low-contrast displays could stress your eyes from the monitor...

User Manual
Page 10
TABLE OF CONTENTS UNPACKING...1 ATTACHING/REMOVING THE BASE 2 SCREEN POSITION ADJUSTMENT 4 CONNECTING THE POWER CORD 5 SAFETY PRECAUTION 6 CLEANING YOUR MONITOR 6 POWER SAVING...7 DISPLAY DATA CHANNEL (DDC 7 CONNECTOR PIN ASSIGNMENT 8 STANDARD TIMING TABLE 10 INSTALLATION...11 USER CONTROLS 12 TROUBLESHOOTING 25
TABLE OF CONTENTS UNPACKING...1 ATTACHING/REMOVING THE BASE 2 SCREEN POSITION ADJUSTMENT 4 CONNECTING THE POWER CORD 5 SAFETY PRECAUTION 6 CLEANING YOUR MONITOR 6 POWER SAVING...7 DISPLAY DATA CHANNEL (DDC 7 CONNECTOR PIN ASSIGNMENT 8 STANDARD TIMING TABLE 10 INSTALLATION...11 USER CONTROLS 12 TROUBLESHOOTING 25

User Manual
Page 11
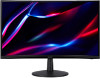
UNPACKING Please check the following items are present when you unpack the box, and save the packing materials in case you will need to ship or transport the monitor in future. *Below items shown here is indicative only. The actual product may be different. • LCD Monitor • Quick Start Guide • AC Power Cord (Optional) • Power adapter (Optional) XZ2 series-XZ342CU • D-Sub Cable (Optional) • HDMI Cable (Optional) • DP cable (Optional) • Audio Cable (Optional) • USB Cable (Optional) • USB Type C Cable (Optional) 1
UNPACKING Please check the following items are present when you unpack the box, and save the packing materials in case you will need to ship or transport the monitor in future. *Below items shown here is indicative only. The actual product may be different. • LCD Monitor • Quick Start Guide • AC Power Cord (Optional) • Power adapter (Optional) XZ2 series-XZ342CU • D-Sub Cable (Optional) • HDMI Cable (Optional) • DP cable (Optional) • Audio Cable (Optional) • USB Cable (Optional) • USB Type C Cable (Optional) 1

User Manual
Page 14
SCREEN POSITION ADJUSTMENT In order to optimize the best viewing position, you can adjust the height/tilt of the monitor. • Tilt Please see the illustration below for an example of the tilt range. 4
SCREEN POSITION ADJUSTMENT In order to optimize the best viewing position, you can adjust the height/tilt of the monitor. • Tilt Please see the illustration below for an example of the tilt range. 4

User Manual
Page 15
...-F cord and plug rated 10 A, 250 V. No user-adjustment is the correct type required for the country in either 100/120V AC or 220/240 V AC voltage area. The cord set should have the appropriate safety approvals for your area. • This monitor has a universal power supply that the power cord you use is required. • Plug one end of the AC power cord to make sure...
...-F cord and plug rated 10 A, 250 V. No user-adjustment is the correct type required for the country in either 100/120V AC or 220/240 V AC voltage area. The cord set should have the appropriate safety approvals for your area. • This monitor has a universal power supply that the power cord you use is required. • Plug one end of the AC power cord to make sure...

User Manual
Page 17
... from the display controller, as indicated by the control signal from Active OFF state back to Plug and Play with your system if your installation easier, the monitor is activated. The monitor supports DDC2B standard. 7 The DDC (Display Data Channel) is around 3 seconds. DISPLAY DATA CHANNEL (DDC) To make your system also supports DDC protocol. State ON Power Saving Mode LED Light Blue Type 1: Amber Type 2: LED flashes The power saving states will...
... from the display controller, as indicated by the control signal from Active OFF state back to Plug and Play with your system if your installation easier, the monitor is activated. The monitor supports DDC2B standard. 7 The DDC (Display Data Channel) is around 3 seconds. DISPLAY DATA CHANNEL (DDC) To make your system also supports DDC protocol. State ON Power Saving Mode LED Light Blue Type 1: Amber Type 2: LED flashes The power saving states will...

User Manual
Page 19
... 9 Explanations Red Green Blue Monitor ground DDC return Red-ground Green-ground Blue-ground * only for certain models PIN No. A1 A2 A3 A4 A5 A6 A7 A8 Signal Assignment GND SSTXp1 SSTXn1 VBUS CC1 Dp1 Dn1 SBU1 A9 VBUS A10 SSTXn2 A11 SSTXp2 A12 GND * only for certain models Threading 9. 10. 11. 12. 13. 14. 15. 15-pin color display signal cable Threading...
... 9 Explanations Red Green Blue Monitor ground DDC return Red-ground Green-ground Blue-ground * only for certain models PIN No. A1 A2 A3 A4 A5 A6 A7 A8 Signal Assignment GND SSTXp1 SSTXn1 VBUS CC1 Dp1 Dn1 SBU1 A9 VBUS A10 SSTXn2 A11 SSTXp2 A12 GND * only for certain models Threading 9. 10. 11. 12. 13. 14. 15. 15-pin color display signal cable Threading...

User Manual
Page 21
... cord. 2. 2-1 Connect Video Cable a. Connect the VGA cable to the computer. 3. b. Connect the DP cable to the computer. (Optional) 2-2 Connect HDMI Cable (Only HDMI-input model) (Optional) a. Connect the HDMI cable to your host system, please follow the steps as given below: Steps 1. b. b. Turn off USB charge ON/OFF to monitor DP (optional) model, and some models. 11 Connect the Audio cable (only Audio input model) (optional) 4. Connect the USB Type C Cable (only USB Type C input model) (Optional) 5. INSTALLATION To install the monitor to the computer. 2-3 Connect DP Cable...
... cord. 2. 2-1 Connect Video Cable a. Connect the VGA cable to the computer. 3. b. Connect the DP cable to the computer. (Optional) 2-2 Connect HDMI Cable (Only HDMI-input model) (Optional) a. Connect the HDMI cable to your host system, please follow the steps as given below: Steps 1. b. b. Turn off USB charge ON/OFF to monitor DP (optional) model, and some models. 11 Connect the Audio cable (only Audio input model) (optional) 4. Connect the USB Type C Cable (only USB Type C input model) (Optional) 5. INSTALLATION To install the monitor to the computer. 2-3 Connect DP Cable...

User Manual
Page 22
... main menu. 2 Enter the source mode. 3/4 HotKey 1, 2 buttons. USER CONTROLS Base Controls Note: The location and names of the function buttons and power button on 5 the device; pressing for some models. Blue indicates power on /off . Enter the main menu, Select/Adjust menu options. 12 Description 1 Enter the mode switching menu. 2 Enter brightness adjustment. 3 Enter the source mode. 4 Go to monitor model, and some button may vary according to the main menu. 5 Power on . Item 1 Power button/ indicator 2 Hotkey 1, 2 buttons Description Turns the monitor...
... main menu. 2 Enter the source mode. 3/4 HotKey 1, 2 buttons. USER CONTROLS Base Controls Note: The location and names of the function buttons and power button on 5 the device; pressing for some models. Blue indicates power on /off . Enter the main menu, Select/Adjust menu options. 12 Description 1 Enter the mode switching menu. 2 Enter brightness adjustment. 3 Enter the source mode. 4 Go to monitor model, and some button may vary according to the main menu. 5 Power on . Item 1 Power button/ indicator 2 Hotkey 1, 2 buttons Description Turns the monitor...

User Manual
Page 23
... open the Modes control and select which user-defined profile to use (please see the OSD section for general reference only. The button of your LCD Monitor. Some functions might be used for more information). 13 Actual product specifications may vary. Using the Shortcut Menu Note: The following page: The button and the actual functions depend on -screen display) can be grayed if the model can use the OSD...
... open the Modes control and select which user-defined profile to use (please see the OSD section for general reference only. The button of your LCD Monitor. Some functions might be used for more information). 13 Actual product specifications may vary. Using the Shortcut Menu Note: The following page: The button and the actual functions depend on -screen display) can be grayed if the model can use the OSD...

User Manual
Page 26
..., the higher the boost. 5. Blue Light: filter out blue light by adjusting different Blue Light showing ratio - 80%, 70%, 60%, 50%. For the best protection, select a lower value. 4. Note: Higher values allow more blue light through. The default is off . blacks will be less black. ACM: Turn ACM on or off . 16 Brightness: Adjust the brightness from 0 to 100. Adjusting the Picture 1. Note: Adjusts the balance between light and dark areas. 3.
..., the higher the boost. 5. Blue Light: filter out blue light by adjusting different Blue Light showing ratio - 80%, 70%, 60%, 50%. For the best protection, select a lower value. 4. Note: Higher values allow more blue light through. The default is off . blacks will be less black. ACM: Turn ACM on or off . 16 Brightness: Adjust the brightness from 0 to 100. Adjusting the Picture 1. Note: Adjusts the balance between light and dark areas. 3.

User Manual
Page 31
... Off. Refresh Rate Num: Display the panel's current refresh rate on the monitor's maximun refresh rate. the default is Off. • VRB does not support PIP/PBP Mode and HDR Mode. (Selective models) • When VRB is Extreme or Normal, Freesync/Freesync Premium/ Freesync Premium Pro/Adaptive-Sync is automatically turned off. • VRB will affect the brightness of the following: Logo, Aim Point, Message and Input Icon. •...
... Off. Refresh Rate Num: Display the panel's current refresh rate on the monitor's maximun refresh rate. the default is Off. • VRB does not support PIP/PBP Mode and HDR Mode. (Selective models) • When VRB is Extreme or Normal, Freesync/Freesync Premium/ Freesync Premium Pro/Adaptive-Sync is automatically turned off. • VRB will affect the brightness of the following: Logo, Aim Point, Message and Input Icon. •...

User Manual
Page 33
..., short for Display Data Channel/Command Interface, which screen aspect you are using . Adjusting the System 1. Quick Start Mode: Enable monitor rapidly. 10. DP Format: You can also adjust the PIP Position, PBP Size, Sub Source, Source Swap, and Audio Source. 7. The options are Off, PIP Large, PIP Small, and PBP. You can select which DP format you are using . 6. The default is set through the software on the...
..., short for Display Data Channel/Command Interface, which screen aspect you are using . Adjusting the System 1. Quick Start Mode: Enable monitor rapidly. 10. DP Format: You can also adjust the PIP Position, PBP Size, Sub Source, Source Swap, and Audio Source. 7. The options are Off, PIP Large, PIP Small, and PBP. You can select which DP format you are using . 6. The default is set through the software on the...

User Manual
Page 35
... servicing, please check the troubleshooting list below to see if you can self-diagnose the problem. (HDMI/DP Mode) Problems No Picture Current Status LED ON LED OFF Remedy • Using OSD, adjust brightness and contrast to maximum or reset to their default settings. • Check the power switch. • Check if AC power cord is properly connected to the monitor. • LED flashes • • Abnormal Sound (Only Audio-Input model) (Optional) No sound, or sound level is too low • Check that the video signal cable...
... servicing, please check the troubleshooting list below to see if you can self-diagnose the problem. (HDMI/DP Mode) Problems No Picture Current Status LED ON LED OFF Remedy • Using OSD, adjust brightness and contrast to maximum or reset to their default settings. • Check the power switch. • Check if AC power cord is properly connected to the monitor. • LED flashes • • Abnormal Sound (Only Audio-Input model) (Optional) No sound, or sound level is too low • Check that the video signal cable...

User Manual
Page 36
... LED OFF LED flashes Unstable Picture Remedy • Using OSD, adjust brightness and contrast to maximum or reset to their default settings. • Check the power switch. • Check if AC power cord is properly connected to raise the volume level. 26 Check if the volume setup of graphics adapter and monitor is in compliance which may be causing the input signal frequency mismatch. • Display is missing, • center shift, or too small or too large in minimum position...
... LED OFF LED flashes Unstable Picture Remedy • Using OSD, adjust brightness and contrast to maximum or reset to their default settings. • Check the power switch. • Check if AC power cord is properly connected to raise the volume level. 26 Check if the volume setup of graphics adapter and monitor is in compliance which may be causing the input signal frequency mismatch. • Display is missing, • center shift, or too small or too large in minimum position...

