

Quick Guide
Page 1
Acer Projectors with 3D Technology Quick Guide
Acer Projectors with 3D Technology Quick Guide

Quick Guide
Page 2
Acer Projector Series Quick Guide Original Issue: 8/2012 Model number Serial number Date of purchase Place of purchase © 2012 All Rights Reserved.
Acer Projector Series Quick Guide Original Issue: 8/2012 Model number Serial number Date of purchase Place of purchase © 2012 All Rights Reserved.

Quick Guide
Page 3
...In order to enhance battery life, they turn it off after a few minutes of the arms that came with your projector to change the battery. Note: Suggest to use Acer DLP 3D glasses to support 144Hz sync signal for instructions how to view 3D content, you need to ensure the ...glasses are turned on page 8. English 3 The Acer projector you have connected your projector to a computer, please read "Watching 3D DVD or Blu-ray content" on , you will be projected at full brightness. In many ...
...In order to enhance battery life, they turn it off after a few minutes of the arms that came with your projector to change the battery. Note: Suggest to use Acer DLP 3D glasses to support 144Hz sync signal for instructions how to view 3D content, you need to ensure the ...glasses are turned on page 8. English 3 The Acer projector you have connected your projector to a computer, please read "Watching 3D DVD or Blu-ray content" on , you will be projected at full brightness. In many ...

Quick Guide
Page 4
... the infra-red transmitter so that may need to view 3D content. English 4 Using NVIDIA 3D Vision technology Only available with NVIDIA 3D Vision certified projectors when using NVIDIA 3D glasses. Before you have the NVIDIA 3D glasses and IR-transmitter. The transmitter controls the 3D glasses and is an automatic...
... the infra-red transmitter so that may need to view 3D content. English 4 Using NVIDIA 3D Vision technology Only available with NVIDIA 3D Vision certified projectors when using NVIDIA 3D glasses. Before you have the NVIDIA 3D glasses and IR-transmitter. The transmitter controls the 3D glasses and is an automatic...

Quick Guide
Page 6
English 6 If you are viewing Blu-ray 3D content over an HDMI 1.4a or later connection, this will be set automatically. 6 Press the menu button on the left-hand side of the window. 7 Set 3D to open the OSD. Select the 3D section (the sixth menu option) on the projector remote control to Nvidia 3D Vision.
English 6 If you are viewing Blu-ray 3D content over an HDMI 1.4a or later connection, this will be set automatically. 6 Press the menu button on the left-hand side of the window. 7 Set 3D to open the OSD. Select the 3D section (the sixth menu option) on the projector remote control to Nvidia 3D Vision.

Quick Guide
Page 7
... a stereoscopic player in order to get the 3D effects. From the 3D options, select Nvidia 3D Vision. Using the stereoscopic player You need to open Acer e3D Management. English 7 8 Alternatively, press the Empowering Key on your projector's remote control to view content at .
... a stereoscopic player in order to get the 3D effects. From the 3D options, select Nvidia 3D Vision. Using the stereoscopic player You need to open Acer e3D Management. English 7 8 Alternatively, press the Empowering Key on your projector's remote control to view content at .

Quick Guide
Page 8
To download software and use an NVIDIA 3DTV Play ready projector with DLP glasses, refer to your graphics card for the latest driver version. 3 You should also download a suitable 3D player such as the one available ... software. 4 Ensure you have installed the drivers, you have the correct DLP-compatible 3D glasses. Select the 3D section (the sixth menu option) on the projector remote control to your graphics card's documentation. 2 Download and install the latest drivers for your graphics card supports 3D playback. Note: Please refer to open...
To download software and use an NVIDIA 3DTV Play ready projector with DLP glasses, refer to your graphics card for the latest driver version. 3 You should also download a suitable 3D player such as the one available ... software. 4 Ensure you have installed the drivers, you have the correct DLP-compatible 3D glasses. Select the 3D section (the sixth menu option) on the projector remote control to your graphics card's documentation. 2 Download and install the latest drivers for your graphics card supports 3D playback. Note: Please refer to open...

Quick Guide
Page 9
The "Frame Packing" is only available for correct 3D displaying. The "3D Format" is only existed at HDMI 1.4 or later input. English 9 3 Set 3D to On. 4 Alternatively, press the Empowering Key on your projector's remote control to open Acer e3D Management. From the 3D options, select On. 5 "3D Format" shows while no enough info, please choose suitable one for HDMI 1.4 or 2nd generation 3D projectors. 2. Note: 1.
The "Frame Packing" is only available for correct 3D displaying. The "3D Format" is only existed at HDMI 1.4 or later input. English 9 3 Set 3D to On. 4 Alternatively, press the Empowering Key on your projector's remote control to open Acer e3D Management. From the 3D options, select On. 5 "3D Format" shows while no enough info, please choose suitable one for HDMI 1.4 or 2nd generation 3D projectors. 2. Note: 1.

Quick Guide
Page 10
Otherwise, try selecting 3D Sync Invert from the projector OSD or Acer e3D Management for frame / field sequential 3D format. Using the stereoscopic player You need to disable the Stereoscopic feature to view 3D content using non-...
Otherwise, try selecting 3D Sync Invert from the projector OSD or Acer e3D Management for frame / field sequential 3D format. Using the stereoscopic player You need to disable the Stereoscopic feature to view 3D content using non-...

Quick Guide
Page 11
...stereoscopic player and set to open the OSD. Connect your DVD or Blu-ray player to the projector using your projector. Note: If your DVD or Blu-ray player supports 3D over HDMI 1.4a, check that.... 2 Open the 3D content in the player. Select the 3D section (the sixth menu option) on the projector remote control to 480i or 576i. 1 Press the menu button on the left-hand side of the available input...options are on and the video uses 24p before turning on your Acer 3D-enabled projector. Older connections should check the resolution is set the viewing method by going to get the 3D ...
...stereoscopic player and set to open the OSD. Connect your DVD or Blu-ray player to the projector using your projector. Note: If your DVD or Blu-ray player supports 3D over HDMI 1.4a, check that.... 2 Open the 3D content in the player. Select the 3D section (the sixth menu option) on the projector remote control to 480i or 576i. 1 Press the menu button on the left-hand side of the available input...options are on and the video uses 24p before turning on your Acer 3D-enabled projector. Older connections should check the resolution is set the viewing method by going to get the 3D ...

Quick Guide
Page 12
The "3D Format" is only existed at HDMI 1.4 or later input. Note: 1. The "Frame Packing" is only available for correct 3D displaying. From the 3D options, select On. 4 "3D Format" shows while no enough info, please choose suitable one for HDMI 1.4 or 2nd generation 3D projectors. 2. English 12 2 Set 3D to On. 3 Alternatively, press the Empowering Key on your projector's remote control to open Acer e3D Management.
The "3D Format" is only existed at HDMI 1.4 or later input. Note: 1. The "Frame Packing" is only available for correct 3D displaying. From the 3D options, select On. 4 "3D Format" shows while no enough info, please choose suitable one for HDMI 1.4 or 2nd generation 3D projectors. 2. English 12 2 Set 3D to On. 3 Alternatively, press the Empowering Key on your projector's remote control to open Acer e3D Management.

Quick Guide
Page 13
Note: The "3D Format" is not displaying properly, try selecting 3D Sync Invert from the projector OSD or Acer e3D Management. 6 If this does not improve the image, change the 3D Format to match the signal sent by your player. English 13 5 If you find that the 3D content is only available for HDMI 1.4 or 2nd generation 3D projectors.
Note: The "3D Format" is not displaying properly, try selecting 3D Sync Invert from the projector OSD or Acer e3D Management. 6 If this does not improve the image, change the 3D Format to match the signal sent by your player. English 13 5 If you find that the 3D content is only available for HDMI 1.4 or 2nd generation 3D projectors.

User Manual
Page 1
Acer Projector P1287/M416/PE-X45 P1387W/M426/PE-W45 P5515/N156/PN-805 H6517BD/E145D/HE-801J H6517ST/E145S/HE-801ST Series User's Guide
Acer Projector P1287/M416/PE-X45 P1387W/M426/PE-W45 P5515/N156/PN-805 H6517BD/E145D/HE-801J H6517ST/E145S/HE-801ST Series User's Guide

User Manual
Page 2
...means, electronically, mechanically, by photocopy, recording or otherwise, without obligation to their respective companies. All Rights Reserved. All correspondence concerning your projector. "HDMI™, the HDMI logo and High-Definition Multimedia Interface are used herein for a particular purpose. Other companies' product names or.... Copyright © 2014. Record the model number, serial number, purchase date and place of HDMI Licensing LLC." Acer Projector User's Guide Original Issue: 12/2014 Changes may be made periodically to the information in any form or by any person of...
...means, electronically, mechanically, by photocopy, recording or otherwise, without obligation to their respective companies. All Rights Reserved. All correspondence concerning your projector. "HDMI™, the HDMI logo and High-Definition Multimedia Interface are used herein for a particular purpose. Other companies' product names or.... Copyright © 2014. Record the model number, serial number, purchase date and place of HDMI Licensing LLC." Acer Projector User's Guide Original Issue: 12/2014 Changes may be made periodically to the information in any form or by any person of...

User Manual
Page 3
... objects of the product and to the equipment, be blocked or covered. These openings must not be sure to unplug the power cord from the projector. • If the system has multiple sources of any kind into is easily accessible and located as close to the equipment operator as they may...
... objects of the product and to the equipment, be blocked or covered. These openings must not be sure to unplug the power cord from the projector. • If the system has multiple sources of any kind into is easily accessible and located as close to the equipment operator as they may...

User Manual
Page 5
...104 ºF. • Locations where the altitudes are covered by the operating instructions, since improper adjustment of other risks. Consult your projector. Additional safety information • Do not look into the product • the product was exposed to rain or water •...been damaged • the product exhibits a distinct change in performance, indicating a need for purchase options. The bright may hurt your projector. Refer all windows rolled up. • Locations where excessive humidity, dust, or cigarette smoke may contaminate optical components, shortening the ...
...104 ºF. • Locations where the altitudes are covered by the operating instructions, since improper adjustment of other risks. Consult your projector. Additional safety information • Do not look into the product • the product was exposed to rain or water •...been damaged • the product exhibits a distinct change in performance, indicating a need for purchase options. The bright may hurt your projector. Refer all windows rolled up. • Locations where excessive humidity, dust, or cigarette smoke may contaminate optical components, shortening the ...

User Manual
Page 6
...lamp, press HIDE on rare occasions. • Never replace the lamp assembly or any object when the projector is capable of the lamp itself. It may hurt you. Only use acer ceiling mount kit for ceiling mount installation. In this case, unplug immediately and contact your dealer. •... Do not keep using this case contact your eyes. • Always open the lens shutter or remove the lens cap when the projector is securely installed....
...lamp, press HIDE on rare occasions. • Never replace the lamp assembly or any object when the projector is capable of the lamp itself. It may hurt you. Only use acer ceiling mount kit for ceiling mount installation. In this case, unplug immediately and contact your dealer. •... Do not keep using this case contact your eyes. • Always open the lens shutter or remove the lens cap when the projector is securely installed....
User Manual
Page 7
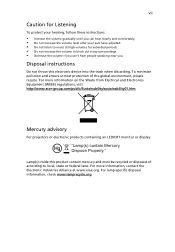
... the volume gradually until you . For more information on the Waste from Electrical and Electronics Equipment (WEEE) regulations, visit http://www.acer-group.com/public/Sustainability/sustainability01.htm Mercury advisory For projectors or electronic products containing an LCD/CRT monitor or display: "Lamp(s) contain Mercury, Dispose Properly." For lamp-specific disposal information...
... the volume gradually until you . For more information on the Waste from Electrical and Electronics Equipment (WEEE) regulations, visit http://www.acer-group.com/public/Sustainability/sustainability01.htm Mercury advisory For projectors or electronic products containing an LCD/CRT monitor or display: "Lamp(s) contain Mercury, Dispose Properly." For lamp-specific disposal information...

User Manual
Page 8
...the product as recommended in operation. • When the lamp reaches the end of your unit. Warning: • Do not look into the projector's lens when the lamp is on. To replace the lamp, follow all warnings, precautions and maintenance as this user's guide to maximize the ...to clean the unit. • Use under "Replacing the Lamp". viii First things first Usage Notes Do: • Turn off , please ensure the projector completes its cooling cycle before cleaning. • Use a soft cloth moistened with mild detergent to clean the display housing. • Disconnect the power ...
...the product as recommended in operation. • When the lamp reaches the end of your unit. Warning: • Do not look into the projector's lens when the lamp is on. To replace the lamp, follow all warnings, precautions and maintenance as this user's guide to maximize the ...to clean the unit. • Use under "Replacing the Lamp". viii First things first Usage Notes Do: • Turn off , please ensure the projector completes its cooling cycle before cleaning. • Use a soft cloth moistened with mild detergent to clean the display housing. • Disconnect the power ...
User Manual
Page 9
... 3 Control Panel 5 Remote Control Layout 6 MHL (Mobile High-Definition Link) Control 8 Getting Started 9 Connecting the Projector 9 Turning the Projector On/Off 11 Turning on the Projector 11 Turning the projector off 12 Adjusting the Projected Image 13 Adjusting the Height of Projected Image 13 How to optimize image size and distance 14 How to... User Controls 23 Installation menu 23 Onscreen Display (OSD) Menus 25 Color 26 Image 28 Setting 31 Management 33 Audio 34 3D 35 Language 35 Acer LAN webpage management 36
... 3 Control Panel 5 Remote Control Layout 6 MHL (Mobile High-Definition Link) Control 8 Getting Started 9 Connecting the Projector 9 Turning the Projector On/Off 11 Turning on the Projector 11 Turning the projector off 12 Adjusting the Projected Image 13 Adjusting the Height of Projected Image 13 How to optimize image size and distance 14 How to... User Controls 23 Installation menu 23 Onscreen Display (OSD) Menus 25 Color 26 Image 28 Setting 31 Management 33 Audio 34 3D 35 Language 35 Acer LAN webpage management 36


