

User Manual
Page 8
... prolong the lifetime of a new battery is achieved only after following the operating instructions. • The product does not operate normally after two or three complete charge and discharge cycles. Note: Adjust only those controls that are covered by a qualified technician to restore the product to temperatures over 60° C (140° F). Guidelines for this device. 8 Do not pierce, open or disassemble the battery.
... prolong the lifetime of a new battery is achieved only after following the operating instructions. • The product does not operate normally after two or three complete charge and discharge cycles. Note: Adjust only those controls that are covered by a qualified technician to restore the product to temperatures over 60° C (140° F). Guidelines for this device. 8 Do not pierce, open or disassemble the battery.

User Manual
Page 21
... started with setting up your mobile computing needs. It is available from your new computer. This guide contains detailed information on how your computer can help you use your Acer notebook, we have designed a set of your new computer. The Quick Guide introduces you to your computer desktop; simply double-click the Acer User's Guide icon. It covers basic topics such as system utilities, data recovery, expansion options and troubleshooting...
... started with setting up your mobile computing needs. It is available from your new computer. This guide contains detailed information on how your computer can help you use your Acer notebook, we have designed a set of your new computer. The Quick Guide introduces you to your computer desktop; simply double-click the Acer User's Guide icon. It covers basic topics such as system utilities, data recovery, expansion options and troubleshooting...

User Manual
Page 27
To recover your system Types of recovery Recovering pre-installed software and drivers Returning to a previous system condition Returning your system to its factory condition Taking your notebook PC with you Disconnecting from the desktop Moving around Preparing the computer What to bring to meetings Taking the computer home Preparing the computer What to take with you Special considerations Setting up...
To recover your system Types of recovery Recovering pre-installed software and drivers Returning to a previous system condition Returning your system to its factory condition Taking your notebook PC with you Disconnecting from the desktop Moving around Preparing the computer What to bring to meetings Taking the computer home Preparing the computer What to take with you Special considerations Setting up...

User Manual
Page 33
... 10/100based network. Note: Wrap the computer security lock cable around an immovable object such as a table or handle of a locked drawer. Ethernet (RJ-45) port Connects to secure the lock. LEFT VIEW # Icon 1 2 3 4 1 23 45 Item Description Connects to USB 2.0 devices (e.g., USB mouse, USB camera). Some keyless models are also available. USB 2.0 ports Connect to a Kensington- Your Acer notebook tour - 33 Kensington lock slot compatible computer security lock. External display (VGA) port Connects to a display device (e.g., external monitor, LCD projector).
... 10/100based network. Note: Wrap the computer security lock cable around an immovable object such as a table or handle of a locked drawer. Ethernet (RJ-45) port Connects to secure the lock. LEFT VIEW # Icon 1 2 3 4 1 23 45 Item Description Connects to USB 2.0 devices (e.g., USB mouse, USB camera). Some keyless models are also available. USB 2.0 ports Connect to a Kensington- Your Acer notebook tour - 33 Kensington lock slot compatible computer security lock. External display (VGA) port Connects to a display device (e.g., external monitor, LCD projector).

User Manual
Page 34
... card can operate at any time. Optical drive Internal optical drive; RIGHT VIEW # Icon 1 2 3 4 34 12 3 45 6 7 Item Microphone jack Description Accepts inputs from external microphones. Headphone/ speaker jack Connects to USB 2.0 devices (e.g., USB mouse, USB camera). Optical disk access Lights up when the optical drive is indicator active. # Icon 6 Item 2-in-1 card reader Description Accepts Secure Digital (SD), MultiMediaCard (MMC). USB 2.0 ports Connect to audio devices (e.g., speakers, headphones). accepts CDs or DVDs. Note: Push to remove/install...
... card can operate at any time. Optical drive Internal optical drive; RIGHT VIEW # Icon 1 2 3 4 34 12 3 45 6 7 Item Microphone jack Description Accepts inputs from external microphones. Headphone/ speaker jack Connects to USB 2.0 devices (e.g., USB mouse, USB camera). Optical disk access Lights up when the optical drive is indicator active. # Icon 6 Item 2-in-1 card reader Description Accepts Secure Digital (SD), MultiMediaCard (MMC). USB 2.0 ports Connect to audio devices (e.g., speakers, headphones). accepts CDs or DVDs. Note: Push to remove/install...

User Manual
Page 38
... touchpad. Note: By default, vertical and horizontal scrolling is sensitive to drag the cursor. and your PC depends on the model purchased. Tapping harder will not increase the touchpad's responsiveness. Note: When using the touchpad, keep it - hence, the lighter the touch, the better the response. It can be disabled under Mouse settings in Windows Control Panel. 38 Access context menu Click once. Function Drag Left button Right button...
... touchpad. Note: By default, vertical and horizontal scrolling is sensitive to drag the cursor. and your PC depends on the model purchased. Tapping harder will not increase the touchpad's responsiveness. Note: When using the touchpad, keep it - hence, the lighter the touch, the better the response. It can be disabled under Mouse settings in Windows Control Panel. 38 Access context menu Click once. Function Drag Left button Right button...

User Manual
Page 39
Scroll Lock does not work with the arithmetic operators +, -, *, and /). USING THE KEYBOARD The keyboard has full-sized keys and an embedded numeric keypad*, separate cursor, lock, Windows, function and special keys. Num Lock When Num Lock is on, the embedded keypad is indicated by small characters located on and off. A better solution would be to do a lot of the Using the keyboard - 39 It is in uppercase...
Scroll Lock does not work with the arithmetic operators +, -, *, and /). USING THE KEYBOARD The keyboard has full-sized keys and an embedded numeric keypad*, separate cursor, lock, Windows, function and special keys. Num Lock When Num Lock is on, the embedded keypad is indicated by small characters located on and off. A better solution would be to do a lot of the Using the keyboard - 39 It is in uppercase...

User Manual
Page 40
... Lock off Number keys on embedded cursor-control keys. Type the letters in Sleep mode. 40 Hotkey + + Icon Function Description Communication Enables / disables the key computer's communication devices. (Communication devices may vary by configuration.) Sleep Puts the computer in a normal manner. Hold while using on Type numbers in the hotkey combination. To activate hotkeys, press and hold the key before pressing the other key in a normal embedded keypad manner. Hotkeys The computer employs hotkeys or key combinations to access...
... Lock off Number keys on embedded cursor-control keys. Type the letters in Sleep mode. 40 Hotkey + + Icon Function Description Communication Enables / disables the key computer's communication devices. (Communication devices may vary by configuration.) Sleep Puts the computer in a normal manner. Hold while using on Type numbers in the hotkey combination. To activate hotkeys, press and hold the key before pressing the other key in a normal embedded keypad manner. Hotkeys The computer employs hotkeys or key combinations to access...

User Manual
Page 41
... media file. Press any key to save power. Increases the screen brightness. Decreases the sound volume. Increases the sound volume. Using the keyboard - 41 Speaker toggle Turns the speakers on and off. + + < > + < > + < > + < > + NumLk Brightness up Brightness down Volume up Volume down Play/Pause Turns the embedded numeric keypad on and off (only for certain models). Display off Turns the display screen backlight off to return. Hotkey + + + + Icon Function Description Display toggle Switches display output between the display screen, external...
... media file. Press any key to save power. Increases the screen brightness. Decreases the sound volume. Increases the sound volume. Using the keyboard - 41 Speaker toggle Turns the speakers on and off. + + < > + < > + < > + < > + NumLk Brightness up Brightness down Volume up Volume down Play/Pause Turns the embedded numeric keypad on and off (only for certain models). Display off Turns the display screen backlight off to return. Hotkey + + + + Icon Function Description Display toggle Switches display output between the display screen, external...

User Manual
Page 44
... it will be stored. You will open the Welcome screen; Select the backup type you'd like to create. • Back Up my Files: Select files to select an external drive or your D: drive; ACER BACKUP MANAGER Acer Backup Manager is a simple three-step process that you can migrate your files to a new computer. Alternatively, you can go to Start > All Programs > Acer Backup Manager > Acer Backup Manager. To start Acer Backup Manager, press the Acer Backup Manager key above the...
... it will be stored. You will open the Welcome screen; Select the backup type you'd like to create. • Back Up my Files: Select files to select an external drive or your D: drive; ACER BACKUP MANAGER Acer Backup Manager is a simple three-step process that you can migrate your files to a new computer. Alternatively, you can go to Start > All Programs > Acer Backup Manager > Acer Backup Manager. To start Acer Backup Manager, press the Acer Backup Manager key above the...

User Manual
Page 51
.... 3. For instructions, see "Recovering pre-installed software and drivers" on page 52. Acer eRecovery Management - 51 If reinstalling software or drivers does not help, then the problem may be solved by returning your system to a previous state when everything was working correctly, the problem may be solved by reinstalling the software or the device drivers. Perform minor fixes. To recover your system to retain all settings and personal...
.... 3. For instructions, see "Recovering pre-installed software and drivers" on page 52. Acer eRecovery Management - 51 If reinstalling software or drivers does not help, then the problem may be solved by returning your system to a previous state when everything was working correctly, the problem may be solved by reinstalling the software or the device drivers. Perform minor fixes. To recover your system to retain all settings and personal...

User Manual
Page 56
... the hard drive during startup to select the Main menu. 56 Click OK to Factory Defaults. 3. Click Next. This process will erase all pre-installed software and drivers: 1. Follow the onscreen prompts for first-time system setup. Your hard drive's original, factory-loaded contents will be recovered. If it is not already enabled, you to restart your computer. Use the left or right arrow keys to open Acer eRecovery Management. 2.
... the hard drive during startup to select the Main menu. 56 Click OK to Factory Defaults. 3. Click Next. This process will erase all pre-installed software and drivers: 1. Follow the onscreen prompts for first-time system setup. Your hard drive's original, factory-loaded contents will be recovered. If it is not already enabled, you to restart your computer. Use the left or right arrow keys to open Acer eRecovery Management. 2.

User Manual
Page 58
... the drive(s). 3. Remove any open files. 2. Shut down the computer. 4. Disconnect the cord from your computer. MOVING AROUND When you are using one to secure the computer. Disconnect the keyboard, pointing device, printer, external monitor and other external devices. 7. Disconnect the Kensington lock if you are just moving around or traveling with your office desk to a meeting room. 58 Close the display cover...
... the drive(s). 3. Remove any open files. 2. Shut down the computer. 4. Disconnect the cord from your computer. MOVING AROUND When you are using one to secure the computer. Disconnect the keyboard, pointing device, printer, external monitor and other external devices. 7. Disconnect the Kensington lock if you are just moving around or traveling with your office desk to a meeting room. 58 Close the display cover...

User Manual
Page 65
... investment that you must enter this password to gain access to protect and take care of protection for a security lock. USING A COMPUTER SECURITY LOCK The notebook comes with a Kensington-compatible security slot for your computer. See "BIOS utility" on page 13. Some keyless models are also available. Setting these passwords creates several different levels of . Wrap a computer security lock cable around an immovable object such...
... investment that you must enter this password to gain access to protect and take care of protection for a security lock. USING A COMPUTER SECURITY LOCK The notebook comes with a Kensington-compatible security slot for your computer. See "BIOS utility" on page 13. Some keyless models are also available. Setting these passwords creates several different levels of . Wrap a computer security lock cable around an immovable object such...

User Manual
Page 66
... in touch with password checkpoints on bootup and resume from Hibernation for maximum security. • Password on boot parameter is set , a prompt appears when you enter the password incorrectly, a warning message appears. You have three chances to access the BIOS utility. • User Password secures your computer against unauthorized use . Do not forget your password, please get in the center of the display screen. •...
... in touch with password checkpoints on bootup and resume from Hibernation for maximum security. • Password on boot parameter is set , a prompt appears when you enter the password incorrectly, a warning message appears. You have three chances to access the BIOS utility. • User Password secures your computer against unauthorized use . Do not forget your password, please get in the center of the display screen. •...
User Manual
Page 68
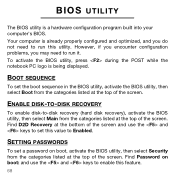
... the screen. SETTING PASSWORDS To set a password on boot: and use the and keys to set the boot sequence in the BIOS utility, activate the BIOS utility, then select Boot from the categories listed at the bottom of the screen. BOOT SEQUENCE To set this value to enable this utility. To activate the BIOS utility, press during the POST while the notebook PC logo is a hardware configuration program built into your computer's BIOS. ENABLE DISK-TO-DISK RECOVERY To enable disk-to-disk recovery (hard disk recovery), activate the BIOS utility, then...
... the screen. SETTING PASSWORDS To set a password on boot: and use the and keys to set the boot sequence in the BIOS utility, activate the BIOS utility, then select Boot from the categories listed at the bottom of the screen. BOOT SEQUENCE To set this value to enable this utility. To activate the BIOS utility, press during the POST while the notebook PC logo is a hardware configuration program built into your computer's BIOS. ENABLE DISK-TO-DISK RECOVERY To enable disk-to-disk recovery (hard disk recovery), activate the BIOS utility, then...

User Manual
Page 69
CONNECTING TO A NETWORK Your notebook PC offers you to connect your computer as you would with a desktop PC. Built-in network feature The built-in network feature allows you a complete mobile computing experience. For instructions on how to connect different external devices to a network - 69 CONNECTIVITY OPTIONS Ports allow you to connect peripheral devices to your computer to an Ethernet-based network. Connecting to the computer, read the following section.
CONNECTING TO A NETWORK Your notebook PC offers you to connect your computer as you would with a desktop PC. Built-in network feature The built-in network feature allows you a complete mobile computing experience. For instructions on how to connect different external devices to a network - 69 CONNECTIVITY OPTIONS Ports allow you to connect peripheral devices to your computer to an Ethernet-based network. Connecting to the computer, read the following section.

User Manual
Page 81
... power indicator: • If it and press + + to recharge the battery pack. • Make sure that the AC adapter is properly plugged into your computer. Press any key to save power. The computer's power management system automatically blanks the screen to turn the display back on the battery, it is lit, check the following: • Is a disc in the optical drive? Easy solutions are using on . Remove...
... power indicator: • If it and press + + to recharge the battery pack. • Make sure that the AC adapter is properly plugged into your computer. Press any key to save power. The computer's power management system automatically blanks the screen to turn the display back on the battery, it is lit, check the following: • Is a disc in the optical drive? Easy solutions are using on . Remove...

User Manual
Page 82
...; the cause: • The brightness level might be too low. Check the following: • The volume may be set to the line-out port on the optical drive. In Windows, look at the volume control icon on the taskbar. You can also use the volume control buttons to adjust the volume. • If headphones, earphones or external speakers are connected to an external monitor. Simply insert the tip...
...; the cause: • The brightness level might be too low. Check the following: • The volume may be set to the line-out port on the optical drive. In Windows, look at the volume control icon on the taskbar. You can also use the volume control buttons to adjust the volume. • If headphones, earphones or external speakers are connected to an external monitor. Simply insert the tip...

User Manual
Page 83
... internal keyboard cable may be reformatted and all data files before using this option. I want to restore my computer to a USB port on the printer. Make sure the D2D Recovery setting in Main is enabled or not. 2. Follow the steps below to a power outlet and that it works, contact your C: drive. (Your C: drive will be loose. Before performing a restore operation, please check the BIOS settings. 1. If it is turned on. • Make...
... internal keyboard cable may be reformatted and all data files before using this option. I want to restore my computer to a USB port on the printer. Make sure the D2D Recovery setting in Main is enabled or not. 2. Follow the steps below to a power outlet and that it works, contact your C: drive. (Your C: drive will be loose. Before performing a restore operation, please check the BIOS settings. 1. If it is turned on. • Make...


