
Generic User Guide
Page 3
...-in too many devices. Using electrical power • This product should never be blocked by plugging in installation unless proper ventilation is used , the load should never be placed near water. • Do not place this product through cabinet slots as they may touch dangerous voltage points or short-out parts that could be blocked or covered. If you...
...-in too many devices. Using electrical power • This product should never be blocked by plugging in installation unless proper ventilation is used , the load should never be placed near water. • Do not place this product through cabinet slots as they may touch dangerous voltage points or short-out parts that could be blocked or covered. If you...

Generic User Guide
Page 4
... AC adapter plug. If you to dangerous voltage points or other controls may expose you need for details. Note: Adjust only those controls that is incorrectly replaced. Make sure the power outlet is a safety feature. Warning! Using a power outlet that are covered by the operating instructions, since improper adjustment of other risks. Product servicing Do not attempt to service this product yourself, as opening or removing covers may...
... AC adapter plug. If you to dangerous voltage points or other controls may expose you need for details. Note: Adjust only those controls that is incorrectly replaced. Make sure the power outlet is a safety feature. Warning! Using a power outlet that are covered by the operating instructions, since improper adjustment of other risks. Product servicing Do not attempt to service this product yourself, as opening or removing covers may...

Generic User Guide
Page 5
... http://www.acer-group.com/public/Sustainability/sustainability01.htm http://www.acer-group.com/public/Sustainability/sustainability04.htm Mercury advisory For projectors or electronic products containing an LCD/CRT monitor or display: Lamp(s) inside this electronic device into the ...instructions Do not throw this product contain mercury and must be recycled or disposed of climate change. Acer is committed to offer products and services worldwide that are ENERGY STAR qualified use and/or before servicing. • To avoid the remote risk of electric shock from lightning, do not connect...
... http://www.acer-group.com/public/Sustainability/sustainability01.htm http://www.acer-group.com/public/Sustainability/sustainability04.htm Mercury advisory For projectors or electronic products containing an LCD/CRT monitor or display: Lamp(s) inside this electronic device into the ...instructions Do not throw this product contain mercury and must be recycled or disposed of climate change. Acer is committed to offer products and services worldwide that are ENERGY STAR qualified use and/or before servicing. • To avoid the remote risk of electric shock from lightning, do not connect...

Generic User Guide
Page 6
... long hours of working conditions, personal health and other musculoskeletal disorders. Long work periods, bad posture, poor work habits, stress, inadequate working in one fixed ...Install the external display, keyboard and mouse properly and within comfortable reach. If you have these symptoms, or any other recurring or persistent discomfort and/or pain related to achieve maximum comfort. Acer ENERGY STAR qualified products: • Produce less heat and reduce cooling loads, and warmer climates. • Automatically go into "display sleep" and "computer sleep" mode after prolonged use...
... long hours of working conditions, personal health and other musculoskeletal disorders. Long work periods, bad posture, poor work habits, stress, inadequate working in one fixed ...Install the external display, keyboard and mouse properly and within comfortable reach. If you have these symptoms, or any other recurring or persistent discomfort and/or pain related to achieve maximum comfort. Acer ENERGY STAR qualified products: • Produce less heat and reduce cooling loads, and warmer climates. • Automatically go into "display sleep" and "computer sleep" mode after prolonged use...

Generic User Guide
Page 7
... is unavoidable, work habits to make your eyes. Display • Keep your display clean. • Keep your head at a higher level than your documents, place the display at bright light sources, such as open windows, for only short periods, take breaks regularly, and do not recommend using drapes, shades or blinds. • Using a task light. • Changing the display's viewing angle. • Using a glare...
... is unavoidable, work habits to make your eyes. Display • Keep your display clean. • Keep your head at a higher level than your documents, place the display at bright light sources, such as open windows, for only short periods, take breaks regularly, and do not recommend using drapes, shades or blinds. • Using a task light. • Changing the display's viewing angle. • Using a glare...

Generic User Guide
Page 9
... keyboard 7 USB interface 7 PS/2 interface 7 Connecting a monitor 7 Connecting the power cable 8 Turning on your computer 8 Turning off your computer 8 3 Upgrading your computer 9 Installation precautions 10 ESD precautions 10 Preinstallation instructions 10 Post-installation instructions 10 Opening your computer 11 To remove the computer cover 11 To replace the computer cover 11 Upgrading your computer 11 To remove a memory DIMM 12 To install a memory DIMM 13 To reconfigure your computer 13 Replacing the hard disk 13 Installing an expansion card...
... keyboard 7 USB interface 7 PS/2 interface 7 Connecting a monitor 7 Connecting the power cable 8 Turning on your computer 8 Turning off your computer 8 3 Upgrading your computer 9 Installation precautions 10 ESD precautions 10 Preinstallation instructions 10 Post-installation instructions 10 Opening your computer 11 To remove the computer cover 11 To replace the computer cover 11 Upgrading your computer 11 To remove a memory DIMM 12 To install a memory DIMM 13 To reconfigure your computer 13 Replacing the hard disk 13 Installing an expansion card...

Generic User Guide
Page 12
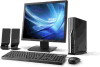
English 2 Front panel The front panel of your computer has the following: Icon Description Microphone-in jack (front) Headphone jack USB ports USB 3.0 USB 3.0 ports (selected models only) Recovery button Network / hard disk drive indicators Power button Rear panel The rear panel of your computer has the following: Icon Description PS/2 mouse port PS/2 keyboard port Serial port VGA port USB ports 1 System tour
English 2 Front panel The front panel of your computer has the following: Icon Description Microphone-in jack (front) Headphone jack USB ports USB 3.0 USB 3.0 ports (selected models only) Recovery button Network / hard disk drive indicators Power button Rear panel The rear panel of your computer has the following: Icon Description PS/2 mouse port PS/2 keyboard port Serial port VGA port USB ports 1 System tour

Generic User Guide
Page 14
... DVD-Super multi drive. Taking care of compact discs (CD). A DVD drive can render data on the disc unreadable or damage the reading lens in the drive. • Keeps discs in their cases when not in use a soft, dust-free cloth and wipe the disc in a circular motion. • Clean your computer's optical drive: 1 Push the eject button on the front panel. 2 When the tray slides open...
... DVD-Super multi drive. Taking care of compact discs (CD). A DVD drive can render data on the disc unreadable or damage the reading lens in the drive. • Keeps discs in their cases when not in use a soft, dust-free cloth and wipe the disc in a circular motion. • Clean your computer's optical drive: 1 Push the eject button on the front panel. 2 When the tray slides open...

Generic User Guide
Page 16
... you to 60 cm away from you type. Then try typing with a light touch. Putting your keyboard beside your monitor will add tension to your shoulder muscles. • The keyboard should be placed just above your lap. English 6 2 Setting up your computer Arranging a comfortable work area Take note of the following when selecting a location for your computer: • Do not...
... you to 60 cm away from you type. Then try typing with a light touch. Putting your keyboard beside your monitor will add tension to your shoulder muscles. • The keyboard should be placed just above your lap. English 6 2 Setting up your computer Arranging a comfortable work area Take note of the following when selecting a location for your computer: • Do not...

Generic User Guide
Page 17
... added to the PCI Express slot, the monitor should be disabled. For the most part, you stretch or lean over. • Use your arm to move the mouse. located on PS/2 interface Plug the PS/2 keyboard cable into any of the USB ports the front and rear panels of your computer. Plug the PS/2 mouse cable into the video port on the rear panel of your computer. Connecting a monitor To connect a monitor, simply plug the monitor cable into the PS/2 mouse...
... added to the PCI Express slot, the monitor should be disabled. For the most part, you stretch or lean over. • Use your arm to move the mouse. located on PS/2 interface Plug the PS/2 keyboard cable into any of the USB ports the front and rear panels of your computer. Plug the PS/2 mouse cable into the video port on the rear panel of your computer. Connecting a monitor To connect a monitor, simply plug the monitor cable into the PS/2 mouse...

Generic User Guide
Page 18
..., change your computer's voltage setting according to your area. Turning on your computer After connecting the necessary peripherals and plugging in and turned on the rear panel of your computer. Important: Make sure that the power cable is plugged in the power cable, you are now ready to your computer, such as the monitor, printer, speakers, etc. 2 On the front panel of the power cable into the power cable socket located on...
..., change your computer's voltage setting according to your area. Turning on your computer After connecting the necessary peripherals and plugging in and turned on the rear panel of your computer. Important: Make sure that the power cable is plugged in the power cable, you are now ready to your computer, such as the monitor, printer, speakers, etc. 2 On the front panel of the power cable into the power cable socket located on...

Generic User Guide
Page 20
... you start installing the components may cause serious damage. Warning! Do not attempt the procedures described in their respective sections. Not turning off your computer and all cables from its protective packaging until you wish to the step-by-step instructions in the following precautions before you install a computer component: 1 Do not remove a component from the power outlets. 2 Open...
... you start installing the components may cause serious damage. Warning! Do not attempt the procedures described in their respective sections. Not turning off your computer and all cables from its protective packaging until you wish to the step-by-step instructions in the following precautions before you install a computer component: 1 Do not remove a component from the power outlets. 2 Open...

Generic User Guide
Page 21
..., make sure that you removed earlier. 3 Replace the side panels. 4 Connect the necessary cables and turn on your computer. To remove the computer cover 1 Turn off your computer and all cables. 2 Place your computer are upgradeable, such as the memory, the hard disk, the CPU and the expansion cards. Upgrading your computer Certain components of your computer on its side. 3 Turn the screws counterclockwise to replace or upgrade any expansion boards or...
..., make sure that you removed earlier. 3 Replace the side panels. 4 Connect the necessary cables and turn on your computer. To remove the computer cover 1 Turn off your computer and all cables. 2 Place your computer are upgradeable, such as the memory, the hard disk, the CPU and the expansion cards. Upgrading your computer Certain components of your computer on its side. 3 Turn the screws counterclockwise to replace or upgrade any expansion boards or...

Generic User Guide
Page 23
... memory DIMM into the socket, turn the memory DIMM around and try to insert it . To reconfigure your computer's hard disk: 1 Remove the computer cover. 2 Detach all cables to the new hard disk. Run the BIOS utility to view the new value for total system memory and make a note of memory installed. Set the drive rails aside. 4 Insert the new hard disk into the frame and secure it with the socket (a). If you insert a memory...
... memory DIMM into the socket, turn the memory DIMM around and try to insert it . To reconfigure your computer's hard disk: 1 Remove the computer cover. 2 Detach all cables to the new hard disk. Run the BIOS utility to view the new value for total system memory and make a note of memory installed. Set the drive rails aside. 4 Insert the new hard disk into the frame and secure it with the socket (a). If you insert a memory...

Generic User Guide
Page 24
..., BIOS automatically detects and assigns resources to the newly installed devices. 14 3 Upgrading your computer English Note: Make sure that the other ends of the disk cables are securely connected to their corresponding connectors on the mainboard. 6 Reinstall the metal bracket frame to replace or upgrade any of these components, contact your computer with the bracket lock you removed earlier. 8 Replace the computer cover...
..., BIOS automatically detects and assigns resources to the newly installed devices. 14 3 Upgrading your computer English Note: Make sure that the other ends of the disk cables are securely connected to their corresponding connectors on the mainboard. 6 Reinstall the metal bracket frame to replace or upgrade any of these components, contact your computer with the bracket lock you removed earlier. 8 Replace the computer cover...

Generic User Guide
Page 26
... you properly plugged the power cable into an electrical outlet. • If you can restart your dealer or technical support center for assistance. The printer does not work. Nothing appears on . Just press any key to save power. I pressed the power switch but the system did not boot up. Your computer's power management function automatically blanks the screen to turn the display back on . • Make sure the...
... you properly plugged the power cable into an electrical outlet. • If you can restart your dealer or technical support center for assistance. The printer does not work. Nothing appears on . Just press any key to save power. I pressed the power switch but the system did not boot up. Your computer's power management function automatically blanks the screen to turn the display back on . • Make sure the...

Generic User Guide
Page 27
... be a problem with the drive. English 17 No sound comes out from mute to sound on the icon and deselect the Mute option. Check the following : • The volume may be muted. If your USB keyboard to toggle from the computer. Check the following : • Make sure the hard disk is clean and unscratched. • Check your dealer or technical support center for...
... be a problem with the drive. English 17 No sound comes out from mute to sound on the icon and deselect the Mute option. Check the following : • The volume may be muted. If your USB keyboard to toggle from the computer. Check the following : • Make sure the hard disk is clean and unscratched. • Check your dealer or technical support center for...

Generic User Guide
Page 30
....) certified to comply with the instructions, may be made using shielded cables to maintain compliance with FCC regulations. However, there is no guarantee that to which is connected. • Consult the dealer or an experienced radio/television technician for help. Operation with FCC regulations, use shielded cables to connect to other computing devices must be attached to this equipment...
....) certified to comply with the instructions, may be made using shielded cables to maintain compliance with FCC regulations. However, there is no guarantee that to which is connected. • Consult the dealer or an experienced radio/television technician for help. Operation with FCC regulations, use shielded cables to connect to other computing devices must be attached to this equipment...

Generic User Guide
Page 32
... higher speeds for Australia For safety reasons, only connect headsets with this equipment should fail to operate properly, disconnect the equipment from the phone line to determine if it provide any item of a different make changes in its network. Notice for which it imply that any single manual call initiation, and The associated equipment shall be set to operate...
... higher speeds for Australia For safety reasons, only connect headsets with this equipment should fail to operate properly, disconnect the equipment from the phone line to determine if it provide any item of a different make changes in its network. Notice for which it imply that any single manual call initiation, and The associated equipment shall be set to operate...

Generic User Guide
Page 33
... statement The CD or DVD drive used with wireless LAN and/or Bluetooth only. Digital audio output statement The optical connector contains no guarantee that Telecom lines will always continue to support pulse dialing. 7 Use of pulse dialing, when this equipment is connected to the same line as other equipment, may give rise to the same line. 9 Under power failure conditions this appliance...
... statement The CD or DVD drive used with wireless LAN and/or Bluetooth only. Digital audio output statement The optical connector contains no guarantee that Telecom lines will always continue to support pulse dialing. 7 Use of pulse dialing, when this equipment is connected to the same line as other equipment, may give rise to the same line. 9 Under power failure conditions this appliance...


