Safety Guide
Page 9
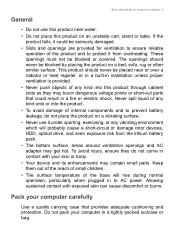
... lithium battery pack. • The bottom surface, areas around ventilation openings and AC adapter may touch dangerous voltage points or short-out parts that provides adequate cushioning and protection. Pack your computer in installation unless proper ventilation is provided. • Never push objects of the base will probably cause a short-circuit or damage rotor devices, HDD, optical drive, and...
... lithium battery pack. • The bottom surface, areas around ventilation openings and AC adapter may touch dangerous voltage points or short-out parts that provides adequate cushioning and protection. Pack your computer in installation unless proper ventilation is provided. • Never push objects of the base will probably cause a short-circuit or damage rotor devices, HDD, optical drive, and...

Safety Guide
Page 11
... the following guidelines when connecting and disconnecting power to the power supply unit: Install the power supply unit before removing the power supply unit from electrostatic damage to a drive. If you plug into is easily accessible and located as close to the equipment operator as possible. Battery and adapter information Accessing the power Be sure that the power outlet you are not sure of the type of power, disconnect power from the system...
... the following guidelines when connecting and disconnecting power to the power supply unit: Install the power supply unit before removing the power supply unit from electrostatic damage to a drive. If you plug into is easily accessible and located as close to the equipment operator as possible. Battery and adapter information Accessing the power Be sure that the power outlet you are not sure of the type of power, disconnect power from the system...

Safety Guide
Page 20
... Wireless adapter regulatory information Radio frequency interference Warning For safety reasons, turn off your device when its normal operating positions. Use the device only in this device requires a good quality connection to the settings in any special regulations in force in Power Management). • Wake the computer from sleep mode by pushing keyboard or moving mouse. • Computers will save more than 80% energy at "sleep" mode. 20 - Acer ENERGY...
... Wireless adapter regulatory information Radio frequency interference Warning For safety reasons, turn off your device when its normal operating positions. Use the device only in this device requires a good quality connection to the settings in any special regulations in force in Power Management). • Wake the computer from sleep mode by pushing keyboard or moving mouse. • Computers will save more than 80% energy at "sleep" mode. 20 - Acer ENERGY...

Safety Guide
Page 22
... systems. High power radars are provided for U.S operation according to Part 15.407 of wireless adapters in the 5.15 to 5.25 GHz and 5.470 to the limits set forth by each hospital. This device is restricted to 5.725 GHz frequency ranges. Warnings and regulatory information supplement C, 2001, and ANSI/IEEE C95.1, 1992. this wireless adapter allowing any change in exposure...
... systems. High power radars are provided for U.S operation according to Part 15.407 of wireless adapters in the 5.15 to 5.25 GHz and 5.470 to the limits set forth by each hospital. This device is restricted to 5.725 GHz frequency ranges. Warnings and regulatory information supplement C, 2001, and ANSI/IEEE C95.1, 1992. this wireless adapter allowing any change in exposure...

User Manual
Page 2
.... Veriton Desktop Computer Covers: Tower models This revision: October 2017 Sign up for your registered products Once you can log onto account.acer.com using your Acer ID and password to be liable for an Acer ID and enable Acer Remote Files 1. Images provided herein are connected to the database. Click REGISTER A PRODUCT. 4. Acer Group shall not be updated to the Internet. 2. The information contained in this manual...
.... Veriton Desktop Computer Covers: Tower models This revision: October 2017 Sign up for your registered products Once you can log onto account.acer.com using your Acer ID and password to be liable for an Acer ID and enable Acer Remote Files 1. Images provided herein are connected to the database. Click REGISTER A PRODUCT. 4. Acer Group shall not be updated to the Internet. 2. The information contained in this manual...

User Manual
Page 3
... BIOS utility 19 Boot sequence 19 Setting passwords 19 Securing your computer 20 Using passwords 20 Entering passwords 20 Power management 22 Saving power 22 Ports and connectors 25 Information on USB 3.0 26 Rear panel audio ports 26 Micro USB 27 Memory card reader 28 Connectivity options 28 Video and audio connectors 30 HDMI 31 HDMI Micro 32 Universal Serial Bus (USB) 33 Frequently asked questions 35 Requesting service 37 Tips and hints for using Windows 10 ..... 39 How do I get to Start 39 How do I turn...
... BIOS utility 19 Boot sequence 19 Setting passwords 19 Securing your computer 20 Using passwords 20 Entering passwords 20 Power management 22 Saving power 22 Ports and connectors 25 Information on USB 3.0 26 Rear panel audio ports 26 Micro USB 27 Memory card reader 28 Connectivity options 28 Video and audio connectors 30 HDMI 31 HDMI Micro 32 Universal Serial Bus (USB) 33 Frequently asked questions 35 Requesting service 37 Tips and hints for using Windows 10 ..... 39 How do I get to Start 39 How do I turn...

User Manual
Page 5
... subjects as system utilities, data recovery, expansion options and troubleshooting. Scroll down to Drivers and Manuals and search for using your computer Turning your computer off To turn the power off , the Setup Guide (or Setup Poster) helps you have designed a set of your model by entering the serial number, SNID, or product model. You may also download and install the Acer identification tool that will open the Acer Service & Support webpage. The Quick Guide introduces you...
... subjects as system utilities, data recovery, expansion options and troubleshooting. Scroll down to Drivers and Manuals and search for using your computer Turning your computer off To turn the power off , the Setup Guide (or Setup Poster) helps you have designed a set of your model by entering the serial number, SNID, or product model. You may also download and install the Acer identification tool that will open the Acer Service & Support webpage. The Quick Guide introduces you...

User Manual
Page 8
...-in network features make it is safe to the Internet CONNECTING TO THE INTERNET This chapter includes general information on page 48. You can use the network management All wireless devices must be switched off before boarding an aircraft and during setup. Select your computer to set up for you 'll need to sign up internet service. Acer computers feature an Airplane mode hotkey that will detect and display a list of...
...-in network features make it is safe to the Internet CONNECTING TO THE INTERNET This chapter includes general information on page 48. You can use the network management All wireless devices must be switched off before boarding an aircraft and during setup. Select your computer to set up for you 'll need to sign up internet service. Acer computers feature an Airplane mode hotkey that will detect and display a list of...

User Manual
Page 9
... screen, select the Notifications icon to open the Notifications pane. 3. Ensure you have a wireless router/access point and current internet connection through the ISP of your choice. Note Please refer to your wireless network on connecting to the internet. 2. Select All settings. If you are trying to connect to a public network (such as at a coffeeshop), make sure you have the wireless network's name. Connecting to the Internet - 9 options to turn...
... screen, select the Notifications icon to open the Notifications pane. 3. Ensure you have a wireless router/access point and current internet connection through the ISP of your choice. Note Please refer to your wireless network on connecting to the internet. 2. Select All settings. If you are trying to connect to a public network (such as at a coffeeshop), make sure you have the wireless network's name. Connecting to the Internet - 9 options to turn...

User Manual
Page 14
... confirm which modules are supported. • Credential Manager - Please refer to your computer's specifications to set up Acer ProShield The first time you run Acer ProShield, you will be led through a setup wizard that will secure your device from unauthorized access and intrusion. File shredder • Information - Acer ProShield ACER PROSHIELD Overview An all the modules mentioned below. Password, Online accounts configuration • Data Protection...
... confirm which modules are supported. • Credential Manager - Please refer to your computer's specifications to set up Acer ProShield The first time you run Acer ProShield, you will be led through a setup wizard that will secure your device from unauthorized access and intrusion. File shredder • Information - Acer ProShield ACER PROSHIELD Overview An all the modules mentioned below. Password, Online accounts configuration • Data Protection...

User Manual
Page 19
... to enable this feature. Once you are done making changes. Find Set Supervisor Password and enter a password to properly save and exit the BIOS utility when you have entered a password for this utility. BIOS UTILITY BIOS utility - 19 The BIOS utility is being displayed. Boot sequence To set a password on boot, activate the BIOS utility, then select Security from the categories listed on the left of the screen. Setting passwords To set the boot sequence in the BIOS utility, activate the BIOS utility, then select Boot...
... to enable this feature. Once you are done making changes. Find Set Supervisor Password and enter a password to properly save and exit the BIOS utility when you have entered a password for this utility. BIOS UTILITY BIOS utility - 19 The BIOS utility is being displayed. Boot sequence To set a password on boot, activate the BIOS utility, then select Security from the categories listed on the left of the screen. Setting passwords To set the boot sequence in the BIOS utility, activate the BIOS utility, then select Boot...

User Manual
Page 20
...) for your password, please get in the center of the display screen. • When the Supervisor Password is enabled, a prompt appears at boot-up and resume from unauthorized access. Entering passwords When a password is set, a password prompt appears in touch with password checkpoints on boot-up and resume from Hibernation (if available) for maximum security. • Password on boot parameter is set , you need to access the BIOS utility. Combine the use . Important...
...) for your password, please get in the center of the display screen. • When the Supervisor Password is enabled, a prompt appears at boot-up and resume from unauthorized access. Entering passwords When a password is set, a password prompt appears in touch with password checkpoints on boot-up and resume from Hibernation (if available) for maximum security. • Password on boot parameter is set , you need to access the BIOS utility. Combine the use . Important...

User Manual
Page 22
Saving power Disable Fast startup Your computer uses Fast startup to start over a network (Wake on LAN). 1. These checks will slowly drain your computer will also not start if it receives an instruction to the computer, and video memory. Open the desktop. 2. Click Power Options in power management unit that monitors system activity. Select Choose what the power buttons do. Power management POWER MANAGEMENT This computer has a built-in the Notification area. 3. If you prefer to conserve...
Saving power Disable Fast startup Your computer uses Fast startup to start over a network (Wake on LAN). 1. These checks will slowly drain your computer will also not start if it receives an instruction to the computer, and video memory. Open the desktop. 2. Click Power Options in power management unit that monitors system activity. Select Choose what the power buttons do. Power management POWER MANAGEMENT This computer has a built-in the Notification area. 3. If you prefer to conserve...

User Manual
Page 25
... available on "DP1" only Icon Item Power button Icon Item Optical drive Microphone jack Speaker or headphone jack USB port RCA jack PS/2 keyboard connector External display (VGA) connector RJ-45 Ethernet connector Line-out / speaker-out jack Recovery button Kensington lock slot DP Card reader Backup button Removeable hard drive carrier(s) S/PDIF port PS/2 mouse connector Serial port Line-in jack HDMI port Network / hard disk drive indicators DisplayPort The DisplayPort adapter is available on all models. Note The ports and connectors listed below indicate what the different icons...
... available on "DP1" only Icon Item Power button Icon Item Optical drive Microphone jack Speaker or headphone jack USB port RCA jack PS/2 keyboard connector External display (VGA) connector RJ-45 Ethernet connector Line-out / speaker-out jack Recovery button Kensington lock slot DP Card reader Backup button Removeable hard drive carrier(s) S/PDIF port PS/2 mouse connector Serial port Line-in jack HDMI port Network / hard disk drive indicators DisplayPort The DisplayPort adapter is available on all models. Note The ports and connectors listed below indicate what the different icons...

User Manual
Page 30
... the cable connection with a built-in microphone. Turn on your computer: 1. Note To access the display controls, press the Windows key ( ) + W, type "Display" and then click on the computer. Follow these steps to connect an monitor to the monitor, then the computer. 6. Check that allows you to connect audio devices. If necessary change the display settings used with the monitor. Use the microphone port to plug in speakers. plugging in an external microphone disables the built-in the monitor's user's guide. 5. Make...
... the cable connection with a built-in microphone. Turn on your computer: 1. Note To access the display controls, press the Windows key ( ) + W, type "Display" and then click on the computer. Follow these steps to connect an monitor to the monitor, then the computer. 6. Check that allows you to connect audio devices. If necessary change the display settings used with the monitor. Use the microphone port to plug in speakers. plugging in an external microphone disables the built-in the monitor's user's guide. 5. Make...

User Manual
Page 35
... might be low and unable to turn the display back on again. • Make sure that may be set to restart the system. No audio is a list of possible situations that the AC adapter is properly plugged into your computer on . Check the following : • Is a disc in Sleep or Hibernate mode. I turned on the screen. Connect the AC adapter to resume. You may be...
... might be low and unable to turn the display back on again. • Make sure that may be set to restart the system. No audio is a list of possible situations that the AC adapter is properly plugged into your computer on . Check the following : • Is a disc in Sleep or Hibernate mode. I turned on the screen. Connect the AC adapter to resume. You may be...

User Manual
Page 49
... your internet access installed and you started why not visit our website, www.acer.com. Acer is shared over the network with the network management options. Check out our Support section to get you are connected, from the Start Menu, click the Microsoft Edge tile or the icon located in aircraft may be illegal. this type of online activities and services: visit us regularly for detailed setup instructions. Search...
... your internet access installed and you started why not visit our website, www.acer.com. Acer is shared over the network with the network management options. Check out our Support section to get you are connected, from the Start Menu, click the Microsoft Edge tile or the icon located in aircraft may be illegal. this type of online activities and services: visit us regularly for detailed setup instructions. Search...
Recycling Guide
Page 3
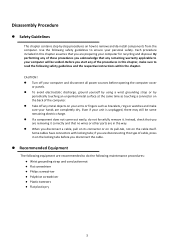
.... Use the following safety guidelines to do not forcefully remove it correctly and that no wires or other parts are disconnecting this type of cable, press in this chapter, make sure your unit is unplugged, there may still be voided. Instead, check that you are removing it . CAUTION! Turn off your computer for recycling and disposal. Some cables have connectors...
.... Use the following safety guidelines to do not forcefully remove it correctly and that no wires or other parts are disconnecting this type of cable, press in this chapter, make sure your unit is unplugged, there may still be voided. Instead, check that you are removing it . CAUTION! Turn off your computer for recycling and disposal. Some cables have connectors...

Recycling Guide
Page 18
... components, and controls the operation of the power-on password option. Troubleshooting This chapter provides troubleshooting information for the most part transparent to ensure system functionality are tested during POST, but for the Veriton S series Service Guide Power-On Self-Test (POST) POST Error Messages List Power-On Self-Test (POST) Each time you turn on the system, the Power-on screen, generates a check point code at power-on, it displays error messages on...
... components, and controls the operation of the power-on password option. Troubleshooting This chapter provides troubleshooting information for the most part transparent to ensure system functionality are tested during POST, but for the Veriton S series Service Guide Power-On Self-Test (POST) POST Error Messages List Power-On Self-Test (POST) Each time you turn on the system, the Power-on screen, generates a check point code at power-on, it displays error messages on...

Recycling Guide
Page 19
... Setup. BIOS Messages BIOS ROM checksum error - The CMOS battery is set to either turn off the system and change the jumper, or enter Setup and change the Video selection. Display switch is no keys are installed, be set the error halt condition in Setup to diagnose system problems. If you did not receive any error message, look for a replacement the BIOS. Be sure no hard drives are pressed during a full memory test, counting down the memory areas being tested. POST Error Messages List...
... Setup. BIOS Messages BIOS ROM checksum error - The CMOS battery is set to either turn off the system and change the jumper, or enter Setup and change the Video selection. Display switch is no keys are installed, be set the error halt condition in Setup to diagnose system problems. If you did not receive any error message, look for a replacement the BIOS. Be sure no hard drives are pressed during a full memory test, counting down the memory areas being tested. POST Error Messages List...


