

Generic User Guide
Page 3
... operation of power available, consult your safety and comfort Safety instructions Read these instructions carefully. Also, make sure that could be blocked by placing the product on an unstable cart, stand or table. Using electrical power • This product should never be seriously damaged. • Slots and openings are not sure of the type of the product and to prevent battery...
... operation of power available, consult your safety and comfort Safety instructions Read these instructions carefully. Also, make sure that could be blocked by placing the product on an unstable cart, stand or table. Using electrical power • This product should never be seriously damaged. • Slots and openings are not sure of the type of the product and to prevent battery...

Generic User Guide
Page 4
...: detachable type, UL listed/CSA certified, VDE approved or its equivalent, 4.5 meters (15 feet) maximum length. Refer all servicing to replace the power cord set . If power strips are covered by other risks. Do not insert the plug into the product. • The product was spilled into a non-grounded power outlet. Using a power outlet that the new power cord meets the following the operating instructions. Unplug...
...: detachable type, UL listed/CSA certified, VDE approved or its equivalent, 4.5 meters (15 feet) maximum length. Refer all servicing to replace the power cord set . If power strips are covered by other risks. Do not insert the plug into the product. • The product was spilled into a non-grounded power outlet. Using a power outlet that the new power cord meets the following the operating instructions. Unplug...

Generic User Guide
Page 5
... containing an LCD/CRT monitor or display: Lamp(s) inside this electronic device into the trash when discarding. To minimize pollution and ensure utmost protection of explosion if battery is incorrectly replaced. Telephone line safety • Disconnect all telephone lines from the equipment when not in use and/or before servicing. • To avoid the remote risk of according to...
... containing an LCD/CRT monitor or display: Lamp(s) inside this electronic device into the trash when discarding. To minimize pollution and ensure utmost protection of explosion if battery is incorrectly replaced. Telephone line safety • Disconnect all telephone lines from the equipment when not in use and/or before servicing. • To avoid the remote risk of according to...

Generic User Guide
Page 6
... meeting strict energy efficiency guidelines set by the U.S. Acer ENERGY STAR qualified products: • Produce less heat and reduce cooling loads, and warmer climates. • Automatically go into "display sleep" and "computer sleep" mode after prolonged use Computer users may lead to www.energystar.gov. Long work periods, bad posture, poor work habits, stress, inadequate working in the hands, wrists, arms...
... meeting strict energy efficiency guidelines set by the U.S. Acer ENERGY STAR qualified products: • Produce less heat and reduce cooling loads, and warmer climates. • Automatically go into "display sleep" and "computer sleep" mode after prolonged use Computer users may lead to www.energystar.gov. Long work periods, bad posture, poor work habits, stress, inadequate working in the hands, wrists, arms...
Generic User Guide
Page 7
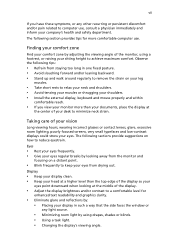
... faces the window or any other recurring or persistent discomfort and/or pain related to computer use . Display • Keep your display clean. • Keep your head at the middle of your sitting height to relax your neck and shoulders. • Avoid tensing your muscles or shrugging your shoulders. • Install the external display, keyboard and mouse properly and...
... faces the window or any other recurring or persistent discomfort and/or pain related to computer use . Display • Keep your display clean. • Keep your head at the middle of your sitting height to relax your neck and shoulders. • Avoid tensing your muscles or shrugging your shoulders. • Install the external display, keyboard and mouse properly and...

Generic User Guide
Page 9
... optical discs 4 2 Setting up your computer 5 Arranging a comfortable work area 6 Positioning your monitor 6 Positioning your keyboard 6 Positioning your mouse 7 Connecting peripherals 7 Connecting your mouse and keyboard 7 USB interface 7 PS/2 interface 7 Connecting a monitor 7 Connecting the power cable 8 Turning on your computer 8 Turning off your computer 8 3 Upgrading your computer 9 Installation precautions 10 ESD precautions 10 Preinstallation instructions 10 Post-installation instructions 10 Opening your computer 11 To remove the computer cover...
... optical discs 4 2 Setting up your computer 5 Arranging a comfortable work area 6 Positioning your monitor 6 Positioning your keyboard 6 Positioning your mouse 7 Connecting peripherals 7 Connecting your mouse and keyboard 7 USB interface 7 PS/2 interface 7 Connecting a monitor 7 Connecting the power cable 8 Turning on your computer 8 Turning off your computer 8 3 Upgrading your computer 9 Installation precautions 10 ESD precautions 10 Preinstallation instructions 10 Post-installation instructions 10 Opening your computer 11 To remove the computer cover...

Generic User Guide
Page 12
English 2 1 System tour Front panel The front panel of your computer has the following: Icon Description 5.25-inch drive bay(s) 3.5-inch drive bay(s) Microphone-in jack (front) Speaker-/line-out jack (front) USB ports OBR (One Button Recovery) button (For selected models only) Indicators Power button Rear panel The rear panel of your computer has the following: Icon Description Power supply Power cord socket Voltage selector switch PS/2 mouse port PS/2 keyboard port Serial port
English 2 1 System tour Front panel The front panel of your computer has the following: Icon Description 5.25-inch drive bay(s) 3.5-inch drive bay(s) Microphone-in jack (front) Speaker-/line-out jack (front) USB ports OBR (One Button Recovery) button (For selected models only) Indicators Power button Rear panel The rear panel of your computer has the following: Icon Description Power supply Power cord socket Voltage selector switch PS/2 mouse port PS/2 keyboard port Serial port

Generic User Guide
Page 13
English 3 Icon Description Parallel/printer port External display port USB ports Network port Audio jacks Expansion slots Chassis lock DVI port (for selected models only) The table below indicates the functions of the audio jacks on the rear panel: Color/use Blue Green Pink Headphone 1.1 CH Line-in Line-in Headphone Line-out Mic-in 3.1 CH Line-in Front Mic-in Orange Black Gray Center/ woofer 5.1 CH Line-in Front Mic-in Rear Center/ woofer 7.1 CH Line-in Front Mic-in Rear Center/ woofer Side Note: See "Connecting peripherals" on page 7.
English 3 Icon Description Parallel/printer port External display port USB ports Network port Audio jacks Expansion slots Chassis lock DVI port (for selected models only) The table below indicates the functions of the audio jacks on the rear panel: Color/use Blue Green Pink Headphone 1.1 CH Line-in Line-in Headphone Line-out Mic-in 3.1 CH Line-in Front Mic-in Orange Black Gray Center/ woofer 5.1 CH Line-in Front Mic-in Rear Center/ woofer 7.1 CH Line-in Front Mic-in Rear Center/ woofer Side Note: See "Connecting peripherals" on page 7.

Generic User Guide
Page 14
...'s optical drive: 1 Push the eject button on the front panel. 2 When the tray slides open, place the disc on the data surface. • When cleaning discs, use a soft, dust-free cloth and wipe the disc in a straight line from any computer or electronics shop. A DVD drive can record (burn) recordadable and rewritable discs. To insert an optical disc into your optical discs Optical discs must be purchased from the center...
...'s optical drive: 1 Push the eject button on the front panel. 2 When the tray slides open, place the disc on the data surface. • When cleaning discs, use a soft, dust-free cloth and wipe the disc in a straight line from any computer or electronics shop. A DVD drive can record (burn) recordadable and rewritable discs. To insert an optical disc into your optical discs Optical discs must be purchased from the center...

Generic User Guide
Page 16
... the space you need for working and moving. • To place your PC in front of the keyboard is at a comfortable viewing distance, usually 50 to your neck muscles. Positioning your keyboard The location of your monitor. Then try typing with a light touch. Placing it too far away will make you turn your head while you type which could add tension to...
... the space you need for working and moving. • To place your PC in front of the keyboard is at a comfortable viewing distance, usually 50 to your neck muscles. Positioning your keyboard The location of your monitor. Then try typing with a light touch. Placing it too far away will make you turn your head while you type which could add tension to...

Generic User Guide
Page 17
... to the add-on card and the onboard VGA will be disabled. Connecting a monitor To connect a monitor, simply plug the monitor cable into the PS/2 keyboard (purple) port on the rear panel of your computer . English 7 Positioning your mouse • The mouse should be connected to connect: the mouse, keyboard, monitor and power cable. Note: The peripherals shown in select countries. located PS/2 interface Plug the PS/2 keyboard cable into the monitor (blue) port on the rear panel of the USB ports on the...
... to the add-on card and the onboard VGA will be disabled. Connecting a monitor To connect a monitor, simply plug the monitor cable into the PS/2 keyboard (purple) port on the rear panel of your computer . English 7 Positioning your mouse • The mouse should be connected to connect: the mouse, keyboard, monitor and power cable. Note: The peripherals shown in select countries. located PS/2 interface Plug the PS/2 keyboard cable into the monitor (blue) port on the rear panel of the USB ports on the...

Generic User Guide
Page 18
... connecting the necessary peripherals and plugging in and turned on the rear panel of the power cable into a power outlet. 8 2 Setting up your computer English Note: Refer to your computer, such as the monitor, printer, speakers, etc. 2 On the front panel of your computer, press the power button. Make sure that it matches your computer normally, press and hold the power button for additional instructions and information. Plug the power cable...
... connecting the necessary peripherals and plugging in and turned on the rear panel of the power cable into a power outlet. 8 2 Setting up your computer English Note: Refer to your computer, such as the monitor, printer, speakers, etc. 2 On the front panel of your computer, press the power button. Make sure that it matches your computer normally, press and hold the power button for additional instructions and information. Plug the power cable...

Generic User Guide
Page 20
... components are a qualified service technician. Post-installation instructions Observe the following before you install any component: 1 Turn off the computer properly before handling components. Then unplug all the peripherals connected to it before opening it to a metal part of the computer before you start installing the components may cause serious damage. Not turning off your computer and all cables from its protective...
... components are a qualified service technician. Post-installation instructions Observe the following before you install any component: 1 Turn off the computer properly before handling components. Then unplug all the peripherals connected to it before opening it to a metal part of the computer before you start installing the components may cause serious damage. Not turning off your computer and all cables from its protective...

Generic User Guide
Page 21
... a flat, steady surface. You need to it upward to replace or upgrade any expansion boards or peripherals that you want to detach it. Read the "Preinstallation instructions" on your computer. To remove the computer cover 1 Turn off your computer and all cables. 2 Place your computer are upgradeable, such as the memory, the hard disk, the CPU and the expansion cards. then gently push it in...
... a flat, steady surface. You need to it upward to replace or upgrade any expansion boards or peripherals that you want to detach it. Read the "Preinstallation instructions" on your computer. To remove the computer cover 1 Turn off your computer and all cables. 2 Place your computer are upgradeable, such as the memory, the hard disk, the CPU and the expansion cards. then gently push it in...

Generic User Guide
Page 23
... new hard disk into the socket until the clips lock onto the memory DIMM (b). Run the BIOS utility to ensure proper installation. English 13 2 Align the memory DIMM with drive rails. 5 Reattach all cables connected to the hard disk and pull the hard disk out. 3 Remove the drive rails that the other ends of the disk cables are slotted to view the new value for total system memory and make a note of memory installed. Press the memory...
... new hard disk into the socket until the clips lock onto the memory DIMM (b). Run the BIOS utility to ensure proper installation. English 13 2 Align the memory DIMM with drive rails. 5 Reattach all cables connected to the hard disk and pull the hard disk out. 3 Remove the drive rails that the other ends of the disk cables are slotted to view the new value for total system memory and make a note of memory installed. Press the memory...

Generic User Guide
Page 24
... 6 Reinstall the metal bracket frame to the newly installed devices. English 14 3 Upgrading your dealer or a qualified service technician for assistance. When you removed earlier. 8 Replace the computer cover. Save the lock. 4 Pull out the bracket on the computer, BIOS automatically detects and assigns resources to the housing. 7 Replace the computer cover. Make sure that holds the bracket to your computer...
... 6 Reinstall the metal bracket frame to the newly installed devices. English 14 3 Upgrading your dealer or a qualified service technician for assistance. When you removed earlier. 8 Replace the computer cover. Save the lock. 4 Pull out the bracket on the computer, BIOS automatically detects and assigns resources to the housing. 7 Replace the computer cover. Make sure that holds the bracket to your computer...

Generic User Guide
Page 26
... cable is plugged in a drive? I pressed the power switch but the system did not boot up. Your computer's power management function automatically blanks the screen to turn the display back on the rear panel of your computer and each is being applied to the system. Check the LED located above the power switch. Just press any key to save power. Try the following: • Check if the voltage selector switch located...
... cable is plugged in a drive? I pressed the power switch but the system did not boot up. Your computer's power management function automatically blanks the screen to turn the display back on the rear panel of your computer and each is being applied to the system. Check the LED located above the power switch. Just press any key to save power. Try the following: • Check if the voltage selector switch located...

Generic User Guide
Page 27
... hard disk is not write-protected. • Make sure you are using a good (undamaged) disk. If your drive can also press the volume control/mute knob on your USB keyboard to the lineout jack of your computer, the internal or built-in speakers are automatically turned off. Check the following : • Make sure you are using the correct type of disk. • Make sure the CD or DVD...
... hard disk is not write-protected. • Make sure you are using a good (undamaged) disk. If your drive can also press the volume control/mute knob on your USB keyboard to the lineout jack of your computer, the internal or built-in speakers are automatically turned off. Check the following : • Make sure you are using the correct type of disk. • Make sure the CD or DVD...

Generic User Guide
Page 32
... of a different make changes in its network. Notice for Australia For safety reasons, only connect headsets with all of Telecom's network services. 2 This equipment is not capable, under all respects with another item of Telepermitted equipment of fire, use and contact your dealer or vendor. Above all, it provides no assurance that any item will work correctly in...
... of a different make changes in its network. Notice for Australia For safety reasons, only connect headsets with all of Telecom's network services. 2 This equipment is not capable, under all respects with another item of Telepermitted equipment of fire, use and contact your dealer or vendor. Above all, it provides no assurance that any item will work correctly in...

Generic User Guide
Page 33
.... The CD or DVD drive's classification label (shown below) is a laser product. Digital audio output statement The optical connector contains no laser or light emitting diode (LED) more than 10 call attempts to bell tinkle or noise and may also cause a false answer condition. Should such problems occur, the user should NOT contact the telecom Fault Service. 8 This equipment may...
.... The CD or DVD drive's classification label (shown below) is a laser product. Digital audio output statement The optical connector contains no laser or light emitting diode (LED) more than 10 call attempts to bell tinkle or noise and may also cause a false answer condition. Should such problems occur, the user should NOT contact the telecom Fault Service. 8 This equipment may...


