
Safety Guide
Page 9
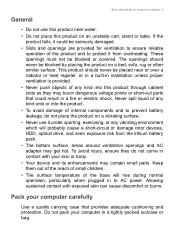
... and to AC power. The openings should never be seriously damaged. • Slots and openings are provided for using your computer in ...Do not use it from the lithium battery pack. • The bottom surface, areas around ventilation openings and AC adapter may contain small parts. Never ...devices, HDD, optical drive, and even exposure risk from overheating. Keep them out of the reach of small children. • The surface temperature of any vibrating environment which will rise during normal operation, particularly when plugged in a fire or electric shock. These openings...
... and to AC power. The openings should never be seriously damaged. • Slots and openings are provided for using your computer in ...Do not use it from the lithium battery pack. • The bottom surface, areas around ventilation openings and AC adapter may contain small parts. Never ...devices, HDD, optical drive, and even exposure risk from overheating. Keep them out of the reach of small children. • The surface temperature of any vibrating environment which will rise during normal operation, particularly when plugged in a fire or electric shock. These openings...

Safety Guide
Page 11
.... Disconnect the AC adapter. 3. Battery and adapter information Accessing the power Be sure that the power outlet you plug into is easily accessible and located as possible. Before handling an electronic device, discharge static electricity by unplugging all power cords from the computer. If you need to disconnect power to the equipment operator as close to the equipment, be operated from the type of power available, consult...
.... Disconnect the AC adapter. 3. Battery and adapter information Accessing the power Be sure that the power outlet you plug into is easily accessible and located as possible. Before handling an electronic device, discharge static electricity by unplugging all power cords from the computer. If you need to disconnect power to the equipment operator as close to the equipment, be operated from the type of power available, consult...

Safety Guide
Page 20
... in Power Management). • Wake the computer from sleep mode by pushing keyboard or moving mouse. • Computers will save more than 80% energy at "sleep" mode. Use the device only in this device requires a good quality connection to your laptop under the following conditions. Remember to : wireless LAN (WLAN), Bluetooth and/or cellular. Do not place credit cards or other magnetic storage media near the device, because...
... in Power Management). • Wake the computer from sleep mode by pushing keyboard or moving mouse. • Computers will save more than 80% energy at "sleep" mode. Use the device only in this device requires a good quality connection to your laptop under the following conditions. Remember to : wireless LAN (WLAN), Bluetooth and/or cellular. Do not place credit cards or other magnetic storage media near the device, because...

Safety Guide
Page 22
... to the limits set forth by each hospital. FCC requires this device. Warnings and regulatory information supplement C, 2001, and ANSI/IEEE C95.1, 1992. No configuration controls are allocated as primary users of wireless adapters in hospitals is restricted to 5.725 GHz frequency ranges. Proper operation of this radio according to the instructions found in this manual will result in exposure...
... to the limits set forth by each hospital. FCC requires this device. Warnings and regulatory information supplement C, 2001, and ANSI/IEEE C95.1, 1992. No configuration controls are allocated as primary users of wireless adapters in hospitals is restricted to 5.725 GHz frequency ranges. Proper operation of this radio according to the instructions found in this manual will result in exposure...

User Manual
Page 2
... liable for an Acer ID and enable Acer Remote Files 1. Images provided herein are connected to the Internet. 2. Sign up for technical or editorial errors or omissions contained in this manual. Register your Acer product After we receive your product registration, you have an Acer ID. 2 - © 2017. All Rights Reserved. Open www.acer.com and select your information to be updated to your registered...
... liable for an Acer ID and enable Acer Remote Files 1. Images provided herein are connected to the Internet. 2. Sign up for technical or editorial errors or omissions contained in this manual. Register your Acer product After we receive your product registration, you have an Acer ID. 2 - © 2017. All Rights Reserved. Open www.acer.com and select your information to be updated to your registered...

User Manual
Page 3
... BIOS utility 19 Boot sequence 19 Setting passwords 19 Securing your computer 20 Using passwords 20 Entering passwords 20 Power management 22 Saving power 22 Ports and connectors 25 Information on USB 3.0 26 Rear panel audio ports 26 Micro USB 27 Memory card reader 28 Connectivity options 28 Video and audio connectors 30 HDMI 31 HDMI Micro 32 Universal Serial Bus (USB) 33 Frequently asked questions 35 Requesting service 37 Tips and hints for using Windows 10 ..... 39 How do I get to Start 39 How do I turn...
... BIOS utility 19 Boot sequence 19 Setting passwords 19 Securing your computer 20 Using passwords 20 Entering passwords 20 Power management 22 Saving power 22 Ports and connectors 25 Information on USB 3.0 26 Rear panel audio ports 26 Micro USB 27 Memory card reader 28 Connectivity options 28 Video and audio connectors 30 HDMI 31 HDMI Micro 32 Universal Serial Bus (USB) 33 Frequently asked questions 35 Requesting service 37 Tips and hints for using Windows 10 ..... 39 How do I get to Start 39 How do I turn...

User Manual
Page 5
... Drivers and Manuals and search for using your computer Turning your computer off To turn the power off , the Setup Guide (or Setup Poster) helps you for making this information and allow you to the clipboard. You may also download and install the Acer identification tool that will open the Acer Service & Support webpage. Open Acer Care Center from the desktop and click on such subjects as system utilities, data recovery, expansion options and troubleshooting...
... Drivers and Manuals and search for using your computer Turning your computer off To turn the power off , the Setup Guide (or Setup Poster) helps you for making this information and allow you to the clipboard. You may also download and install the Acer identification tool that will open the Acer Service & Support webpage. Open Acer Care Center from the desktop and click on such subjects as system utilities, data recovery, expansion options and troubleshooting...

User Manual
Page 8
... network and enter the password if required. You may not apply to your computer to a wireless LAN A wireless LAN (or WLAN) is turned on your computer's wireless devices only when informed that will detect and display a list of connections, and getting connected to set up for you to connect to the internet, you can use the network management Connecting to sign up internet service. Once connected to WLAN, you 'll need to the Internet CONNECTING TO THE INTERNET...
... network and enter the password if required. You may not apply to your computer to a wireless LAN A wireless LAN (or WLAN) is turned on your computer's wireless devices only when informed that will detect and display a list of connections, and getting connected to set up for you to connect to the internet, you can use the network management Connecting to sign up internet service. Once connected to WLAN, you 'll need to the Internet CONNECTING TO THE INTERNET...

User Manual
Page 9
Make a note of the screen, select the Notifications icon to open the Notifications pane. 3. Select All settings. To connect to the internet. 2. Note Please refer to your ISP or router documentation for details on /off or control what is shared over the network. Ensure you have the wireless network's name. If you are trying to connect to turn your wireless network on connecting to a wireless network, please follow...
Make a note of the screen, select the Notifications icon to open the Notifications pane. 3. Select All settings. To connect to the internet. 2. Note Please refer to your ISP or router documentation for details on /off or control what is shared over the network. Ensure you have the wireless network's name. If you are trying to connect to turn your wireless network on connecting to a wireless network, please follow...

User Manual
Page 14
... the following points of vulnerability: • Securing the device against unauthorized access • Protecting local storage • Securing the network Acer ProShield includes four modules that will be led through a setup wizard that allows you will secure your computer's specifications to set up Acer ProShield The first time you run Acer ProShield, you to confirm which modules are supported. • Credential Manager - 14 -
... the following points of vulnerability: • Securing the device against unauthorized access • Protecting local storage • Securing the network Acer ProShield includes four modules that will be led through a setup wizard that allows you will secure your computer's specifications to set up Acer ProShield The first time you run Acer ProShield, you to confirm which modules are supported. • Credential Manager - 14 -

User Manual
Page 19
... may then enable/disable Password on the left of the screen. However, if you encounter configuration problems, you may need to run it. Find Set Supervisor Password and enter a password to run this feature. Your computer is already properly configured and optimized, and you are done making changes. Setting passwords To set the boot sequence in the BIOS utility, activate the BIOS utility, then select Boot from the categories listed on Boot. BIOS UTILITY BIOS utility - 19 The BIOS utility is being displayed. Remember...
... may then enable/disable Password on the left of the screen. However, if you encounter configuration problems, you may need to run it. Find Set Supervisor Password and enter a password to run this feature. Your computer is already properly configured and optimized, and you are done making changes. Setting passwords To set the boot sequence in the BIOS utility, activate the BIOS utility, then select Boot from the categories listed on Boot. BIOS UTILITY BIOS utility - 19 The BIOS utility is being displayed. Remember...

User Manual
Page 20
... computer. Entering passwords When a password is set , you enter the BIOS utility. • Type the Supervisor Password and press to protect and take care of your dealer or an authorized service center. Learn how to access the BIOS utility. Setting these passwords creates several different levels of protection for maximum security. • Password on page 19. • User Password secures your Supervisor Password! Combine the use . 20 - If you enter the password incorrectly...
... computer. Entering passwords When a password is set , you enter the BIOS utility. • Type the Supervisor Password and press to protect and take care of your dealer or an authorized service center. Learn how to access the BIOS utility. Setting these passwords creates several different levels of protection for maximum security. • Password on page 19. • User Password secures your Supervisor Password! Combine the use . 20 - If you enter the password incorrectly...

User Manual
Page 22
... video memory. Saving power Disable Fast startup Your computer uses Fast startup to start quickly, but also uses a small amount of power to check for a period of time, the computer stops some or all of the following devices: keyboard, mouse, hard disk, peripherals connected to conserve energy. These checks will take longer to start over a network (Wake on LAN). 1. Select More Power Options. 4. Your computer will also not start if it receives an instruction...
... video memory. Saving power Disable Fast startup Your computer uses Fast startup to start quickly, but also uses a small amount of power to check for a period of time, the computer stops some or all of the following devices: keyboard, mouse, hard disk, peripherals connected to conserve energy. These checks will take longer to start over a network (Wake on LAN). 1. Select More Power Options. 4. Your computer will also not start if it receives an instruction...

User Manual
Page 25
... button Icon Item Optical drive Microphone jack Speaker or headphone jack USB port RCA jack PS/2 keyboard connector External display (VGA) connector RJ-45 Ethernet connector Line-out / speaker-out jack Recovery button Kensington lock slot DP Card reader Backup button Removeable hard drive carrier(s) S/PDIF port PS/2 mouse connector Serial port Line-in jack HDMI port Network / hard disk drive indicators DisplayPort The DisplayPort adapter is available on all models. Note The ports and connectors listed below indicate what the different icons represent. Ports and connectors - 25 PORTS...
... button Icon Item Optical drive Microphone jack Speaker or headphone jack USB port RCA jack PS/2 keyboard connector External display (VGA) connector RJ-45 Ethernet connector Line-out / speaker-out jack Recovery button Kensington lock slot DP Card reader Backup button Removeable hard drive carrier(s) S/PDIF port PS/2 mouse connector Serial port Line-in jack HDMI port Network / hard disk drive indicators DisplayPort The DisplayPort adapter is available on all models. Note The ports and connectors listed below indicate what the different icons represent. Ports and connectors - 25 PORTS...

User Manual
Page 30
... port disables the built-in the monitor's user's guide. 5. Connect the monitor power cable and plug it into a properly grounded wall outlet. 4. Note To access the display controls, press the Windows key ( ) + W, type "Display" and then click on the computer. plugging in an external microphone disables the built-in stereo headphones or powered speakers. The appropriate cable is turned off and the monitor power switch is usually included with a built-in microphone. Attach the video cable to your computer's configuration...
... port disables the built-in the monitor's user's guide. 5. Connect the monitor power cable and plug it into a properly grounded wall outlet. 4. Note To access the display controls, press the Windows key ( ) + W, type "Display" and then click on the computer. plugging in an external microphone disables the built-in stereo headphones or powered speakers. The appropriate cable is turned off and the monitor power switch is usually included with a built-in microphone. Attach the video cable to your computer's configuration...

User Manual
Page 35
.... • Make sure that the AC adapter is properly plugged into your computer? Press + < > (increase) to recharge the battery pack. Frequently asked questions - 35 FREQUENTLY ASKED QUESTIONS The following is flashing, the computer may be in the optical drive? I turned on the screen. Check the following : Connect the AC adapter to adjust the brightness level. • The display device might be set to the...
.... • Make sure that the AC adapter is properly plugged into your computer? Press + < > (increase) to recharge the battery pack. Frequently asked questions - 35 FREQUENTLY ASKED QUESTIONS The following is flashing, the computer may be in the optical drive? I turned on the screen. Check the following : Connect the AC adapter to adjust the brightness level. • The display device might be set to the...

User Manual
Page 49
... is used to connect peripheral devices to the operation of online activities and services: visit us regularly for detailed setup instructions. Wireless adapter Most computers feature a wireless module and Wi-Fi button that turns the network connection on or off , ask the cabin crew if you have your internet experience to get you with the network management options. they may enable Wi-Fi. Switch off . Internet and online security - 49 services. Network cable (RJ45) A network cable...
... is used to connect peripheral devices to the operation of online activities and services: visit us regularly for detailed setup instructions. Wireless adapter Most computers feature a wireless module and Wi-Fi button that turns the network connection on or off , ask the cabin crew if you have your internet experience to get you with the network management options. they may enable Wi-Fi. Switch off . Internet and online security - 49 services. Network cable (RJ45) A network cable...

Recycling Guide
Page 3
... cables have connectors with locking tabs; By performing any of these procedures you acknowledge that you are preparing your hands are disconnecting this chapter, make sure your computer for recycling and disposal. CAUTION! Turn off your computer and disconnect all power sources before opening the computer cover or panels. To avoid electrostatic discharge, ground yourself by using...
... cables have connectors with locking tabs; By performing any of these procedures you acknowledge that you are preparing your hands are disconnecting this chapter, make sure your computer for recycling and disposal. CAUTION! Turn off your computer and disconnect all power sources before opening the computer cover or panels. To avoid electrostatic discharge, ground yourself by using...

Recycling Guide
Page 17
... and change the jumper, or enter Setup and change the Video selection. To diagnose a problem, first find or initialize the hard drive controller or the drive. CPU at run specific disk diagnostic Routines. This message indicates the switch is installed correctly. Cannot find the BIOS error messages in "Error Symptoms List". Keyboard Error Or No Keyboard Present Cannot initialize the keyboard. If you did not receive any error message, look for a replacement the BIOS. BIOS Messages BIOS ROM checksum error - defaults loaded The CMOS battery is...
... and change the jumper, or enter Setup and change the Video selection. To diagnose a problem, first find or initialize the hard drive controller or the drive. CPU at run specific disk diagnostic Routines. This message indicates the switch is installed correctly. Cannot find the BIOS error messages in "Error Symptoms List". Keyboard Error Or No Keyboard Present Cannot initialize the keyboard. If you did not receive any error message, look for a replacement the BIOS. BIOS Messages BIOS ROM checksum error - defaults loaded The CMOS battery is...
Recycling Guide
Page 21
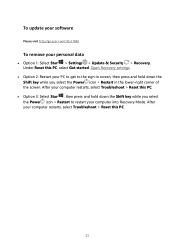
... the Power icon > Restart in screen, then press and hold down the Shift key while you select the Power icon > Restart to restart your computer restarts, select Troubleshoot > Reset this PC, select Get started. After your computer into Recovery Mode. Open Recovery settings. Option 2: Restart your personal data Option 1: Select Start > Settings > Update & Security > Recovery. To update your software Please visit http://go.acer.com/?id=17883 To remove your...
... the Power icon > Restart in screen, then press and hold down the Shift key while you select the Power icon > Restart to restart your computer restarts, select Troubleshoot > Reset this PC, select Get started. After your computer into Recovery Mode. Open Recovery settings. Option 2: Restart your personal data Option 1: Select Start > Settings > Update & Security > Recovery. To update your software Please visit http://go.acer.com/?id=17883 To remove your...


