
User Manual
Page 3
... has multiple sources of internal components and to the external power supply unit: yy Install the power supply unit before cleaning. The openings should never be sure to the AC power outlet. When you plug the power cord into is provided. Turning the product off before cleaning Unplug this product from the wall outlet before connecting the power cord to unplug the power cord from the power supplies. Caution for...
... has multiple sources of internal components and to the external power supply unit: yy Install the power supply unit before cleaning. The openings should never be sure to the AC power outlet. When you plug the power cord into is provided. Turning the product off before cleaning Unplug this product from the wall outlet before connecting the power cord to unplug the power cord from the power supplies. Caution for...
User Manual
Page 4
... supplied power supply cord set , make sure that may result in just 2 hours and can lead to rest on the cord. yy This product contains a coin cell battery. yy Keep new and used , the load should be operated from unexpected noise produced by other nearby electrical devices that the new power cord meets the following precautions for details. yy If you need to replace the power cord set...
... supplied power supply cord set , make sure that may result in just 2 hours and can lead to rest on the cord. yy This product contains a coin cell battery. yy Keep new and used , the load should be operated from unexpected noise produced by other nearby electrical devices that the new power cord meets the following precautions for details. yy If you need to replace the power cord set...
User Manual
Page 5
... air around the projector is on the projector first and then signal sources yy Do not place the product in following the operating instructions Note: Adjust only those controls that is damaged, cut or frayed yy liquid was spilled into the projector's lens when the light is necessary. It might cause fire or electric shock. yy Locations where temperatures may hurt your projector. Refer all windows...
... air around the projector is on the projector first and then signal sources yy Do not place the product in following the operating instructions Note: Adjust only those controls that is damaged, cut or frayed yy liquid was spilled into the projector's lens when the light is necessary. It might cause fire or electric shock. yy Locations where temperatures may hurt your projector. Refer all windows...

User Manual
Page 6
... not attempt to suitable qualified professional service personnel. There are dangerous high voltages inside may cause the projector to block out noisy surroundings. yy When switching the projector off the main power abruptly or unplug the projector during operation. The temperatue inside which becomes hot. yy 360° projection capability Images can lead to turn off , suggest to the sun. yy...
... not attempt to suitable qualified professional service personnel. There are dangerous high voltages inside may cause the projector to block out noisy surroundings. yy When switching the projector off the main power abruptly or unplug the projector during operation. The temperatue inside which becomes hot. yy 360° projection capability Images can lead to turn off , suggest to the sun. yy...

User Manual
Page 9
......12 Input / Output Connections 13 Control Panel...14 Remote Control...15 Installing the Remote Control Battery 16 Operating Range with Remote Control 16 Installation...17 Connecting the Projector...17 Turning On/Off the Projector 19 Turning Your Projector On 19 Turning Your Projector Off 19 Adjusting the Projected Image 20 Adjusting Projection Image Size 21 User Controls...23 Using the On-Screen Display 23 Main Menu (Type 1)...23 Image...24 Display...25 Setup...26 Setup > Advanced 27 Info...27 Main Menu (Type 2)...28 Audio...28 Color...29 Image...30 3D...31 Setup...32...
......12 Input / Output Connections 13 Control Panel...14 Remote Control...15 Installing the Remote Control Battery 16 Operating Range with Remote Control 16 Installation...17 Connecting the Projector...17 Turning On/Off the Projector 19 Turning Your Projector On 19 Turning Your Projector Off 19 Adjusting the Projected Image 20 Adjusting Projection Image Size 21 User Controls...23 Using the On-Screen Display 23 Main Menu (Type 1)...23 Image...24 Display...25 Setup...26 Setup > Advanced 27 Info...27 Main Menu (Type 2)...28 Audio...28 Color...29 Image...30 3D...31 Setup...32...

User Manual
Page 13
... power. In addition, USB2 supports Wireless adapter. - Use the USB connectors for firmware upgrade or for optional Wireless Adapter* 3 HDMI/MHL connector 4 VGA/YPbPr connector 5 VIDEO connector 6 AUDIO IN connector 7 AUDIO OUT connector 8 Power socket 9 KensingtonTM Lock Port Note: - Multimedia: Display photos, movies, documents and play music files from a USB drive plugged into USB1. Both File Reader and Wireless Adapter USB A connectors support up to project. Input / Output Connections 12 3 4 5 67 9 8 # Description 1 USB1 File Reader and Service* 2 USB2 for multimedia...
... power. In addition, USB2 supports Wireless adapter. - Use the USB connectors for firmware upgrade or for optional Wireless Adapter* 3 HDMI/MHL connector 4 VGA/YPbPr connector 5 VIDEO connector 6 AUDIO IN connector 7 AUDIO OUT connector 8 Power socket 9 KensingtonTM Lock Port Note: - Multimedia: Display photos, movies, documents and play music files from a USB drive plugged into USB1. Both File Reader and Wireless Adapter USB A connectors support up to project. Input / Output Connections 12 3 4 5 67 9 8 # Description 1 USB1 File Reader and Service* 2 USB2 for multimedia...

User Manual
Page 14
Control Panel 1 234 11 10 5 9 6 8 7 # Name Description 1 Power LED Indicates the projector's power status. Please refer to "Status Indicators" for more information on or off. 11 Four Directional Press to activate the On-Screen Display (OSD) Menu. Please refer to "Status Indicators" for more information on Lamp LED behavior. 3 Keystone Correction Adjusts the image to compensate for more information on Temp LED behavior. 5 Information Displays the projector information. 6 Re-Sync Automatically synchronizes the projector to the input source. 7 Enter...
Control Panel 1 234 11 10 5 9 6 8 7 # Name Description 1 Power LED Indicates the projector's power status. Please refer to "Status Indicators" for more information on or off. 11 Four Directional Press to activate the On-Screen Display (OSD) Menu. Please refer to "Status Indicators" for more information on Lamp LED behavior. 3 Keystone Correction Adjusts the image to compensate for more information on Temp LED behavior. 5 Information Displays the projector information. 6 Re-Sync Automatically synchronizes the projector to the input source. 7 Enter...
User Manual
Page 18
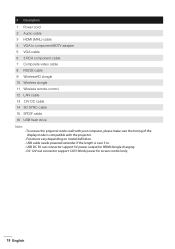
... cable 7 Composite video cable 8 RS232 cable 9 WirelessHD dongle 10 Wireless dongle 11 Wireless remote control 12 LAN cable 13 12V DC cable 14 3D SYNC cable 15 SPDIF cable 16 USB flash drive Note: - USB DC 5V out connector support 5V power output for screen control only. 18 English DC 12V out connector support 12V/100mA power for HDMI dongle charging. - To ensure the projector works well with your computer, please make sure the timing of the display mode...
... cable 7 Composite video cable 8 RS232 cable 9 WirelessHD dongle 10 Wireless dongle 11 Wireless remote control 12 LAN cable 13 12V DC cable 14 3D SYNC cable 15 SPDIF cable 16 USB flash drive Note: - USB DC 5V out connector support 5V power output for screen control only. 18 English DC 12V out connector support 12V/100mA power for HDMI dongle charging. - To ensure the projector works well with your computer, please make sure the timing of the display mode...

User Manual
Page 19
... be displayed. Power Off? Turn on the source (computer, DVD player, etc.). The cooling fans continue to properly turn on your source to clear it. 1. Power Off? Disconnect the power cord from the electrical outlet and the projector. Press the Power button again. The Power LED is lighted solid red until the Power button is determined by the last connected input source. (By default, the input source of the projector if necessary. Connect the power cord and appropriate signal cables to HDMI). message...
... be displayed. Power Off? Turn on the source (computer, DVD player, etc.). The cooling fans continue to properly turn on your source to clear it. 1. Power Off? Disconnect the power cord from the electrical outlet and the projector. Press the Power button again. The Power LED is lighted solid red until the Power button is determined by the last connected input source. (By default, the input source of the projector if necessary. Connect the power cord and appropriate signal cables to HDMI). message...
User Manual
Page 23
... Mode: Optimize the display image. Contrast: Adjust the display contrast. Volume: Adjust the volume. The options are : VGA, HDMI, Media, and Video. Brightness: Adjust the display brightness. To select an option, press the or button. 4. Main Menu (Type 1) Menu Input Source Volume Display Mode Brightness Contrast Image Display Setup Info HDMI Bright Select Exit Enter Input Source: Select your projector's input source. Press the Enter button to adjust the settings. 5. Use the or button to select highlighted menu items. 6. English 23 User Controls Using the On-Screen...
... Mode: Optimize the display image. Contrast: Adjust the display contrast. Volume: Adjust the volume. The options are : VGA, HDMI, Media, and Video. Brightness: Adjust the display brightness. To select an option, press the or button. 4. Main Menu (Type 1) Menu Input Source Volume Display Mode Brightness Contrast Image Display Setup Info HDMI Bright Select Exit Enter Input Source: Select your projector's input source. Press the Enter button to adjust the settings. 5. Use the or button to select highlighted menu items. 6. English 23 User Controls Using the On-Screen...

User Manual
Page 24
... projects a 4:3 image. Zoom: Zoom in VGA mode. Color Space: Select an appropriate color matrix type. If the image appears to be unstable or flickers, use the Frequency control to match the frequency of the image. Note: The Phase can be adjusted only in VGA mode. 24 English yy 4:3: The input source scales to fit the screen and projects a 16:10 image. This is a fine adjustment. Phase: Synchronize the signal timing of the display with computer sources...
... projects a 4:3 image. Zoom: Zoom in VGA mode. Color Space: Select an appropriate color matrix type. If the image appears to be unstable or flickers, use the Frequency control to match the frequency of the image. Note: The Phase can be adjusted only in VGA mode. 24 English yy 4:3: The input source scales to fit the screen and projects a 16:10 image. This is a fine adjustment. Phase: Synchronize the signal timing of the display with computer sources...

User Manual
Page 26
... : Auto, VGA, Video, HDMI, and Media. Note: If the Sleep Timer is applied, without a video source. The projector will be displayed. After choosing this option, a confirmation message appears on the remote control. Reset Reset? No Yes 26 English Options are : Auto, Off, 0.5, 1, 3, 8, 12. Reset: Reset all settings to Auto the last source used will automatically shut off after the selected time. Boot-up Source: Select the projector's boot-up Source Direct Power On Sleep Timer (Hours) Advanced Reset English Auto Off...
... : Auto, VGA, Video, HDMI, and Media. Note: If the Sleep Timer is applied, without a video source. The projector will be displayed. After choosing this option, a confirmation message appears on the remote control. Reset Reset? No Yes 26 English Options are : Auto, Off, 0.5, 1, 3, 8, 12. Reset: Reset all settings to Auto the last source used will automatically shut off after the selected time. Boot-up Source: Select the projector's boot-up Source Direct Power On Sleep Timer (Hours) Advanced Reset English Auto Off...

User Manual
Page 29
... providing true more vibrant colors in HDMI mode. Note: Not available with computer sources. Gamma: Set up gamma curve type. Note: The Color Space function is supported only in the image. Color Temperature: Select the color temperature. Color Space: Select an appropriate color matrix type. Color Color Brightness Contrast Saturation Hue BrilliantColor Color Temperature Gamma Color Space Warm Auto Select Exit Enter Brightness: Adjust the display brightness. Contrast: Adjust the display contrast. Options are...
... providing true more vibrant colors in HDMI mode. Note: Not available with computer sources. Gamma: Set up gamma curve type. Note: The Color Space function is supported only in the image. Color Temperature: Select the color temperature. Color Space: Select an appropriate color matrix type. Color Color Brightness Contrast Saturation Hue BrilliantColor Color Temperature Gamma Color Space Warm Auto Select Exit Enter Brightness: Adjust the display brightness. Contrast: Adjust the display contrast. Options are...

User Manual
Page 30
... or out of the image. Options are: yy Auto: Automatically selects the appropriate display format. If you see a vertical flickering wave, use the Frequency control to fit the screen and projects a 4:3 image. yy 4:3: The input source scales to minimize the bars. yy Auto Keystone: On Direct projection Rear projection yy Auto Keystone: Off Direct projection Rear projection Ceiling mount projection Ceiling mount rear projection Aspect Ratio: Adjust the aspect ratio to match the video source. Image Image Projection Aspect Ratio Auto Zoom Sharpness H.
... or out of the image. Options are: yy Auto: Automatically selects the appropriate display format. If you see a vertical flickering wave, use the Frequency control to fit the screen and projects a 4:3 image. yy 4:3: The input source scales to minimize the bars. yy Auto Keystone: On Direct projection Rear projection yy Auto Keystone: Off Direct projection Rear projection Ceiling mount projection Ceiling mount rear projection Aspect Ratio: Adjust the aspect ratio to match the video source. Image Image Projection Aspect Ratio Auto Zoom Sharpness H.

User Manual
Page 32
... source, even if the cable is applied, without a video source. Source Lock: Select On to enable DC 5V output function when using either of the USB connectors: USB1 or USB2. HDMI EDID: Select the HDMI EDID type from 2.0 or 1.4. 32 English Setup Setup Language Source Lock Auto Keystone Keystone Sleep Timer (Hours) Direct Power On DC 5V Out High Altitude HDMI EDID Reset English Off Off Auto Off Off Off Select Exit Enter Language: Set...
... source, even if the cable is applied, without a video source. Source Lock: Select On to enable DC 5V output function when using either of the USB connectors: USB1 or USB2. HDMI EDID: Select the HDMI EDID type from 2.0 or 1.4. 32 English Setup Setup Language Source Lock Auto Keystone Keystone Sleep Timer (Hours) Direct Power On DC 5V Out High Altitude HDMI EDID Reset English Off Off Auto Off Off Off Select Exit Enter Language: Set...
User Manual
Page 37
Connect the power cord to your projector: 1. Select the Media source using the remote control or control panel on your projector. English 37 Plug in order to set-up File Type for Multi-Media with USB Note: 1. The Multi-Media menu opens. Please do not connect a camera to USB port in a USB flash disk to the projector and turn on the projector by pressing the Menu button. 3. Select the EZ Media icon, and then press the...
Connect the power cord to your projector: 1. Select the Media source using the remote control or control panel on your projector. English 37 Plug in order to set-up File Type for Multi-Media with USB Note: 1. The Multi-Media menu opens. Please do not connect a camera to USB port in a USB flash disk to the projector and turn on the projector by pressing the Menu button. 3. Select the EZ Media icon, and then press the...
User Manual
Page 45
... press the Enter button to the next photo after the time out. Video Setup Access the video settings menu. The photo settings menu provides the following option: English 45 Options are : Off, Mode A, Mode B, or Mode C. The video setting menu provides the following options: Effect Select the slide transition effect for the slideshow. The image will automatically switch to exit the menu without saving the settings. Options are : 10...
... press the Enter button to the next photo after the time out. Video Setup Access the video settings menu. The photo settings menu provides the following option: English 45 Options are : Off, Mode A, Mode B, or Mode C. The video setting menu provides the following options: Effect Select the slide transition effect for the slideshow. The image will automatically switch to exit the menu without saving the settings. Options are : 10...

User Manual
Page 54
... displayed properly, please upgrade the video driver of your presentation Image is unstable or flickering Image has vertical flickering bar Image is out of the projected image according to "Adjusting Projection Image Size" for more information.) yy The projector automatically detects the input signal format. yy If you have chosen the correct input source on the projector lens. yy Adjust the frequency in the OSD. yy Adjust the focus ring on the OSD Menu > Input Source menu. If the problem...
... displayed properly, please upgrade the video driver of your presentation Image is unstable or flickering Image has vertical flickering bar Image is out of the projected image according to "Adjusting Projection Image Size" for more information.) yy The projector automatically detects the input signal format. yy If you have chosen the correct input source on the projector lens. yy Adjust the frequency in the OSD. yy Adjust the focus ring on the OSD Menu > Input Source menu. If the problem...

User Manual
Page 55
... Acer. Amber flashing Amber flashing OFF and Blue ON (0.5 seconds off, 2 seconds on . Projector in Standby mode. Reset the projector mode by pressing and holding the Power button for 10 seconds. Please wait for about 5 minutes and try to display an image. If the problem persists, contact Acer. Amber flashing OFF Amber Note: If the projector fan fails, the projector will automatically shut down . Turn the display on Projector overheated Fan breakdown LED failure Description Power Temp (Blue / Amber) (Amber) Lamp (Amber) Projector...
... Acer. Amber flashing Amber flashing OFF and Blue ON (0.5 seconds off, 2 seconds on . Projector in Standby mode. Reset the projector mode by pressing and holding the Power button for 10 seconds. Please wait for about 5 minutes and try to display an image. If the problem persists, contact Acer. Amber flashing OFF Amber Note: If the projector fan fails, the projector will automatically shut down . Turn the display on Projector overheated Fan breakdown LED failure Description Power Temp (Blue / Amber) (Amber) Lamp (Amber) Projector...

User Manual
Page 61
...%, 50/60Hz AC In 1.9A Multimedia FW based USB-A portion Description Linux similar OS - WXGA (1280 x 800) - 1080p (1920 x 1080) RGB LED (LED life=20,000hrs) Manual focus - Audio In x1 - Specification Optical Maximum resolution Lighting source Lens Image size (diagonal) Projection distance Description - USB-A x2 - Support Host mode for USB stick (USB 2.0 supported) - For firmware upgrade - English 61 WXGA: 29.4" ~ 300" (75cm ~ 762cm) - 1080p: 30.1" ~ 300" (76cm ~ 762cm) - Support WiFi dongle (USB 2 only) - Video x1 Audio Out x1 -
...%, 50/60Hz AC In 1.9A Multimedia FW based USB-A portion Description Linux similar OS - WXGA (1280 x 800) - 1080p (1920 x 1080) RGB LED (LED life=20,000hrs) Manual focus - Audio In x1 - Specification Optical Maximum resolution Lighting source Lens Image size (diagonal) Projection distance Description - USB-A x2 - Support Host mode for USB stick (USB 2.0 supported) - For firmware upgrade - English 61 WXGA: 29.4" ~ 300" (75cm ~ 762cm) - 1080p: 30.1" ~ 300" (76cm ~ 762cm) - Support WiFi dongle (USB 2 only) - Video x1 Audio Out x1 -


