

User Manual
Page 4
... and Inspection 7 Basic Connections 7 Powering Up...8 Setting Levels ...8 Automatic Input Level Settings 8 What's in the Display 9 Auditioning Internal Programs 10 Switching Between Preset and User Banks 10 Bypass Program/Preset 00 10 Changing Effect Settings 11 Using Online Help 12 Adjusting Effects Mix Levels... 13 Dry Defeat ...13 Comparing an Edited Program to its Original Settings 14 Restoring an Edited Program to its Original Settings 14 Storing Edited Programs 15 Bypassing Effects...16 Connections 17 AC Power Hookup 17 Line Conditioners...
... and Inspection 7 Basic Connections 7 Powering Up...8 Setting Levels ...8 Automatic Input Level Settings 8 What's in the Display 9 Auditioning Internal Programs 10 Switching Between Preset and User Banks 10 Bypass Program/Preset 00 10 Changing Effect Settings 11 Using Online Help 12 Adjusting Effects Mix Levels... 13 Dry Defeat ...13 Comparing an Edited Program to its Original Settings 14 Restoring an Edited Program to its Original Settings 14 Storing Edited Programs 15 Bypassing Effects...16 Connections 17 AC Power Hookup 17 Line Conditioners...

User Manual
Page 5
... Mono Delay 33 Stereo Delay 33 Ping Pong Delay 33 MultiTap Delay 33 BPM Mono Delay 33 Synchronizing to MIDI Clock 34 Delay & DLY 34 Setting Delay Time Using Tap Tempo 34 Pitch Effects...35 Stereo Chorus 35 Quad Chorus 35 Chorus...35 Stereo Flange 36 Flange...37 Lezlie...37 Stereo...
... Mono Delay 33 Stereo Delay 33 Ping Pong Delay 33 MultiTap Delay 33 BPM Mono Delay 33 Synchronizing to MIDI Clock 34 Delay & DLY 34 Setting Delay Time Using Tap Tempo 34 Pitch Effects...35 Stereo Chorus 35 Quad Chorus 35 Chorus...35 Stereo Flange 36 Flange...37 Lezlie...37 Stereo...

User Manual
Page 6
... 57 Receiving Program Changes 58 Program Change Table 58 Sysex Storage 59 Realtime Modulation Functions 60 Defining the Modulation Sources 60 Modulation Parameters Index 61 Setting Modulation Amplitude 61 Controlling Delay Time via MIDI Clock 62 Troubleshooting 63 Trouble-Shooting Index 63 Re-initializing...63 Checking the Software Version 64 Maintenance...
... 57 Receiving Program Changes 58 Program Change Table 58 Sysex Storage 59 Realtime Modulation Functions 60 Defining the Modulation Sources 60 Modulation Parameters Index 61 Setting Modulation Amplitude 61 Controlling Delay Time via MIDI Clock 62 Troubleshooting 63 Trouble-Shooting Index 63 Re-initializing...63 Checking the Software Version 64 Maintenance...
User Manual
Page 9
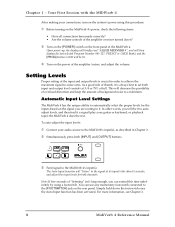
...the signal you can use any momentary footswitch connected to it a signal (play your guitar or keyboard, or playback tape); Chapter 1 - Setting Levels Proper setting of thumb, it is crucial in Chapter 2. Simultaneously press both channels. For more information, see Chapter 2. 8 MidiVerb 4 ...142; Feed signal to the MidiVerb 4's input(s). Note: If five seconds of the MidiVerb 4. Upon power-up, the display will briefly read "ALESIS MIDIVERB 4", and will then display the last selected Program Number (00-127, PRESET or USER Bank), and the [PROG] button's LED will...
...the signal you can use any momentary footswitch connected to it a signal (play your guitar or keyboard, or playback tape); Chapter 1 - Setting Levels Proper setting of thumb, it is crucial in Chapter 2. Simultaneously press both channels. For more information, see Chapter 2. 8 MidiVerb 4 ...142; Feed signal to the MidiVerb 4's input(s). Note: If five seconds of the MidiVerb 4. Upon power-up, the display will briefly read "ALESIS MIDIVERB 4", and will then display the last selected Program Number (00-127, PRESET or USER Bank), and the [PROG] button's LED will...

User Manual
Page 11
... First Session with the MIDIVerb 4 Auditioning Internal Programs The MidiVerb 4 comes with the [VALUE] knob. Each time you are looking for which the MidiVerb 4 is set to the Advance function), or by reading either "PRESET" or "USER" next to the [MIDI IN]connector. Use this chapter. The display will indicate this...
... First Session with the MIDIVerb 4 Auditioning Internal Programs The MidiVerb 4 comes with the [VALUE] knob. Each time you are looking for which the MidiVerb 4 is set to the Advance function), or by reading either "PRESET" or "USER" next to the [MIDI IN]connector. Use this chapter. The display will indicate this...

User Manual
Page 12
... lit (Note: Pressing these buttons in other modes performs different functions). Your First Session with both its number. To edit a Program's effect settings, you press the [PAGE] button, the display will advance to the right of the Program's name. The type of two or three effects...the display will change in Edit mode contains up to select the desired parameter for editing. Each parameter in the example above their value settings. Parameter Values and Bar Graphs . RoomVerb REAL ROOM The Configuration will be pressed to four pages available in the Program's ...
... lit (Note: Pressing these buttons in other modes performs different functions). Your First Session with both its number. To edit a Program's effect settings, you press the [PAGE] button, the display will advance to the right of the Program's name. The type of two or three effects...the display will change in Edit mode contains up to select the desired parameter for editing. Each parameter in the example above their value settings. Parameter Values and Bar Graphs . RoomVerb REAL ROOM The Configuration will be pressed to four pages available in the Program's ...

User Manual
Page 13
... while page 1 is selected for editing. Turn the [VALUE] knob to normal. For more information , see previous section), you have a box around its original setting, the word "EDITED" disappears. 7 Any changes you make are temporary, until you are usually two or more then one second would reveal the name of... for the first time. For example, if we were still editing Program 01 (see Chapter 4. The [PROG] button will display the page and/or parameter set you store those changes into memory. If you change the value back to enter Edit mode.
... while page 1 is selected for editing. Turn the [VALUE] knob to normal. For more information , see previous section), you have a box around its original setting, the word "EDITED" disappears. 7 Any changes you make are temporary, until you are usually two or more then one second would reveal the name of... for the first time. For example, if we were still editing Program 01 (see Chapter 4. The [PROG] button will display the page and/or parameter set you store those changes into memory. If you change the value back to enter Edit mode.

User Manual
Page 14
... it doesn't appear, press the [PAGE] button repeatedly until page 1 is selected. MidiVerb 4 Reference Manual 13 Keep in mind that its Reverb Mix parameter disabled (set at the mixing console with the returning wet signal. CMIX = Chorus Mix, RMIX = Reverb Mix, etc.). To be available for each effect will still be...
... it doesn't appear, press the [PAGE] button repeatedly until page 1 is selected. MidiVerb 4 Reference Manual 13 Keep in mind that its Reverb Mix parameter disabled (set at the mixing console with the returning wet signal. CMIX = Chorus Mix, RMIX = Reverb Mix, etc.). To be available for each effect will still be...

User Manual
Page 15
Restoring an Edited Program to its Original Settings If you decide to abort the changes you have made to an edited Program, this can be accessed. Consequently, any button exits Compare mode; This ... edited, the edited effect's name will read "delay>REVERB" if the [PROG] button is , unless you are editing - the display will return to its Original Settings The left side of the selected Program number, and the Configuration name in the display returns to compare the differences created by changing parameters in...
Restoring an Edited Program to its Original Settings If you decide to abort the changes you have made to an edited Program, this can be accessed. Consequently, any button exits Compare mode; This ... edited, the edited effect's name will read "delay>REVERB" if the [PROG] button is , unless you are editing - the display will return to its Original Settings The left side of the selected Program number, and the Configuration name in the display returns to compare the differences created by changing parameters in...

User Manual
Page 17
...and [UTIL] buttons are pressed, or the footswitch connected to trigger the Bypass function, which is turned on, the [BYPASS] LED will be lit. To set the [FOOTSWITCH] jack to Bypass mode (bYP). 16 MidiVerb 4 Reference Manual Chapter 1 - The display will light. Press [EDIT/PAGE] until...panel; The [UTIL] button will read: Footswitch Dry Defeat Ž Press [B] to select the Footswitch parameter. Turn the [VALUE] knob to set to the [FOOTSWITCH] jack is pressed, Bypass mode is selected. This requires that the [FOOTSWITCH] jack be done in two ways: • by ...
...and [UTIL] buttons are pressed, or the footswitch connected to trigger the Bypass function, which is turned on, the [BYPASS] LED will be lit. To set the [FOOTSWITCH] jack to Bypass mode (bYP). 16 MidiVerb 4 Reference Manual Chapter 1 - The display will light. Press [EDIT/PAGE] until...panel; The [UTIL] button will read: Footswitch Dry Defeat Ž Press [B] to select the Footswitch parameter. Turn the [VALUE] knob to set to the [FOOTSWITCH] jack is pressed, Bypass mode is selected. This requires that the [FOOTSWITCH] jack be done in two ways: • by ...

User Manual
Page 21
... the MidiVerb 4 input). Still another way of interfacing the MidiVerb 4 to a mixer or recording console would be done in two ways: • Set each channel in several instruments at all , consider connecting the MidiVerb 4 to a mixing console in the Program you needed to the effects by using ...; Turn on the mixer. No matter where you connect the output of the MidiVerb 4 into the mixer, you have aux master controls, which set the overall level of each effect's Mix parameters to channel inputs. For more than two sends, connect the MidiVerb 4 using the auxiliary send and...
... the MidiVerb 4 input). Still another way of interfacing the MidiVerb 4 to a mixer or recording console would be done in two ways: • Set each channel in several instruments at all , consider connecting the MidiVerb 4 to a mixing console in the Program you needed to the effects by using ...; Turn on the mixer. No matter where you connect the output of the MidiVerb 4 into the mixer, you have aux master controls, which set the overall level of each effect's Mix parameters to channel inputs. For more than two sends, connect the MidiVerb 4 using the auxiliary send and...

User Manual
Page 26
... pedals, etc.) • To send and receive Sysex (System Exclusive) dumps of individual programs or the entire bank of programs for Delay effects (Control) To set the [FOOTSWITCH] jack's mode: Œ Press [UTIL]. Press the [EDIT/PAGE] button until page 1 is no need to receive information back from one device...
... pedals, etc.) • To send and receive Sysex (System Exclusive) dumps of individual programs or the entire bank of programs for Delay effects (Control) To set the [FOOTSWITCH] jack's mode: Œ Press [UTIL]. Press the [EDIT/PAGE] button until page 1 is no need to receive information back from one device...

User Manual
Page 27
... drum, or sing some "doot doots" into your microphone (depending on what is plugged into the inputs), and the delay time will be set to a value that the MidiVerb 4 can configure itself for the three footswitch functions. Connections Any momentary single-pole/single-throw footswitch, normally open... or normally closed, will be plugged in the Lezlie effect between its input(s); If the footswitch function is set to the Control function and the Lezlie->Room Configuration is activated, the [BYPASS] LED will work for the type of programming the ...
... drum, or sing some "doot doots" into your microphone (depending on what is plugged into the inputs), and the delay time will be set to a value that the MidiVerb 4 can configure itself for the three footswitch functions. Connections Any momentary single-pole/single-throw footswitch, normally open... or normally closed, will be plugged in the Lezlie effect between its input(s); If the footswitch function is set to the Control function and the Lezlie->Room Configuration is activated, the [BYPASS] LED will work for the type of programming the ...

User Manual
Page 30
... a reverb), and have only the dry, uneffected signal going to the second effect in the chain. Overview of its input(s). These Configurations are identified by setting the first effect's Mix parameter to 000% (this is not as "dense" as the Single Configuration called "Realroom". this means none of Effects - Chapter 3 Multi...
... a reverb), and have only the dry, uneffected signal going to the second effect in the chain. Overview of its input(s). These Configurations are identified by setting the first effect's Mix parameter to 000% (this is not as "dense" as the Single Configuration called "Realroom". this means none of Effects - Chapter 3 Multi...

User Manual
Page 31
... and guitars. Selecting the forward direction provides a classic "Gated" digital reverb sound. The MidiVerb 4 offers the following types of reflective surfaces, where sounds can be set either end used to augment a sound. It can be large rooms with lots of reverberation: Concert Hall This is needed to produce reverb. Nonlinear This...
... and guitars. Selecting the forward direction provides a classic "Gated" digital reverb sound. The MidiVerb 4 offers the following types of reflective surfaces, where sounds can be set either end used to augment a sound. It can be large rooms with lots of reverberation: Concert Hall This is needed to produce reverb. Nonlinear This...

User Manual
Page 32
... to hear a bit of the Reverb (the Pre-Delayed Reverb) sounds, and makes for a bigger, smoother sounding Reverb. With higher diffusion settings, the echoes increase in the Single Configuration reverb types. MidiVerb 4 Reference Manual 31 However, reverbs which use more parameters which are the reverb ...that can make up to 0, the first reflection is because a number of the reverb sound by 6dB per octave. The lower the setting, the less high frequencies of each. Thus, the reverb sounds more easily stands out from the reverb. Greater diffusion works better with percussive...
... to hear a bit of the Reverb (the Pre-Delayed Reverb) sounds, and makes for a bigger, smoother sounding Reverb. With higher diffusion settings, the echoes increase in the Single Configuration reverb types. MidiVerb 4 Reference Manual 31 However, reverbs which use more parameters which are the reverb ...that can make up to 0, the first reflection is because a number of the reverb sound by 6dB per octave. The lower the setting, the less high frequencies of each. Thus, the reverb sounds more easily stands out from the reverb. Greater diffusion works better with percussive...

User Manual
Page 33
...it creates a more dramatic detuning effect as the reverb decays. These include: Gate, Hold Time, and Release Time. Alternatively, the Gate parameter can be set to control the equalization of a room or hall, with softer surfaces absorbing more "choppy" sound. Chapter 3 - These parameters allow you to 50%, ...is determined by the Release Time, which use the gating effect. Example: If a room has lots of 0. Alternatively, the Gate parameter can be set from 0 to a high value, it off the reverb's decay for both the hold and release times of the reverb signal after the initial ...
...it creates a more dramatic detuning effect as the reverb decays. These include: Gate, Hold Time, and Release Time. Alternatively, the Gate parameter can be set to control the equalization of a room or hall, with softer surfaces absorbing more "choppy" sound. Chapter 3 - These parameters allow you to 50%, ...is determined by the Release Time, which use the gating effect. Example: If a room has lots of 0. Alternatively, the Gate parameter can be set from 0 to a high value, it off the reverb's decay for both the hold and release times of the reverb signal after the initial ...

User Manual
Page 34
...because it is simulating quarter-note triplets in milliseconds. MultiTap Delay This is used to establish delay time. Each of Effects - For example, if you set the tempo using quarter-note beats to determine what beat value your tempo represents. Overview of the 3 "taps" have individual delay, level, panning ...previous one. Again, low and high frequency cut is also available to increase the complexity of signal up to 1299 ms. The delay time can set the note to right in BPM (beats per minute) value. Ping Pong Delay So called Note, is like having three delays at once. ...
...because it is simulating quarter-note triplets in milliseconds. MultiTap Delay This is used to establish delay time. Each of Effects - For example, if you set the tempo using quarter-note beats to determine what beat value your tempo represents. Overview of the 3 "taps" have individual delay, level, panning ...previous one. Again, low and high frequency cut is also available to increase the complexity of signal up to 1299 ms. The delay time can set the note to right in BPM (beats per minute) value. Ping Pong Delay So called Note, is like having three delays at once. ...

User Manual
Page 35
...can also adjust the delay time using a technique called "tap tempo". the Double Configuration Realroom+Delay; By tapping the button which requires that you set the Not value to a dotted-note variation, such as described above while in Edit mode. or • Hold down on the footswitch. ...Delay:Delay, Chorus:Delay and Flange:Delay. They provide only high frequency cutting ability with the MidiVerb 4, see Chapter 2. 34 MidiVerb 4 Reference Manual Setting Delay Time Using Tap Tempo You can be done by hitting a drum, plucking notes on a guitar or keyboard, or by the MIDI clock signal...
...can also adjust the delay time using a technique called "tap tempo". the Double Configuration Realroom+Delay; By tapping the button which requires that you set the Not value to a dotted-note variation, such as described above while in Edit mode. or • Hold down on the footswitch. ...Delay:Delay, Chorus:Delay and Flange:Delay. They provide only high frequency cutting ability with the MidiVerb 4, see Chapter 2. 34 MidiVerb 4 Reference Manual Setting Delay Time Using Tap Tempo You can be done by hitting a drum, plucking notes on a guitar or keyboard, or by the MIDI clock signal...

User Manual
Page 36
... Chorus The Chorus effect is achieved by splitting the signal into at least two parts, effecting the pitch of one another depending on the parameter settings, each with a dry signal and a separate Detuning section for both left channel is detuned sharp, the right is detuned flat, and vice versa. The various...
... Chorus The Chorus effect is achieved by splitting the signal into at least two parts, effecting the pitch of one another depending on the parameter settings, each with a dry signal and a separate Detuning section for both left channel is detuned sharp, the right is detuned flat, and vice versa. The various...


