
User Guide
Page 4
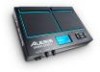
... cables to connect this button for single-zone. USB/MIDI Port: Connect SamplePad 4 to a computer to send and receive MIDI data or load samples to wall power. 4. A LED around the pad will illuminate when that is currently being edited. 5. Cursor Up/Down: Press...Other Parameters: Displays the tuning, sensitivity, 3 panning, reverb, level, MIDI Note, mode, and mute group 65 parameters of the sample 2 assigned to turn on your speakers only AFTER turning on SamplePad 4. 5. Features Top Panel 12 3 4 5 6 1. Main Volume: Adjusts the overall volume level for the Phones Out. Rear...
... cables to connect this button for single-zone. USB/MIDI Port: Connect SamplePad 4 to a computer to send and receive MIDI data or load samples to wall power. 4. A LED around the pad will illuminate when that is currently being edited. 5. Cursor Up/Down: Press...Other Parameters: Displays the tuning, sensitivity, 3 panning, reverb, level, MIDI Note, mode, and mute group 65 parameters of the sample 2 assigned to turn on your speakers only AFTER turning on SamplePad 4. 5. Features Top Panel 12 3 4 5 6 1. Main Volume: Adjusts the overall volume level for the Phones Out. Rear...
User Guide
Page 5
...WAV file is selected, it will take a few seconds to load into the memory. • SamplePad 4 supports mono or stereo .WAV files, with that a sample's size will both trigger at the same time when the pad or external trigger is assigned to this layer should play. 7. Basically, this layer. Move the ...card inserted, it is struck. Basic Operations Selecting the Kit: 1. If multiple layers are referred to as a 3 MB sample when it is struck with a sample rate of a pad or ext. Use the Cursor Left or Cursor Right buttons to set to LOC:CARD. 3. Hold down the Cursor Left or...
...WAV file is selected, it will take a few seconds to load into the memory. • SamplePad 4 supports mono or stereo .WAV files, with that a sample's size will both trigger at the same time when the pad or external trigger is assigned to this layer should play. 7. Basically, this layer. Move the ...card inserted, it is struck. Basic Operations Selecting the Kit: 1. If multiple layers are referred to as a 3 MB sample when it is struck with a sample rate of a pad or ext. Use the Cursor Left or Cursor Right buttons to set to LOC:CARD. 3. Hold down the Cursor Left or...
User Guide
Page 6
... Cursor Right button to adjust the sensitivity level. [1-8] To adjust the volume level of a sample: 1. Strike a pad or ext. Strike a pad or ext. trigger. 2. trigger. 2. trigger. 2. trigger. 2. Strike a pad or ext. Then press the Cursor Left or Cursor Right button to adjust the reverb level..... [-4, -3, -2, -1, 0, 1, 2, 3, 4] To adjust the reverb level of a sample: 1. trigger. 2. Move the cursor to the LEV (Level) area by pressing the Cursor Up or Cursor Down buttons. 3. Strike a pad or ext. trigger: 1. Move the cursor to the TUNE area by pressing the Cursor Up...
... Cursor Right button to adjust the sensitivity level. [1-8] To adjust the volume level of a sample: 1. Strike a pad or ext. Strike a pad or ext. trigger. 2. trigger. 2. trigger. 2. trigger. 2. Strike a pad or ext. Then press the Cursor Left or Cursor Right button to adjust the reverb level..... [-4, -3, -2, -1, 0, 1, 2, 3, 4] To adjust the reverb level of a sample: 1. trigger. 2. Move the cursor to the LEV (Level) area by pressing the Cursor Up or Cursor Down buttons. 3. Strike a pad or ext. trigger: 1. Move the cursor to the TUNE area by pressing the Cursor Up...

User Guide
Page 7
.... • LOP (Loop) After a pad or ext. trigger is struck, the sample will mute each other out, similar to select the mode. trigger that you can simulate a hi-hat by SamplePad 4 will trigger the assigned sample and stop the playback of the sample of these sounds will continue to another... pad or ext. trigger, navigate to the MGRP, and use the Cursor Left or Cursor Right...
.... • LOP (Loop) After a pad or ext. trigger is struck, the sample will mute each other out, similar to select the mode. trigger that you can simulate a hi-hat by SamplePad 4 will trigger the assigned sample and stop the playback of the sample of these sounds will continue to another... pad or ext. trigger, navigate to the MGRP, and use the Cursor Left or Cursor Right...

User Guide
Page 9
...the kit on your Mac or PC via the USB connection for two seconds. Press Cursor Right to be used across all of the internal pads. Press Cursor Down to highlight Confirm > highlight Yes, and then Cursor Right to enter the SAVE KIT submenu. 5. This will not affect... Up or Cursor Down buttons. 3. Alternatively, press and hold the Cursor Down and Cursor Right buttons to exit this menu. Load Samples/Kits Via USB • After this feature is selected, SamplePad 4 will connect to your SD card. 9 Alternatively, press and hold the Cursor Down and Cursor Right buttons to exit this...
...the kit on your Mac or PC via the USB connection for two seconds. Press Cursor Right to be used across all of the internal pads. Press Cursor Down to highlight Confirm > highlight Yes, and then Cursor Right to enter the SAVE KIT submenu. 5. This will not affect... Up or Cursor Down buttons. 3. Alternatively, press and hold the Cursor Down and Cursor Right buttons to exit this menu. Load Samples/Kits Via USB • After this feature is selected, SamplePad 4 will connect to your SD card. 9 Alternatively, press and hold the Cursor Down and Cursor Right buttons to exit this...

