
Virtue - User Guide - v1.1.pdf
Page 3
Note: Please use a nonabrasive dry cloth when cleaning Virtue. 3 For additional product support, visit alesis.com/support. User Guide (English) Introduction Box Contents Virtue Digital Piano Piano Stand with Music Rest and 3 Pedals Adjustable Piano Bench Assembly Parts Power Adapter User Guide Safety & Warranty Manual Support For the latest information about this product (system requirements, compatibility information, etc.) and product registration, visit alesis.com.
Note: Please use a nonabrasive dry cloth when cleaning Virtue. 3 For additional product support, visit alesis.com/support. User Guide (English) Introduction Box Contents Virtue Digital Piano Piano Stand with Music Rest and 3 Pedals Adjustable Piano Bench Assembly Parts Power Adapter User Guide Safety & Warranty Manual Support For the latest information about this product (system requirements, compatibility information, etc.) and product registration, visit alesis.com.

Virtue - User Guide - v1.1.pdf
Page 4
... panels to connect the left and right corner panels and back panel. 3. Setup Piano Assembly Follow these instructions to the piano brackets Use 4 of the appropriate size for assembly. Press the 8 hammer nuts into the corresponding holes on the left and right panels to the left and right piano corner panels. 2. Use the 12 TA4*12 screws to attach the 4 corner brackets to the pedal...
... panels to connect the left and right corner panels and back panel. 3. Setup Piano Assembly Follow these instructions to the piano brackets Use 4 of the appropriate size for assembly. Press the 8 hammer nuts into the corresponding holes on the left and right panels to the left and right piano corner panels. 2. Use the 12 TA4*12 screws to attach the 4 corner brackets to the pedal...

Virtue - User Guide - v1.1.pdf
Page 6
... Range Chord: Press this button to enable recording to start immediately once a chord is pressed with a style. See the section Split for more details. 15. See the section Touch Sensitivity for more details. 10. See the section Song Recording for more details. 8. Sync: When this button to track 3. 6 Auto Chord: Press this button is played. Accompaniment Volume: Press these buttons to turn the split function on/off. Chord Off: Press this button to adjust the tempo...
... Range Chord: Press this button to enable recording to start immediately once a chord is pressed with a style. See the section Split for more details. 15. See the section Touch Sensitivity for more details. 10. See the section Song Recording for more details. 8. Sync: When this button to track 3. 6 Auto Chord: Press this button is played. Accompaniment Volume: Press these buttons to turn the split function on/off. Chord Off: Press this button to adjust the tempo...

Virtue - User Guide - v1.1.pdf
Page 7
... selected memory bank. 38. Style Mode: Press this button to enter Accompaniment Style mode. 25. Octave -: Press this button to decrease the octave setting in Lesson mode. 30. Power Switch: Press this button to turn the chorus effect on or off . 34. Metronome: Press this button to turn Layer mode on /off . 32. Piano Performance Mode: Press this button to quickly access an acoustic piano sound. 24. See the section Lesson Mode for more details. 28. Song/Volume...
... selected memory bank. 38. Style Mode: Press this button to enter Accompaniment Style mode. 25. Octave -: Press this button to decrease the octave setting in Lesson mode. 30. Power Switch: Press this button to turn the chorus effect on or off . 34. Metronome: Press this button to turn Layer mode on /off . 32. Piano Performance Mode: Press this button to quickly access an acoustic piano sound. 24. See the section Lesson Mode for more details. 28. Song/Volume...

Virtue - User Guide - v1.1.pdf
Page 8
... not set the USB driver to the USB flash drive or the piano. 3. Doing this to the MIDI output of an external MIDI device (MIDI sequencer, drum machine, sound module, etc.) using a standard MIDI cable. 6. The piano's internal speakers will be input and output simultaneously when you are connected. Sustain Input: Connect the included sustain pedal here. 5. MIDI In: Connect this may cause damage to be overlapped when playing the keys. 8. Rear Panel USB (TO DEVICE) OUTPUT SUS PEDAL IN MIDI OUT USB (TO HOST) 1. Power Input: Connect the included power adapter...
... not set the USB driver to the USB flash drive or the piano. 3. Doing this to the MIDI output of an external MIDI device (MIDI sequencer, drum machine, sound module, etc.) using a standard MIDI cable. 6. The piano's internal speakers will be input and output simultaneously when you are connected. Sustain Input: Connect the included sustain pedal here. 5. MIDI In: Connect this may cause damage to be overlapped when playing the keys. 8. Rear Panel USB (TO DEVICE) OUTPUT SUS PEDAL IN MIDI OUT USB (TO HOST) 1. Power Input: Connect the included power adapter...

Virtue - User Guide - v1.1.pdf
Page 9
Numerical display area 2. Accompaniment Style selection 6. Tempo 8. Chord display area 13. Record/Play 16. Touch 17. Staff display area 9 Display 1. Reverb 9. Split mode 12. Fill In 1/Fill In 2 15. Voice selection 5. Metronome 14. Song selection 7. Layer mode 11. Chorus 10. Memory Bank 18. Volume 4. Character display area 3.
Numerical display area 2. Accompaniment Style selection 6. Tempo 8. Chord display area 13. Record/Play 16. Touch 17. Staff display area 9 Display 1. Reverb 9. Split mode 12. Fill In 1/Fill In 2 15. Voice selection 5. Metronome 14. Song selection 7. Layer mode 11. Chorus 10. Memory Bank 18. Volume 4. Character display area 3.

Virtue - User Guide - v1.1.pdf
Page 10
... set the split point: 1. Press the Function Menu button repeatedly to cycle through to switch between the first and second voice or between the upper and lower voice and select different voices. If Split mode is enabled, you are using the Layer mode and Split mode at the same time to reset the split point to hear the new voice. Layering Voices Virtue features a Layer mode that you can play two different voices for your right hand, and the Bass voice...
... set the split point: 1. Press the Function Menu button repeatedly to cycle through to switch between the first and second voice or between the upper and lower voice and select different voices. If Split mode is enabled, you are using the Layer mode and Split mode at the same time to reset the split point to hear the new voice. Layering Voices Virtue features a Layer mode that you can play two different voices for your right hand, and the Bass voice...

Virtue - User Guide - v1.1.pdf
Page 11
... you play the keys, the greater volume comes from the speakers. Tip: Press the Transpose Up/Down buttons at the same time to reset the transposition back to control the level of 0. buttons to reset the parameter to adjust the menu options for the selected option (Tune, Keyboard Split, Beat Type, Metronome Volume, Reverb Depth, Chorus Depth, MIDI Receiving Channel, MIDI Sending Channel). 3. The default setting is selected, and then use the +/- Press the Touch repeatedly to set the tune value...
... you play the keys, the greater volume comes from the speakers. Tip: Press the Transpose Up/Down buttons at the same time to reset the transposition back to control the level of 0. buttons to reset the parameter to adjust the menu options for the selected option (Tune, Keyboard Split, Beat Type, Metronome Volume, Reverb Depth, Chorus Depth, MIDI Receiving Channel, MIDI Sending Channel). 3. The default setting is selected, and then use the +/- Press the Touch repeatedly to set the tune value...

Virtue - User Guide - v1.1.pdf
Page 12
... set the new time signature. To adjust these volumes: 1. Press the -/+ buttons to adjust parameters. Tip: Press the Tempo Up/Down buttons at a consistent tempo. Track Type Percussion music track Bass track volume Harmony track volume Phrase track volume Left-hand volume Right hand volume Display Name XXX Rhythm XXX Bass XXX Chord XXX Phrase XXX Lower XXX Upper Adjustment Range 0 - 127 0 - 127 0 - 127 0 - 127 0 - 127 0 - 127 12 To set the metronome volume, press the Function Menu button repeatedly until the Beat Type setting is selected, and then use the +/- Metronome...
... set the new time signature. To adjust these volumes: 1. Press the -/+ buttons to adjust parameters. Tip: Press the Tempo Up/Down buttons at a consistent tempo. Track Type Percussion music track Bass track volume Harmony track volume Phrase track volume Left-hand volume Right hand volume Display Name XXX Rhythm XXX Bass XXX Chord XXX Phrase XXX Lower XXX Upper Adjustment Range 0 - 127 0 - 127 0 - 127 0 - 127 0 - 127 0 - 127 12 To set the metronome volume, press the Function Menu button repeatedly until the Beat Type setting is selected, and then use the +/- Metronome...
Virtue - User Guide - v1.1.pdf
Page 13
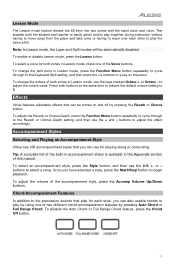
... the Voice buttons. To disable the Auto Chord or Full Range Chord feature, press the Chord Off button. 13 Note: In Lesson mode, the Layer and Split modes will be turned on the piano. Effects Virtue features adjustable effects that can be automatically disabled. To adjust the volume of this manual. Chord Accompaniment Features In addition to the percussion sounds that you have selected a style, press the Start/Stop button to the Keyboard Split setting, and then press the -/+ buttons or a key...
... the Voice buttons. To disable the Auto Chord or Full Range Chord feature, press the Chord Off button. 13 Note: In Lesson mode, the Layer and Split modes will be turned on the piano. Effects Virtue features adjustable effects that can be automatically disabled. To adjust the volume of this manual. Chord Accompaniment Features In addition to the percussion sounds that you have selected a style, press the Start/Stop button to the Keyboard Split setting, and then press the -/+ buttons or a key...

Virtue - User Guide - v1.1.pdf
Page 14
... accompaniment feature will play a variation pattern of all accompaniment tracks to balance the volume between the accompaniment part and voice. When the Full Range Chord feature is enabled, the Virtue will turn on any chords played across the full keyboard. You can use the abbreviated chord shapes shown below starting on the display screen. key to set the accompaniment volume, adjustable from 0- 127. When the Auto Chord feature is enabled, Virtue will generate the accompaniment chords based on any note to play major...
... accompaniment feature will play a variation pattern of all accompaniment tracks to balance the volume between the accompaniment part and voice. When the Full Range Chord feature is enabled, the Virtue will turn on any chords played across the full keyboard. You can use the abbreviated chord shapes shown below starting on the display screen. key to set the accompaniment volume, adjustable from 0- 127. When the Auto Chord feature is enabled, Virtue will generate the accompaniment chords based on any note to play major...

Virtue - User Guide - v1.1.pdf
Page 15
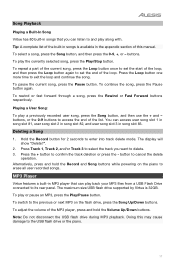
... track at the same time as compose your own user songs. Intro/Ending If you would like an introduction for recording melodies. Songs Song Recording Virtue is enabled. You can record the accompaniment track by itself, or at a time. In record mode, you would like an ending for the accompaniment style to play, press the Intro/Ending button while the style is playing, and the Auto Chord feature or Full Range Chord feature is equipped with a useful record feature...
... track at the same time as compose your own user songs. Intro/Ending If you would like an introduction for recording melodies. Songs Song Recording Virtue is enabled. You can record the accompaniment track by itself, or at a time. In record mode, you would like an ending for the accompaniment style to play, press the Intro/Ending button while the style is playing, and the Auto Chord feature or Full Range Chord feature is equipped with a useful record feature...

Virtue - User Guide - v1.1.pdf
Page 16
... select the new track accordingly. TIP: While you have these set before entering record mode. TIP: If the internal recording memory is helpful to have finished recording, press the Record button to . "Rec_Full" will then see a "Delete?" After this function. Alternatively, press the - To delete the full song, clear all 3 user song slots at once using the Auto Chord or Full Range Chord features in record mode, make the track icon appear for the track or tracks that...
... select the new track accordingly. TIP: While you have these set before entering record mode. TIP: If the internal recording memory is helpful to have finished recording, press the Record button to . "Rec_Full" will then see a "Delete?" After this function. Alternatively, press the - To delete the full song, clear all 3 user song slots at once using the Auto Chord or Full Range Chord features in record mode, make the track icon appear for the track or tracks that...
Virtue - User Guide - v1.1.pdf
Page 17
... Player Virtue features a built-in MP3 player that you want to delete. 3. The maximum size USB flash drive supported by Virtue is available in the appendix section of the list. Note: Do not disconnect the USB flash drive during MP3 playback. Doing this manual. buttons, or the 0-9 buttons to the previous or next MP3 on the piano to erase all user recorded songs. Alternatively, press and hold the Volume Up/Down buttons. To switch...
... Player Virtue features a built-in MP3 player that you want to delete. 3. The maximum size USB flash drive supported by Virtue is available in the appendix section of the list. Note: Do not disconnect the USB flash drive during MP3 playback. Doing this manual. buttons, or the 0-9 buttons to the previous or next MP3 on the piano to erase all user recorded songs. Alternatively, press and hold the Volume Up/Down buttons. To switch...

Virtue - User Guide - v1.1.pdf
Page 18
... as a USB-MIDI connection so that you can use the +/- The following parameters are stored in each preset: • Voice Parameters: main voice, layer voice, split point voice, reverb, chorus, mixer. • Accompaniment Parameters: style, tempo, auto/full range chord • Function Parameters: touch These four different presets are divided into two banks, B1 and B2. To access presets 3 and 4, press the Bank button until B1 is lit on the display screen...
... as a USB-MIDI connection so that you can use the +/- The following parameters are stored in each preset: • Voice Parameters: main voice, layer voice, split point voice, reverb, chorus, mixer. • Accompaniment Parameters: style, tempo, auto/full range chord • Function Parameters: touch These four different presets are divided into two banks, B1 and B2. To access presets 3 and 4, press the Bank button until B1 is lit on the display screen...

Virtue - User Guide - v1.1.pdf
Page 19
... may produce interference. The wrong notes sound when the keys are played. buttons while powering on , but no sound is produced when the keys are played. After connecting with the computer, the piano is selected for MIDI input. Troubleshooting Problem The piano is turned on Virtue to revert the settings back to factory defaults. Make sure the Tune setting is set to an appropriate level. Make sure the USB cable is set to the Phones jack. Using a mobile phone produces noise...
... may produce interference. The wrong notes sound when the keys are played. buttons while powering on , but no sound is produced when the keys are played. After connecting with the computer, the piano is selected for MIDI input. Troubleshooting Problem The piano is turned on Virtue to revert the settings back to factory defaults. Make sure the Tune setting is set to an appropriate level. Make sure the USB cable is set to the Phones jack. Using a mobile phone produces noise...

Virtue - User Guide - v1.1.pdf
Page 92
...Detuned Electric Piano 1 Detuned Electric Piano 2 Electric Piano 1 Electric Piano 2 Electric Piano (wide) 1 Electric Piano (wide) 2 EP Legend EP Phase 60's Electric Piano Electric Piano 1 (velocity mix) Electric Piano 2 (velocity mix) Velocity Crossfade Electric Piano Layered Electric Piano 1 Layered Electric Piano 2 Nylon Electric Piano Warm Electric Piano Grand Harpsichord Harpsichord 1 Harpsichord 2 Harpsichord (wide) Harpsichord (octave mix) 1 Harpsichord Release Harpsichord (with key off) Clavi 1 Clavi 2 Clavi (wide) 1 Clavi (wide) 2 Clavi Wah Pulse Clavi Celesta 1 Celesta 2 Voice Number...
...Detuned Electric Piano 1 Detuned Electric Piano 2 Electric Piano 1 Electric Piano 2 Electric Piano (wide) 1 Electric Piano (wide) 2 EP Legend EP Phase 60's Electric Piano Electric Piano 1 (velocity mix) Electric Piano 2 (velocity mix) Velocity Crossfade Electric Piano Layered Electric Piano 1 Layered Electric Piano 2 Nylon Electric Piano Warm Electric Piano Grand Harpsichord Harpsichord 1 Harpsichord 2 Harpsichord (wide) Harpsichord (octave mix) 1 Harpsichord Release Harpsichord (with key off) Clavi 1 Clavi 2 Clavi (wide) 1 Clavi (wide) 2 Clavi Wah Pulse Clavi Celesta 1 Celesta 2 Voice Number...

Virtue - User Guide - v1.1.pdf
Page 94
Voice List (continued) Voice Number...Voice Synth Voice Bass Hit Plus Orchestra Hit 1 Orchestra Hit 2 Euro Hit 6th Hit Trumpet 1 Trumpet 2 Trumpet 3 Dark Trumpet Soft Sweet Trumpet Trombone 1 Trombone 2 Bright Trombone Tuba 1 Tuba 2 Muted Trumpet 1 Muted Trumpet 2 French Horn 1 French Horn 2 (warm) Brass Section 1 Brass Section 2 (octave...(wire lead) Lead 6 (voice) Lead 7 (fifths) Lead 8 (bass + lead) Lead 8a (soft wrl) Pad 1 (new age) New Year Pad Pad 2 (warm) Pad 2a (sine pad) Pad 3 (polysynth) 1 Pad 4 (choir) Pad 4a (itopia) Pad 5 (bowed) 1 Pad 6 (metallic) 1 Pad 7 (halo) 1 Pad 8 (sweep) 1 FX 1...
Voice List (continued) Voice Number...Voice Synth Voice Bass Hit Plus Orchestra Hit 1 Orchestra Hit 2 Euro Hit 6th Hit Trumpet 1 Trumpet 2 Trumpet 3 Dark Trumpet Soft Sweet Trumpet Trombone 1 Trombone 2 Bright Trombone Tuba 1 Tuba 2 Muted Trumpet 1 Muted Trumpet 2 French Horn 1 French Horn 2 (warm) Brass Section 1 Brass Section 2 (octave...(wire lead) Lead 6 (voice) Lead 7 (fifths) Lead 8 (bass + lead) Lead 8a (soft wrl) Pad 1 (new age) New Year Pad Pad 2 (warm) Pad 2a (sine pad) Pad 3 (polysynth) 1 Pad 4 (choir) Pad 4a (itopia) Pad 5 (bowed) 1 Pad 6 (metallic) 1 Pad 7 (halo) 1 Pad 8 (sweep) 1 FX 1...

Virtue - User Guide - v1.1.pdf
Page 95
... 352 353 354 355 356 357 358 359 360 Voice Telephone Ring 1 Applause Stereo Piano & Strings Pad Stereo Piano & Choir Stereo Piano & Synth Strings Stereo Piano & Warm Pad Rock Organ & Strings Steel Guitar & Warm Pad Orchestra Full Strings 1 Symphonic GuZheng PiPa ErHu 1 Bandi Hulusi LuSheng 1 SuoNa PaiXiao Standard Set Room Set Power Set Jazz Set Style Number 28 29 30 31 32 33 34 35 36...
... 352 353 354 355 356 357 358 359 360 Voice Telephone Ring 1 Applause Stereo Piano & Strings Pad Stereo Piano & Choir Stereo Piano & Synth Strings Stereo Piano & Warm Pad Rock Organ & Strings Steel Guitar & Warm Pad Orchestra Full Strings 1 Symphonic GuZheng PiPa ErHu 1 Bandi Hulusi LuSheng 1 SuoNa PaiXiao Standard Set Room Set Power Set Jazz Set Style Number 28 29 30 31 32 33 34 35 36...

Virtue - User Guide - v1.1.pdf
Page 98
.... Phillips is a trademark of inMusic Brands, Inc., registered in the United States and other countries. and other countries. Technical Specifications Keyboard Polyphony (Max) Voices (Sounds) Styles Demo Songs Power Dimensions (width x depth x height) Weight 88 full-sized non-weighted keys with velocity sensitivity and adjustable touch response 128 360 160 80 12V DC, 2A, center-positive 55.9" x 18.9" x 10.6" 142 cm x 48 cm x 27 cm...
.... Phillips is a trademark of inMusic Brands, Inc., registered in the United States and other countries. and other countries. Technical Specifications Keyboard Polyphony (Max) Voices (Sounds) Styles Demo Songs Power Dimensions (width x depth x height) Weight 88 full-sized non-weighted keys with velocity sensitivity and adjustable touch response 128 360 160 80 12V DC, 2A, center-positive 55.9" x 18.9" x 10.6" 142 cm x 48 cm x 27 cm...


