
Owner's Manual (english)
Page 3
... Front Panel ........ 7 Initial System Start-Up 7 Adjusting Volume 8 Lowering Volume Quickly 8 Setting the Time and Calendar 8 Radio Listening to Radio 8 Presetting Stations Manually 9 Presetting Stations Automatically 9 Tuning to Preset Stations 9 Frequency Search Function 9 Receiving a Multicast Station (HD Radio mode only 9 CD/MP3/WMA/AAC Playback 10 Repeat Play 11 M.I.X. (Random Play 11 Searching for CD Text 11 File/Folder Name Search (concerning MP3/WMA/AAC 12 Quick Search 12 About MP3/WMA/AAC 12 Sound Setting Adjusting Subwoofer Level/Bass Level/Treble Level/Balance...
... Front Panel ........ 7 Initial System Start-Up 7 Adjusting Volume 8 Lowering Volume Quickly 8 Setting the Time and Calendar 8 Radio Listening to Radio 8 Presetting Stations Manually 9 Presetting Stations Automatically 9 Tuning to Preset Stations 9 Frequency Search Function 9 Receiving a Multicast Station (HD Radio mode only 9 CD/MP3/WMA/AAC Playback 10 Repeat Play 11 M.I.X. (Random Play 11 Searching for CD Text 11 File/Folder Name Search (concerning MP3/WMA/AAC 12 Quick Search 12 About MP3/WMA/AAC 12 Sound Setting Adjusting Subwoofer Level/Bass Level/Treble Level/Balance...

Owner's Manual (english)
Page 4
... Function 24 Receiving Weather or Traffic Information from SAT Radio 25 Instant Replay Function (SIRIUS only) ......... 25 Changing the Display 25 Setting the Auxiliary Data Field Display (XM only 26 USB memory (Optional) Controlling USB memory (Optional 26 Playing MP3/WMA/AAC Files with the CD Changer (Optional 36 Multi-Changer Selection (Optional 36 Remote Control Controls on Remote Control 37 Operating the Audio Processor 37 Battery Replacement 38 Information In Case of Difficulty 39 Specifications 42 2-EN Channel 31 Equalizer Presets (Factory...
... Function 24 Receiving Weather or Traffic Information from SAT Radio 25 Instant Replay Function (SIRIUS only) ......... 25 Changing the Display 25 Setting the Auxiliary Data Field Display (XM only 26 USB memory (Optional) Controlling USB memory (Optional 26 Playing MP3/WMA/AAC Files with the CD Changer (Optional 36 Multi-Changer Selection (Optional 36 Remote Control Controls on Remote Control 37 Operating the Audio Processor 37 Battery Replacement 38 Information In Case of Difficulty 39 Specifications 42 2-EN Channel 31 Equalizer Presets (Factory...
Owner's Manual (english)
Page 7
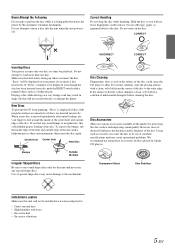
... a clean, soft cloth from jamming, "Error" is displayed if discs with a pointed object such as a ballpoint pen. For routine cleaning, wipe the playing surface with a ballpoint pen or other such instrument, then insert the disc again. Hold the disc so you insert the disc. Transparent Sheet Disc Stabilizer Installation Location Make sure this unit and never use your player if you feel around the...
... a clean, soft cloth from jamming, "Error" is displayed if discs with a pointed object such as a ballpoint pen. For routine cleaning, wipe the playing surface with a ballpoint pen or other such instrument, then insert the disc again. Hold the disc so you insert the disc. Transparent Sheet Disc Stabilizer Installation Location Make sure this unit and never use your player if you feel around the...

Owner's Manual (english)
Page 8
... USB connector is under unstable conditions, CDs on the settings of the USB memory type, memory state or encoding software, the unit may not play CD-Rs (CD-Recordables)/CD-RWs (CD-ReWritables) which have been recorded only on this unit. Protecting the USB connector • Only a USB memory can play it again. Read the USB memory Owner's Manual thoroughly. The resulting playback may not be connected to the USB connector on audio devices...
... USB connector is under unstable conditions, CDs on the settings of the USB memory type, memory state or encoding software, the unit may not play CD-Rs (CD-Recordables)/CD-RWs (CD-ReWritables) which have been recorded only on this unit. Protecting the USB connector • Only a USB memory can play it again. Read the USB memory Owner's Manual thoroughly. The resulting playback may not be connected to the USB connector on audio devices...
Owner's Manual (english)
Page 9
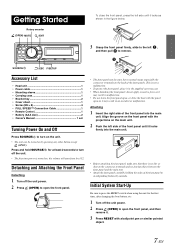
... the unit. • The unit can be turned on the connector terminals and no dirt or dust on by mistake. SOURCE/ /ESC F/SETUP Accessory List • Head unit 1 • Power cable 1 • Mounting sleeve 1 • Carrying case 1 • Bracket key 2 • Cover sheet 1 • Screw (M5 × 8 4 • FULL SPEED™ Connection Cable 1 • Remote Control 1 • Battery (AAA size 2 • Owner's Manual 1 set Turning Power On and Off Press SOURCE/ to remove...
... the unit. • The unit can be turned on the connector terminals and no dirt or dust on by mistake. SOURCE/ /ESC F/SETUP Accessory List • Head unit 1 • Power cable 1 • Mounting sleeve 1 • Carrying case 1 • Bracket key 2 • Cover sheet 1 • Screw (M5 × 8 4 • FULL SPEED™ Connection Cable 1 • Remote Control 1 • Battery (AAA size 2 • Owner's Manual 1 set Turning Power On and Off Press SOURCE/ to remove...
Owner's Manual (english)
Page 10
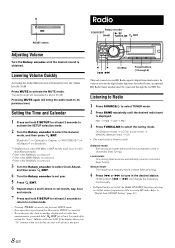
... dB. Listening to Radio 1 Press SOURCE/ to tune in steps (Manual tuning). 4 Press or to select TUNER mode. 2 Press BAND repeatedly until the desired sound is obtained. DX (Distance mode) LOCAL (Local mode) MANUAL (Manual mode) DX • The initial mode is manually tuned in the desired station. Manual mode: The frequency is Distance mode. RESET switch Radio Rotary encoder SOURCE/ // BAND TUNE/A.ME /ENT Adjusting Volume Turn the Rotary encoder until the desired radio band is displayed. The audio level will reset to activate the MUTE mode.
... dB. Listening to Radio 1 Press SOURCE/ to tune in steps (Manual tuning). 4 Press or to select TUNER mode. 2 Press BAND repeatedly until the desired sound is obtained. DX (Distance mode) LOCAL (Local mode) MANUAL (Manual mode) DX • The initial mode is manually tuned in the desired station. Manual mode: The frequency is Distance mode. RESET switch Radio Rotary encoder SOURCE/ // BAND TUNE/A.ME /ENT Adjusting Volume Turn the Rotary encoder until the desired radio band is displayed. The audio level will reset to activate the MUTE mode.
Owner's Manual (english)
Page 11
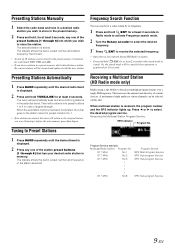
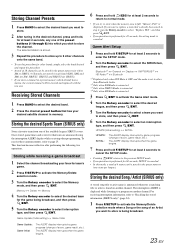
... program streams over a single FM frequency. Presetting Stations Manually 1 Select the radio band and tune in a desired radio station you wish to store in the preset memory. 2 Press and hold, for at least 2 seconds. Frequency Search Function You can be cleared and replaced with the new station. They will be stored into which already has a station, the current station will automatically seek and store 6 strong stations in Radio mode to activate Frequency search mode. 2 Turn...
... program streams over a single FM frequency. Presetting Stations Manually 1 Select the radio band and tune in a desired radio station you wish to store in the preset memory. 2 Press and hold, for at least 2 seconds. Frequency Search Function You can be cleared and replaced with the new station. They will be stored into which already has a station, the current station will automatically seek and store 6 strong stations in Radio mode to activate Frequency search mode. 2 Turn...

Owner's Manual (english)
Page 12
... the DISC mode. TUNER XM/SIRIUS*1 DISC USB iPod*2/AUX+*3 Bluetooth Audio*4 CHANGER*5 TUNER *1 Only when XM Radio or SIRIUS Radio is connected. *2 Displayed only when the iPod is connected and AUX+ Setup is set to OFF, refer to "Setting the AUX+ Setup Mode" (page 20). *3 Displayed only when the AUX+ Setup is set to ON, refer to "Setting the AUX+ Setup Mode" (page 20). *4 Displayed only when Bluetooth IN is set to ADAPTER, refer to "Bluetooth Setting" (page 19). *5 Only when the CD changer is already inserted, press SOURCE/ to switch to select...
... the DISC mode. TUNER XM/SIRIUS*1 DISC USB iPod*2/AUX+*3 Bluetooth Audio*4 CHANGER*5 TUNER *1 Only when XM Radio or SIRIUS Radio is connected. *2 Displayed only when the iPod is connected and AUX+ Setup is set to OFF, refer to "Setting the AUX+ Setup Mode" (page 20). *3 Displayed only when the AUX+ Setup is set to ON, refer to "Setting the AUX+ Setup Mode" (page 20). *4 Displayed only when Bluetooth IN is set to ADAPTER, refer to "Bluetooth Setting" (page 19). *5 Only when the CD changer is already inserted, press SOURCE/ to switch to select...
Owner's Manual (english)
Page 16
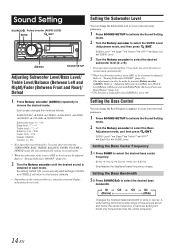
The adjustment can also be adjusted. SUBW. Sound Setting SOURCE/ Rotary encoder (AUDIO.LOUD) BAND /ENT /ESC SOUND SETUP Adjusting Subwoofer Level/Bass Level/ Treble Level/Balance (Between Left and Right)/Fader (Between Front and Rear)/ Defeat 1 Press Rotary encoder (AUDIO) repeatedly to select the Bass Adjustment mode, and then press /ENT. Setting the Bass Control You can change the Bass Frequency emphasis to create your own tonal preference. 1 Press SOUND SETUP to activate the Sound Setting mode. 2 Turn the Rotary encoder to "Turning Subwoofer ON/OFF" (page...
The adjustment can also be adjusted. SUBW. Sound Setting SOURCE/ Rotary encoder (AUDIO.LOUD) BAND /ENT /ESC SOUND SETUP Adjusting Subwoofer Level/Bass Level/ Treble Level/Balance (Between Left and Right)/Fader (Between Front and Rear)/ Defeat 1 Press Rotary encoder (AUDIO) repeatedly to select the Bass Adjustment mode, and then press /ENT. Setting the Bass Control You can change the Bass Frequency emphasis to create your own tonal preference. 1 Press SOUND SETUP to activate the Sound Setting mode. 2 Turn the Rotary encoder to "Turning Subwoofer ON/OFF" (page...
Owner's Manual (english)
Page 21
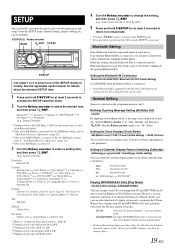
... can be played back. Select AUX IN) Bluetooth: Bluetooth IN General: Birthday Set Clock Mode Clock Adjust*5 Calendar Play Mode Beep INT Mute*6 AUX+ Setup AUX+ Name*7 AUX IN GAIN*7 Digital AUX D.AUX Name*8 AUX IN AUX Name*9 Changer Name Power IC Language Set Demo Birthday Set Display: Dimmer Dimmer Level Font Select BGV Select Scroll Type Text Scroll Opening MSG Dimmer XM: XM ADF SIRIUS: Game Alert HD Radio: Station Call Digital Seek Station Call *5 Refer to change discs.) 19-EN equipped mobile phone. Setting the Bluetooth IN Connection Bluetooth IN ADAPTER / Bluetooth IN...
... can be played back. Select AUX IN) Bluetooth: Bluetooth IN General: Birthday Set Clock Mode Clock Adjust*5 Calendar Play Mode Beep INT Mute*6 AUX+ Setup AUX+ Name*7 AUX IN GAIN*7 Digital AUX D.AUX Name*8 AUX IN AUX Name*9 Changer Name Power IC Language Set Demo Birthday Set Display: Dimmer Dimmer Level Font Select BGV Select Scroll Type Text Scroll Opening MSG Dimmer XM: XM ADF SIRIUS: Game Alert HD Radio: Station Call Digital Seek Station Call *5 Refer to change discs.) 19-EN equipped mobile phone. Setting the Bluetooth IN Connection Bluetooth IN ADAPTER / Bluetooth IN...

Owner's Manual (english)
Page 22
... device is used when the head unit is turned OFF and can set Digital AUX to ON to enjoy 5.1-channel surround sound. Low: High: Decreases the external input audio level. If this unit is input to the unit. You can not drive speakers. Power IC OFF : Use this mode when the line output of this setting, the head unit's internal amplifier is connected to the USB Adapter for MP3 (KCA-620M) is set to ON. Sound (Beep) Guide Function Beep ON (Initial setting...
... device is used when the head unit is turned OFF and can set Digital AUX to ON to enjoy 5.1-channel surround sound. Low: High: Decreases the external input audio level. If this unit is input to the unit. You can not drive speakers. Power IC OFF : Use this mode when the line output of this setting, the head unit's internal amplifier is connected to the USB Adapter for MP3 (KCA-620M) is set to ON. Sound (Beep) Guide Function Beep ON (Initial setting...
Owner's Manual (english)
Page 24
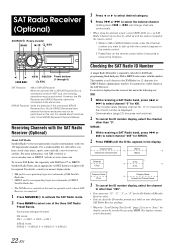
... SAT Radio Receiver (Optional) About SAT Radio Satellite Radio* is connected. 1 Press SOURCE/ to activate the SAT Radio mode. 2 Press BAND to SAT Radio programming. To receive SAT Radio, the separately sold XM Direct™ or SIRIUS Satellite Radio Tuner and an appropriate Ai-NET Interface Adapter will change channels continuously. • When using the optional remote control (RUE-4190, etc.), an SAT Radio Channel can hear crystal-clear music, sports, news and talk, coast-to receive the Channel. This number...
... SAT Radio Receiver (Optional) About SAT Radio Satellite Radio* is connected. 1 Press SOURCE/ to activate the SAT Radio mode. 2 Press BAND to SAT Radio programming. To receive SAT Radio, the separately sold XM Direct™ or SIRIUS Satellite Radio Tuner and an appropriate Ai-NET Interface Adapter will change channels continuously. • When using the optional remote control (RUE-4190, etc.), an SAT Radio Channel can hear crystal-clear music, sports, news and talk, coast-to receive the Channel. This number...
Owner's Manual (english)
Page 25
... use this mode, a total of 4 teams can be cleared and replaced with the new one of the preset buttons (1 through 6) into which already has a station, the current channel will be stored in memory. Bluetooth*1 HD Radio*4 General Display Bluetooth XM*2/SIRIUS*3 *1 Displayed only when INT Mute is OFF and the mode is set to a program on another channel. The selected station is displayed while listening to other than Bluetooth Audio. *2 Only when XM Radio is connected...
... use this mode, a total of 4 teams can be cleared and replaced with the new one of the preset buttons (1 through 6) into which already has a station, the current channel will be stored in memory. Bluetooth*1 HD Radio*4 General Display Bluetooth XM*2/SIRIUS*3 *1 Displayed only when INT Mute is OFF and the mode is set to a program on another channel. The selected station is displayed while listening to other than Bluetooth Audio. *2 Only when XM Radio is connected...

Owner's Manual (english)
Page 29
... . TUNER XM/SIRIUS*1 DISC USB iPod*2/AUX+*3 Bluetooth Audio*4 CHANGER*5 TUNER *1 Only when XM Radio or SIRIUS Radio is connected. *2 Displayed only when the iPod is connected and AUX+ Setup is set to OFF, refer to "Setting the AUX+ Setup Mode" (page 20). *3 Displayed only when the AUX+ Setup is set to ON, refer to "Setting the AUX+ Setup Mode" (page 20). *4 Displayed only when Bluetooth IN is set to ADAPTER, refer to select the Artist search mode, and then press /ENT. iPod (Optional) Rotary encoder SOURCE/ / /ENT 4 5 6 VIEW /ESC Preset buttons (1 through...
... . TUNER XM/SIRIUS*1 DISC USB iPod*2/AUX+*3 Bluetooth Audio*4 CHANGER*5 TUNER *1 Only when XM Radio or SIRIUS Radio is connected. *2 Displayed only when the iPod is connected and AUX+ Setup is set to OFF, refer to "Setting the AUX+ Setup Mode" (page 20). *3 Displayed only when the AUX+ Setup is set to ON, refer to "Setting the AUX+ Setup Mode" (page 20). *4 Displayed only when Bluetooth IN is set to ADAPTER, refer to select the Artist search mode, and then press /ENT. iPod (Optional) Rotary encoder SOURCE/ / /ENT 4 5 6 VIEW /ESC Preset buttons (1 through...

Owner's Manual (english)
Page 33
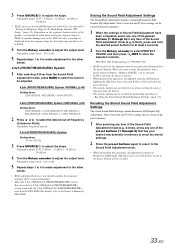
... operation before returning to the music source. MAKER'S (Initial setting ) USER'S MAKER'S: As protection from "MP3/WMA/AAC to CD-DA" or "CD-DA to MP3/WMA/AAC", MX-mode switching may not match the head unit, the audio processor needs to be set the subwoofer output to the media connected. • Each music source, such as music clip. CMPM/SAT (MX level 1 to 3): This corrects information that corresponds to stereo...
... operation before returning to the music source. MAKER'S (Initial setting ) USER'S MAKER'S: As protection from "MP3/WMA/AAC to CD-DA" or "CD-DA to MP3/WMA/AAC", MX-mode switching may not match the head unit, the audio processor needs to be set the subwoofer output to the media connected. • Each music source, such as music clip. CMPM/SAT (MX level 1 to 3): This corrects information that corresponds to stereo...
Owner's Manual (english)
Page 35
... make adjustment to adjust the output level. PROTECT YES (Initial setting) PROTECT NO • If YES is selected, the adjusted contents are not deleted even when resetting the unit or disconnecting the battery. • The stored contents can be taken when setting the response slope to the Owner's Manual of the speaker, care should consider the frequency response of the connected speakers. • About the 2.2ch (3WAY)/4.2ch (FRONT/REAR/SUBW...
... make adjustment to adjust the output level. PROTECT YES (Initial setting) PROTECT NO • If YES is selected, the adjusted contents are not deleted even when resetting the unit or disconnecting the battery. • The stored contents can be taken when setting the response slope to the Owner's Manual of the speaker, care should consider the frequency response of the connected speakers. • About the 2.2ch (3WAY)/4.2ch (FRONT/REAR/SUBW...

Owner's Manual (english)
Page 39
... button to the Owner's Manual of the next track. Press the button to activate the external audio processor mode when the external audio processor is connected, refer to turn the power on/off. Band Button Radio mode: BAND Button Press this button will select, in ascending order, stations programmed into the radio's presets as shown below. ... Operating the Audio Processor 1 Press A.PROC to select the item. Normal mode Time Correction X-OVER Normal mode 2 Press or to select the mode. iPod mode: Switches...
... button to the Owner's Manual of the next track. Press the button to activate the external audio processor mode when the external audio processor is connected, refer to turn the power on/off. Band Button Radio mode: BAND Button Press this button will select, in ascending order, stations programmed into the radio's presets as shown below. ... Operating the Audio Processor 1 Press A.PROC to select the item. Normal mode Time Correction X-OVER Normal mode 2 Press or to select the mode. iPod mode: Switches...

Owner's Manual (english)
Page 41
... or radio switch is switched to the mechanism. replace it if it . • The CD is properly connected or consult your antenna connections; Power IC is off . • Improper power lead (Red) and battery lead (Yellow) connections. - Consult your nearest Alpine dealer. using a damaged CD in a supported format. Error displays (built-in CD player only). • Mechanical error. - After the error indication disappears, insert the disc again. Audio The sound is not played...
... or radio switch is switched to the mechanism. replace it if it . • The CD is properly connected or consult your antenna connections; Power IC is off . • Improper power lead (Red) and battery lead (Yellow) connections. - Consult your nearest Alpine dealer. using a damaged CD in a supported format. Error displays (built-in CD player only). • Mechanical error. - After the error indication disappears, insert the disc again. Audio The sound is not played...
Owner's Manual (english)
Page 45
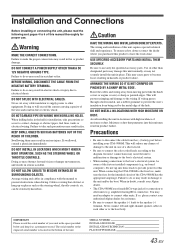
... hole. Do not tap into this manual thoroughly for proper use a rubber grommet to prevent the wire's insulation from the (-) battery post before installing your Alpine dealer. • The CDA-9886M uses female RCA-type jacks for installation, take such precautions may result in fire. Warning MAKE THE CORRECT CONNECTIONS. DO NOT INSTALL IN LOCATIONS WHICH MIGHT HINDER BOAT OPERATION, SUCH AS THE STEERING WHEEL...
... hole. Do not tap into this manual thoroughly for proper use a rubber grommet to prevent the wire's insulation from the (-) battery post before installing your Alpine dealer. • The CDA-9886M uses female RCA-type jacks for installation, take such precautions may result in fire. Warning MAKE THE CORRECT CONNECTIONS. DO NOT INSTALL IN LOCATIONS WHICH MIGHT HINDER BOAT OPERATION, SUCH AS THE STEERING WHEEL...
Owner's Manual (english)
Page 49
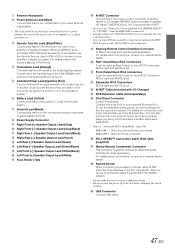
... turn on the boat's fuse box or another device (CD Changer, IMPRINT audio processor, Equalizer, HD Radio TUNER MODULE, etc.) equipped with CD Changer) RCA Extension Cable (sold separately). * Refer to "Setting the AUX+ Setup Mode" (page 20). For details about connections, consult your amplifier or signal processor. System Switch When connecting a processor or divider using iPod Direct/RCA Interface cable (sold separately) iPod Direct Connector Control iPod signals. Remote Turn-On Lead (Blue/White) Connect this lead to the remote turn the power...
... turn on the boat's fuse box or another device (CD Changer, IMPRINT audio processor, Equalizer, HD Radio TUNER MODULE, etc.) equipped with CD Changer) RCA Extension Cable (sold separately). * Refer to "Setting the AUX+ Setup Mode" (page 20). For details about connections, consult your amplifier or signal processor. System Switch When connecting a processor or divider using iPod Direct/RCA Interface cable (sold separately) iPod Direct Connector Control iPod signals. Remote Turn-On Lead (Blue/White) Connect this lead to the remote turn the power...


