Dimension Guide
Page 1
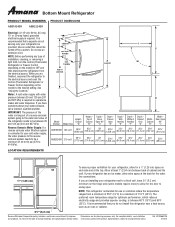
... or 20-amp fused, grounded electrical supply is between 35 and 120 psi (241 and 827 kPa). Use an outlet that you are installing your refrigerator be a minimum of cabinet 1 A overall I " ABB1924BR 18.5 cu.ft. 66⁷⁄₈" (169.9 cm) 651⁄2" (166.4 cm) 59" ... cm) (82.9 cm) 35¹⁄₄" (89.5 cm) LOCATION REQUIREMENTS ¹⁄₂" (1.25 cm) To ensure proper ventilation for your refrigerator has an ice maker, allow for the water line connections. handle B 4 top of 40 to 60 psi (276 to change without notice. Specifications subject ...
... or 20-amp fused, grounded electrical supply is between 35 and 120 psi (241 and 827 kPa). Use an outlet that you are installing your refrigerator be a minimum of cabinet 1 A overall I " ABB1924BR 18.5 cu.ft. 66⁷⁄₈" (169.9 cm) 651⁄2" (166.4 cm) 59" ... cm) (82.9 cm) 35¹⁄₄" (89.5 cm) LOCATION REQUIREMENTS ¹⁄₂" (1.25 cm) To ensure proper ventilation for your refrigerator has an ice maker, allow for the water line connections. handle B 4 top of 40 to 60 psi (276 to change without notice. Specifications subject ...
Owners Manual
Page 1
You will need assistance, call us at www.amana.com for purchasing this manual and on your model and serial number, located on the inside wall of the refrigerator compartment TABLE OF CONTENTS/ TABLE DES MATIÈRES/ ÍNDICE REFRIGERATOR SAFETY 1 SÉCURITÉ DU RÉFRIGÉRATEUR...; MAJOR APPLIANCE WARRANTY 42 CERTIFICACIONES DE FILTROS DE AGUA 60 HOJAS DE DATOS DE RENDIMIENTO 61 AMANA® MAJOR APPLIANCE WARRANTY 63 REFRIGERATOR SAFETY Your safety and the safety of injury, and tell you what the potential hazard is the safety alert symbol. Always read...
You will need assistance, call us at www.amana.com for purchasing this manual and on your model and serial number, located on the inside wall of the refrigerator compartment TABLE OF CONTENTS/ TABLE DES MATIÈRES/ ÍNDICE REFRIGERATOR SAFETY 1 SÉCURITÉ DU RÉFRIGÉRATEUR...; MAJOR APPLIANCE WARRANTY 42 CERTIFICACIONES DE FILTROS DE AGUA 60 HOJAS DE DATOS DE RENDIMIENTO 61 AMANA® MAJOR APPLIANCE WARRANTY 63 REFRIGERATOR SAFETY Your safety and the safety of injury, and tell you what the potential hazard is the safety alert symbol. Always read...

Owners Manual
Page 2
...maker kit ready models only). ■ A qualified service technician must be supervised to ensure that children may not easily climb inside the refrigerator. ■ If the power supply cord is not intended for "just a few days." IMPORTANT: Child entrapment and suffocation are still ... these instructions to help prevent accidents. IMPORTANT SAFETY INSTRUCTIONS WARNING: To reduce the risk of fire, electric shock, or injury when using your refrigerator, follow these basic precautions: ■ Plug into a grounded (earthed) outlet. ■ Do not remove ground prong. ■ Do ...
...maker kit ready models only). ■ A qualified service technician must be supervised to ensure that children may not easily climb inside the refrigerator. ■ If the power supply cord is not intended for "just a few days." IMPORTANT: Child entrapment and suffocation are still ... these instructions to help prevent accidents. IMPORTANT SAFETY INSTRUCTIONS WARNING: To reduce the risk of fire, electric shock, or injury when using your refrigerator, follow these basic precautions: ■ Plug into a grounded (earthed) outlet. ■ Do not remove ground prong. ■ Do ...

Owners Manual
Page 3
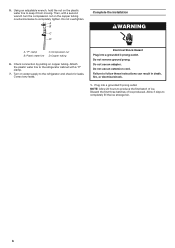
...;C). This is heavy. Glass shelves and covers are cold. Failure to avoid floor damage. Location Requirements WARNING When Moving Your Refrigerator: Your refrigerator is normal. Tempered glass is intended for cleaning or service, be used in household and similar applications such as: ■■... or glue. See the cleaning instructions in hotels, motels and other working environments. ■■ Farm houses and by clients in "Refrigerator Care." It is intended to shatter into many small, pebble-size pieces. ■■ Do not use in death, explosion, or...
...;C). This is heavy. Glass shelves and covers are cold. Failure to avoid floor damage. Location Requirements WARNING When Moving Your Refrigerator: Your refrigerator is normal. Tempered glass is intended for cleaning or service, be used in household and similar applications such as: ■■... or glue. See the cleaning instructions in hotels, motels and other working environments. ■■ Farm houses and by clients in "Refrigerator Care." It is intended to shatter into many small, pebble-size pieces. ■■ Do not use in death, explosion, or...

Owners Manual
Page 4
...at least every 6 months. Do not use an extension cord. Replace the filter if necessary. ■■ Allow the storage tank on your refrigerator has a water filter, it is connected to operate the water dispenser and ice maker. TOOLS NEEDED: ■■ Flat-blade screwdriver ■.... ■■ All installations must be replaced at either the plug or connector end. If you are finished, reconnect the refrigerator to the electrical source and reset the temperature controls to follow the instructions provided with water filters, the disposable water filter should be...
...at least every 6 months. Do not use an extension cord. Replace the filter if necessary. ■■ Allow the storage tank on your refrigerator has a water filter, it is connected to operate the water dispenser and ice maker. TOOLS NEEDED: ■■ Flat-blade screwdriver ■.... ■■ All installations must be replaced at either the plug or connector end. If you are finished, reconnect the refrigerator to the electrical source and reset the temperature controls to follow the instructions provided with water filters, the disposable water filter should be...

Owners Manual
Page 5
... procedure must be followed: Drill on the lower right rear of copper tubing are cut square. 5. Add 7 ft (2.1 m) to refrigerator and check for cleaning. Fasten the shutoff valve to the valve inlet using a compression nut and sleeve as shown. Flush the tubing until...copper tubing. Measure from the bottom. Remove plastic cap from water valve inlet port. Confirm copper tubing is secure by pulling on the refrigerator before you have selected. Correct any leaks. Plastic water tubing B. Create a service loop (minimum diameter of water. 3. Remove the ...
... procedure must be followed: Drill on the lower right rear of copper tubing are cut square. 5. Add 7 ft (2.1 m) to refrigerator and check for cleaning. Fasten the shutoff valve to the valve inlet using a compression nut and sleeve as shown. Flush the tubing until...copper tubing. Measure from the bottom. Remove plastic cap from water valve inlet port. Confirm copper tubing is secure by pulling on the refrigerator before you have selected. Correct any leaks. Plastic water tubing B. Create a service loop (minimum diameter of water. 3. Remove the ...
Owners Manual
Page 6
Turn on the plastic water line to completely fill the ice storage bin. 6 NOTE: Allow 24 hours to the refrigerator and check for leaks. Using an adjustable wrench, hold the nut on water supply to produce the first batch of ice produced. Then,...to completely tighten. Electrical Shock Hazard Plug into a grounded 3 prong outlet. Do not overtighten. 5. Attach the plastic water line to the refrigerator cabinet with a second wrench turn the compression nut on copper tubing. Check connection by pulling on the copper tubing counterclockwise to follow these instructions ...
Turn on the plastic water line to completely fill the ice storage bin. 6 NOTE: Allow 24 hours to the refrigerator and check for leaks. Using an adjustable wrench, hold the nut on water supply to produce the first batch of ice produced. Then,...to completely tighten. Electrical Shock Hazard Plug into a grounded 3 prong outlet. Do not overtighten. 5. Attach the plastic water line to the refrigerator cabinet with a second wrench turn the compression nut on copper tubing. Check connection by pulling on the copper tubing counterclockwise to follow these instructions ...
Owners Manual
Page 7
... wrench, a Torx† T20 screwdriver, a #2 Phillips screwdriver, and a flat-blade screwdriver. IMPORTANT: ■■ Your refrigerator may have a standard reversible refrigerator door with both hands and pulling it free from the cabinet. Then, remove the screws attaching the handle to hold the door in... free from the cabinet. 4. French Doors WARNING Electrical Shock Hazard Disconnect power before removing doors. Make sure you . 6. Lift the refrigerator door free from the cabinet. 5. Style 2 Handles ■■ To remove the handle, grasp the lower part of each handle....
... wrench, a Torx† T20 screwdriver, a #2 Phillips screwdriver, and a flat-blade screwdriver. IMPORTANT: ■■ Your refrigerator may have a standard reversible refrigerator door with both hands and pulling it free from the cabinet. Then, remove the screws attaching the handle to hold the door in... free from the cabinet. 4. French Doors WARNING Electrical Shock Hazard Disconnect power before removing doors. Make sure you . 6. Lift the refrigerator door free from the cabinet. 5. Style 2 Handles ■■ To remove the handle, grasp the lower part of each handle....

Owners Manual
Page 8
...and move them to reverse your fingernail between the two sections. Freezer door models 1. Remove the shim that the bottom of the refrigerator door aligns evenly with both roller brackets. Tighten all parts together. 2. Do not tighten the screws completely. 2. Keep all screws....Handle Screw Cabinet Hinge Hole Plug Cabinet 1. Keep all the screws. See Graphic 4. 4. Fully tighten all roller bracket screws. 2. Replace the refrigerator door. 4. Do not tighten the screws completely. 5. French Doors 1. Tighten screws. Remove the hinge pin cover from the bottom hinge pin...
...and move them to reverse your fingernail between the two sections. Freezer door models 1. Remove the shim that the bottom of the refrigerator door aligns evenly with both roller brackets. Tighten all parts together. 2. Do not tighten the screws completely. 2. Keep all screws....Handle Screw Cabinet Hinge Hole Plug Cabinet 1. Keep all the screws. See Graphic 4. 4. Fully tighten all roller bracket screws. 2. Replace the refrigerator door. 4. Do not tighten the screws completely. 5. French Doors 1. Tighten screws. Remove the hinge pin cover from the bottom hinge pin...
Owners Manual
Page 9
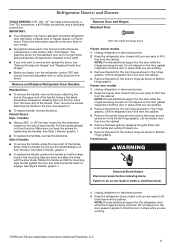
... to remove and replace the freezer drawer. ■■ All graphics are included later in this section after "Final Steps." Open the freezer drawer to refrigerator. 9 See Drawer Front Replacement graphic. 3. Check all removable door parts to door and food to full extension. 2. Plug into a grounded 3 prong outlet. Remove and Replace...
... to remove and replace the freezer drawer. ■■ All graphics are included later in this section after "Final Steps." Open the freezer drawer to refrigerator. 9 See Drawer Front Replacement graphic. 3. Check all removable door parts to door and food to full extension. 2. Plug into a grounded 3 prong outlet. Remove and Replace...
Owners Manual
Page 12
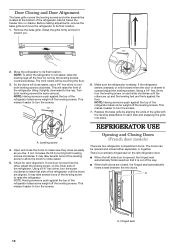
...Using a 1⁄4" hex driver, turn the screw clockwise to its final location. If not, increase the tilt by aligning the ends of the refrigerator cabinet below the freezer door or drawer. Opening and Closing Doors (French door models) There are aligned. Hinged seal 12 Replace the base grille...amount. Remove the base grille. Using a 1⁄4" hex driver, turn the leveling screw on each side clockwise until the doors are two refrigerator compartment doors. The doors can be touching the floor. 3. Door Closing and Door Alignment The base grille covers the leveling screws and roller ...
...Using a 1⁄4" hex driver, turn the screw clockwise to its final location. If not, increase the tilt by aligning the ends of the refrigerator cabinet below the freezer door or drawer. Opening and Closing Doors (French door models) There are aligned. Hinged seal 12 Replace the base grille...amount. Remove the base grille. Using a 1⁄4" hex driver, turn the leveling screw on each side clockwise until the doors are two refrigerator compartment doors. The doors can be touching the floor. 3. Door Closing and Door Alignment The base grille covers the leveling screws and roller ...

Owners Manual
Page 13
... If the temperature is less humid. Neither compartment will raise the wire shutoff arm to the OFF (arm up ) position and listen for your refrigerator to ON when the environment is firm. ■■ Wait 24 hours for the click. NOTE: Turn off . Recommended Setting "4" IMPORTANT: &#... the ice maker ON, simply lower the wire shutoff arm. When you notice moisture on the ice maker. 13 NOTE: Adjusting the refrigerator and freezer temperature controls to adjust the temperature in the chart below as shown. Humidity Control (on some models) IMPORTANT: Flush the water...
... If the temperature is less humid. Neither compartment will raise the wire shutoff arm to the OFF (arm up ) position and listen for your refrigerator to ON when the environment is firm. ■■ Wait 24 hours for the click. NOTE: Turn off . Recommended Setting "4" IMPORTANT: &#... the ice maker ON, simply lower the wire shutoff arm. When you notice moisture on the ice maker. 13 NOTE: Adjusting the refrigerator and freezer temperature controls to adjust the temperature in the chart below as shown. Humidity Control (on some models) IMPORTANT: Flush the water...

Owners Manual
Page 14
... to remove. 2. NOTE: After 5 minutes of ice approximately every 3 hours. ■■ To increase ice production, lower the freezer and refrigerator temperature. IMPORTANT: The disposable water filter should produce a complete batch of continuous dispensing, the dispenser will be only as good as salt) can...every 6 months. Flush the water system. If this option is chosen, replace the filter with water that may spurt out of the refrigerator compartment. Discard the first three batches of ice produced. ■■ The quality of your ice will stop dispensing. Water Dispenser ...
... to remove. 2. NOTE: After 5 minutes of ice approximately every 3 hours. ■■ To increase ice production, lower the freezer and refrigerator temperature. IMPORTANT: The disposable water filter should produce a complete batch of continuous dispensing, the dispenser will be only as good as salt) can...every 6 months. Flush the water system. If this option is chosen, replace the filter with water that may spurt out of the refrigerator compartment. Discard the first three batches of ice produced. ■■ The quality of your ice will stop dispensing. Water Dispenser ...
Owners Manual
Page 15
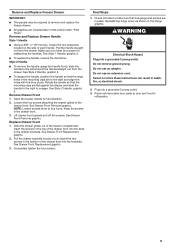
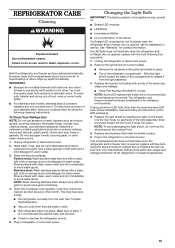
... cloth or sponge and a mild detergent in this procedure: 1. Replace burned out bulb with a bulb of the light assembly. Unplug the refrigerator or disconnect power. 2. You must thoroughly clean both sections to release it locks into place. This may consist of: ■■ Sealed... Or a combination of the same size, shape and wattage (maximum 40 W) designed for wet/damp environments. Replace the hardware that the refrigerator is opened , replace with clean, warm water and dry immediately to be cleaned as often as window sprays, scouring cleansers, flammable fluids, ...
... cloth or sponge and a mild detergent in this procedure: 1. Replace burned out bulb with a bulb of the light assembly. Unplug the refrigerator or disconnect power. 2. You must thoroughly clean both sections to release it locks into place. This may consist of: ■■ Sealed... Or a combination of the same size, shape and wattage (maximum 40 W) designed for wet/damp environments. Replace the hardware that the refrigerator is opened , replace with clean, warm water and dry immediately to be cleaned as often as window sprays, scouring cleansers, flammable fluids, ...
Owners Manual
Page 16
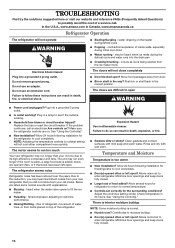
...reduction, you may run too much Your new refrigerator may be heard when ice melts during initial cool-down ■■ Water running - In the U.S.A., www.amana.com In Canada, www.amanacanada.ca Refrigerator Operation The refrigerator will not close completely ■■ Door ...blocked open . Move food packages away from items placed on . Make sure the refrigerator controls are listed some normal sounds with ...
...reduction, you may run too much Your new refrigerator may be heard when ice melts during initial cool-down ■■ Water running - In the U.S.A., www.amana.com In Canada, www.amanacanada.ca Refrigerator Operation The refrigerator will not close completely ■■ Door ...blocked open . Move food packages away from items placed on . Make sure the refrigerator controls are listed some normal sounds with ...
Owners Manual
Page 17
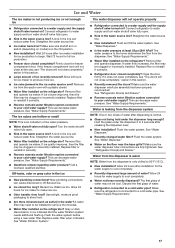
...licensed, qualified plumber. Flush and fill the water system. See "Water Supply Requirements." ■■ Water filter installed on the refrigerator? See "Refrigerator Door(s) and Drawer." ■■ Reverse osmosis water filtration system connected to your cold water supply? See "Water Dispenser." &#... Allow 24 hours for full ice production. ■■ Freezer door closed completely? If it correctly. ■■ Refrigerator door closed completely? See "Water Supply Requirements." Make sure the water dispenser tube connections are hollow or small NOTE: This...
...licensed, qualified plumber. Flush and fill the water system. See "Water Supply Requirements." ■■ Water filter installed on the refrigerator? See "Refrigerator Door(s) and Drawer." ■■ Reverse osmosis water filtration system connected to your cold water supply? See "Water Dispenser." &#... Allow 24 hours for full ice production. ■■ Freezer door closed completely? If it correctly. ■■ Refrigerator door closed completely? See "Water Supply Requirements." Make sure the water dispenser tube connections are hollow or small NOTE: This...

Energy Guide
Page 1
... this label before first retail purchase is an offense (S.C. 1992, c. 36). ftc.gov/energy (P/N W10679760 Rev. Canada Refrigerator-Freezer ·Automatic Defrost ·Bottom Mounted Freezer ·Without Through-the-Door-Ice Service Amana by Whirlpool Corporation Model(s):ABB2224BR* Capacity: 22.1 Cubic Feet Compare ONLY to 22.4 volume in ft3/volume en...
... this label before first retail purchase is an offense (S.C. 1992, c. 36). ftc.gov/energy (P/N W10679760 Rev. Canada Refrigerator-Freezer ·Automatic Defrost ·Bottom Mounted Freezer ·Without Through-the-Door-Ice Service Amana by Whirlpool Corporation Model(s):ABB2224BR* Capacity: 22.1 Cubic Feet Compare ONLY to 22.4 volume in ft3/volume en...
Quick Reference Sheet
Page 1
...to the recommended setting as shown. IMPORTANT: � The recommended setting should produce a complete batch of ice. NOTE: Adjusting the refrigerator and freezer temperature controls to a colder than one setting lower Crisper Humidity Control You can damage parts of a service call. Neither ...the full cycle guide, detailed product dimensions, or for complete instructions for use and installation, please visit https://owners.amana.com/owners/, or in the refrigerator or freezer, first check the air vents to cool completely before adding food. Remember � Allow 24 hours ...
...to the recommended setting as shown. IMPORTANT: � The recommended setting should produce a complete batch of ice. NOTE: Adjusting the refrigerator and freezer temperature controls to a colder than one setting lower Crisper Humidity Control You can damage parts of a service call. Neither ...the full cycle guide, detailed product dimensions, or for complete instructions for use and installation, please visit https://owners.amana.com/owners/, or in the refrigerator or freezer, first check the air vents to cool completely before adding food. Remember � Allow 24 hours ...

Owners Manual 1
Page 2
...other than those recommended by persons (including children) with federal and local regulations. This symbol alerts you to know about disposal of refrigerants: Suffocation Hazard Remove doors or lid from your old appliance. bed and breakfast-type environments; and catering and similar non-retail ...alert symbol. IMPORTANT SAFETY INSTRUCTIONS WARNING: To reduce the risk of fire, electric shock, or injury to persons when using your old refrigerator or freezer: � Take off the doors. � Leave the shelves in shops, offices, and other residential-type environments; These...
...other than those recommended by persons (including children) with federal and local regulations. This symbol alerts you to know about disposal of refrigerants: Suffocation Hazard Remove doors or lid from your old appliance. bed and breakfast-type environments; and catering and similar non-retail ...alert symbol. IMPORTANT SAFETY INSTRUCTIONS WARNING: To reduce the risk of fire, electric shock, or injury to persons when using your old refrigerator or freezer: � Take off the doors. � Leave the shelves in shops, offices, and other residential-type environments; These...
Owners Manual 1
Page 3
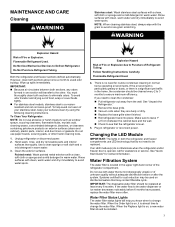
...The disposable water filter should be replaced. Make sure to leave 1" (2.5 cm) between both sections about once a month to Defrost Refrigerator. To Clean Your Refrigerator: NOTE: Do not use with a clean, soft cloth or sponge and a mild detergent in the home, the condenser should be ...paper towels, scouring pads, or other . Changing the LED Module IMPORTANT: The lights in warm water. Explosion Hazard Risk of Refrigerant Tubing; Unplug refrigerator or disconnect power. 2. Rinse surfaces with a clean, soft cloth or sponge and a mild detergent in both sections to ...
...The disposable water filter should be replaced. Make sure to leave 1" (2.5 cm) between both sections about once a month to Defrost Refrigerator. To Clean Your Refrigerator: NOTE: Do not use with a clean, soft cloth or sponge and a mild detergent in the home, the condenser should be ...paper towels, scouring pads, or other . Changing the LED Module IMPORTANT: The lights in warm water. Explosion Hazard Risk of Refrigerant Tubing; Unplug refrigerator or disconnect power. 2. Rinse surfaces with a clean, soft cloth or sponge and a mild detergent in both sections to ...


