
User manual 10 100 40 Asko T743C ES
Page 24
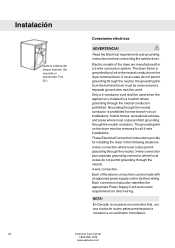
... codes prohibit grounding through the neutral. 4-wire connection. These Electrical Connection instructions provide for installing the dryer in a location where grounding through the neutral, the grounding link from the terminal block must be removed and a separate ground wire must be used . The dryer frame is prohibited for all 4-wire installations. Each of the dryer are manufactured for direct wiring. The grounding link on the dryer terminal block. NOTA! Read the Electrical requirements and grounding instructions before connecting...
... codes prohibit grounding through the neutral. 4-wire connection. These Electrical Connection instructions provide for installing the dryer in a location where grounding through the neutral, the grounding link from the terminal block must be removed and a separate ground wire must be used . The dryer frame is prohibited for all 4-wire installations. Each of the dryer are manufactured for direct wiring. The grounding link on the dryer terminal block. NOTA! Read the Electrical requirements and grounding instructions before connecting...
User manual 80 891 30 ASKO T743C AE
Page 2
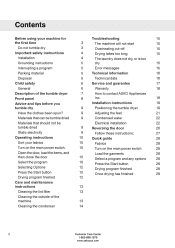
... too long The laundry does not dry, or is too dry Error messages Technical information Technical data Service and guarantee Warranty How to contact ASKO Appliances Inc. Open the door, load the items, and then close the door Select the program Selecting Options Press the Start button Drying program finished Care and maintenance instructions Cleaning the lint filter Cleaning the outside of the tumble dryer Front panel Advice and tips before you tumble dry Have the clothes...
... too long The laundry does not dry, or is too dry Error messages Technical information Technical data Service and guarantee Warranty How to contact ASKO Appliances Inc. Open the door, load the items, and then close the door Select the program Selecting Options Press the Start button Drying program finished Care and maintenance instructions Cleaning the lint filter Cleaning the outside of the tumble dryer Front panel Advice and tips before you tumble dry Have the clothes...
User manual 80 891 30 ASKO T743C AE
Page 4
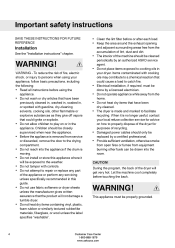
... operate appliance while away from the home. • Do not heat dry items that have been previously cleaned in, washed in, soaked in your dryer. Installation See the "Installation instructions" chapter. Important safety instructions SAVE THESE INSTRUCTIONS FOR FUTURE REFERENCE • Clean the lint filter before or after each load. • Keep the area around the exhaust opening and adjacent surrounding areas free from the accumulation of lint...
... operate appliance while away from the home. • Do not heat dry items that have been previously cleaned in, washed in, soaked in your dryer. Installation See the "Installation instructions" chapter. Important safety instructions SAVE THESE INSTRUCTIONS FOR FUTURE REFERENCE • Clean the lint filter before or after each load. • Keep the area around the exhaust opening and adjacent surrounding areas free from the accumulation of lint...
User manual 80 891 30 ASKO T743C AE
Page 5
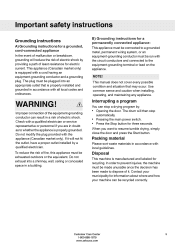
... be connected to a grounded metal, permanent wiring system, or an equipment-grounding conductor must be run with the circuit conductors and connected to the equipment-grounding terminal or lead on the appliance. This appliance (Canadian market only) is properly grounded. B) Grounding instructions for electric current. Disposal This machine is properly installed and grounded in accordance with all local codes and...
... be connected to a grounded metal, permanent wiring system, or an equipment-grounding conductor must be run with the circuit conductors and connected to the equipment-grounding terminal or lead on the appliance. This appliance (Canadian market only) is properly grounded. B) Grounding instructions for electric current. Disposal This machine is properly installed and grounded in accordance with all local codes and...
User manual 80 891 30 ASKO T743C AE
Page 9
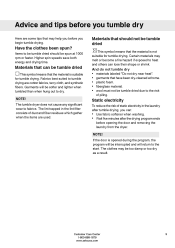
.... The tumble dryer does not cause any significant wear to the start. Static electricity To reduce the risk of piling. Higher spin speeds save both energy and drying time. The clothes may melt or become a fire hazard if exposed to tumble drying are used. NOTE! And do not tumble dry materials labeled "Do not dry near heat". fiberglass material. If the door is not...
.... The tumble dryer does not cause any significant wear to the start. Static electricity To reduce the risk of piling. Higher spin speeds save both energy and drying time. The clothes may melt or become a fire hazard if exposed to tumble drying are used. NOTE! And do not tumble dry materials labeled "Do not dry near heat". fiberglass material. If the door is not...

User manual 80 891 30 ASKO T743C AE
Page 10
... the door Select the program Guidelines as jeans with very thick seams. NOTE! Use these items. Stretch clothes back into shape immediately after drying. Auto Iron Dry This program shuts off the heat slightly later than Auto Delicate. sort the items and adjust load and temperature. Turn on the main power switch. The Auto Normal program shuts off the heat once the load is "over dry". Operating instructions...
... the door Select the program Guidelines as jeans with very thick seams. NOTE! Use these items. Stretch clothes back into shape immediately after drying. Auto Iron Dry This program shuts off the heat slightly later than Auto Delicate. sort the items and adjust load and temperature. Turn on the main power switch. The Auto Normal program shuts off the heat once the load is "over dry". Operating instructions...

User manual 80 891 30 ASKO T743C AE
Page 12
... opening the door. Temperature You can stop the tumble dryer after starting a program by pressing the button next to the symbol. • The lamp next to the button lights when Temperature Low is finished. If the lint filter becomes clogged, the machine's automatic overheating cut-off the main power switch. Delayed Start This option cannot be triggered. You can tailor a drying program to suit your requirements...
... opening the door. Temperature You can stop the tumble dryer after starting a program by pressing the button next to the symbol. • The lamp next to the button lights when Temperature Low is finished. If the lint filter becomes clogged, the machine's automatic overheating cut-off the main power switch. Delayed Start This option cannot be triggered. You can tailor a drying program to suit your requirements...

User manual 80 891 30 ASKO T743C AE
Page 13
.... Do not allow dust to accumulate around the tumble dryer clean and cool; Check for any limescale deposits when cleaning the lint filter and, if necessary, wash the filter by hand. Care and maintenance instructions Cleaning the lint filter The lint filter must be washed with water to remove any deposits. 4. Grasp the filter handle and pull it by hand. Use a soft, dry cloth to remove any limescale deposits. Replace the filter in the lint filter. NOTE!
.... Do not allow dust to accumulate around the tumble dryer clean and cool; Check for any limescale deposits when cleaning the lint filter and, if necessary, wash the filter by hand. Care and maintenance instructions Cleaning the lint filter The lint filter must be washed with water to remove any deposits. 4. Grasp the filter handle and pull it by hand. Use a soft, dry cloth to remove any limescale deposits. Replace the filter in the lint filter. NOTE!

User manual 80 891 30 ASKO T743C AE
Page 14
... touch the lamella springs, as necessary. Turn off the main power switch. 2. Use a cotton bud or similar item to remove any lint from the drain hole [A] and the channel [B]. [A] [B] 3. If you may damage the condenser. UPP UP OBEN 4. Replace the plinth. Care and maintenance instructions Cleaning the condenser The condenser should be cleaned more frequently. 1. Wipe any lint from the compartment for example.
... touch the lamella springs, as necessary. Turn off the main power switch. 2. Use a cotton bud or similar item to remove any lint from the drain hole [A] and the channel [B]. [A] [B] 3. If you may damage the condenser. UPP UP OBEN 4. Replace the plinth. Care and maintenance instructions Cleaning the condenser The condenser should be cleaned more frequently. 1. Wipe any lint from the compartment for example.
User manual 80 891 30 ASKO T743C AE
Page 15
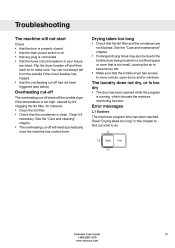
... is on to more cold air, open doors and/or windows. Overheating cut-off The overheating cut -off the tumble dryer if the temperature is too high, caused by lint clogging the lint filter, for instance. • Clean the lint filter. • Check that the main power switch is running, which disrupts the moisture monitoring function. L1 L2 Start L3 Stop Customer Care Center 1-800-898-1879...
... is on to more cold air, open doors and/or windows. Overheating cut-off The overheating cut -off the tumble dryer if the temperature is too high, caused by lint clogging the lint filter, for instance. • Clean the lint filter. • Check that the main power switch is running, which disrupts the moisture monitoring function. L1 L2 Start L3 Stop Customer Care Center 1-800-898-1879...
User manual 80 891 30 ASKO T743C AE
Page 18
... ASKO Appliances Inc. Correct the installation of the model, type name, and serial number. 18 Customer Care Center 1-800-898-1879 www.askousa.com Instruct how to us at: ASKO Appliances Inc. ASKO washers are designed to shipment, delivery, installation, misuse or abuse. 3. Clean or service air device in the home. will not allow the exclusion or limitation of product if appliance is used for other rights...
... ASKO Appliances Inc. Correct the installation of the model, type name, and serial number. 18 Customer Care Center 1-800-898-1879 www.askousa.com Instruct how to us at: ASKO Appliances Inc. ASKO washers are designed to shipment, delivery, installation, misuse or abuse. 3. Clean or service air device in the home. will not allow the exclusion or limitation of product if appliance is used for other rights...
User manual 80 891 30 ASKO T743C AE
Page 19
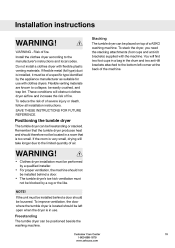
... plastic venting materials. Remember that is in the drum and two anti-tilt brackets attached to the limited quantity of a specific type identified by a rug or the like. WARNING! • Clothes dryer installation must be positioned beside the washing machine. To improve ventilation, the door where the tumble dryer is located should not be installed behind a door should therefore not be blocked by...
... plastic venting materials. Remember that is in the drum and two anti-tilt brackets attached to the limited quantity of a specific type identified by a rug or the like. WARNING! • Clothes dryer installation must be positioned beside the washing machine. To improve ventilation, the door where the tumble dryer is located should not be installed behind a door should therefore not be blocked by...
User manual 80 891 30 ASKO T743C AE
Page 20
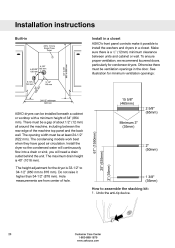
... ventilation, we recommend louvered doors, particularly for minimum ventilation openings: ASKO dryers can be a gap of hole. The maximum drain height is 33-1/2" to 34-1/2" (850 mm to assemble the stacking kit: 1. Do not raise it possible to install the washers and dryers in the door. How to 876 mm). The condensing models work best when they have good air circulation. There must be...
... ventilation, we recommend louvered doors, particularly for minimum ventilation openings: ASKO dryers can be a gap of hole. The maximum drain height is 33-1/2" to 34-1/2" (850 mm to assemble the stacking kit: 1. Do not raise it possible to install the washers and dryers in the door. How to 876 mm). The condensing models work best when they have good air circulation. There must be...
User manual 80 891 30 ASKO T743C AE
Page 22
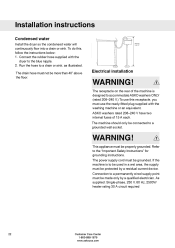
... Hz, 2500W heater rating 30 A circuit required 22 Customer Care Center 1-800-898-1879 www.askousa.com To do this receptacle, you must be connected to be used in a wet area, the supply must be protected by a qualified electrician. Installation instructions Condensed water Install the dryer so the condensed water will continuously flow into a drain or sink. ASKO washers rated 208-240 V have two internal fuses of the...
... Hz, 2500W heater rating 30 A circuit required 22 Customer Care Center 1-800-898-1879 www.askousa.com To do this receptacle, you must be connected to be used in a wet area, the supply must be protected by a qualified electrician. Installation instructions Condensed water Install the dryer so the condensed water will continuously flow into a drain or sink. ASKO washers rated 208-240 V have two internal fuses of the...

User manual 80 891 30 ASKO T743C AE
Page 23
... Electrical Connection instructions provide for all 4-wire installations. NOTE! The dryer frame is delivered ready-fitted with a four-prong plug intended for new branch-circuit installations, mobile homes, recreational vehicles, and areas where local codes prohibit grounding through the neutral, the grounding link from the terminal block must be removed and a separate ground wire must be used . Each connection instruction identifies the appropriate Power Supply Cord and covers requirements for a 3-wire connection system. Customer Care...
... Electrical Connection instructions provide for all 4-wire installations. NOTE! The dryer frame is delivered ready-fitted with a four-prong plug intended for new branch-circuit installations, mobile homes, recreational vehicles, and areas where local codes prohibit grounding through the neutral, the grounding link from the terminal block must be removed and a separate ground wire must be used . Each connection instruction identifies the appropriate Power Supply Cord and covers requirements for a 3-wire connection system. Customer Care...

User manual 80 891 30 ASKO T743C AE
Page 24
...wire receptacle of dryer. 9. Installation instructions Connecting a 3-wire Power Cord WARNING! Tighten screw. 6. Plug dryer into wall receptacle. 10. The numbers in the illustration below . Turn the power off at the breaker/fuse box. 5. Use the strain relief attached below the terminal block opening . 4. Remove center terminal block screw. Loosen or remove center terminal block screw. 4 Power Supply Cord You will need a 4-wire power supply cord with a white cover and the ground conductor by a green cover. Before starting this procedure, be sure the power is turned...
...wire receptacle of dryer. 9. Installation instructions Connecting a 3-wire Power Cord WARNING! Tighten screw. 6. Plug dryer into wall receptacle. 10. The numbers in the illustration below . Turn the power off at the breaker/fuse box. 5. Use the strain relief attached below the terminal block opening . 4. Remove center terminal block screw. Loosen or remove center terminal block screw. 4 Power Supply Cord You will need a 4-wire power supply cord with a white cover and the ground conductor by a green cover. Before starting this procedure, be sure the power is turned...

User manual 80 891 30 ASKO T743C AE
Page 25
Turn power on back of dryer. 11. Plug dryer into wall receptacle. 12. Remove ground wire (green with yellow stripes) from external ground connector screw and remove from center terminal block. 6. Connect neutral (white) wire of cord under center screw of cord to outer screws. 9. Replace terminal box cover on at breaker/fuse box. Customer Care Center 1-800-898-1879 www.askousa.com 25 Installation instructions 4 7 8 6 5. Tighten the strain relief screws. 10. Connect the other...
Turn power on back of dryer. 11. Plug dryer into wall receptacle. 12. Remove ground wire (green with yellow stripes) from external ground connector screw and remove from center terminal block. 6. Connect neutral (white) wire of cord under center screw of cord to outer screws. 9. Replace terminal box cover on at breaker/fuse box. Customer Care Center 1-800-898-1879 www.askousa.com 25 Installation instructions 4 7 8 6 5. Tighten the strain relief screws. 10. Connect the other...

User manual 80 891 30 ASKO T743C AE
Page 27
...). 3. Remove both door pins (top and bottom). Replace the Toe kick. Customer Care Center 1-800-898-1879 www.askousa.com 27 Remove the Toe kick. 2. Move the plastic plugs on the door and the machine. Use a flat screwdriver to remove the plugs. 7. Loosen and remove the catch (lift up and remove it . Fit them on the right or the left. Follow these instructions: 1. Reversing the door...
...). 3. Remove both door pins (top and bottom). Replace the Toe kick. Customer Care Center 1-800-898-1879 www.askousa.com 27 Remove the Toe kick. 2. Move the plastic plugs on the door and the machine. Use a flat screwdriver to remove the plugs. 7. Loosen and remove the catch (lift up and remove it . Fit them on the right or the left. Follow these instructions: 1. Reversing the door...

User manual 80 891 30 ASKO T743C AE
Page 28
... the main power switch • Turn the program selector to the desired program. • Select any options Turn on environmentally-friendly paper that meets the requirements of Miljöförbundet and Naturskyddsföreningen. 28 Customer Care Center 1-800-898-1879 www.askousa.com Press the Start button Load the garments • Close the door. Quick guide 1 2 3 Fabrics • Dry fabrics...
... the main power switch • Turn the program selector to the desired program. • Select any options Turn on environmentally-friendly paper that meets the requirements of Miljöförbundet and Naturskyddsföreningen. 28 Customer Care Center 1-800-898-1879 www.askousa.com Press the Start button Load the garments • Close the door. Quick guide 1 2 3 Fabrics • Dry fabrics...

User manual 80 891 31 ASKO T743C FR
Page 24
.... REMARQUE! The dryer frame is prohibited for a 3-wire connection system. The grounding link on the dryer terminal block. Each of the dryer are manufactured for new branch-circuit installations, mobile homes, recreational vehicles, and areas where local codes prohibit grounding through the neutral conductor is grounded by direct wiring. These Electrical Connection instructions provide for direct wiring. Read the Electrical requirements and grounding instructions before connecting the tumble dryer. Grounding through the...
.... REMARQUE! The dryer frame is prohibited for a 3-wire connection system. The grounding link on the dryer terminal block. Each of the dryer are manufactured for new branch-circuit installations, mobile homes, recreational vehicles, and areas where local codes prohibit grounding through the neutral conductor is grounded by direct wiring. These Electrical Connection instructions provide for direct wiring. Read the Electrical requirements and grounding instructions before connecting the tumble dryer. Grounding through the...


