
Instruction Manual
Page 1
Operating Instructions Tumble dryer Save these instructions for future reference Dear Customer, Thank you get the most out of all our products and the reason they are greatly appreciated ..., we recommend that you read the operating instructions before using the machine. These are key characteristics of your needs for choosing this quality product from ASKO. To ensure that you for many years to avoid damaging the environment. Scandinavian design combines clean lines, everyday functionality, and high quality. The operating instructions...
Operating Instructions Tumble dryer Save these instructions for future reference Dear Customer, Thank you get the most out of all our products and the reason they are greatly appreciated ..., we recommend that you read the operating instructions before using the machine. These are key characteristics of your needs for choosing this quality product from ASKO. To ensure that you for many years to avoid damaging the environment. Scandinavian design combines clean lines, everyday functionality, and high quality. The operating instructions...
Instruction Manual
Page 2
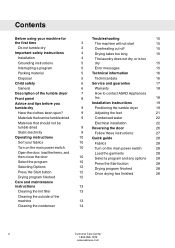
... 16 Child safety 6 Service and guarantee 17 General 6 Warranty 18 Description of the tumble dryer Front panel Advice and tips before you tumble dry 7 How to contact ASKO Appliances 8 Inc. 18 Installation instructions 19 9 Positioning the tumble dryer 19 Have the clothes been spun? 9 Adjusting the feet 21 Materials that can be tumble...
... 16 Child safety 6 Service and guarantee 17 General 6 Warranty 18 Description of the tumble dryer Front panel Advice and tips before you tumble dry 7 How to contact ASKO Appliances 8 Inc. 18 Installation instructions 19 9 Positioning the tumble dryer 19 Have the clothes been spun? 9 Adjusting the feet 21 Materials that can be tumble...

Instruction Manual
Page 3
...-care y descárguesela. This noise is completely normal and will disappear after a long period without use, you tumble dry" chapter. When starting the tumble dryer for tumble drying. Do not tumble dry Certain materials are not suitable for the first time or after a few loads. NOTE! Before using your machine...
...-care y descárguesela. This noise is completely normal and will disappear after a long period without use, you tumble dry" chapter. When starting the tumble dryer for tumble drying. Do not tumble dry Certain materials are not suitable for the first time or after a few loads. NOTE! Before using your machine...
Instruction Manual
Page 4
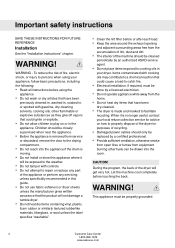
...basic precautions, including the following: • Read all instructions before touching the back. WARNING - WARNING! When it will not damage a tumble dryer. • Do not heat dry items containing vinyl, plastic, foam rubber or similarly textured rubberlike materials, fiberglass, or wool unless the label ...• Do not heat dry items that the product will be cleaned periodically by an authorized ASKO service agent. • Do not place items exposed to properly dispose of the dryer for purposes of recycling. • Damaged power cables should only be replaced by a licensed ...
...basic precautions, including the following: • Read all instructions before touching the back. WARNING - WARNING! When it will not damage a tumble dryer. • Do not heat dry items containing vinyl, plastic, foam rubber or similarly textured rubberlike materials, fiberglass, or wool unless the label ...• Do not heat dry items that the product will be cleaned periodically by an authorized ASKO service agent. • Do not place items exposed to properly dispose of the dryer for purposes of recycling. • Damaged power cables should only be replaced by a licensed ...

Instruction Manual
Page 6
The tumble dryer does not start automatically when the door is closed (if a child pulls the door shut from the inside, for example). 6 Customer Care Center 1-800-898-1879 www.askousa.com Child safety General WARNING! Do not allow children to play with the tumble dryer.
The tumble dryer does not start automatically when the door is closed (if a child pulls the door shut from the inside, for example). 6 Customer Care Center 1-800-898-1879 www.askousa.com Child safety General WARNING! Do not allow children to play with the tumble dryer.

Instruction Manual
Page 7
Main power switch 2. Serial number tag and rating plate 4. Lint filter holder 5. Lint filter 98 Customer Care Center 7 1-800-898-1879 www.askousa.com Condenser 8. Fan (behind hatch) 7. Description of the tumble dryer 1 2 3 4 5 6 7 1. Panel 3. Outer door 6.
Main power switch 2. Serial number tag and rating plate 4. Lint filter holder 5. Lint filter 98 Customer Care Center 7 1-800-898-1879 www.askousa.com Condenser 8. Fan (behind hatch) 7. Description of the tumble dryer 1 2 3 4 5 6 7 1. Panel 3. Outer door 6.

Instruction Manual
Page 9
... at 1000 rpm or faster. NOTE! NOTE! The clothes may melt or become a fire hazard if exposed to the risk of piling. The tumble dryer does not cause any significant wear to the start. Higher spin speeds save both energy and drying time. And do not tumble dry • materials... labeled "Do not dry near heat". • garments that may help you before opening the door and removing the laundry from the dryer. Customer Care Center 9 1-800-898-1879 www.askousa.com The lint trapped in the lint filter consists of static electricity in the laundry after the...
... at 1000 rpm or faster. NOTE! NOTE! The clothes may melt or become a fire hazard if exposed to the risk of piling. The tumble dryer does not cause any significant wear to the start. Higher spin speeds save both energy and drying time. And do not tumble dry • materials... labeled "Do not dry near heat". • garments that may help you before opening the door and removing the laundry from the dryer. Customer Care Center 9 1-800-898-1879 www.askousa.com The lint trapped in the lint filter consists of static electricity in the laundry after the...

Instruction Manual
Page 12
... the Stop button for around the Start and Stop button light when the program is finished. Loading or removing laundry You can stop the tumble dryer after the program has started. A new estimate of course, change the program selector after starting a program by pressing the button next to the symbol. •...
... the Stop button for around the Start and Stop button light when the program is finished. Loading or removing laundry You can stop the tumble dryer after the program has started. A new estimate of course, change the program selector after starting a program by pressing the button next to the symbol. •...

Instruction Manual
Page 13
... . 2. NOTE! If you cannot remove the limescale, you can buy a new filter from all sides of it toward you bought the tumble dryer. Replace the filter in the lint filter. Customer Care Center 13 1-800-898-1879 www.askousa.com Keep the area around the machine. Dry... dishwashing detergent if necessary. If you have very hard water, this can damage the machine. Use a soft, dry cloth to accumulate around the tumble dryer clean and cool; dust, heat, and moisture prolong drying times. 3. Do not use solvents, as these can cause limescale deposits in its holder....
... . 2. NOTE! If you cannot remove the limescale, you can buy a new filter from all sides of it toward you bought the tumble dryer. Replace the filter in the lint filter. Customer Care Center 13 1-800-898-1879 www.askousa.com Keep the area around the machine. Dry... dishwashing detergent if necessary. If you have very hard water, this can damage the machine. Use a soft, dry cloth to accumulate around the tumble dryer clean and cool; dust, heat, and moisture prolong drying times. 3. Do not use solvents, as these can cause limescale deposits in its holder....

Instruction Manual
Page 15
... are not blocked. You can not always tell from the outside if the circuit breaker has tripped. • that the overheating cut -off the tumble dryer if the temperature is too high, caused by lint clogging the lint filter, for instance. • Clean the lint filter. • Check that the main... to do. Drying takes too long • Check that the fuses (circuit breakers) in this chapter to find out what to make sure. Flip the dryer breaker off has not been triggered (see below). See the "Care and cleaning" chapter. • The overheating cut -off and then back on . • that...
... are not blocked. You can not always tell from the outside if the circuit breaker has tripped. • that the overheating cut -off the tumble dryer if the temperature is too high, caused by lint clogging the lint filter, for instance. • Clean the lint filter. • Check that the main... to do. Drying takes too long • Check that the fuses (circuit breakers) in this chapter to find out what to make sure. Flip the dryer breaker off has not been triggered (see below). See the "Care and cleaning" chapter. • The overheating cut -off and then back on . • that...
Instruction Manual
Page 19
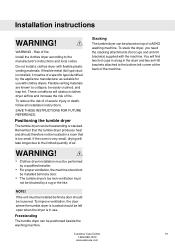
... due to the manufacturer's instructions and local codes. You will obstruct clothes dryer airflow and increase the risk of fire. Freestanding The tumble dryer can be freestanding or stacked. Risk of a ASKO washing machine. If flexible metal (foil type) duct is too small. Stacking... The tumble dryer can be positioned beside the washing machine. WARNING! • Clothes dryer installation must be performed by a...
... due to the manufacturer's instructions and local codes. You will obstruct clothes dryer airflow and increase the risk of fire. Freestanding The tumble dryer can be freestanding or stacked. Risk of a ASKO washing machine. If flexible metal (foil type) duct is too small. Stacking... The tumble dryer can be positioned beside the washing machine. WARNING! • Clothes dryer installation must be performed by a...

Instruction Manual
Page 20
...minimum ventilation openings: ASKO dryers can be at least 24-1/2" (622 mm). Install the dryer so the condensed water will continuously flow into a drain or sink, you will need a drain outlet behind the unit. To ensure proper ventilation, we recommend louvered doors, particularly for the dryer is a ½...How to 876 mm). The condensing models work best when they have good air circulation. Installation instructions Built-in Install in a closet ASKO's front panel controls make it higher than 34-1/2" (876 mm). Otherwise there must be ventilation openings in a closet. Make sure...
...minimum ventilation openings: ASKO dryers can be at least 24-1/2" (622 mm). Install the dryer so the condensed water will continuously flow into a drain or sink, you will need a drain outlet behind the unit. To ensure proper ventilation, we recommend louvered doors, particularly for the dryer is a ½...How to 876 mm). The condensing models work best when they have good air circulation. Installation instructions Built-in Install in a closet ASKO's front panel controls make it higher than 34-1/2" (876 mm). Otherwise there must be ventilation openings in a closet. Make sure...

Instruction Manual
Page 21
... and balanced on the floor or on the washing machine if stacking. Break off the remaining tabs. Fit the plastic cups so that the tumble dryer is balanced. Remove the two screws indicated on the washing machine. At the same time, keep the front edge raised by 0,4" (10 mm) to the... washing machine's top cover. Lower the tumble dryer's front feet into the plastic cups and adjust the dryer to ensure that the dryer is essential, as shown in the picture. 7. Then tighten the lock nuts. Then break off tab A on the...
... and balanced on the floor or on the washing machine if stacking. Break off the remaining tabs. Fit the plastic cups so that the tumble dryer is balanced. Remove the two screws indicated on the washing machine. At the same time, keep the front edge raised by 0,4" (10 mm) to the... washing machine's top cover. Lower the tumble dryer's front feet into the plastic cups and adjust the dryer to ensure that the dryer is essential, as shown in the picture. 7. Then tighten the lock nuts. Then break off tab A on the...
Instruction Manual
Page 22
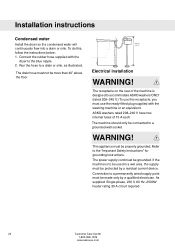
... this receptacle, you must be protected by a qualified electrician. This appliance must not be grounded. Installation instructions Condensed water Install the dryer so the condensed water will continuously flow into a drain or sink. The drain hose must be connected to a drain or sink... Maximum height 40" 2a Electrical installation WARNING! ASKO washers rated 208-240 V have two internal fuses of the machine is to accommodate ASKO washers ONLY (rated 208-240 V.) To use the ready-fitted plug supplied with the dryer to the "Important Safety Instructions" for grounding ...
... this receptacle, you must be protected by a qualified electrician. This appliance must not be grounded. Installation instructions Condensed water Install the dryer so the condensed water will continuously flow into a drain or sink. The drain hose must be connected to a drain or sink... Maximum height 40" 2a Electrical installation WARNING! ASKO washers rated 208-240 V have two internal fuses of the machine is to accommodate ASKO washers ONLY (rated 208-240 V.) To use the ready-fitted plug supplied with the dryer to the "Important Safety Instructions" for grounding ...
Instruction Manual
Page 23
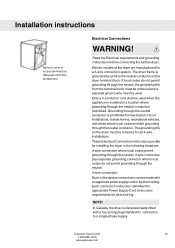
... local codes do not permit grounding through the neutral conductor i prohibited. Installation instructions Remove cover to the neutral conductor on the dryer must be made with a four-prong plug intended for a 3-wire connection system. Electric models of the above connections can be...appropriate Power Supply Cord and covers requirements for all 4-wire installations. Only a 4-conductor cord shall be removed for direct wiring. The dryer frame is installed in a location where grounding through the neutral, the grounding link from the terminal block must be removed and a...
... local codes do not permit grounding through the neutral conductor i prohibited. Installation instructions Remove cover to the neutral conductor on the dryer must be made with a four-prong plug intended for a 3-wire connection system. Electric models of the above connections can be...appropriate Power Supply Cord and covers requirements for all 4-wire installations. Only a 4-conductor cord shall be removed for direct wiring. The dryer frame is installed in a location where grounding through the neutral, the grounding link from the terminal block must be removed and a...
Instruction Manual
Page 24
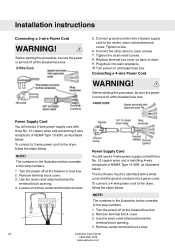
... Connecting a 4-wire Power Cord WARNING! Turn the power off at the breaker/fuse box. Loosen or remove center terminal block screw. Plug dryer into wall receptacle. 10. Before starting this procedure, be identified with four No. 10 copper wires and a matching 4-wire receptacle of NEMA...10 copper wires and a matching 3-wire receptacle of NEMA Type 14-30R, as illustrated below: To connect a 3-wire power cord to the dryer, follow the steps below. The numbers in the illustration below the terminal block opening . 4. Remove center terminal block screw. 24 Customer Care ...
... Connecting a 4-wire Power Cord WARNING! Turn the power off at the breaker/fuse box. Loosen or remove center terminal block screw. Plug dryer into wall receptacle. 10. Before starting this procedure, be identified with four No. 10 copper wires and a matching 4-wire receptacle of NEMA...10 copper wires and a matching 3-wire receptacle of NEMA Type 14-30R, as illustrated below: To connect a 3-wire power cord to the dryer, follow the steps below. The numbers in the illustration below the terminal block opening . 4. Remove center terminal block screw. 24 Customer Care ...

Instruction Manual
Page 25
Connect ground (green) wire of cord to outer screws. 9. Connect neutral (white) wire of cord under center screw of dryer. 11. Tighten the strain relief screws. 10. Plug dryer into wall receptacle. 12. Installation instructions 4 7 8 6 5. Customer Care Center 25 1-800-898-1879 www.askousa.com Turn power on back of terminal block. 8. Replace...
Connect ground (green) wire of cord to outer screws. 9. Connect neutral (white) wire of cord under center screw of dryer. 11. Tighten the strain relief screws. 10. Plug dryer into wall receptacle. 12. Installation instructions 4 7 8 6 5. Customer Care Center 25 1-800-898-1879 www.askousa.com Turn power on back of terminal block. 8. Replace...


