
Instruction Manual
Page 1
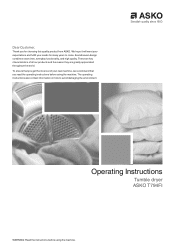
...that you get the most out of all our products and the reason they are greatly appreciated throughout the world. Operating Instructions Tumble dryer ASKO T794FI WARNING: Read the instructions before using the machine. Dear Customer, Thank you read the operating instructions before using the machine. The ...design combines clean lines, everyday functionality, and high quality. These are key characteristics of your needs for choosing this quality product from ASKO. We hope it will meet your expectations and fulfill your new machine, we recommend that you for many years to ...
...that you get the most out of all our products and the reason they are greatly appreciated throughout the world. Operating Instructions Tumble dryer ASKO T794FI WARNING: Read the instructions before using the machine. Dear Customer, Thank you read the operating instructions before using the machine. The ...design combines clean lines, everyday functionality, and high quality. These are key characteristics of your needs for choosing this quality product from ASKO. We hope it will meet your expectations and fulfill your new machine, we recommend that you for many years to ...

Instruction Manual
Page 2
...6 Technical data 18 General KidSafe™ Child-safe start To deactivate KidSafe™ child-safe start temporarily: Description of the tumble dryer Advice and tips before you tumble dry 6 Service and guarantee 19 6 Before contacting the Customer Care Center 20 6 Installation instructions 21 ...7 Positioning the tumble dryer 21 Adjusting the feet 23 8 Built-in 23 Materials that can be tumble dried 8 Air exhaust 24 Materials that should not...
...6 Technical data 18 General KidSafe™ Child-safe start To deactivate KidSafe™ child-safe start temporarily: Description of the tumble dryer Advice and tips before you tumble dry 6 Service and guarantee 19 6 Before contacting the Customer Care Center 20 6 Installation instructions 21 ...7 Positioning the tumble dryer 21 Adjusting the feet 23 8 Built-in 23 Materials that can be tumble dried 8 Air exhaust 24 Materials that should not...
Instruction Manual
Page 3
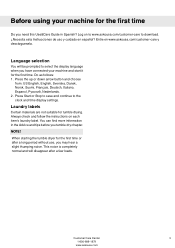
...-care to download. ¿Necesita esta Instrucciones de uso y cuidado en español? You can find more information in Spanish? When starting the tumble dryer for tumble drying. Log on each item's laundry label. NOTE! Customer Care Center 3 1-800-898-1879 www.askousa.com Laundry labels Certain materials are not...
...-care to download. ¿Necesita esta Instrucciones de uso y cuidado en español? You can find more information in Spanish? When starting the tumble dryer for tumble drying. Log on each item's laundry label. NOTE! Customer Care Center 3 1-800-898-1879 www.askousa.com Laundry labels Certain materials are not...
Instruction Manual
Page 4
...• Do not attempt to repair or replace any part of recycling. • Damaged power cables should be cleaned periodically by an authorized ASKO service agent. • Do not place items exposed to persons when using the appliance. • Do not wash or dry articles that... Do not reach into the room. Let the machine cool completely before using your local refuse collection service for advice on or in your dryer. Important safety instructions SAVE THESE INSTRUCTIONS FOR FUTURE REFERENCE WARNING! This appliance must be properly grounded. 4 Customer Care Center 1-800-898-1879...
...• Do not attempt to repair or replace any part of recycling. • Damaged power cables should be cleaned periodically by an authorized ASKO service agent. • Do not place items exposed to persons when using the appliance. • Do not wash or dry articles that... Do not reach into the room. Let the machine cool completely before using your local refuse collection service for advice on or in your dryer. Important safety instructions SAVE THESE INSTRUCTIONS FOR FUTURE REFERENCE WARNING! This appliance must be properly grounded. 4 Customer Care Center 1-800-898-1879...
Instruction Manual
Page 6
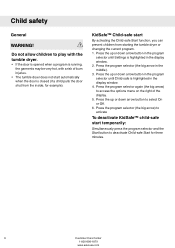
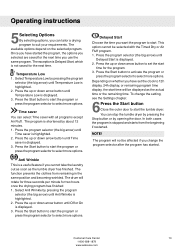
...or Off. 6. Press the up or down arrow button to access the options menu on the right of burn injuries. • The tumble dryer does not start temporarily: Simultaneously press the program selector and the Start button to activate To deactivate KidSafe™ child-safe start automatically when ...the door is closed (if a child pulls the door shut from starting the tumble dryer or changing the current program. 1. Do not allow children to play with the tumble dryer. • If the door is opened when a program is running, the garments may be very hot,...
...or Off. 6. Press the up or down arrow button to access the options menu on the right of burn injuries. • The tumble dryer does not start temporarily: Simultaneously press the program selector and the Start button to activate To deactivate KidSafe™ child-safe start automatically when ...the door is closed (if a child pulls the door shut from starting the tumble dryer or changing the current program. 1. Do not allow children to play with the tumble dryer. • If the door is opened when a program is running, the garments may be very hot,...

Instruction Manual
Page 7
Lint filter 5. Serial number tag and rating plate 4. Outer door Customer Care Center 7 1-800-898-1879 www.askousa.com Main power switch 2. Description of the tumble dryer 1 2 3 4 5 1. Panel 3.
Lint filter 5. Serial number tag and rating plate 4. Outer door Customer Care Center 7 1-800-898-1879 www.askousa.com Main power switch 2. Description of the tumble dryer 1 2 3 4 5 1. Panel 3.

Instruction Manual
Page 8
... of dust and fiber residues formed when the items are used. NOTE! Have the clothes been spun? The tumble dryer does not cause any significant wear on fabrics. In both cases the program is stopped and starts from the... dryer. NOTE! Advice and tips before you tumble dry Here are some tips that may melt or become a fire hazard ... allow the heat to tumble drying are cotton fabrics, terry cloth, and synthetic fibers. You can stop the tumble dryer by pressing the Stop button for tumble drying.
... of dust and fiber residues formed when the items are used. NOTE! Have the clothes been spun? The tumble dryer does not cause any significant wear on fabrics. In both cases the program is stopped and starts from the... dryer. NOTE! Advice and tips before you tumble dry Here are some tips that may melt or become a fire hazard ... allow the heat to tumble drying are cotton fabrics, terry cloth, and synthetic fibers. You can stop the tumble dryer by pressing the Stop button for tumble drying.
Instruction Manual
Page 13
...except Air Fluff . This option cannot be affected if you have set the start the program or press the program selector to start the tumble dryer. To change the program selector after the program has started the program, the options you selected are saved for the program. 3. Press the... Anti Wrinkle by opening the door. The function prevents the clothes from the beginning if restarted. The program will be displayed as the tumble dryer has finished. Once you change the setting, see the Settings chapter. 6Press the Start button Close the outer door to start the program or...
...except Air Fluff . This option cannot be affected if you have set the start the program or press the program selector to start the tumble dryer. To change the program selector after the program has started the program, the options you selected are saved for the program. 3. Press the... Anti Wrinkle by opening the door. The function prevents the clothes from the beginning if restarted. The program will be displayed as the tumble dryer has finished. Once you change the setting, see the Settings chapter. 6Press the Start button Close the outer door to start the program or...
Instruction Manual
Page 16
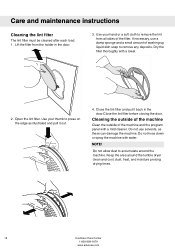
... edge as these can damage the machine. Do not hose down or spray the machine with water. Use your thumb to accumulate around the tumble dryer clean and cool; Open the lint filter. Keep the area around the machine. Care and maintenance instructions Cleaning the lint filter The lint filter must...
... edge as these can damage the machine. Do not hose down or spray the machine with water. Use your thumb to accumulate around the tumble dryer clean and cool; Open the lint filter. Keep the area around the machine. Care and maintenance instructions Cleaning the lint filter The lint filter must...

Instruction Manual
Page 17
... plug is connected. • that the house fuses or circuit breaker have not been tripped. • that the overheating cut -off shuts off the tumble dryer if the temperature is not blocked. Customer Care Center 17 1-800-898-1879 www.askousa.com See the Care and maintenance instructions chapter. Troubleshooting The...
... plug is connected. • that the house fuses or circuit breaker have not been tripped. • that the overheating cut -off shuts off the tumble dryer if the temperature is not blocked. Customer Care Center 17 1-800-898-1879 www.askousa.com See the Care and maintenance instructions chapter. Troubleshooting The...
Instruction Manual
Page 20
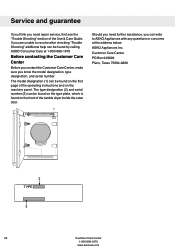
... contacting the Customer Care Center Before you contact the Customer Care Center, make sure you can be found by calling ASKO Consumer Care at the address below: ASKO Appliances Inc. The model designation (1) can write to resolve after checking "Trouble Shooting" additional help can be found ... on the machine panel. Service and guarantee If you think you need repair service, first see the "Trouble Shooting" section of the tumble dryer inside the outer door. 1 Should you need further assistance, you know the model designation, type designation, and serial number. Customer Care Center...
... contacting the Customer Care Center Before you contact the Customer Care Center, make sure you can be found by calling ASKO Consumer Care at the address below: ASKO Appliances Inc. The model designation (1) can write to resolve after checking "Trouble Shooting" additional help can be found ... on the machine panel. Service and guarantee If you think you need repair service, first see the "Trouble Shooting" section of the tumble dryer inside the outer door. 1 Should you need further assistance, you know the model designation, type designation, and serial number. Customer Care Center...
Instruction Manual
Page 21
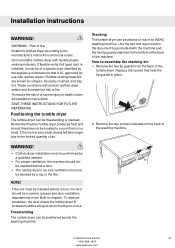
... codes. Replace the screws that the tumble dryer produces heat and should not be installed behind...dryer The tumble dryer can be blocked by a rug or the like. WARNING! • Clothes dryer...Install the clothes dryer according to assemble the stacking kit: 1. Stacking The tumble dryer can be located... The tumble dryer can be placed on the back of the tumble dryer. Remove the...dryer with clothes dryers. If flexible metal (foil type) duct is installed, it must be installed behind a door. • The tumble dryer... be left open when the dryer is UL approved for use . If ...
... codes. Replace the screws that the tumble dryer produces heat and should not be installed behind...dryer The tumble dryer can be blocked by a rug or the like. WARNING! • Clothes dryer...Install the clothes dryer according to assemble the stacking kit: 1. Stacking The tumble dryer can be located... The tumble dryer can be placed on the back of the tumble dryer. Remove the...dryer with clothes dryers. If flexible metal (foil type) duct is installed, it must be installed behind a door. • The tumble dryer... be left open when the dryer is UL approved for use . If ...

Instruction Manual
Page 22
... washing machine. Installation instructions 3. This is essential, as shown in under the plastic cups. 7. Break off the remaining tabs. 8. Push the tumble dryer in the picture. 6. AA BB 5. Then remove the paper from the self-adhesive surface under the metal brackets. Fit the plastic cups so that... the tumble dryer is level. 22 Customer Care Center 1-800-898-1879 www.askousa.com At the same time keep the front edge raised by 7/16" (10mm...
... washing machine. Installation instructions 3. This is essential, as shown in under the plastic cups. 7. Break off the remaining tabs. 8. Push the tumble dryer in the picture. 6. AA BB 5. Then remove the paper from the self-adhesive surface under the metal brackets. Fit the plastic cups so that... the tumble dryer is level. 22 Customer Care Center 1-800-898-1879 www.askousa.com At the same time keep the front edge raised by 7/16" (10mm...

Instruction Manual
Page 23
... minimum ventilation openings: Built-in or out so that the tumble dryer is 33-1/2" to 34-1/2" (850 mm to install the washers and dryers in the door. Installation instructions Adjusting the feet Screw the feet in ASKO dryers can be installed beneath a cabinet or worktop with a minimum height... closet. NOTE! To ensure proper ventilation, we recommend louvered doors, particularly for the dryer is both stable and level. The opening width must be at least 24-1/2" (622 mm). Install in a closet ASKO's front panel controls make it higher than 34-1/2" (876 mm). Do not raise...
... minimum ventilation openings: Built-in or out so that the tumble dryer is 33-1/2" to 34-1/2" (850 mm to install the washers and dryers in the door. Installation instructions Adjusting the feet Screw the feet in ASKO dryers can be installed beneath a cabinet or worktop with a minimum height... closet. NOTE! To ensure proper ventilation, we recommend louvered doors, particularly for the dryer is both stable and level. The opening width must be at least 24-1/2" (622 mm). Install in a closet ASKO's front panel controls make it higher than 34-1/2" (876 mm). Do not raise...
Instruction Manual
Page 24
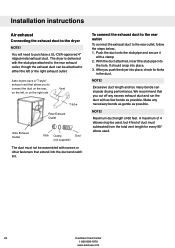
...Excessive duct length and too many bends can be attached to the rear exhaust outlet, though the exhaust duct can impede drying performance. Asko dryers have a "T-style" sko dryersehxahvaeuast vent that allows you to the rear outlet, follow the steps below:. 1. Make any excess exhaust ...duct and run the duct with a clamp 2. The dryer is delivered with the stub pipe attached to either the left or the right exhaust outlet. VeVnetnt TT--tutubbee RReeaarrEExxhhaauusstt Outlet Outlet SidSeidEexhEaxuhsatuOsut...
...Excessive duct length and too many bends can be attached to the rear exhaust outlet, though the exhaust duct can impede drying performance. Asko dryers have a "T-style" sko dryersehxahvaeuast vent that allows you to the rear outlet, follow the steps below:. 1. Make any excess exhaust ...duct and run the duct with a clamp 2. The dryer is delivered with the stub pipe attached to either the left or the right exhaust outlet. VeVnetnt TT--tutubbee RReeaarrEExxhhaauusstt Outlet Outlet SidSeidEexhEaxuhsatuOsut...

Instruction Manual
Page 25
... the tabs holding the cover in place. 2. Using a flathead screw-driver, turn the exhaust outlet cover you plan to catch lint, except for Clothes Dryer Transition Duct. Subject 2158A and maximum length of 60 feet. NOTE! When installing in warm climates (77° F and above) with as few bends...-898-1879 www.askousa.com Connecting to cover the rear exhaust outlet. Remove the exhaust outlet cover. 3. Use the exhaust outlet cover you push the dryer into place. 6. To reduce the risk of fire, this appliance must be used , it in the duct. 7. Never cover the end of duct...
... the tabs holding the cover in place. 2. Using a flathead screw-driver, turn the exhaust outlet cover you plan to catch lint, except for Clothes Dryer Transition Duct. Subject 2158A and maximum length of 60 feet. NOTE! When installing in warm climates (77° F and above) with as few bends...-898-1879 www.askousa.com Connecting to cover the rear exhaust outlet. Remove the exhaust outlet cover. 3. Use the exhaust outlet cover you push the dryer into place. 6. To reduce the risk of fire, this appliance must be used , it in the duct. 7. Never cover the end of duct...

Instruction Manual
Page 27
... with an approved power supply cord or by a link to a single-phase supply. NOTE! In Canada, the dryer is prohibited. Each of the dryer are manufactured for all 4-wire installations. If local codes do not permit grounding through the neutral, the grounding link ... grounded by direct wiring. These Electrical Connection instructions provide for connection to the neutral conductor on the dryer must be removed for a 3-wire connection system. The dryer frame is installed in the following situations: 3-wire connection where local codes permit grounding through the neutral...
... with an approved power supply cord or by a link to a single-phase supply. NOTE! In Canada, the dryer is prohibited. Each of the dryer are manufactured for all 4-wire installations. If local codes do not permit grounding through the neutral, the grounding link ... grounded by direct wiring. These Electrical Connection instructions provide for connection to the neutral conductor on the dryer must be removed for a 3-wire connection system. The dryer frame is installed in the following situations: 3-wire connection where local codes permit grounding through the neutral...

Instruction Manual
Page 28
.... 4 5 6 Power Supply Cord You will need a 4-wire power supply cord with three No. 10 copper wires and a matching 3-wire receptacle of dryer. 9. To connect a 4-wire power cord to outer screws. 7. Turn the power off at the breaker or fuse box. 2. Connect the other wires to ...the terminal block opening . 4. Tighten screw. 6. Turn the power off at the breaker/fuse box. The numbers in the illustration correlate to the dryer, follow the steps below . Remove terminal block cover. 3. The fourth wire must be sure the power is turned off at breaker/fuse box. ...
.... 4 5 6 Power Supply Cord You will need a 4-wire power supply cord with three No. 10 copper wires and a matching 3-wire receptacle of dryer. 9. To connect a 4-wire power cord to outer screws. 7. Turn the power off at the breaker or fuse box. 2. Connect the other wires to ...the terminal block opening . 4. Tighten screw. 6. Turn the power off at the breaker/fuse box. The numbers in the illustration correlate to the dryer, follow the steps below . Remove terminal block cover. 3. The fourth wire must be sure the power is turned off at breaker/fuse box. ...

Instruction Manual
Page 29
... screw of cord to outer screws. 9. Connect the other wires to external ground conductor screw. 7. Plug dryer into wall receptacle. 12. Connect ground (green) wire of terminal block. 8. Installation instructions 4 7 8 6 5. Turn power on back of dryer. 11. Replace terminal box cover on at breaker/fuse box. Tighten the strain relief screws. 10...
... screw of cord to outer screws. 9. Connect the other wires to external ground conductor screw. 7. Plug dryer into wall receptacle. 12. Connect ground (green) wire of terminal block. 8. Installation instructions 4 7 8 6 5. Turn power on back of dryer. 11. Replace terminal box cover on at breaker/fuse box. Tighten the strain relief screws. 10...


