
User Guide
Page 2
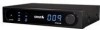
..., news, and entertainment. Congratulations on the purchase of your new SIRIUS Connect SCH2P Satellite Radio Tuner Your new SCH2P SIRIUS® Connect Tuner is designed to classical masterpieces. Consult the SIRIUS website at http://www.sirius.com. Only SIRIUS has more than 65 original music channels, from ESPN, the SIRIUS sports offering is Sirius Satellite Radio? Entertainment Radio. And don't forget a host of all, it's all completely commercial...
..., news, and entertainment. Congratulations on the purchase of your new SIRIUS Connect SCH2P Satellite Radio Tuner Your new SCH2P SIRIUS® Connect Tuner is designed to classical masterpieces. Consult the SIRIUS website at http://www.sirius.com. Only SIRIUS has more than 65 original music channels, from ESPN, the SIRIUS sports offering is Sirius Satellite Radio? Entertainment Radio. And don't forget a host of all, it's all completely commercial...

User Guide
Page 11
... two cables you understand the entire installation process. Connecting the AC Power Cord Connect the AC power cord to the AC power connector at the rear of the antenna. You will need to purchase two RG-6 cables to complete the installation of the tuner, and plug it into a wall outlet. (...; A successful antenna installation consists of three steps: First, determining a location for cable TV installations, and may be purchased from your local hardware store, home center, or electronics retailer. and Third, adjusting and aiming the antenna. Figure 3 50' MAX. [ Installation ] 11
... two cables you understand the entire installation process. Connecting the AC Power Cord Connect the AC power cord to the AC power connector at the rear of the antenna. You will need to purchase two RG-6 cables to complete the installation of the tuner, and plug it into a wall outlet. (...; A successful antenna installation consists of three steps: First, determining a location for cable TV installations, and may be purchased from your local hardware store, home center, or electronics retailer. and Third, adjusting and aiming the antenna. Figure 3 50' MAX. [ Installation ] 11

User Guide
Page 12
... sky. No obstructions to the sky within the cone-shaped area as bushes, trees, other homes or buildings, overhangs, soffits, chimneys, gables, dormers, etc., will impair or prevent the ...antenna from receiving a signal. Determining a Location for the Antenna For correct operation and best reception of the SIRIUS signal, it will have a clear view of the sky within this area Figure 4 12 [ Installation ] ...The best reception is obtained if the pod portion of the antenna (where the SIRIUS logo is located in a place where it is important that the outdoor antenna is printed) has a ...
... sky. No obstructions to the sky within the cone-shaped area as bushes, trees, other homes or buildings, overhangs, soffits, chimneys, gables, dormers, etc., will impair or prevent the ...antenna from receiving a signal. Determining a Location for the Antenna For correct operation and best reception of the SIRIUS signal, it will have a clear view of the sky within this area Figure 4 12 [ Installation ] ...The best reception is obtained if the pod portion of the antenna (where the SIRIUS logo is located in a place where it is important that the outdoor antenna is printed) has a ...

User Guide
Page 15
... Mount: Mounting the antenna on a mast or pole, such as shown in place temporarily and connect the antenna to the wall of the building or home using the provided #10 screws. If a good SIRIUS signal is recommended that you can use: Wall Mount: Mounting the antenna directly on the front of... the tuner, either SAT or TER, or both. Antenna Mounting Options There are three possible mounting options for your area, it is being received, 2 or 3 of the signal strength lights will be oriented in a vertical position (as an existing satellite TV dish mast, an existing...
... Mount: Mounting the antenna on a mast or pole, such as shown in place temporarily and connect the antenna to the wall of the building or home using the provided #10 screws. If a good SIRIUS signal is recommended that you can use: Wall Mount: Mounting the antenna directly on the front of... the tuner, either SAT or TER, or both. Antenna Mounting Options There are three possible mounting options for your area, it is being received, 2 or 3 of the signal strength lights will be oriented in a vertical position (as an existing satellite TV dish mast, an existing...

User Guide
Page 16
... the antenna's view of the sky as described in the previous section by locating the antenna too high under the eaves or soffit of the home or building. (Figure 8) INCORRECT VIEW OF THE SKY IS OBSTRUCTED BY THE SOFFIT AND GUTTER CORRECT UNOBSTRUCTED VIEW OF THE SKY CORRECT UNOBSTRUCTED VIEW OF...
... the antenna's view of the sky as described in the previous section by locating the antenna too high under the eaves or soffit of the home or building. (Figure 8) INCORRECT VIEW OF THE SKY IS OBSTRUCTED BY THE SOFFIT AND GUTTER CORRECT UNOBSTRUCTED VIEW OF THE SKY CORRECT UNOBSTRUCTED VIEW OF...

User Guide
Page 17
... to fill the holes with the location of the four screw holes in the bracket. Roof Mount When mounting the antenna on the roof of a home or building, mount the antenna as close to the peak of the roof as shown in Figure 5, and mounted directly to the soffit or chimney...
... to fill the holes with the location of the four screw holes in the bracket. Roof Mount When mounting the antenna on the roof of a home or building, mount the antenna as close to the peak of the roof as shown in Figure 5, and mounted directly to the soffit or chimney...

User Guide
Page 21
... the Splitter. Attach the cable to the antenna and slide the rubber boot over the connection to where you purchased separately, slide the rubber boot over the cable connection. Trim off the excess cable tie. (Figure 14) Figure 14 2. Connect the cable from slipping down. Using one of the antenna cable into the...
... the Splitter. Attach the cable to the antenna and slide the rubber boot over the connection to where you purchased separately, slide the rubber boot over the cable connection. Trim off the excess cable tie. (Figure 14) Figure 14 2. Connect the cable from slipping down. Using one of the antenna cable into the...