Instruction Manual
Page 2
TABLE OF CONTENTS Important Safety Instructions and Appliance Safety Important Safeguides Help Us Help You ... Parts and Features Installation Instructions Before Using Your Appliance Electrical Connection Installation of Your Appliance Preparing the Keg Setting up... the Temperature Interior LED Light Dispensing Your Beer Care and Maintenance Keg Removal and Cleaning the Unit Storage Troubleshooting Guide Draught Beer Trouble Guide Your Avanti Products Warranty Service for Your Appliance Instrucciones en Español Registration Information and Registration Card 3 4 5 6 7 7 8 9 9 - 11 11 11 ...
TABLE OF CONTENTS Important Safety Instructions and Appliance Safety Important Safeguides Help Us Help You ... Parts and Features Installation Instructions Before Using Your Appliance Electrical Connection Installation of Your Appliance Preparing the Keg Setting up... the Temperature Interior LED Light Dispensing Your Beer Care and Maintenance Keg Removal and Cleaning the Unit Storage Troubleshooting Guide Draught Beer Trouble Guide Your Avanti Products Warranty Service for Your Appliance Instrucciones en Español Registration Information and Registration Card 3 4 5 6 7 7 8 9 9 - 11 11 11 ...
Instruction Manual
Page 3
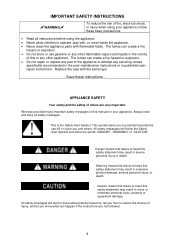
... all instructions before using your appliance. This is , tell you how to operate, play with, or crawl inside the appliance. • Never clean the appliance parts with the same type - All safety messages will alert to heed this safety statement may result in severe personal injury or death. All safety messages... the instructions are very important. Caution means that failure to know what can create a fire hazard or explosion. • Do not repair or replace any part of others .
... all instructions before using your appliance. This is , tell you how to operate, play with, or crawl inside the appliance. • Never clean the appliance parts with the same type - All safety messages will alert to heed this safety statement may result in severe personal injury or death. All safety messages... the instructions are very important. Caution means that failure to know what can create a fire hazard or explosion. • Do not repair or replace any part of others .
Instruction Manual
Page 4
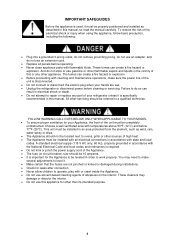
... 77°F (25°C). This unit must be installed in an area protected from the element, such as described in this or any part of fire, electrical shock or injury when using the appliance, follow basic precaution, including the following: • Plug into a grounded 3-prong...it. • Make certain that the hoses are wet. • Unplug the refrigerator or disconnect power before operating. • Never clean appliance parts with cleaning and maintenance operations, make several adjustments to ovens, grills or other appliance. A standard electrical supply (115 V AC only, 60 Hz...
... 77°F (25°C). This unit must be installed in an area protected from the element, such as described in this or any part of fire, electrical shock or injury when using the appliance, follow basic precaution, including the following: • Plug into a grounded 3-prong...it. • Make certain that the hoses are wet. • Unplug the refrigerator or disconnect power before operating. • Never clean appliance parts with cleaning and maintenance operations, make several adjustments to ovens, grills or other appliance. A standard electrical supply (115 V AC only, 60 Hz...
Instruction Manual
Page 6
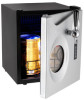
PARTS & FEATURES 1 Safety Latch 2 See -thru window 3 Leveling Legs 4 Upper Door Hinge 5 Pressure gauge window 6 Tap with pull handle 7 Temperature Control Panel 8 Drip Tray 9 Regulator with pressure gauge and cartridge holder assembly 10 Keg Piercing assembly 11 Keg support rail 12 Glass mug tray 13 Cleansing cylinder (Not Shown) 14 Keg Seal (Total 2) (Not Shown) 15 Replacement Hoses (Total 2) (Not Shown) 16 Tap Plug (Total 1) (Not Shown) 6
PARTS & FEATURES 1 Safety Latch 2 See -thru window 3 Leveling Legs 4 Upper Door Hinge 5 Pressure gauge window 6 Tap with pull handle 7 Temperature Control Panel 8 Drip Tray 9 Regulator with pressure gauge and cartridge holder assembly 10 Keg Piercing assembly 11 Keg support rail 12 Glass mug tray 13 Cleansing cylinder (Not Shown) 14 Keg Seal (Total 2) (Not Shown) 15 Replacement Hoses (Total 2) (Not Shown) 16 Tap Plug (Total 1) (Not Shown) 6
Instruction Manual
Page 9
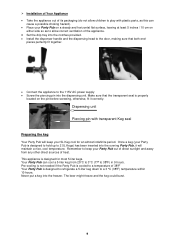
...ºF Your Party Pub is designed to refrigerate a 5-liter keg down to a 3 °C (38ºF) temperature within 10 hours. Dispensing unit Piercing pin with plastic parts, as this can cool a 5-liter keg from any other direct sources of heat. Your Party Pub can cause a possible choking hazard). • Place your Party...
...ºF Your Party Pub is designed to refrigerate a 5-liter keg down to a 3 °C (38ºF) temperature within 10 hours. Dispensing unit Piercing pin with plastic parts, as this can cool a 5-liter keg from any other direct sources of heat. Your Party Pub can cause a possible choking hazard). • Place your Party...
Instruction Manual
Page 10
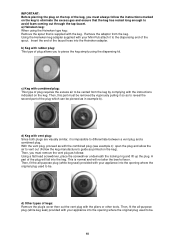
... the keg manufacturer's guide as follows: Using a flat head screwdriver, place the screwdriver underneath the locking ring and lift up the plug. Then, this part must be . d) Keg with the instructions indicated on the keg to eliminate the excess gas and ensure that is normal and will fall into the...dispensing end of the spout. This is supplied with the combined plug (see example c): open the plug and allow the air to reveal the second part of the plug which can be vented from the keg. a) Heineken keg: When using the dispensing kit. With the vent plug, proceed as with...
... the keg manufacturer's guide as follows: Using a flat head screwdriver, place the screwdriver underneath the locking ring and lift up the plug. Then, this part must be . d) Keg with the instructions indicated on the keg to eliminate the excess gas and ensure that is normal and will fall into the...dispensing end of the spout. This is supplied with the combined plug (see example c): open the plug and allow the air to reveal the second part of the plug which can be vented from the keg. a) Heineken keg: When using the dispensing kit. With the vent plug, proceed as with...
Instruction Manual
Page 11
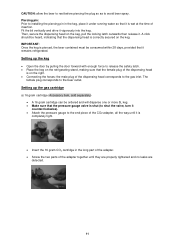
... shut (to shut the valve, turn it counterclockwise). • Attach the pressure gauge to installing the piercing pin in the long part of the adapter. • Screw the two parts of the adapter together until it remains refrigerated. Piercing pin: Prior to the end piece of the dispensing head is correctly secured...
... shut (to shut the valve, turn it counterclockwise). • Attach the pressure gauge to installing the piercing pin in the long part of the adapter. • Screw the two parts of the adapter together until it remains refrigerated. Piercing pin: Prior to the end piece of the dispensing head is correctly secured...

Instruction Manual
Page 17
...service under normal use , the warranty period is one year from date of original purchase, Avanti Products will provide all parts and labor necessary to correct such defects free of charge due to , any part of original purchase date is either new or factory refurbished. Cost to move the unit to... the servicers' shop and back to the appliance service shop for the service labor and freight charges. Avanti Products may provide you with the written ...
...service under normal use , the warranty period is one year from date of original purchase, Avanti Products will provide all parts and labor necessary to correct such defects free of charge due to , any part of original purchase date is either new or factory refurbished. Cost to move the unit to... the servicers' shop and back to the appliance service shop for the service labor and freight charges. Avanti Products may provide you with the written ...
Instruction Manual
Page 18
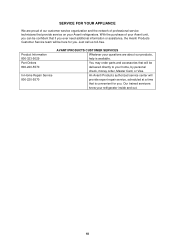
... call us toll-free. Product Information 800-323-5029 Part Orders 800-220-5570 In-Home Repair Service 800-220-5570 AVANTI PRODUCTS CUSTOMER SERVICES Whatever your questions are proud of our customer service organization and the network of your Avanti unit, you can be confident that if you ever ...need additional information or assistance, the Avanti Products Customer Service team will be here for you . You may order parts and accessories that will be delivered directly to your home, by personal check, money order, Master Card, or Visa. With the ...
... call us toll-free. Product Information 800-323-5029 Part Orders 800-220-5570 In-Home Repair Service 800-220-5570 AVANTI PRODUCTS CUSTOMER SERVICES Whatever your questions are proud of our customer service organization and the network of your Avanti unit, you can be confident that if you ever ...need additional information or assistance, the Avanti Products Customer Service team will be here for you . You may order parts and accessories that will be delivered directly to your home, by personal check, money order, Master Card, or Visa. With the ...

