
Instruction Manual
Page 1
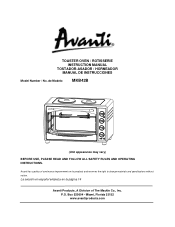
Avanti has a policy of The Mackle Co., Inc. P.O. Miami, Florida 33152 www.avantiproducts.com de Modelo: MKB42B (Unit appearance may vary) BEFORE USE, PLEASE READ AND FOLLOW ALL SAFETY RULES AND OPERATING INSTRUCTIONS. TOASTER OVEN / ROTISSERIE INSTRUCTION MANUAL TOSTADOR-ASADOR / HORNEADOR MANUAL DE INSTRUCCIONES Model Number / No. La sección en español empieza en la página 14 Avanti Products, A Division of continuous improvement on its products and reserves the right to change materials and specifications without notice. Box 520604 -
Avanti has a policy of The Mackle Co., Inc. P.O. Miami, Florida 33152 www.avantiproducts.com de Modelo: MKB42B (Unit appearance may vary) BEFORE USE, PLEASE READ AND FOLLOW ALL SAFETY RULES AND OPERATING INSTRUCTIONS. TOASTER OVEN / ROTISSERIE INSTRUCTION MANUAL TOSTADOR-ASADOR / HORNEADOR MANUAL DE INSTRUCCIONES Model Number / No. La sección en español empieza en la página 14 Avanti Products, A Division of continuous improvement on its products and reserves the right to change materials and specifications without notice. Box 520604 -

Instruction Manual
Page 2
TABLE OF CONTENTS Important Safety Instructions Help Us Help You Parts and Features Installation Instructions Before Using Your Appliance Installation of Your Appliance Electrical Connection Operating Your Appliance Control Panel Using Your Oven Care and Maintenance Cleaning Your Appliance Storing Your Appliance Troubleshooting Guide Service for Your Appliance Your Avanti Products Warranty Instrucciones en Español Registration Information / Registration Card 3 4 5 6 6 6 6 7 7 8 - 11 11 11 11 12 12 13 14 - 18 19 2
TABLE OF CONTENTS Important Safety Instructions Help Us Help You Parts and Features Installation Instructions Before Using Your Appliance Installation of Your Appliance Electrical Connection Operating Your Appliance Control Panel Using Your Oven Care and Maintenance Cleaning Your Appliance Storing Your Appliance Troubleshooting Guide Service for Your Appliance Your Avanti Products Warranty Instrucciones en Español Registration Information / Registration Card 3 4 5 6 6 6 6 7 7 8 - 11 11 11 11 12 12 13 14 - 18 19 2

Instruction Manual
Page 3
... fire extinguisher. Turns the controls off the pad and touch electrical parts involving a risk of electrical shock. When broiling, use extreme caution when removing tray or disposing of hot grease. To turn this or any appliance with a frayed or damaged cord or plug, after the appliance malfunctions, is turned off before cleaning. This Unit Is For Household Use Only - IMPORTANT SAFETY INSTRUCTIONS To reduce...
... fire extinguisher. Turns the controls off the pad and touch electrical parts involving a risk of electrical shock. When broiling, use extreme caution when removing tray or disposing of hot grease. To turn this or any appliance with a frayed or damaged cord or plug, after the appliance malfunctions, is turned off before cleaning. This Unit Is For Household Use Only - IMPORTANT SAFETY INSTRUCTIONS To reduce...

Instruction Manual
Page 4
... located on the back side of our service and want you need more assistance, please call for some reason you are not happy with this guide to : Customer Service Avanti Products 10880 NW 30 Street Miami, FL 33172 USA 4 IF YOU NEED SERVICE We're proud of the unit. Write down the model and serial numbers. If for service, check the Problem Solver Guide. HELP...
... located on the back side of our service and want you need more assistance, please call for some reason you are not happy with this guide to : Customer Service Avanti Products 10880 NW 30 Street Miami, FL 33172 USA 4 IF YOU NEED SERVICE We're proud of the unit. Write down the model and serial numbers. If for service, check the Problem Solver Guide. HELP...

Instruction Manual
Page 5
PARTS AND FEATURES 1 Glass Door 2 Door Handle 3 Housing 4 Power Cord 5 Cookertop Selector Knob 6 Cookertop Indicator Light 7 Temperature Selector Knob 8 Function Selector Knob 9 Timer Selector Knob 10 Power Indicator Light 11 Cookertop and Oven Selector 12 Foot (Total 4) 13 Oven Rack 14 Bake / Broil / Drip Pan (Total 2) 15 Rotisserie Rod 16 Rotisserie Forks (Total 2) 17 Rotisserie Fork Screws (Total 2) 18 Rotisserie Handle 19 Tray Handle 5
PARTS AND FEATURES 1 Glass Door 2 Door Handle 3 Housing 4 Power Cord 5 Cookertop Selector Knob 6 Cookertop Indicator Light 7 Temperature Selector Knob 8 Function Selector Knob 9 Timer Selector Knob 10 Power Indicator Light 11 Cookertop and Oven Selector 12 Foot (Total 4) 13 Oven Rack 14 Bake / Broil / Drip Pan (Total 2) 15 Rotisserie Rod 16 Rotisserie Forks (Total 2) 17 Rotisserie Fork Screws (Total 2) 18 Rotisserie Handle 19 Tray Handle 5

Instruction Manual
Page 6
... following parts: 2 Bake/Broil/Drip Pan • 1 - If the plug does not fit fully into the outlet, reserve the plug. Rotisserie Forks with Screws 1 Tray Handle • 1 - Any questions concerning power should be the only appliance operating on a flat, steady surface. Do not block air vents. The electrical rating of this appliance. INSTALLATION INSTRUCTIONS Before Using Your Appliance Remove the exterior and interior packing...
... following parts: 2 Bake/Broil/Drip Pan • 1 - If the plug does not fit fully into the outlet, reserve the plug. Rotisserie Forks with Screws 1 Tray Handle • 1 - Any questions concerning power should be the only appliance operating on a flat, steady surface. Do not block air vents. The electrical rating of this appliance. INSTALLATION INSTRUCTIONS Before Using Your Appliance Remove the exterior and interior packing...

Instruction Manual
Page 7
... you turn the TIMER selector knob to the " " position. CONVECTION BAKE CONVECTION BROIL BAKE BROIL BROIL ROTISSERIE CONVECTION ROTISSERIES TIMER SELECTOR KNOB You can use . For cooking times greater than 60 minutes you would like to the position. To switch off the oven turn the the temperature control to the "200" setting position. If you cannot use the oven, push the operation selector to the "OVEN " position. To switch off the heating elements of oven, push the OPERATION selector...
... you turn the TIMER selector knob to the " " position. CONVECTION BAKE CONVECTION BROIL BAKE BROIL BROIL ROTISSERIE CONVECTION ROTISSERIES TIMER SELECTOR KNOB You can use . For cooking times greater than 60 minutes you would like to the position. To switch off the oven turn the the temperature control to the "200" setting position. If you cannot use the oven, push the operation selector to the "OVEN " position. To switch off the heating elements of oven, push the OPERATION selector...

Instruction Manual
Page 8
... cooking time has finished, open the door completely and carefully remove the food. 8 USING THE CONVECTION BAKE FUNCTION Arrange the food accordingly on the baking rack. Turn the function selector knob to the Convection Bake function (icon as shown). Turn the temperature selector knob to the desired oven temperature. Turn the timer selector knob to the desired temperature. position the temperature is in the "200" position and the timer control...
... cooking time has finished, open the door completely and carefully remove the food. 8 USING THE CONVECTION BAKE FUNCTION Arrange the food accordingly on the baking rack. Turn the function selector knob to the Convection Bake function (icon as shown). Turn the temperature selector knob to the desired oven temperature. Turn the timer selector knob to the desired temperature. position the temperature is in the "200" position and the timer control...

Instruction Manual
Page 9
...; Turn the timer selector knob to the appropriate cooking time as required (maximum 60 minutes). At the end of the cooking time a bell signal will sound and the oven will turn off automatically. After the cooking time has finished, open the door completely and carefully remove the food. 9 Convection Broil Only the TOP heating element is used. Fan is used continuously (ON) NO PREHEATING PERIOD IS REQUIRED TO USE THIS...
...; Turn the timer selector knob to the appropriate cooking time as required (maximum 60 minutes). At the end of the cooking time a bell signal will sound and the oven will turn off automatically. After the cooking time has finished, open the door completely and carefully remove the food. 9 Convection Broil Only the TOP heating element is used. Fan is used continuously (ON) NO PREHEATING PERIOD IS REQUIRED TO USE THIS...

Instruction Manual
Page 10
... oven will turn off automatically. After the cooking time has finished, open the door completely and carefully remove the food. USING THE CONVECTION ROTISSERIE FUNCTION Mount the food to collect the natural dripping of the rod. Broil Rotisserie Only the TOP heating element is used. Fan is not used (OFF) Rotating Rotisserie is a method of cooking tender cuts of meat by direct heat under the broil element of the oven...
... oven will turn off automatically. After the cooking time has finished, open the door completely and carefully remove the food. USING THE CONVECTION ROTISSERIE FUNCTION Mount the food to collect the natural dripping of the rod. Broil Rotisserie Only the TOP heating element is used. Fan is not used (OFF) Rotating Rotisserie is a method of cooking tender cuts of meat by direct heat under the broil element of the oven...

Instruction Manual
Page 11
... appliance could result in electrical shock or personal injury. Storing Your Appliance Allow the appliance to the OFF position. Note: Do not use pans, which have flat bottom of food particles. Remove the crumb tray, wire rack and drip/baking pan. COOK-TOP Place your cooking pan on this unit. Wash the crumb tray, wire rack, drip/baking pan and metal handling tool with a mild...
... appliance could result in electrical shock or personal injury. Storing Your Appliance Allow the appliance to the OFF position. Note: Do not use pans, which have flat bottom of food particles. Remove the crumb tray, wire rack and drip/baking pan. COOK-TOP Place your cooking pan on this unit. Wash the crumb tray, wire rack, drip/baking pan and metal handling tool with a mild...

Instruction Manual
Page 12
... you . TROUBLESHOOTING GUIDE PROBLEMS POSSIBLE CAUSES/SOLUTIONS Appliance does not operate. Unit not plugged in drip/baking pan. Rack may have to adjust the temperature to the desired cooking setting. Overcooked/undercooked Foods Burnt Smell Incorrect temperature setting. An Avanti Products authorized service center will be confident that will provide expert repair service, scheduled at a time that the temperature, function and timer selectors are not heating up inside and...
... you . TROUBLESHOOTING GUIDE PROBLEMS POSSIBLE CAUSES/SOLUTIONS Appliance does not operate. Unit not plugged in drip/baking pan. Rack may have to adjust the temperature to the desired cooking setting. Overcooked/undercooked Foods Burnt Smell Incorrect temperature setting. An Avanti Products authorized service center will be confident that will provide expert repair service, scheduled at a time that the temperature, function and timer selectors are not heating up inside and...

Instruction Manual
Page 13
... may not apply to state. YOUR AVANTI WARRANTY LENGTH OF WARRANTY WE WILL PAY FOR FULL ONE YEAR WARRANTY FROM REPLACEMENT PARTS AND REPAIR DATE OF PURCHASE ON ALL PARTS LABOR TO CORRECT DEFECTS IN EXCEPT GLASS PARTS, AND/OR PARTS MATERIALS OR WORKMANSHIP. AUTHORIZED SERVICE COMPANY. FULL 30-DAY WARRANTY FROM DATE REPLACEMENT PARTS AND REPAIR OF PURCHASE ON GLASS PARTS AND LABOR TO CORRECT DEFECTS IN...
... may not apply to state. YOUR AVANTI WARRANTY LENGTH OF WARRANTY WE WILL PAY FOR FULL ONE YEAR WARRANTY FROM REPLACEMENT PARTS AND REPAIR DATE OF PURCHASE ON ALL PARTS LABOR TO CORRECT DEFECTS IN EXCEPT GLASS PARTS, AND/OR PARTS MATERIALS OR WORKMANSHIP. AUTHORIZED SERVICE COMPANY. FULL 30-DAY WARRANTY FROM DATE REPLACEMENT PARTS AND REPAIR OF PURCHASE ON GLASS PARTS AND LABOR TO CORRECT DEFECTS IN...

Instruction Manual
Page 19
P.O.Box 520604 - detach here Avanti Registration Card Name Model # Serial # Address Date Purchased Store / Dealer Name City State Zip E-mail Address Area Code Phone Number Did You Purchase An Additional Warranty Extended None Reason for purchasing this fine Avanti product. Please fill out this form and return it to purchase this product: Price Product Features Avanti Reputation ...
P.O.Box 520604 - detach here Avanti Registration Card Name Model # Serial # Address Date Purchased Store / Dealer Name City State Zip E-mail Address Area Code Phone Number Did You Purchase An Additional Warranty Extended None Reason for purchasing this fine Avanti product. Please fill out this form and return it to purchase this product: Price Product Features Avanti Reputation ...
Parts and Accessories
Page 1
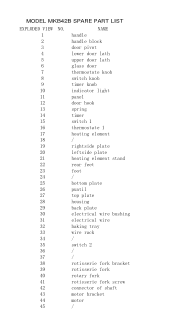
... 8 switch knob 9 timer knob 10 indicator light 11 panel 12 door hook 13 spring 14 timer 15 switch 1 16 thermostate 1 17 heating element 18 / 19 rightside plate 20 leftside plate 21 heating element stand 22 rear feet 23 foot 24 / 25 bottom plate 26 puntil 27 top plate 28 housing 29 back plate 30 electrical wire bushing 31 electrical wire 32 baking tray 33 wire rack 34 / 35 switch 2 36 / 37 / 38 rotisserie fork bracket 39...
... 8 switch knob 9 timer knob 10 indicator light 11 panel 12 door hook 13 spring 14 timer 15 switch 1 16 thermostate 1 17 heating element 18 / 19 rightside plate 20 leftside plate 21 heating element stand 22 rear feet 23 foot 24 / 25 bottom plate 26 puntil 27 top plate 28 housing 29 back plate 30 electrical wire bushing 31 electrical wire 32 baking tray 33 wire rack 34 / 35 switch 2 36 / 37 / 38 rotisserie fork bracket 39...

Parts and Accessories
Page 2
46 door pivot stand 47 bracket 48 fan motor 49 motor bracket 50 fan 51 switch (RL2) 52 / 53 / 54 / 55 / 56 crimp connector 57 internal wiring 58 locking tube 59 locking band 60 fuse 61 thermostat 2 62 stove bracket 63 stove cover 64 / 65 big stove 66 small stove
46 door pivot stand 47 bracket 48 fan motor 49 motor bracket 50 fan 51 switch (RL2) 52 / 53 / 54 / 55 / 56 crimp connector 57 internal wiring 58 locking tube 59 locking band 60 fuse 61 thermostat 2 62 stove bracket 63 stove cover 64 / 65 big stove 66 small stove
