Instruction Manual
Page 1
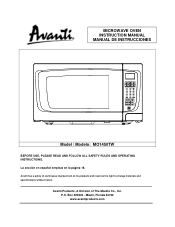
Box 520604 - MICROWAVE OVEN INSTRUCTION MANUAL MANUAL DE INSTRUCCIONES Model / Modelo: MO1450TW BEFORE USE, PLEASE READ AND FOLLOW ALL SAFETY RULES AND OPERATING INSTRUCTIONS. La sección en español empieza en la página 18. Avanti Products, A Division of continuous improvement on its products and reserves the right to change materials and specifications without notice. P.O. Avanti has a policy of The Mackle Co., Inc. Miami, Florida 33152 www.avantiproducts.com
Box 520604 - MICROWAVE OVEN INSTRUCTION MANUAL MANUAL DE INSTRUCCIONES Model / Modelo: MO1450TW BEFORE USE, PLEASE READ AND FOLLOW ALL SAFETY RULES AND OPERATING INSTRUCTIONS. La sección en español empieza en la página 18. Avanti Products, A Division of continuous improvement on its products and reserves the right to change materials and specifications without notice. P.O. Avanti has a policy of The Mackle Co., Inc. Miami, Florida 33152 www.avantiproducts.com
Instruction Manual
Page 2
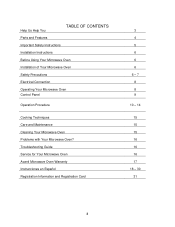
Help Us Help You TABLE OF CONTENTS Parts and Features Important Safety Instructions Installation Instructions Before Using Your Microwave Oven Installation of Your Microwave Oven Safety Precautions Electrical Connection Operating Your Microwave Oven Control Panel Operation Procedure Cooking Techniques Care and Maintenance Cleaning Your Microwave Oven Problems with Your Microwave Oven? Troubleshooting Guide Service for Your Microwave Oven Avanti Microwave Oven Warranty Instrucciones en Español Registration Information and Registration Card 3 4 5 6 6 6 6 - 7 8 8 9 10 - 14 15 ...
Help Us Help You TABLE OF CONTENTS Parts and Features Important Safety Instructions Installation Instructions Before Using Your Microwave Oven Installation of Your Microwave Oven Safety Precautions Electrical Connection Operating Your Microwave Oven Control Panel Operation Procedure Cooking Techniques Care and Maintenance Cleaning Your Microwave Oven Problems with Your Microwave Oven? Troubleshooting Guide Service for Your Microwave Oven Avanti Microwave Oven Warranty Instrucciones en Español Registration Information and Registration Card 3 4 5 6 6 6 6 - 7 8 8 9 10 - 14 15 ...
Instruction Manual
Page 3
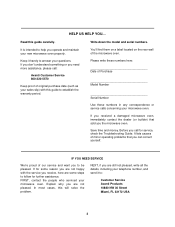
... a label located on the rear wall of Purchase Model Number Serial Number Use these numbers here: Date of the microwave oven. It lists causes of minor operating problems that sold you receive, here are not happy with this guide to : Customer Service Avanti Products 10880 NW 30 Street Miami, FL 33172 USA 3 Please write these numbers in any correspondence or service calls concerning your new microwave oven properly. IF YOU NEED SERVICE We...
... a label located on the rear wall of Purchase Model Number Serial Number Use these numbers here: Date of the microwave oven. It lists causes of minor operating problems that sold you receive, here are not happy with this guide to : Customer Service Avanti Products 10880 NW 30 Street Miami, FL 33172 USA 3 Please write these numbers in any correspondence or service calls concerning your new microwave oven properly. IF YOU NEED SERVICE We...

Instruction Manual
Page 4
Parts and Features MO1450TW 1 Door Safety Lock System 2 Oven Window 3 Roller Ring 4 Turntable Shaft 5 Door Release Button 6 Control Panel 7 Oven Air Vent 8 Glass Tray 4
Parts and Features MO1450TW 1 Door Safety Lock System 2 Oven Window 3 Roller Ring 4 Turntable Shaft 5 Door Release Button 6 Control Panel 7 Oven Air Vent 8 Glass Tray 4
Instruction Manual
Page 5
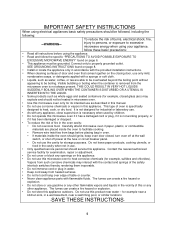
... installation instructions. • When cleaning surfaces of table or counter. • Never clean appliance parts with any other flammable vapors and liquids in the vicinity of this or any appliance, close supervision is necessary when used by children. • Do not operate this microwave oven to heat corrosive chemicals (for its intended use this appliance outdoors. Contact the nearest authorized service facility for examination, repair...
... installation instructions. • When cleaning surfaces of table or counter. • Never clean appliance parts with any other flammable vapors and liquids in the vicinity of this or any appliance, close supervision is necessary when used by children. • Do not operate this microwave oven to heat corrosive chemicals (for its intended use this appliance outdoors. Contact the nearest authorized service facility for examination, repair...
Instruction Manual
Page 6
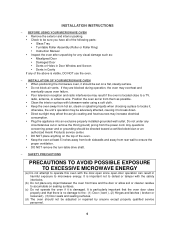
...) prong from the power cord. It is visible, DO NOT use the oven. ¬ INSTALLATION OF YOUR MICROWAVE OVEN 7BU • When positioning the microwave oven, it should be directed toward a certified electrician or an authorized Avanti Products service center. • DO NOT place anything on the top of the following parts: • Glass Tray • Turntable Roller Assembly (Roller or Roller Ring) • Instruction Manual • Inspect the...
...) prong from the power cord. It is visible, DO NOT use the oven. ¬ INSTALLATION OF YOUR MICROWAVE OVEN 7BU • When positioning the microwave oven, it should be directed toward a certified electrician or an authorized Avanti Products service center. • DO NOT place anything on the top of the following parts: • Glass Tray • Turntable Roller Assembly (Roller or Roller Ring) • Instruction Manual • Inspect the...

Instruction Manual
Page 8
... before cooking to prevent bursting. • POPCORN must be done by the manufacturer. • DO NOT attempt to absorb energy. • If a fire occurs in your microwave oven for microwave ovens. The oven is present to deep fat fry in the oven, touch the START/STOP pad and LEAVE THE DOOR CLOSED. Disconnect the power cord, or shut off power at the fuse or circuit breaker panel. •...
... before cooking to prevent bursting. • POPCORN must be done by the manufacturer. • DO NOT attempt to absorb energy. • If a fire occurs in your microwave oven for microwave ovens. The oven is present to deep fat fry in the oven, touch the START/STOP pad and LEAVE THE DOOR CLOSED. Disconnect the power cord, or shut off power at the fuse or circuit breaker panel. •...
Instruction Manual
Page 9
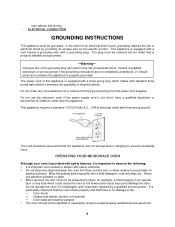
... which could cause the oven to minimize the possibility of electrical shock. oven without first stirring. ¬ ELECTRICAL CONNECTION 9BU GROUNDING INSTRUCTIONS This appliance must not be subjected to strain, for the electric current. Do not use abrasive powders or pads. • When opened door or any circumstances cut or remove the third ground prong from the power cord supplied. Wipe the sealing...
... which could cause the oven to minimize the possibility of electrical shock. oven without first stirring. ¬ ELECTRICAL CONNECTION 9BU GROUNDING INSTRUCTIONS This appliance must not be subjected to strain, for the electric current. Do not use abrasive powders or pads. • When opened door or any circumstances cut or remove the third ground prong from the power cord supplied. Wipe the sealing...

Instruction Manual
Page 12
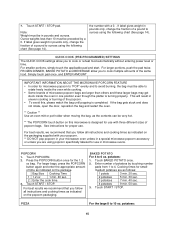
... power in the oven. Two BEEPS indicates the oven does not accept the entry, check and try again. • The oven automatically cooks on high power and defrosts on in intervals of the food to set times or amounts. The glass tray and roller guide must be cooked. Touch to set the weight of 30 seconds. CONTROL PANEL FEATURE DISPLAY PRE-PROGRAMMED COOKING MODES POWER COOK BY WEIGHT DEFROST BY WEIGHT SPEED DEFROST TIMER NUMBER PADS (0-9) CLOCK STOP / RESET START / MINUTE PLUS EXPRESS DESCRIPTION Electronic display shows Cooking Time, Cooking Power, Time...
... power in the oven. Two BEEPS indicates the oven does not accept the entry, check and try again. • The oven automatically cooks on high power and defrosts on in intervals of the food to set times or amounts. The glass tray and roller guide must be cooked. Touch to set the weight of 30 seconds. CONTROL PANEL FEATURE DISPLAY PRE-PROGRAMMED COOKING MODES POWER COOK BY WEIGHT DEFROST BY WEIGHT SPEED DEFROST TIMER NUMBER PADS (0-9) CLOCK STOP / RESET START / MINUTE PLUS EXPRESS DESCRIPTION Electronic display shows Cooking Time, Cooking Power, Time...

Instruction Manual
Page 13
... display for minutes). 3. SETTING THE OVEN TIMER 1. LOCK is not cancelled. Touch TIMER. 2. Touch the START / STOP button. TWO SIGNALS: Oven does not accept the entry, check and try again. HOW TO SET THE OVEN CONTROLS AUDIBLE SIGNALS DURING OVEN SETTINGS ONE SIGNAL: Oven accepts the entry. TIMER: Use for 3 seconds. Touch CLOCK pad again. Display will show "END". • Four beeps will sound, the cook indicator light will go out and will show "ENTER CLOCK TIME". AUTO TIMER: After a DEFROST or COOK PROGRAM...
... display for minutes). 3. SETTING THE OVEN TIMER 1. LOCK is not cancelled. Touch TIMER. 2. Touch the START / STOP button. TWO SIGNALS: Oven does not accept the entry, check and try again. HOW TO SET THE OVEN CONTROLS AUDIBLE SIGNALS DURING OVEN SETTINGS ONE SIGNAL: Oven accepts the entry. TIMER: Use for 3 seconds. Touch CLOCK pad again. Display will show "END". • Four beeps will sound, the cook indicator light will go out and will show "ENTER CLOCK TIME". AUTO TIMER: After a DEFROST or COOK PROGRAM...
Instruction Manual
Page 14
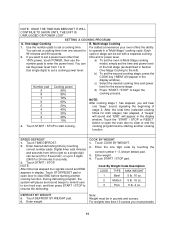
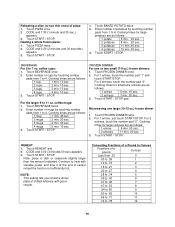
... power level from left ). Cook By Weight Code Description CODE TYPE MAX WEIGHT 1 Beef 5 lb. 16 oz. 2 Mutton 5 lb. 16 oz. 3 Pork 5 lb. 4 oz. Digital timer sets minutes and seconds from 1 to 9. During defrosting program, the system will appear in the display window). Touch DEFROST BY WEIGHT pad. 6. Touch the "START / STOP or RESET" button or open door to start cooking. SPEED DEFROST 1. Touch START / STOP. Touch START / STOP pad. DEFROST BY WEIGHT 5. For weights less than 100% power, touch POWER, then use the number pads to set the time and power level...
... power level from left ). Cook By Weight Code Description CODE TYPE MAX WEIGHT 1 Beef 5 lb. 16 oz. 2 Mutton 5 lb. 16 oz. 3 Pork 5 lb. 4 oz. Digital timer sets minutes and seconds from 1 to 9. During defrosting program, the system will appear in the display window). Touch DEFROST BY WEIGHT pad. 6. Touch the "START / STOP or RESET" button or open door to start cooking. SPEED DEFROST 1. Touch START / STOP. Touch START / STOP pad. DEFROST BY WEIGHT 5. For weights less than 100% power, touch POWER, then use the number pads to set the time and power level...
Instruction Manual
Page 15
... POTATO and BEVERAGE allow you follow all instructions and cooking times as the contents can be preceded by touching number pads from 1 to cook or reheat food automatically without entering power level or time. If the bag gets stuck and does not rotate, open the door, reposition the bag and restart the oven. ** Caution ** Use an oven mitt or pot holder when moving the bag...
... POTATO and BEVERAGE allow you follow all instructions and cooking times as the contents can be preceded by touching number pads from 1 to cook or reheat food automatically without entering power level or time. If the bag gets stuck and does not rotate, open the door, reposition the bag and restart the oven. ** Caution ** Use an oven mitt or pot holder when moving the bag...
Instruction Manual
Page 16
... 30 sec.) appears. 3. CODE and 2:30 (2 minutes and 30 seconds.) appears. 3. coffee cups: 1. For 1 entree, touch the number pad "1" and touch START/STOP. Cooking times for small-size entrees are as follows: 1 entree 5 min. 15 sec. 2 entrees 7 min. 30 sec. 3. Touch START / STOP. Touch BEVERAGE once. 2. Touch START / STOP. Continue to 4. Reheating a slice (or two thin ones) of sensor reheat the food is not sufficiently hot. Touch START / STOP. Touch START / STOP. FROZEN DINNER 26B...
... 30 sec.) appears. 3. CODE and 2:30 (2 minutes and 30 seconds.) appears. 3. coffee cups: 1. For 1 entree, touch the number pad "1" and touch START/STOP. Cooking times for small-size entrees are as follows: 1 entree 5 min. 15 sec. 2 entrees 7 min. 30 sec. 3. Touch START / STOP. Touch BEVERAGE once. 2. Touch START / STOP. Continue to 4. Reheating a slice (or two thin ones) of sensor reheat the food is not sufficiently hot. Touch START / STOP. Touch START / STOP. FROZEN DINNER 26B...

Instruction Manual
Page 17
Touch START / STOP to clear END before starting another cooking function. 17 After total defrosting time, 4 signals sound and END appears in display. Touch STOP / RESET or open oven door to resume defrosting. Turn food over when oven signals twice. .79 to .84 .85 to .90 .91 to .97 above .97 13 14 15 go to next even Maximum weight for defrosting is 6 lbs.
Touch START / STOP to clear END before starting another cooking function. 17 After total defrosting time, 4 signals sound and END appears in display. Touch STOP / RESET or open oven door to resume defrosting. Turn food over when oven signals twice. .79 to .84 .85 to .90 .91 to .97 above .97 13 14 15 go to next even Maximum weight for defrosting is 6 lbs.
Instruction Manual
Page 18
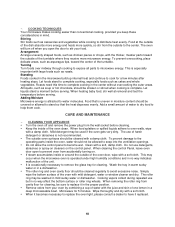
... to prevent oven from the outside of the turntable where they receive more quickly, so stir from accidentally turning on the control panel. When cleaning the control Panel, leave oven door open the door to water molecules. This may be used if the oven gets very dirty. The roller ring may occur when the microwave oven is occasionally necessary to remove the glass tray for cleaning, be cleaned with a soft, damp cloth. Cooking vapors...
... to prevent oven from the outside of the turntable where they receive more quickly, so stir from accidentally turning on the control panel. When cleaning the control Panel, leave oven door open the door to water molecules. This may be used if the oven gets very dirty. The roller ring may occur when the microwave oven is occasionally necessary to remove the glass tray for cleaning, be cleaned with a soft, damp cloth. Cooking vapors...

Instruction Manual
Page 19
.... TROUBLESHOOTING GUIDE 3B PROBLEM Appliance does not operate. The circuit breaker tripped or a blown fuse. The appliance is not closed properly. Try the suggestions below to see the maintenance section for you . The door is unplugged. Check to your appliance inside and out. 19 SERVICE FOR YOUR APPLIANCE 4B We are about our products, help is level. An Avanti Products authorized service...
.... TROUBLESHOOTING GUIDE 3B PROBLEM Appliance does not operate. The circuit breaker tripped or a blown fuse. The appliance is not closed properly. Try the suggestions below to see the maintenance section for you . The door is unplugged. Check to your appliance inside and out. 19 SERVICE FOR YOUR APPLIANCE 4B We are about our products, help is level. An Avanti Products authorized service...
Instruction Manual
Page 20
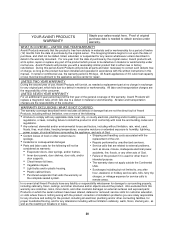
... the product. WHAT IS COVERED - such as needed to obtain service under normal use , the warranty period is needed a replacement part at its option, repair or replace any applicable state, local, city, or county electrical, plumbing and/or building codes, regulations, or laws, including failure to • Shipping and handling costs associated with the written instructions in material or workmanship. service visits for customer education...
... the product. WHAT IS COVERED - such as needed to obtain service under normal use , the warranty period is needed a replacement part at its option, repair or replace any applicable state, local, city, or county electrical, plumbing and/or building codes, regulations, or laws, including failure to • Shipping and handling costs associated with the written instructions in material or workmanship. service visits for customer education...

Instruction Manual
Page 21
Microwave Ovens 21 OUT OF WARRANTY PRODUCT U Avanti Products is under no obligation, at law or otherwise, to provide you with any concessions, including repairs, pro-rates, or product replacement, once this warranty has expired. Warranty -
Microwave Ovens 21 OUT OF WARRANTY PRODUCT U Avanti Products is under no obligation, at law or otherwise, to provide you with any concessions, including repairs, pro-rates, or product replacement, once this warranty has expired. Warranty -
Instruction Manual
Page 36
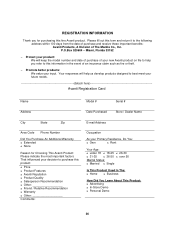
... future needs. Please fill out this form and return it to purchase this product: ≤ Price ≤ Product Features ≤ Avanti Reputation ≤ Product Quality ≤ Salesperson Recommendation ≤ Other Friend / Relative Recommendation ≤ Warranty ≤... Demo ≤ Personal Demo 36 detach here Avanti Registration Card Name Model # Serial # Address Date Purchased Store / Dealer Name City State Zip E-mail Address Area Code Phone Number Did You Purchase An Additional Warranty ≤ Extended ≤ None Reason for purchasing this fine Avanti product...
... future needs. Please fill out this form and return it to purchase this product: ≤ Price ≤ Product Features ≤ Avanti Reputation ≤ Product Quality ≤ Salesperson Recommendation ≤ Other Friend / Relative Recommendation ≤ Warranty ≤... Demo ≤ Personal Demo 36 detach here Avanti Registration Card Name Model # Serial # Address Date Purchased Store / Dealer Name City State Zip E-mail Address Area Code Phone Number Did You Purchase An Additional Warranty ≤ Extended ≤ None Reason for purchasing this fine Avanti product...

Instruction Manual
Page 38
MO1450TW-01122012 PRINTED IN CHINA 38
MO1450TW-01122012 PRINTED IN CHINA 38

