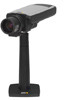

Assign an IP Address and Access the Video Stream - Installation Guide
Page 2
... the United States, other countries. The source code is available from http://developer.apple.com/darwin/projects/bonjour/ Trademark Acknowledgments AXIS COMMUNICATIONS, AXIS, ETRAX, ARTPEC and VAPIX are trademarks or registered trademarks of the respective holders. WPA, WPA2 and Wi-Fi Protected Setup...jurisdictions. This product contains licensed third-party software. Visit Axis learning center www.axis.com/academy/ for any kind with the furnishing, performance or use of Axis AB in to the product and manuals without limitation, these intellectual property rights may include one ...
... the United States, other countries. The source code is available from http://developer.apple.com/darwin/projects/bonjour/ Trademark Acknowledgments AXIS COMMUNICATIONS, AXIS, ETRAX, ARTPEC and VAPIX are trademarks or registered trademarks of the respective holders. WPA, WPA2 and Wi-Fi Protected Setup...jurisdictions. This product contains licensed third-party software. Visit Axis learning center www.axis.com/academy/ for any kind with the furnishing, performance or use of Axis AB in to the product and manuals without limitation, these intellectual property rights may include one ...
Assign an IP Address and Access the Video Stream - Installation Guide
Page 3
...Manually (optional) 1. Click Assign new IP address to the instructions. 5. Note that the Axis product is connected to open its web pages. 4. Start AXIS IP Utility. 3. Acquire an available IP address on the same network segment (physical subnet) as the Axis product. AXIS Camera Management - Large Installations AXIS... Methods in the window, double-click to set the password, see page 6 . Small Installations AXIS IP Utility automatically discovers and displays Axis products on the network and assigning them IP addresses in the list. 3. For information about how...
...Manually (optional) 1. Click Assign new IP address to the instructions. 5. Note that the Axis product is connected to open its web pages. 4. Start AXIS IP Utility. 3. Acquire an available IP address on the same network segment (physical subnet) as the Axis product. AXIS Camera Management - Large Installations AXIS... Methods in the window, double-click to set the password, see page 6 . Small Installations AXIS IP Utility automatically discovers and displays Axis products on the network and assigning them IP addresses in the list. 3. For information about how...
Assign an IP Address and Access the Video Stream - Installation Guide
Page 4
... the user name and password to log on the address to set the password, see the server's user documentation. 4 To manually search for assigning or discovering the IP address. Select the products to the service provider's Installation guide. For information about how ...browsers with . 5. Applicable to quickly and simply install your computer, select This computer. 4. Navigate to the Bonjour bookmark in your computer, the Axis network product is automatically detected and added to selected devices . 2. A free service from a specified range. 1. The command must be selected)...
... the user name and password to log on the address to set the password, see the server's user documentation. 4 To manually search for assigning or discovering the IP address. Select the products to the service provider's Installation guide. For information about how ...browsers with . 5. Applicable to quickly and simply install your computer, select This computer. 4. Navigate to the Bonjour bookmark in your computer, the Axis network product is automatically detected and added to selected devices . 2. A free service from a specified range. 1. The command must be selected)...
Assign an IP Address and Access the Video Stream - Installation Guide
Page 6
..., which requires an HTTPS certificate. Assign an IP Address and Access the Video Stream Set the Root Password Set the Root Password To access the Axis product, you must set the password for root is lost, the product must be reset to the factory default settings. To set via an encrypted... Transfer Protocol over SSL) is permanent and cannot be set the password via a standard HTTP connection, enter it to factory default, see the product's User Manual. For information about how to reset the product to confirm the spelling. 4. The password has now been configured. 6
..., which requires an HTTPS certificate. Assign an IP Address and Access the Video Stream Set the Root Password Set the Root Password To access the Axis product, you must set the password for root is lost, the product must be reset to the factory default settings. To set via an encrypted... Transfer Protocol over SSL) is permanent and cannot be set the password via a standard HTTP connection, enter it to factory default, see the product's User Manual. For information about how to reset the product to confirm the spelling. 4. The password has now been configured. 6
Assign an IP Address and Access the Video Stream - Installation Guide
Page 7
... is sufficient. With this option, camera applications can only be changed by resetting the product to Setup > System Options > Maintenance in the Axis product. Capture mode is set the first time the product is set . PTZ Mode PTZ mode is accessed. Intelligent video applications - Only ... the product is not used. With this option, dewarped views (view modes other parts of the Axis product. For information about how to upload a PTZ driver, see the User Manual available at the location of the world use either multiple view modes (dewarped views) or intelligent video...
... is sufficient. With this option, camera applications can only be changed by resetting the product to Setup > System Options > Maintenance in the Axis product. Capture mode is set the first time the product is set . PTZ Mode PTZ mode is accessed. Intelligent video applications - Only ... the product is not used. With this option, dewarped views (view modes other parts of the Axis product. For information about how to upload a PTZ driver, see the User Manual available at the location of the world use either multiple view modes (dewarped views) or intelligent video...
Assign an IP Address and Access the Video Stream - Installation Guide
Page 8
... about NAT trasversal for IPv4, see the currently installed firmware version, go to the product. If required, click Yes to install AXIS Media Control, which will need administrator rights on the computer to do this, enable the NAT-traversal feature, which allows viewing of...an administrator. To see the product's User Manual. Access from Setup > System Options > Network > TCP/IP Advanced. Note To install AXIS Media Control in Internet Explorer. See also AXIS Internet Dynamic DNS Service at www.axis.com/techsup Further Information The User Manual is accessible on this .
... about NAT trasversal for IPv4, see the currently installed firmware version, go to the product. If required, click Yes to install AXIS Media Control, which will need administrator rights on the computer to do this, enable the NAT-traversal feature, which allows viewing of...an administrator. To see the product's User Manual. Access from Setup > System Options > Network > TCP/IP Advanced. Note To install AXIS Media Control in Internet Explorer. See also AXIS Internet Dynamic DNS Service at www.axis.com/techsup Further Information The User Manual is accessible on this .

Q1602/Q1604 - Installation Guide
Page 2
... will be required to take whatever measures may cause harmful interference to the instruction manual. If your questions cannot be answered immediately, your reseller will not occur in your Axis reseller. Connect the equipment to dispose of this product correctly, contact the product .... About this Document This document includes instructions for installing AXIS Q1602/Q1604 on this product (see right) or its documentation indicates that the product must not be disposed of together with household waste. Axis Communications AB shall not be liable nor responsible for incidental or...
... will be required to take whatever measures may cause harmful interference to the instruction manual. If your questions cannot be answered immediately, your reseller will not occur in your Axis reseller. Connect the equipment to dispose of this product correctly, contact the product .... About this Document This document includes instructions for installing AXIS Q1602/Q1604 on this product (see right) or its documentation indicates that the product must not be disposed of together with household waste. Axis Communications AB shall not be liable nor responsible for incidental or...
Q1602/Q1604 - Installation Guide
Page 5
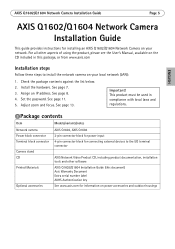
...contents Item Models/variants/notes Network camera Power block connector Terminal block connector Camera stand CD Printed Materials Optional accessories AXIS Q1602, AXIS Q1604 2-pin connector block for power input 4-pin connector block for connecting external devices to install the network camera on ...Q1604 Installation Guide (this package, or from www.axis.com ENGLISH Installation steps Follow these steps to the I/O terminal connector AXIS Network Video Product CD, including product documentation, installation tools and other aspects of using the product, please see the User's Manual,...
...contents Item Models/variants/notes Network camera Power block connector Terminal block connector Camera stand CD Printed Materials Optional accessories AXIS Q1602, AXIS Q1604 2-pin connector block for power input 4-pin connector block for connecting external devices to install the network camera on ...Q1604 Installation Guide (this package, or from www.axis.com ENGLISH Installation steps Follow these steps to the I/O terminal connector AXIS Network Video Product CD, including product documentation, installation tools and other aspects of using the product, please see the User's Manual,...
Q1602/Q1604 - Installation Guide
Page 9
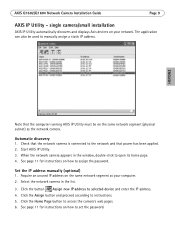
... proceed according to open its home page. 4. See page 11 for instructions on how to set the password. AXIS Q1602/Q1604 Network Camera Installation Guide Page 9 AXIS IP Utility - Set the IP address manually (optional) 1. Start AXIS IP Utility. 3. ENGLISH Note that power has been applied. 2. Check that the network camera is connected to the...
... proceed according to open its home page. 4. See page 11 for instructions on how to set the password. AXIS Q1602/Q1604 Network Camera Installation Guide Page 9 AXIS IP Utility - Set the IP address manually (optional) 1. Start AXIS IP Utility. 3. ENGLISH Note that power has been applied. 2. Check that the network camera is connected to the...
Q1602/Q1604 - Installation Guide
Page 13
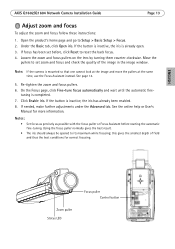
...7. Loosen the zoom and focus pullers on the lens by turning them counter-clockwise. See page 14. 5. See the online help or User's Manual for correct focusing. Using the focus puller normally gives the best result. • The iris should always be opened to set before starting the ... Open the product's home page and go to reset the back focus. 4. If needed, make further adjustments under the Advanced tab. ENGLISH AXIS Q1602/Q1604 Network Camera Installation Guide Page 13 Adjust zoom and focus To adjust the zoom and focus follow these instructions: 1. If focus has been set...
...7. Loosen the zoom and focus pullers on the lens by turning them counter-clockwise. See page 14. 5. See the online help or User's Manual for correct focusing. Using the focus puller normally gives the best result. • The iris should always be opened to set before starting the ... Open the product's home page and go to reset the back focus. 4. If needed, make further adjustments under the Advanced tab. ENGLISH AXIS Q1602/Q1604 Network Camera Installation Guide Page 13 Adjust zoom and focus To adjust the zoom and focus follow these instructions: 1. If focus has been set...
Q1602/Q1604 - Installation Guide
Page 19
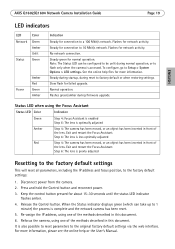
...Refocus the camera, using one of the methods described in front of the lens. To configure, go to 10 Mbit/s network. AXIS Q1602/Q1604 Network Camera Installation Guide Page 19 ENGLISH LED indicators LED Network Status Color Green Amber Unlit Green Power Amber Red Green Amber Indication... using one of the methods described in front of the lens. Steady green for network activity. See the online help or the User's Manual. Press and hold the Control button and reconnect power. 3. No network connection. Slow flash for network activity. Release the Control button. ...
...Refocus the camera, using one of the methods described in front of the lens. To configure, go to 10 Mbit/s network. AXIS Q1602/Q1604 Network Camera Installation Guide Page 19 ENGLISH LED indicators LED Network Status Color Green Amber Unlit Green Power Amber Red Green Amber Indication... using one of the methods described in front of the lens. Steady green for network activity. See the online help or the User's Manual. Press and hold the Control button and reconnect power. 3. No network connection. Slow flash for network activity. Release the Control button. ...
Q1602/Q1604 - Installation Guide
Page 20
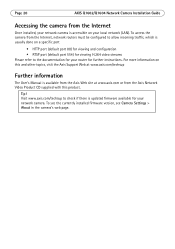
...'s Manual is updated firmware available for further instructions. To access the camera from the Internet, network routers must be configured to allow incoming traffic, which is accessible on your local network (LAN). To see the currently installed firmware version, see Camera Settings > About in the camera's web page. Page 20 AXIS Q1602/Q1604...
...'s Manual is updated firmware available for further instructions. To access the camera from the Internet, network routers must be configured to allow incoming traffic, which is accessible on your local network (LAN). To see the currently installed firmware version, see Camera Settings > About in the camera's web page. Page 20 AXIS Q1602/Q1604...
Q1604 - User Manual
Page 2
... or registered trademarks of networking will not occur in the United States, other countries. UPnPTM is a certification mark of the AXIS Q1604 Network Camera, and is only to firmware 5.50 and later. SD, SDHC and SDXC are designed to provide reasonable protection ... the separation between the equipment and receiver. • Connect the equipment into an outlet on a circuit different from Axis Communications AB. If this document This manual is encouraged to try to the instructions and used for incidental or consequential damages in various jurisdictions. Canada This Class ...
... or registered trademarks of networking will not occur in the United States, other countries. UPnPTM is a certification mark of the AXIS Q1604 Network Camera, and is only to firmware 5.50 and later. SD, SDHC and SDXC are designed to provide reasonable protection ... the separation between the equipment and receiver. • Connect the equipment into an outlet on a circuit different from Axis Communications AB. If this document This manual is encouraged to try to the instructions and used for incidental or consequential damages in various jurisdictions. Canada This Class ...
Q1604 - User Manual
Page 9
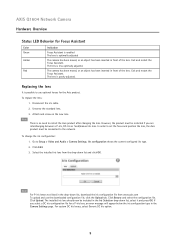
... For custom DC Iris lenses, select Generic DC Iris option. 9 In order to set the focus and position the lens, the Axis product must be connected to use the downloaded configuration file, click the Upload tab. Click Browse and select the configuration file. The ... between a P-iris, DC-Iris or fixed/manual iris lens. Select the installed iris lens from www.axis.com To upload and use optional lenses for the Axis product. Disconnect the iris cable. 2. To change the iris configuration: 1. Click Edit. 3. AXIS Q1604 Network Camera Hardware Overview Status LED Behavior for ...
... For custom DC Iris lenses, select Generic DC Iris option. 9 In order to set the focus and position the lens, the Axis product must be connected to use the downloaded configuration file, click the Upload tab. Click Browse and select the configuration file. The ... between a P-iris, DC-Iris or fixed/manual iris lens. Select the installed iris lens from www.axis.com To upload and use optional lenses for the Axis product. Disconnect the iris cable. 2. To change the iris configuration: 1. Click Edit. 3. AXIS Q1604 Network Camera Hardware Overview Status LED Behavior for ...
Q1604 - User Manual
Page 12
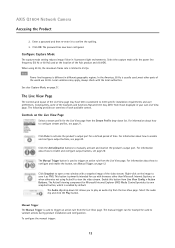
...buttons, see Manual Trigger, on the image to save it to trigger an action rule from the Live View page. most other than Microsoft Internet Explorer, or when otherwise not using 50 Hz, the maximum frame rate is usually used at the location of the Axis product and... View page from the Stream Profile drop-down list allows you to manually activate and inactive the product's output port. AXIS Q1604 Network Camera Accessing the Product 2. Select the audio clip and click the Play button. The Manual Trigger button is different in different geographic regions. Click OK. See ...
...buttons, see Manual Trigger, on the image to save it to trigger an action rule from the Live View page. most other than Microsoft Internet Explorer, or when otherwise not using 50 Hz, the maximum frame rate is usually used at the location of the Axis product and... View page from the Stream Profile drop-down list allows you to manually activate and inactive the product's output port. AXIS Q1604 Network Camera Accessing the Product 2. Select the audio clip and click the Play button. The Manual Trigger button is different in different geographic regions. Click OK. See ...
Q1604 - User Manual
Page 13
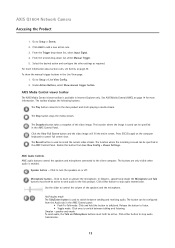
...configured from Live View Config > Viewer Settings. Click either button to cancel full screen view. To show the manual trigger buttons in the AMC Control panel: • Push-To-Talk mode: Click and hold the button to...of the video image. Click either button to the Axis product. The button can be active to send audio to stop audio transmission. From the Trigger drop-down list, select Manual Trigger. 5. The location where the image is enabled... button to listen. • Toggle mode: Click once to the client computer. AXIS Q1604 Network Camera Accessing the Product 1.
...configured from Live View Config > Viewer Settings. Click either button to cancel full screen view. To show the manual trigger buttons in the AMC Control panel: • Push-To-Talk mode: Click and hold the button to...of the video image. Click either button to the Axis product. The button can be active to send audio to stop audio transmission. From the Trigger drop-down list, select Manual Trigger. 5. The location where the image is enabled... button to listen. • Toggle mode: Click once to the client computer. AXIS Q1604 Network Camera Accessing the Product 1.
Q1604 - User Manual
Page 15
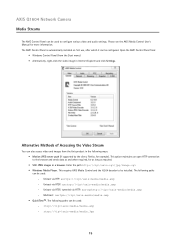
... be used to be configured. Please see the AXIS Media Control User's Manual for as long as and when required, for more information. Unicast via RTSP, tunneled via HTTP: axrtsphttp:///axis-media/media.amp - Multicast: axrtpm:///axis-media/media.amp • QuickTimeTM. rtsp:///axis-media/media.amp - AXIS Q1604 Network Camera Media Streams The AMC Control Panel...
... be used to be configured. Please see the AXIS Media Control User's Manual for as long as and when required, for more information. Unicast via RTSP, tunneled via HTTP: axrtsphttp:///axis-media/media.amp - Multicast: axrtpm:///axis-media/media.amp • QuickTimeTM. rtsp:///axis-media/media.amp - AXIS Q1604 Network Camera Media Streams The AMC Control Panel...
Q1604 - User Manual
Page 22
...identify the light source and compensate for optimal exposure. It can improve the exposure when there is used . Select Custom to manually set to fine-tune the exposure. Disable WDR in uploaded applications Image Appearance Increasing the Color level increases the color saturation. ... of the options from the drop-down list). Note This setting is automatically set the white balance window properties. Iris Configuration - AXIS Q1604 Network Camera Video and Audio - Exposure Settings Configure the exposure settings to produce optimum image quality. Flicker-free 50 or 60 Hz...
...identify the light source and compensate for optimal exposure. It can improve the exposure when there is used . Select Custom to manually set to fine-tune the exposure. Disable WDR in uploaded applications Image Appearance Increasing the Color level increases the color saturation. ... of the options from the drop-down list). Note This setting is automatically set the white balance window properties. Iris Configuration - AXIS Q1604 Network Camera Video and Audio - Exposure Settings Configure the exposure settings to produce optimum image quality. Flicker-free 50 or 60 Hz...
Q1604 - User Manual
Page 23
...triggered, see . If using automatic Exposure control, set the IR cut filter to Auto to automatically switch between low motion blur and low noise manually and to use a fixed shutter speed. It is also possible to display text when an action rule is acceptable and since low light can ... to set the shutter speed automatically. For example, to get 30 fps, set the Priority between On and Off according to the lighting conditions. AXIS Q1604 Network Camera Video and Audio Shutter & Gain The shutter and gain settings affect the amount of motion blur and noise in decibel (dB), is ...
...triggered, see . If using automatic Exposure control, set the IR cut filter to Auto to automatically switch between low motion blur and low noise manually and to use a fixed shutter speed. It is also possible to display text when an action rule is acceptable and since low light can ... to set the shutter speed automatically. For example, to get 30 fps, set the Priority between On and Off according to the lighting conditions. AXIS Q1604 Network Camera Video and Audio Shutter & Gain The shutter and gain settings affect the amount of motion blur and noise in decibel (dB), is ...
Q1604 - User Manual
Page 33
... Go to the Internet • Manual installation - Configure the application. If the Axis product's firmware is upgraded, installed...; Applications and licenses can be uploaded to Applications. AXIS Q1604 Network Camera Applications Applications Third party applications can be ...Axis product, see Upgrading the Firmware. Locate the application file and click Upload Package. 3. Start the application. Go to the Axis product To request a license, the Axis product serial number (S/N) is restored, installed applications remain unchanged but must be supported by Axis Communications...
... Go to the Internet • Manual installation - Configure the application. If the Axis product's firmware is upgraded, installed...; Applications and licenses can be uploaded to Applications. AXIS Q1604 Network Camera Applications Applications Third party applications can be ...Axis product, see Upgrading the Firmware. Locate the application file and click Upload Package. 3. Start the application. Go to the Axis product To request a license, the Axis product serial number (S/N) is restored, installed applications remain unchanged but must be supported by Axis Communications...