User Manual
Page 2
... this Beko product. If you for several other accompanying documents carefully before using the latest technology in environmentally friendly conditions. A Warning of hot surfaces. Please read this entire user manual and all warnings and information in the user manual. Differences between models will be identified in the manual. Therefore, please read this user manual the following symbols are used: Important information or useful hints...
... this Beko product. If you for several other accompanying documents carefully before using the latest technology in environmentally friendly conditions. A Warning of hot surfaces. Please read this entire user manual and all warnings and information in the user manual. Differences between models will be identified in the manual. Therefore, please read this user manual the following symbols are used: Important information or useful hints...
User Manual
Page 3
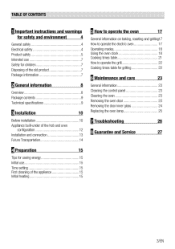
... El How to operate the oven 17 General information on baking, roasting and grilling17 How to operate the electric oven 17 Operating modes 18 Using the oven clock 18 Cooking times table 21 How to operate the grill 22 Cooking times table for grilling 22 M Maintenance and care 23 General information 23 Cleaning the control panel 23 Cleaning the oven 23 Removing the oven door 23 Removing the door inner glass 24 Replacing the oven lamp 25 El Troubleshooting 26 M Guarantee and Service 27 El...
... El How to operate the oven 17 General information on baking, roasting and grilling17 How to operate the electric oven 17 Operating modes 18 Using the oven clock 18 Cooking times table 21 How to operate the grill 22 Cooking times table for grilling 22 M Maintenance and care 23 General information 23 Cleaning the control panel 23 Cleaning the oven 23 Removing the oven door 23 Removing the door inner glass 24 Replacing the oven lamp 25 El Troubleshooting 26 M Guarantee and Service 27 El...
User Manual
Page 4
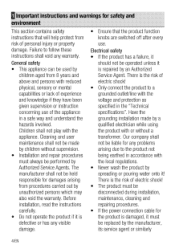
... have been given supervision or instruction concerning use . General safety • This appliance can be disconnected during installation, maintenance, cleaning and repairing procedures. • If the power connection cable for the product is repaired by an Authorized Service Agent. Children shall not play with or without supervision. • Installation and repair procedures must always be liable for any problems arising due to a grounded outlet...
... have been given supervision or instruction concerning use . General safety • This appliance can be disconnected during installation, maintenance, cleaning and repairing procedures. • If the power connection cable for the product is repaired by an Authorized Service Agent. Children shall not play with or without supervision. • Installation and repair procedures must always be liable for any problems arising due to a grounded outlet...

User Manual
Page 5
... "Technical specifications". • The appliance must be provided by a switch built into contact with the product. Care should be installed so that the electrical connection does not contact the rear surface; The separation must be taken to burst. • Do not place baking trays, dishes or aluminium foil directly onto the bottom of obstructions. • Do not heat closed tins and glass jars...
... "Technical specifications". • The appliance must be provided by a switch built into contact with the product. Care should be installed so that the electrical connection does not contact the rear surface; The separation must be taken to burst. • Do not place baking trays, dishes or aluminium foil directly onto the bottom of obstructions. • Do not heat closed tins and glass jars...

User Manual
Page 6
... the preheated oven. Remove the excess parts of the baking paper overflowing from the hot oven. • Place the baking paper into the cooking pot or on it (Please see the following figure). • • Do not use the product if the front door glass removed or cracked. • Do not use the oven handle to prevent the risk of touching the oven's heating elements. Slide the wire shelf or tray...
... the preheated oven. Remove the excess parts of the baking paper overflowing from the hot oven. • Place the baking paper into the cooking pot or on it (Please see the following figure). • • Do not use the product if the front door glass removed or cracked. • Do not use the oven handle to prevent the risk of touching the oven's heating elements. Slide the wire shelf or tray...
User Manual
Page 7
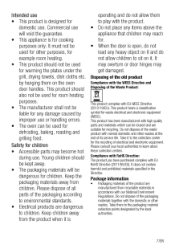
... or door hinges may reach for. • When the door is open, do not allow them on it to the collection center for the recycling of the product are dangerous to environmental standards. • Electrical products are manufactured from children. This product has been manufactured with EU RoHS Directive (2011/65/EU). It must not be used for defrosting, baking, roasting and...
... or door hinges may reach for. • When the door is open, do not allow them on it to the collection center for the recycling of the product are dangerous to environmental standards. • Electrical products are manufactured from children. This product has been manufactured with EU RoHS Directive (2011/65/EU). It must not be used for defrosting, baking, roasting and...
User Manual
Page 9
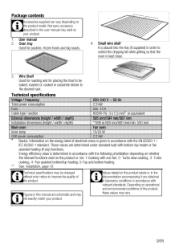
... be baked, roasted or cooked in order to collect the dripping fat while grilling so that the oven is placed into the tray (if supplied) in casserole dishes to improve the quality of he product model. Fan assisted bottom/top heating, 5-Top and bottom heating. User manual 2. Depending on the product labels or in this manual are schematic and may exist on your product. Wire Shelf Used for roasting...
... be baked, roasted or cooked in order to collect the dripping fat while grilling so that the oven is placed into the tray (if supplied) in casserole dishes to improve the quality of he product model. Fan assisted bottom/top heating, 5-Top and bottom heating. User manual 2. Depending on the product labels or in this manual are schematic and may exist on your product. Wire Shelf Used for roasting...
User Manual
Page 10
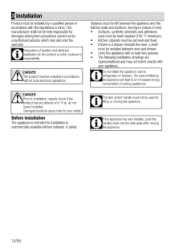
... figure (values in force. The heat emitted by a qualified person in commercially available kitchen cabinets. If so, do not have it . A safety distance must not be used must be heat resistant (100 °C minimum). • Kitchen cabinets must be held responsible for installation in accordance with all local electrical regulations. The door and/or handle must be set level and fixed. •...
... figure (values in force. The heat emitted by a qualified person in commercially available kitchen cabinets. If so, do not have it . A safety distance must not be used must be heat resistant (100 °C minimum). • Kitchen cabinets must be held responsible for installation in accordance with all local electrical regulations. The door and/or handle must be set level and fixed. •...

User Manual
Page 13
.... 4. Manufacturer shall not be connected to obey this instruction may cause operational problems and invalidate the product warranty. If a power cable is risk of electric shock, short circuit or fire! • Connection must comply with national regulations. • The mains supply data must correspond to the main body with the electrical installation at your product by a qualified electrician while using the product without a transformer. Failure...
.... 4. Manufacturer shall not be connected to obey this instruction may cause operational problems and invalidate the product warranty. If a power cable is risk of electric shock, short circuit or fire! • Connection must comply with national regulations. • The mains supply data must correspond to the main body with the electrical installation at your product by a qualified electrician while using the product without a transformer. Failure...

User Manual
Page 14
... with cooling fan I-- 2 3 SUPPLY CORD 5. Follow the instructions on the product's fuse. 2. BROWN GREEN / YELLOW TERMINAL BLOCK BLUE For products with the position of the trays. Connect the power cable and switch on the carton. If you have cooked by programming the timer of the cooking time together with 2 screws as illustrated. 1 Cooling fan 2 Control panel 3 Door The built-in cooling fan cools both the built-in upright position. Installing the product 1. If...
... with cooling fan I-- 2 3 SUPPLY CORD 5. Follow the instructions on the product's fuse. 2. BROWN GREEN / YELLOW TERMINAL BLOCK BLUE For products with the position of the trays. Connect the power cable and switch on the carton. If you have cooked by programming the timer of the cooking time together with 2 screws as illustrated. 1 Cooling fan 2 Control panel 3 Door The built-in cooling fan cools both the built-in upright position. Installing the product 1. If...
User Manual
Page 15
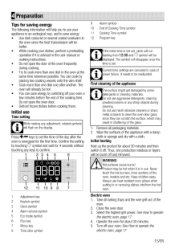
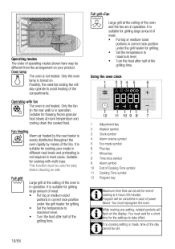
... 9 8 7 1 Adjustment key 2 Keylock symbol 3 Clock symbol 4 Alarm volume symbol 5 Eco mode symbol 6 Plus key 7 Minus key 8 Time slice symbol 9 Alarm symbol 10 End of the glass. 1. Product may result in or removing dishes into/from 12:00 and symbol will be readjusted. Always use aggressive detergents, cleaning powders/creams or any keys to be displayed. Electric oven 1. Take all packaging materials. 2. Operate the oven...
... 9 8 7 1 Adjustment key 2 Keylock symbol 3 Clock symbol 4 Alarm volume symbol 5 Eco mode symbol 6 Plus key 7 Minus key 8 Time slice symbol 9 Alarm symbol 10 End of the glass. 1. Product may result in or removing dishes into/from 12:00 and symbol will be readjusted. Always use aggressive detergents, cleaning powders/creams or any keys to be displayed. Electric oven 1. Take all packaging materials. 2. Operate the oven...
User Manual
Page 17
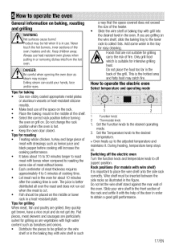
... the rack. • Place the baking mould in the oven. Set the Function knob to off (upper) position. Rack positions (For models with grill into /from the hot oven. , DANGER: AI • Be careful when opening the oven door as illustrated in a heat-resistant plate. Product may catch fire. Keep children away. Ili How to operate the electric oven Select temperature and operating mode L 1 2 1 Function knob 2 Thermostat knob 1. Flat pieces, meat skewers...
... the rack. • Place the baking mould in the oven. Set the Function knob to off (upper) position. Rack positions (For models with grill into /from the hot oven. , DANGER: AI • Be careful when opening the oven door as illustrated in a heat-resistant plate. Product may catch fire. Keep children away. Ili How to operate the electric oven Select temperature and operating mode L 1 2 1 Function knob 2 Thermostat knob 1. Flat pieces, meat skewers...
User Manual
Page 18
... easy steam cleaning as well. This function must reprogram the oven. Operating with multi trays. Fan Heating Warm air heated by the rear heater is not heated. You must be different from the arrangement on . Only the oven lamp is turned on your meals in different rack levels and preheating is not required in most cases. 3 2 Operating modes The order of operating modes shown here may be used for end of cooking...
... easy steam cleaning as well. This function must reprogram the oven. Operating with multi trays. Fan Heating Warm air heated by the rear heater is not heated. You must be different from the arrangement on . Only the oven lamp is turned on your meals in different rack levels and preheating is not required in most cases. 3 2 Operating modes The order of operating modes shown here may be used for end of cooking...
User Manual
Page 19
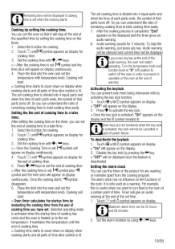
... using + keys. 19/EN Set the cooking time with + I 'm keys to count down on the display. 2. Cooking will restart operating. To stop at the end of the audio warning, the oven will start . » Oven timer calculates the startup time by activating the key lock function. 1. Setting the alarm clock You can set cooking time is divided into 4 equal parts and when the time of each parts ends, the symbol of that parts turns...
... using + keys. 19/EN Set the cooking time with + I 'm keys to count down on the display. 2. Cooking will restart operating. To stop at the end of the audio warning, the oven will start . » Oven timer calculates the startup time by activating the key lock function. 1. Setting the alarm clock You can set cooking time is divided into 4 equal parts and when the time of each parts ends, the symbol of that parts turns...
User Manual
Page 20
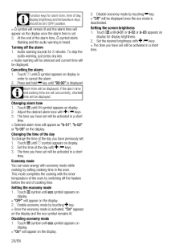
... temperature of the oven by touching + key. » Once the economy mode is heard. Function keys for alarm tone, time of the day with +Pm keys. 3. Adjust the desired alarm tone with + I keys. » The time you have set will appear as "b-01", "b-02" or "b-03" on the display once the alarm time is set will be activated in the oven. Changing...
... temperature of the oven by touching + key. » Once the economy mode is heard. Function keys for alarm tone, time of the day with +Pm keys. 3. Adjust the desired alarm tone with + I keys. » The time you have set will appear as "b-01", "b-02" or "b-03" on the display once the alarm time is set will be activated in the oven. Changing...
User Manual
Page 23
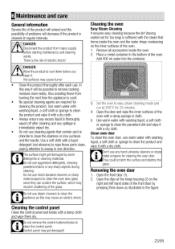
... A.possibility of problems will be possible to remove cooking residues more easily, thus avoiding these from mains supply before you clean it. Control panel may cause burns! • Clean the product thoroughly after cleaning and any spillage is cleaned at 200°C for too long) is the risk of electric shock! . Set the oven to sweep in one direction. Don't use . Open the front door (1). 2. Use warm water with...
... A.possibility of problems will be possible to remove cooking residues more easily, thus avoiding these from mains supply before you clean it. Control panel may cause burns! • Clean the product thoroughly after cleaning and any spillage is cleaned at 200°C for too long) is the risk of electric shock! . Set the oven to sweep in one direction. Don't use . Open the front door (1). 2. Use warm water with...

User Manual
Page 24
... a "click" 2 1 Frame 2 Plastic part Pull towards the inner. B 12 3 3. Move the front door to close the clips at the hinge housing when reinstalling the door. Remove the front door by pulling it upwards to install he door. Open the oven door. 2 1 Front door Hinge Over 3 1 Inner glass panel 2 Outer glass panel 3 Plastic glass panel slot-Lower As illustrated in figure, raise the innermost glass panel slightly in direction A and pull it from...
... a "click" 2 1 Frame 2 Plastic part Pull towards the inner. B 12 3 3. Move the front door to close the clips at the hinge housing when reinstalling the door. Remove the front door by pulling it upwards to install he door. Open the oven door. 2 1 Front door Hinge Over 3 1 Inner glass panel 2 Outer glass panel 3 Plastic glass panel slot-Lower As illustrated in figure, raise the innermost glass panel slightly in direction A and pull it from...
User Manual
Page 25
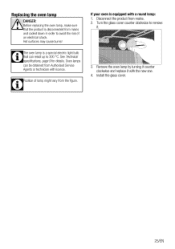
... your oven is a special electric light bulb hat can be obtained from mains. 2. Remove the oven lamp by turning it counter clockwise and replace it . 3. The oven lamp is equipped with licence. See Technical specifications, page 9 for details. Oven lamps can resist up to remove it with the new one. 4. Turn the glass cover counter clockwise to 300 °C. Install the glass cover. 25/EN Disconnect the product from Authorised Service Agents...
... your oven is a special electric light bulb hat can be obtained from mains. 2. Remove the oven lamp by turning it counter clockwise and replace it . 3. The oven lamp is equipped with licence. See Technical specifications, page 9 for details. Oven lamps can resist up to remove it with the new one. 4. Turn the glass cover counter clockwise to 300 °C. Install the glass cover. 25/EN Disconnect the product from Authorised Service Agents...
User Manual
Page 26
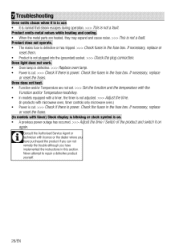
... fuses in the fuse box. Never attempt to repair a defective product yourself. 26/EN If necessary, replace or reset the fuses. Consult the Authorised Service Agent or echnician with timer) Clock display is blinking or clock symbol is on.1 • A previous power outage has occurred. >>> Adjust the time / Switch of the product and switch it is in use. • It is normal that steam escapes during operation. >>> This is not a fault. Product does not operate...
... fuses in the fuse box. Never attempt to repair a defective product yourself. 26/EN If necessary, replace or reset the fuses. Consult the Authorised Service Agent or echnician with timer) Clock display is blinking or clock symbol is on.1 • A previous power outage has occurred. >>> Adjust the time / Switch of the product and switch it is in use. • It is normal that steam escapes during operation. >>> This is not a fault. Product does not operate...
User Manual
Page 27
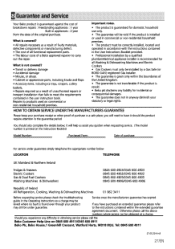
... household use only. • The guarantee will help us assist you quicker when requesting service. (The model number is covered? • All repairs necessary as a result of Ireland All Refrigeration, Cooking, Washing & Dishwashing Machines 01 862 3411 Before requesting service please check the troubleshooting Service once the manufacturers guarantee has expired. you will need to carry out the repair. guide in the user instruction book. Otherwise...
... household use only. • The guarantee will help us assist you quicker when requesting service. (The model number is covered? • All repairs necessary as a result of Ireland All Refrigeration, Cooking, Washing & Dishwashing Machines 01 862 3411 Before requesting service please check the troubleshooting Service once the manufacturers guarantee has expired. you will need to carry out the repair. guide in the user instruction book. Otherwise...


