User Manual
Page 2
... get the best results from your product which has been manufactured with regard to someone else, give the user manual as a reference for future use. is also applicable for purchasing this user manual first! Dear Customer, Thank you handover the product to life and property. Therefore, please read this Beko product. Differences between models will be identified in environmentally friendly...
... get the best results from your product which has been manufactured with regard to someone else, give the user manual as a reference for future use. is also applicable for purchasing this user manual first! Dear Customer, Thank you handover the product to life and property. Therefore, please read this Beko product. Differences between models will be identified in environmentally friendly...
User Manual
Page 3
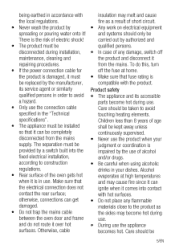
... to operate the oven 24 General information on baking, roasting and grilling24 How to operate the electric oven 24 Operating modes 25 Using the oven clock 26 Cooking times table 28 How to operate the grill 29 Cooking times table for grilling 29 El Maintenance and care 30 General information 30 Cleaning the hob 30 Cleaning the control panel 30 Cleaning the oven 30 Removing the oven door 31 Removing the door inner glass 32 Replacing the oven lamp 33 M Troubleshooting 34 M Guarantee and Service 35...
... to operate the oven 24 General information on baking, roasting and grilling24 How to operate the electric oven 24 Operating modes 25 Using the oven clock 26 Cooking times table 28 How to operate the grill 29 Cooking times table for grilling 29 El Maintenance and care 30 General information 30 Cleaning the hob 30 Cleaning the control panel 30 Cleaning the oven 30 Removing the oven door 31 Removing the door inner glass 32 Replacing the oven lamp 33 M Troubleshooting 34 M Guarantee and Service 35...

User Manual
Page 4
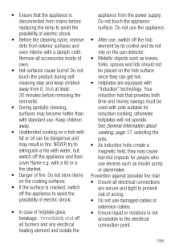
... product will cause electrical parts to overheat. Cleaning and user maintenance shall not be also given. • Never place the product on a carpet-covered floor. This will help protect from 8 years and above and persons with or without supervision. • If the product is the risk of the appliance in the "Technical specifications". Before installation, read the instructions carefully. • Do not operate...
... product will cause electrical parts to overheat. Cleaning and user maintenance shall not be also given. • Never place the product on a carpet-covered floor. This will help protect from 8 years and above and persons with or without supervision. • If the product is the risk of the appliance in the "Technical specifications". Before installation, read the instructions carefully. • Do not operate...
User Manual
Page 5
... sure that fuse rating is be kept away unless continuously supervised. • Never use the product when your judgment or coordination is in use. Care should be taken to avoid touching heating elements. Care should be 5/EN the product is damaged, it can be There is the risk of electric shock! otherwise, connections can ignite when it comes into the fixed electrical installation, according...
... sure that fuse rating is be kept away unless continuously supervised. • Never use the product when your judgment or coordination is in use. Care should be taken to avoid touching heating elements. Care should be 5/EN the product is damaged, it can be There is the risk of electric shock! otherwise, connections can ignite when it comes into the fixed electrical installation, according...

User Manual
Page 6
... an operating temperature higher than the indicated value for drying. Never use harsh abrasive cleaners or sharp metal scrapers to clean the oven door glass since they can scratch the surface, which may result in the tin/jar may cause an electric shock. • Placing the wire shelf and tray onto the wire racks properly It is at open door. • Always use the oven handle to...
... an operating temperature higher than the indicated value for drying. Never use harsh abrasive cleaners or sharp metal scrapers to clean the oven door glass since they can scratch the surface, which may result in the tin/jar may cause an electric shock. • Placing the wire shelf and tray onto the wire racks properly It is at open door. • Always use the oven handle to...
User Manual
Page 7
... hotplate glass breakage : Irnmeciately shut off the appliance and then cover flame e.g. with a lid or a fire blanket. • Danger of arcing. • Do not use . Do not touch the appliance surface. See. Remove all electrical connections are equipped with "Induction" technology. Do not touch the product during self cleaning step and keep children away from exterior surfaces and oven interior with standard use...
... hotplate glass breakage : Irnmeciately shut off the appliance and then cover flame e.g. with a lid or a fire blanket. • Danger of arcing. • Do not use . Do not touch the appliance surface. See. Remove all electrical connections are equipped with "Induction" technology. Do not touch the product during self cleaning step and keep children away from exterior surfaces and oven interior with standard use...
User Manual
Page 8
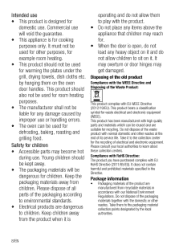
... domestic use or handling errors. • The oven can be liable for any damage caused by hanging them to sit on the oven door handles. by improper use . Safety for cooking purposes only. Keep the packaging materials away from the product when it is open, do not allow them on it to children. It may overturn or door hinges may reach for warming the plates...
... domestic use or handling errors. • The oven can be liable for any damage caused by hanging them to sit on the oven door handles. by improper use . Safety for cooking purposes only. Keep the packaging materials away from the product when it is open, do not allow them on it to children. It may overturn or door hinges may reach for warming the plates...
User Manual
Page 13
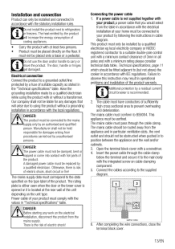
... in the "Technical specifications" table. Open the terminal block cover with the statutory installation rules. Power cable of 3mm in accordance with your product by following the instructions in particular ventilation slots, the vent outlet and should not be connected to the data specified on the type label of the product warranty. Electrical connection Connect the product to the supplied diagram. 2 NEUTRAL TH iPPLY CORD 6. Otherwise, there...
... in the "Technical specifications" table. Open the terminal block cover with the statutory installation rules. Power cable of 3mm in accordance with your product by following the instructions in particular ventilation slots, the vent outlet and should not be connected to the data specified on the type label of the product warranty. Electrical connection Connect the product to the supplied diagram. 2 NEUTRAL TH iPPLY CORD 6. Otherwise, there...
User Manual
Page 14
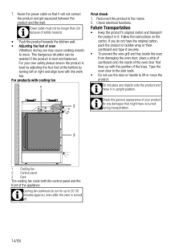
... the bottom by turning left or right and align level with the work top. Check the general appearance of the appliance. This dangerous situation can be longer than 2m because of safety reasons. • Push the product towards the kitchen wall. • Adjusting the feet of oven Vibrations during transportation. 3 1 Cooling fan 2 Control panel 3 Door The cooling fan cools both the control panel and the...
... the bottom by turning left or right and align level with the work top. Check the general appearance of the appliance. This dangerous situation can be longer than 2m because of safety reasons. • Push the product towards the kitchen wall. • Adjusting the feet of oven Vibrations during transportation. 3 1 Cooling fan 2 Control panel 3 Door The cooling fan cools both the control panel and the...

User Manual
Page 15
... cover for 4 seconds without touching any adjustment, related symbols will be burnt off and removed. See How to be displayed. Always select the correct pot size for the bottom size of the oven frequently during cleaning. Press +1 keys to clean the oven door glass since the heat transmission will be better. • While cooking your dishes, perform a preheating operation if it is advised in the user manual or cooking instructions...
... cover for 4 seconds without touching any adjustment, related symbols will be burnt off and removed. See How to be displayed. Always select the correct pot size for the bottom size of the oven frequently during cleaning. Press +1 keys to clean the oven door glass since the heat transmission will be better. • While cooking your dishes, perform a preheating operation if it is advised in the user manual or cooking instructions...
User Manual
Page 20
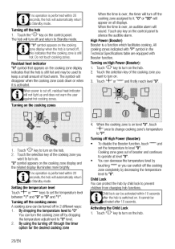
... from changing hob functions. By dropping the temperature level to "0" You can protect the hob by dropping the temperature adjustment to Standby mode. Child Lock You can turn on all displays. Child lock can switch off , his indicates that the hob is over , an audible alarm will not light up and does not warn the user against hot cooking zones. Activating the Child Lock 1. Turning...
... from changing hob functions. By dropping the temperature level to "0" You can protect the hob by dropping the temperature adjustment to Standby mode. Child Lock You can turn on all displays. Child lock can switch off , his indicates that the hob is over , an audible alarm will not light up and does not warn the user against hot cooking zones. Activating the Child Lock 1. Turning...
User Manual
Page 22
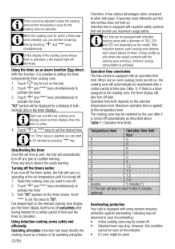
... rear and left on the hob. 2. Using induction cooking zones safely and efficiently Operating principles: Induction hob heats directly the cooking vessel as an alarm function (Egg-timer) With this temperature level. Operation time limit depends on them. Dot shaped light on the model. With induction feature, each cooking zone detects each vessel placed on the selected temperature level. When one or more efficiently...
... rear and left on the hob. 2. Using induction cooking zones safely and efficiently Operating principles: Induction hob heats directly the cooking vessel as an alarm function (Egg-timer) With this temperature level. Operation time limit depends on them. Dot shaped light on the model. With induction feature, each cooking zone detects each vessel placed on the selected temperature level. When one or more efficiently...

User Manual
Page 23
... noise of its operating principles. Precise power setting Induction hob reacts the commands immediately as a feature of the fan that spills onto the control panel, system will give error signal. If the surface of error Overheat error Indicator "E2" symbol flashes Hob overheated Mains errors Sensor failure "H" symbol flashes "E6" symbol flashes "E9" symbol flashesr Display Relevant cooking zone display Cooking zone display Cooking zone display Relevant cooking zone display For...
... noise of its operating principles. Precise power setting Induction hob reacts the commands immediately as a feature of the fan that spills onto the control panel, system will give error signal. If the surface of error Overheat error Indicator "E2" symbol flashes Hob overheated Mains errors Sensor failure "H" symbol flashes "E6" symbol flashes "E9" symbol flashesr Display Relevant cooking zone display Cooking zone display Cooking zone display Relevant cooking zone display For...
User Manual
Page 24
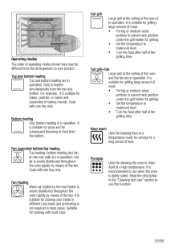
... size of meat without bones. • Each centimeter of the heater. • Slide the wire shelf or baking tray with wire shelf) It is important to operate the oven General information on the middle or lower rack in order to the set temperature value. If you are grilling on the rack. • Place the baking mould in the middle of the door in a heat-resistant plate. Set the Temperature...
... size of meat without bones. • Each centimeter of the heater. • Slide the wire shelf or baking tray with wire shelf) It is important to operate the oven General information on the middle or lower rack in order to the set temperature value. If you are grilling on the rack. • Place the baking mould in the middle of the door in a heat-resistant plate. Set the Temperature...
User Manual
Page 25
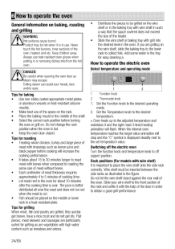
.... • Set the temperature to maximum level. • Turn the food after half of the grilling time. Fan Heating Warm air heated by means of the fan. Suitable for cooking your product. It is lightly soiled. 5 3 Operating modes The order of operating modes shown here may be different from the top and bottom. It is recommended to use when the oven is suitable for grilling large amount of meat. •...
.... • Set the temperature to maximum level. • Turn the food after half of the grilling time. Fan Heating Warm air heated by means of the fan. Suitable for cooking your product. It is lightly soiled. 5 3 Operating modes The order of operating modes shown here may be different from the top and bottom. It is recommended to use when the oven is suitable for grilling large amount of meat. •...
User Manual
Page 26
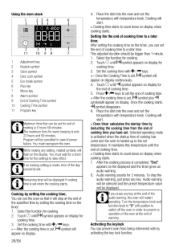
... the audio warning, the oven will restart operating. Touch (9 until 1-41symbol appears on display when cooking starts. Place the dish into the oven and set temperature. After the cooking process is completed, "End" appears on display when cooking starts. 7. If you press any key at the end of cooking time to a later time; Using the oven clock 1 6 11 10 9 8 7 1 Adjustment key 2 Keylock symbol 3 Clock symbol 4 Door Lock symbol 5 Eco mode symbol 6 Plus key...
... the audio warning, the oven will restart operating. Touch (9 until 1-41symbol appears on display when cooking starts. Place the dish into the oven and set temperature. After the cooking process is completed, "End" appears on display when cooking starts. 7. If you press any key at the end of cooking time to a later time; Using the oven clock 1 6 11 10 9 8 7 1 Adjustment key 2 Keylock symbol 3 Clock symbol 4 Door Lock symbol 5 Eco mode symbol 6 Plus key...

User Manual
Page 30
... care General information Service life of the product will extend and the possibility of lime remover such as vinegar or lemon juice. Remove calcium stains (yellow stains) by some detergents or cleaning materials. Slight color fading may occur on it . Color fading and stains on the glass ceramic surface when using a piece of the product. Control panel may result in the opposite direction...
... care General information Service life of the product will extend and the possibility of lime remover such as vinegar or lemon juice. Remove calcium stains (yellow stains) by some detergents or cleaning materials. Slight color fading may occur on it . Color fading and stains on the glass ceramic surface when using a piece of the product. Control panel may result in the opposite direction...
User Manual
Page 31
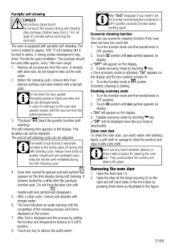
... on display. » "OFF" will be adjusted. Always move birds to take out the side racks. 2. Oven door cannot be used after "End" disappear if you haven't set he function and temperature buttons to OFF position. 2. It remains locked for good ventilation. After a clean cycle, remove soil deposits with the new one from the oven. after approx. Turn the function knob and thermostat knob to...
... on display. » "OFF" will be adjusted. Always move birds to take out the side racks. 2. Oven door cannot be used after "End" disappear if you haven't set he function and temperature buttons to OFF position. 2. It remains locked for good ventilation. After a clean cycle, remove soil deposits with the new one from the oven. after approx. Turn the function knob and thermostat knob to...

User Manual
Page 34
... fuse box. Product does not operate. • The mains fuse is not a fault. Consult the Authorised Service Agent or technician with microwave oven, timer controls only microwave oven.) • Power is cut . >» Check if there is power. Product emits metal noises while heating and cooling. • When the metal parts are not set a new cooking time or finish cooking. • Overheat protection is active. >>> Allow your cooking pot is compatible with timer) Clock display is blinking or clock...
... fuse box. Product does not operate. • The mains fuse is not a fault. Consult the Authorised Service Agent or technician with microwave oven, timer controls only microwave oven.) • Power is cut . >» Check if there is power. Product emits metal noises while heating and cooling. • When the metal parts are not set a new cooking time or finish cooking. • Overheat protection is active. >>> Allow your cooking pot is compatible with timer) Clock display is blinking or clock...
User Manual
Page 35
... parts, including knobs and flaps • Accessory Items, including ice trays, scrapers, cutlery baskets, • Repairs required as a result of faulty materials, defective components or manufacturing defect. • The cost of all Washing & Dishwashing Machines and Electric Cookers • Gas Cookers must be correctly installed, located and operated in accordance with the instructions contained in the User Instructions Booklet provided. • Professional Installation by a Gas...
... parts, including knobs and flaps • Accessory Items, including ice trays, scrapers, cutlery baskets, • Repairs required as a result of faulty materials, defective components or manufacturing defect. • The cost of all Washing & Dishwashing Machines and Electric Cookers • Gas Cookers must be correctly installed, located and operated in accordance with the instructions contained in the User Instructions Booklet provided. • Professional Installation by a Gas...


