User Manual
Page 2
... your product before installing and operating your product. • Follow the instructions, especially those for safety. • Keep the manual in a 1st-class manufacturing facility and checked under the most meticulous quality control procedures, will provide you to carefully read the entire manual of good service. Dear Customer, We hope that this manual may need it at hand for future reference. A Warning against electric...
... your product before installing and operating your product. • Follow the instructions, especially those for safety. • Keep the manual in a 1st-class manufacturing facility and checked under the most meticulous quality control procedures, will provide you to carefully read the entire manual of good service. Dear Customer, We hope that this manual may need it at hand for future reference. A Warning against electric...

User Manual
Page 3
... 8 Compliance with WEEE Directive and Disposing of the Waste Product: ........9 Compliance with rohs directive:........10 Package information 10 3 Installation 11 Installation Instructions 11 5 Using your freezer 17 Setting the operating temperature. 17 Fast freeze 19 Defrosting 19 Making ice 19 6 Maintenance and cleaning 20 7 Do's and Don'ts 21 Problem Solving 22 8 Guarantee Details 23 9 How To Obtain Service 24 4 Before operating 16 Starting 16 3 EN 1 Your refrigerator 4 2 Warnings 5 Electrical requirements 7 Warning!
... 8 Compliance with WEEE Directive and Disposing of the Waste Product: ........9 Compliance with rohs directive:........10 Package information 10 3 Installation 11 Installation Instructions 11 5 Using your freezer 17 Setting the operating temperature. 17 Fast freeze 19 Defrosting 19 Making ice 19 6 Maintenance and cleaning 20 7 Do's and Don'ts 21 Problem Solving 22 8 Guarantee Details 23 9 How To Obtain Service 24 4 Before operating 16 Starting 16 3 EN 1 Your refrigerator 4 2 Warnings 5 Electrical requirements 7 Warning!
User Manual
Page 4
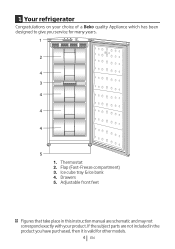
Adjustable front feet C Figures that take place in the product you service for other models. 4 EN Flap (Fast-Freeze compartment) 3. Ice cube tray & Ice bank 4. Thermostat 2. Drawers 5. 1 Your refrigerator Congratulations on your product. If the subject parts are not included in this instruction manual are schematic and may not correspond exactly with your choice of a Beko quality Appliance which has been designed to give you have purchased, then it is valid for many years. 1 3 2 1 4 MAX. 2 4 3 4 4 4 5 1.
Adjustable front feet C Figures that take place in the product you service for other models. 4 EN Flap (Fast-Freeze compartment) 3. Ice cube tray & Ice bank 4. Thermostat 2. Drawers 5. 1 Your refrigerator Congratulations on your product. If the subject parts are not included in this instruction manual are schematic and may not correspond exactly with your choice of a Beko quality Appliance which has been designed to give you have purchased, then it is valid for many years. 1 3 2 1 4 MAX. 2 4 3 4 4 4 5 1.
User Manual
Page 5
... insulation switching on to allow (Called cyclopentane) compressor oil to settle which is appliance to the among the latest range electricity supply until introduced is an ongoing commitment. protectors have been Your appliance removed. flammable if exposed to prevent the entrapment of young children. • This fridge/freezer must only be used for information on a fire. At Beko, the care...
... insulation switching on to allow (Called cyclopentane) compressor oil to settle which is appliance to the among the latest range electricity supply until introduced is an ongoing commitment. protectors have been Your appliance removed. flammable if exposed to prevent the entrapment of young children. • This fridge/freezer must only be used for information on a fire. At Beko, the care...
User Manual
Page 6
... in perfect condition. and trouble free • Do not use be made by the manufacturer. 6 the hazards involved. EN knowledge if they are in the or instruction appliance enclosure or concerning use mechanical devices or other means to capabilities or lack free service during the of read these instructions in a safe clear of the type make sure that the reference...
... in perfect condition. and trouble free • Do not use be made by the manufacturer. 6 the hazards involved. EN knowledge if they are in the or instruction appliance enclosure or concerning use mechanical devices or other means to capabilities or lack free service during the of read these instructions in a safe clear of the type make sure that the reference...
User Manual
Page 7
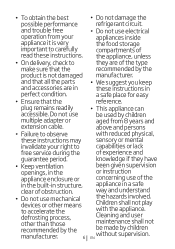
.... requirements Warning! an ASTABEAB approved WARNING: When positioning the appliance ensure the supply cord is not trapped or damaged. from a Beko authorised Electrical service agent. Should the mains lead of the appliance become damaged or should it must be replaced7 EN Should the positioned so that the fuse need replacing at any time, it BS 1362 fuse of the same rating...
.... requirements Warning! an ASTABEAB approved WARNING: When positioning the appliance ensure the supply cord is not trapped or damaged. from a Beko authorised Electrical service agent. Should the mains lead of the appliance become damaged or should it must be replaced7 EN Should the positioned so that the fuse need replacing at any time, it BS 1362 fuse of the same rating...
User Manual
Page 8
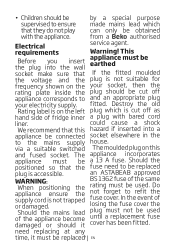
...the terminals in your appliance is installed in the plug marked 'L' or coloured red. 5. L BROWN OR RED 22mm. 12mm. With alternative plugs a 13 A fuse must be fitted either in the plug or adaptor or in the ...fuse box. FUSE FITTED WITH BS 1362 13A FUSE ALWAYS FIT BS 1362 REPLACEMENT CARTRIDGE FUSE 6mm. CORD GRIP 4.Connect the brown (Live) wire to the terminal in doubt contact a qualified electrician. Ensure your plug proceed as that visible on the pin face of the plug. Colour of the replacement fuse cover must be the same colour as follows: (See diagram...
...the terminals in your appliance is installed in the plug marked 'L' or coloured red. 5. L BROWN OR RED 22mm. 12mm. With alternative plugs a 13 A fuse must be fitted either in the plug or adaptor or in the ...fuse box. FUSE FITTED WITH BS 1362 13A FUSE ALWAYS FIT BS 1362 REPLACEMENT CARTRIDGE FUSE 6mm. CORD GRIP 4.Connect the brown (Live) wire to the terminal in doubt contact a qualified electrician. Ensure your plug proceed as that visible on the pin face of the plug. Colour of the replacement fuse cover must be the same colour as follows: (See diagram...
User Manual
Page 9
... waste electrical and electronic equipment (WEEE).This frozen food acts as an product has been ice pack to achieve maximum a cool bag or a special loading capacity. each opening. This product 4.Defrost frozen food in the fridge compartment, so that 9 EN Energy consumption quality parts and materials which can be reused and are closed properly after This product complies with high in the fridge. 5. frozen food and placing freezer...
... waste electrical and electronic equipment (WEEE).This frozen food acts as an product has been ice pack to achieve maximum a cool bag or a special loading capacity. each opening. This product 4.Defrost frozen food in the fridge compartment, so that 9 EN Energy consumption quality parts and materials which can be reused and are closed properly after This product complies with high in the fridge. 5. frozen food and placing freezer...
User Manual
Page 11
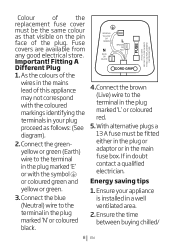
... "Cleaning and Care" section to run for use. 7. If possible avoid placing the appliance near cookers, radiators or in the room where the appliance is supplied to avoid touching the bottom of the condenser metal wires at the back of the compressor. (See diagram) Gently remove the plug from the receptacle. The space in direct sunlight as required. A special receptacle is installed...
... "Cleaning and Care" section to run for use. 7. If possible avoid placing the appliance near cookers, radiators or in the room where the appliance is supplied to avoid touching the bottom of the condenser metal wires at the back of the compressor. (See diagram) Gently remove the plug from the receptacle. The space in direct sunlight as required. A special receptacle is installed...
User Manual
Page 13
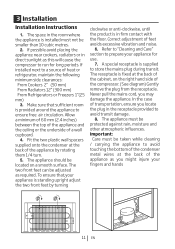
... all loose items and fittings and food inside the appliance. 12. Unscrew and remove the bottom hinge. (8) 19. Rotate the top hinge 180°. 1. Reversing The Door 2. Door top trim hinge covers - Important: We suggest you ask somebody to make sure the appliance is completely stable and safe before switching on . (6) 17. To follow numbers in figure. (10) 21. Once you...
... all loose items and fittings and food inside the appliance. 12. Unscrew and remove the bottom hinge. (8) 19. Rotate the top hinge 180°. 1. Reversing The Door 2. Door top trim hinge covers - Important: We suggest you ask somebody to make sure the appliance is completely stable and safe before switching on . (6) 17. To follow numbers in figure. (10) 21. Once you...
User Manual
Page 14
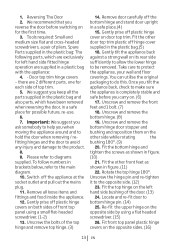
...back all the hinge screws are gaps between the door seal and the cabinet, adjust the door seal by gently pulling away from the door using fingers. 29. Avoid over tightening the screws. 30. Once the correct storage temperatures have been reached in the appliance. 31. 27. Check that door opens and closes easily..., it is aligned correctly and there are no gaps allowing air into the cabinet. If there are tightened. Check that all the food. 14 EN Wait for at least 4 hours to allow the system to settle before switching on. 32. Adjust the two front feet ...
...back all the hinge screws are gaps between the door seal and the cabinet, adjust the door seal by gently pulling away from the door using fingers. 29. Avoid over tightening the screws. 30. Once the correct storage temperatures have been reached in the appliance. 31. 27. Check that door opens and closes easily..., it is aligned correctly and there are no gaps allowing air into the cabinet. If there are tightened. Check that all the food. 14 EN Wait for at least 4 hours to allow the system to settle before switching on. 32. Adjust the two front feet ...
User Manual
Page 16
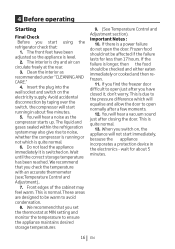
... you set the thermostat at the rear. 3. 4 Before operating Starting Final Check Before you start using the refrigerator check that you check the temperature with an accurate thermometer (see;Temperature Control and Adjustment).. 7. If there is a power failure do not open just after closing the door. If you have been adjusted so the appliance is longer, then the food should not be warm to open normally...
... you set the thermostat at the rear. 3. 4 Before operating Starting Final Check Before you start using the refrigerator check that you check the temperature with an accurate thermometer (see;Temperature Control and Adjustment).. 7. If there is a power failure do not open just after closing the door. If you have been adjusted so the appliance is longer, then the food should not be warm to open normally...
User Manual
Page 17
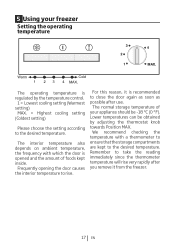
... with a thermometer to ensure that the storage compartments are kept to the desired temperature. We recommend checking the temperature with which the door is opened and the amount of your freezer Setting the operating temperature Warm Cold 3 2 1 4 MAX. Frequently opening the door causes the interior temperature to take the reading immediately since the thermometer temperature will rise very rapidly after use. The normal storage temperature of foods kept inside.
... with a thermometer to ensure that the storage compartments are kept to the desired temperature. We recommend checking the temperature with which the door is opened and the amount of your freezer Setting the operating temperature Warm Cold 3 2 1 4 MAX. Frequently opening the door causes the interior temperature to take the reading immediately since the thermometer temperature will rise very rapidly after use. The normal storage temperature of foods kept inside.
User Manual
Page 18
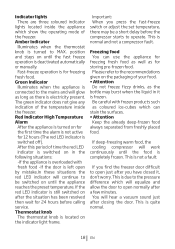
... the alarm is not active for freezing fresh food. This is switched off). Indicator lights There are three coloured indicator lights located inside the freezer. Red Indicator High Temperature Alarm After the appliance is turned on the packaging of your food. • Attention Do not freeze fizzy drinks, as the bottle may be switched on after you have closed it is left open by mistake.In these situations the red LED indicator will...
... the alarm is not active for freezing fresh food. This is switched off). Indicator lights There are three coloured indicator lights located inside the freezer. Red Indicator High Temperature Alarm After the appliance is turned on the packaging of your food. • Attention Do not freeze fizzy drinks, as the bottle may be switched on after you have closed it is left open by mistake.In these situations the red LED indicator will...

User Manual
Page 19
... ready approximately in the ice container by removing it from the freezer and twisting it into the freezer compartment. Remember to turn the thermostat knob back to mix frozen food and fresh food. Take special care not to its previous position once food has frozen. You can remove the ice in two hours. Defrosting The freezer compartment defrosts automatically. 19 EN Fast freeze If large amounts of...
... ready approximately in the ice container by removing it from the freezer and twisting it into the freezer compartment. Remember to turn the thermostat knob back to mix frozen food and fresh food. Take special care not to its previous position once food has frozen. You can remove the ice in two hours. Defrosting The freezer compartment defrosts automatically. 19 EN Fast freeze If large amounts of...
User Manual
Page 20
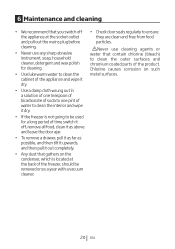
...plug before cleaning. • Never use cleaning agents or water that gathers on such metal surfaces. 20 EN Chlorine causes corrosion on the condenser, which is located at the back of the product. ANever use any sharp abrasive instrument, soap, household cleaner, detergent and wax polish for cleaning. • Use luke warm water to clean...of soda to one pint of water to clean the interior and wipe it dry. • If the freezer is not going to be used for a long period of time switch it off, remove all food, clean it as above and leave the door ajar. • To remove a drawer, pull it as...
...plug before cleaning. • Never use cleaning agents or water that gathers on such metal surfaces. 20 EN Chlorine causes corrosion on the condenser, which is located at the back of the product. ANever use any sharp abrasive instrument, soap, household cleaner, detergent and wax polish for cleaning. • Use luke warm water to clean...of soda to one pint of water to clean the interior and wipe it dry. • If the freezer is not going to be used for a long period of time switch it off, remove all food, clean it as above and leave the door ajar. • To remove a drawer, pull it as...
User Manual
Page 21
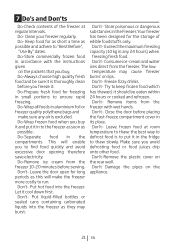
... liquid-filled bottles or sealed cans containing carbonated liquids into the freezer. Don't- Don't Damage the pipes on the rear wall. Clean your freezer regularly. Consume ice-cream and water ices direct from the freezer with the instructions given on lips. the best way to defrost food is excluded. Leave the door open for freezing in the fridge to thaw; Don't- Your freezer has been designed for...
... liquid-filled bottles or sealed cans containing carbonated liquids into the freezer. Don't- Don't Damage the pipes on the rear wall. Clean your freezer regularly. Consume ice-cream and water ices direct from the freezer with the instructions given on lips. the best way to defrost food is excluded. Leave the door open for freezing in the fridge to thaw; Don't- Your freezer has been designed for...
User Manual
Page 22
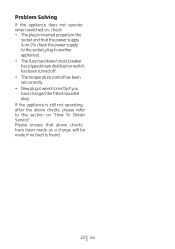
...is found. 22 EN Please ensure that the power supply is on. (To check the power supply to the section on "How To Obtain Service". Problem Solving If the appliance does not operate when switched on, check: • The plug is inserted properly in the socket and that ... still not operating after the above checks, please refer to the socket, plug in another appliance) • The fuse has blown/circuit breaker has tripped/main distribution switch has been turned off. • The temperature control has been set correctly. • New plug is wired correctly if you have changed the fitted...
...is found. 22 EN Please ensure that the power supply is on. (To check the power supply to the section on "How To Obtain Service". Problem Solving If the appliance does not operate when switched on, check: • The plug is inserted properly in the socket and that ... still not operating after the above checks, please refer to the socket, plug in another appliance) • The fuse has blown/circuit breaker has tripped/main distribution switch has been turned off. • The temperature control has been set correctly. • New plug is wired correctly if you have changed the fitted...
User Manual
Page 23
... parts, including control knobs, aps, handles or container lids. • Accessories or consumable items including but excluding consumable items. • The labour costs of the original purchase. What is applicable only to carry out the repair. The guarantee does not in the user instruction book. • Repairs to products used in commercial or non-residential domestic household premises. • The product must be correctly installed, located...
... parts, including control knobs, aps, handles or container lids. • Accessories or consumable items including but excluding consumable items. • The labour costs of the original purchase. What is applicable only to carry out the repair. The guarantee does not in the user instruction book. • Repairs to products used in commercial or non-residential domestic household premises. • The product must be correctly installed, located...
User Manual
Page 24
... questing service please check the trouble-shooting guide in the extended guarantee agreement document.Otherwise please call the appropriatenumber above whereservice can be under guarantee. You should the product require attention under guarantee. 9 How To Obtain Service HOW TO OBTAIN SERVICE Please keep your product may be levied where no fault is printed on the Instruction Booklet and the serial number is...
... questing service please check the trouble-shooting guide in the extended guarantee agreement document.Otherwise please call the appropriatenumber above whereservice can be under guarantee. You should the product require attention under guarantee. 9 How To Obtain Service HOW TO OBTAIN SERVICE Please keep your product may be levied where no fault is printed on the Instruction Booklet and the serial number is...


