
User Manual
Page 2
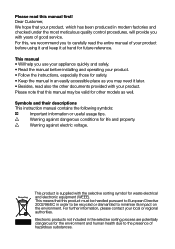
... the other models as you may be recycled or dismantled to the presence of hazardous substances. Please note that this manual first! A Warning against electric voltage. Recycling This product is supplied with years of your local or regional authorities. For further information, please contact your product before installing and operating your product. • Follow the instructions, especially...
... the other models as you may be recycled or dismantled to the presence of hazardous substances. Please note that this manual first! A Warning against electric voltage. Recycling This product is supplied with years of your local or regional authorities. For further information, please contact your product before installing and operating your product. • Follow the instructions, especially...
User Manual
Page 3
CONTENTS 1 Your refrigerator 4 2 Warnings 5 Electrical Requirements 6 Warning! This Appliance Must Be Earthed 6 Energy Saving Tips 7 4 Before operating 15 STARTING 15 5 Using your refrigerator 16 TEMPERATURE CONTROL AND ADJUSTMENT OF FRIDGE 16 CHILLER COMPARTMENT DRAWER.. 3 Installation 8 6 Maintenance and cleaning 17 TRANSPORTATION INSTRUCTIONS. 8 INSTALLATION INSTRUCTIONS........ 8 7 Do's and Don'ts 18 DEFROSTING 10 REPLACING THE INTERIOR LIGHT BULB 11 REVERSING THE DOOR 12 3 EN
CONTENTS 1 Your refrigerator 4 2 Warnings 5 Electrical Requirements 6 Warning! This Appliance Must Be Earthed 6 Energy Saving Tips 7 4 Before operating 15 STARTING 15 5 Using your refrigerator 16 TEMPERATURE CONTROL AND ADJUSTMENT OF FRIDGE 16 CHILLER COMPARTMENT DRAWER.. 3 Installation 8 6 Maintenance and cleaning 17 TRANSPORTATION INSTRUCTIONS. 8 INSTALLATION INSTRUCTIONS........ 8 7 Do's and Don'ts 18 DEFROSTING 10 REPLACING THE INTERIOR LIGHT BULB 11 REVERSING THE DOOR 12 3 EN
User Manual
Page 4
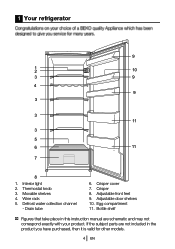
Defrost water collection channel - Crisper cover 7. Crisper 8. Egg compartment 11. Adjustable front feet 9. If the subject parts are not included in this instruction manual are schematic and may not correspond exactly with your product. Drain tube 6. Bottle shelf C Figures that take place in the product you have purchased, then it is valid for other models. 4 EN 1 Your refrigerator 9 1 2 10 3 9 4 9 3 3 11 3 5 6 11 7 8 1. Adjustable door shelves 10. Movable shelves 4. Interior light 2. Thermostat knob 3. Wine rack 5.
Defrost water collection channel - Crisper cover 7. Crisper 8. Egg compartment 11. Adjustable front feet 9. If the subject parts are not included in this instruction manual are schematic and may not correspond exactly with your product. Drain tube 6. Bottle shelf C Figures that take place in the product you have purchased, then it is valid for other models. 4 EN 1 Your refrigerator 9 1 2 10 3 9 4 9 3 3 11 3 5 6 11 7 8 1. Adjustable door shelves 10. Movable shelves 4. Interior light 2. Thermostat knob 3. Wine rack 5.
User Manual
Page 5
... NOT connect your appliance to the electricity supply until all the parts and accessories are in perfect condition. • Ensure that the plug remains readily accessible. This appliance which are potentially flammable if exposed to carefully read these instructions in a safe place for easy reference. • This appliance is not intended for use of the appliance on suitable location...
... NOT connect your appliance to the electricity supply until all the parts and accessories are in perfect condition. • Ensure that the plug remains readily accessible. This appliance which are potentially flammable if exposed to carefully read these instructions in a safe place for easy reference. • This appliance is not intended for use of the appliance on suitable location...
User Manual
Page 6
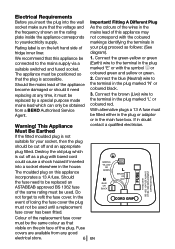
... the symbol or coloured green and yellow or green. 2. Connect the blue (Neutral) wire to the mains supply via a suitable switched and fused socket. CORD GRIP EN Should the fuse need replacing at any good electrical store. 6 Important! L BROWN OR RED 22mm. 12mm. Rating label is cut off as a plug with bared cord could cause a shock hazard if inserted...
... the symbol or coloured green and yellow or green. 2. Connect the blue (Neutral) wire to the mains supply via a suitable switched and fused socket. CORD GRIP EN Should the fuse need replacing at any good electrical store. 6 Important! L BROWN OR RED 22mm. 12mm. Rating label is cut off as a plug with bared cord could cause a shock hazard if inserted...

User Manual
Page 7
Ensure your appliance is kept at minimum, particularly in a well ventilated area. 2- Ensure the time between buying chilled/frozen food and placing them in your appliance open longer than necessary and ensure they are closed properly after each opening. 4- We recommend you use a cool bag or a special carrier bag to assist cooling in the fridge. 7 EN Do not leave the door (s) of your appliance is installed in summer. Defrost frozen food in the fridge compartment, so that frozen food acts as an ice pack to carry perishable food. 3- Energy Saving Tips 1-
Ensure your appliance is kept at minimum, particularly in a well ventilated area. 2- Ensure the time between buying chilled/frozen food and placing them in your appliance open longer than necessary and ensure they are closed properly after each opening. 4- We recommend you use a cool bag or a special carrier bag to assist cooling in the fridge. 7 EN Do not leave the door (s) of your appliance is installed in summer. Defrost frozen food in the fridge compartment, so that frozen food acts as an ice pack to carry perishable food. 3- Energy Saving Tips 1-
User Manual
Page 8
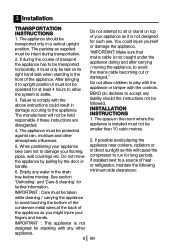
... to comply with the controls. If during and after carrying / moving . The manufacturer will cause the compressor to run for at the back of the appliance. See section 'Defrosting' and 'Care & cleaning' for such use. "IMPORTANT: Make sure that mains cable is installed must be followed. The appliance must not be held responsible if these instructions are disregarded. 4. Failure to...
... to comply with the controls. If during and after carrying / moving . The manufacturer will cause the compressor to run for at the back of the appliance. See section 'Defrosting' and 'Care & cleaning' for such use. "IMPORTANT: Make sure that mains cable is installed must be followed. The appliance must not be held responsible if these instructions are disregarded. 4. Failure to...

User Manual
Page 9
... the mains cord, you locate the plug in firm contact with the appliance to ensure free air circulation. 4. Correct adjustment of a wall cupboard. 3. From Cookers From Radiators From Refrigerators or Freezers Allow a minimum of 60 mm (2.4 inches) between the top of the fridge and the ceiling or the underside of feet avoids excessive vibration and noise. 6. At the same time...
... the mains cord, you locate the plug in firm contact with the appliance to ensure free air circulation. 4. Correct adjustment of a wall cupboard. 3. From Cookers From Radiators From Refrigerators or Freezers Allow a minimum of 60 mm (2.4 inches) between the top of the fridge and the ceiling or the underside of feet avoids excessive vibration and noise. 6. At the same time...

User Manual
Page 10
.... The drain tube can be stored upright in the door rack. 6. the best way to put it in the fridge. During defrosting water droplets may remain on the shelf. Bottles can be cleaned and stored in the salad crisper bin. 5. Some fruit and vegetables suffer damage if kept at the back of the appliance (see diagrams). DEFROSTING The larder refrigerator defrosts automatically. The defrosting water runs to...
.... The drain tube can be stored upright in the door rack. 6. the best way to put it in the fridge. During defrosting water droplets may remain on the shelf. Bottles can be cleaned and stored in the salad crisper bin. 5. Some fruit and vegetables suffer damage if kept at the back of the appliance (see diagrams). DEFROSTING The larder refrigerator defrosts automatically. The defrosting water runs to...
User Manual
Page 11
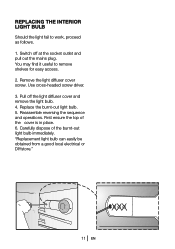
You may find it useful to work, proceed as follows. 1. Remove the light diffuser cover screw. Reassemble reversing the sequence and operations. Carefully dispose of the cover is in place. 6. "Replacement light bulb can easily be obtained from a good local electrical or DIYstore." 11 EN REPLACING THE INTERIOR LIGHT BULB Should the light fail to remove shelves for easy access. 2. Switch off the light diffuser cover and remove the light bulb. 4. Use cross-headed screw driver. 3. Pull off at...
You may find it useful to work, proceed as follows. 1. Remove the light diffuser cover screw. Reassemble reversing the sequence and operations. Carefully dispose of the cover is in place. 6. "Replacement light bulb can easily be obtained from a good local electrical or DIYstore." 11 EN REPLACING THE INTERIOR LIGHT BULB Should the light fail to remove shelves for easy access. 2. Switch off the light diffuser cover and remove the light bulb. 4. Use cross-headed screw driver. 3. Pull off at...
User Manual
Page 12
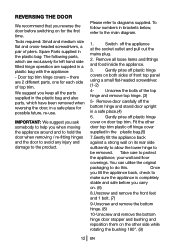
... and fittings and food inside the appliance. 3. Once you tilt the appliance back, check to be removed. To follow numbers in brackets below, refer to protect the appliance, your wall and floor coverings. Door top trim hinge covers - Unscrew the bolts of pliers. Switch off the bottom hinge and stand door upright in a safe place.(4) 6. Spare Parts supplied in the plastic bag...
... and fittings and food inside the appliance. 3. Once you tilt the appliance back, check to be removed. To follow numbers in brackets below, refer to protect the appliance, your wall and floor coverings. Door top trim hinge covers - Unscrew the bolts of pliers. Switch off the bottom hinge and stand door upright in a safe place.(4) 6. Spare Parts supplied in the plastic bag...

User Manual
Page 13
...- Locate and re-fit door to the opposite side. (12) 14- Check that door opens and closes easily, it to bottom hinge pin. (14) 16- Adjust the two front feet if necessary. 19- Unscrew the hinge pin and re-tighten it is aligned correctly and there are no gaps allowing air into the cabinet. Fit front top panel plastic hinge covers on...
...- Locate and re-fit door to the opposite side. (12) 14- Check that door opens and closes easily, it to bottom hinge pin. (14) 16- Adjust the two front feet if necessary. 19- Unscrew the hinge pin and re-tighten it is aligned correctly and there are no gaps allowing air into the cabinet. Fit front top panel plastic hinge covers on...
User Manual
Page 15
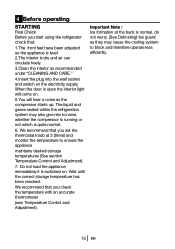
... using the refrigerator check that: 1.The front feet have been adjusted so the appliance is level. 2.The interior is normal, do not worry. (See Defrosting) fan guard as they may also give rise to noise, whether the compressor is running or not which is switched on the electricity supply. Do not load the appliance immediately it is quite normal. 6. We recommend that you set the thermostat...
... using the refrigerator check that: 1.The front feet have been adjusted so the appliance is level. 2.The interior is normal, do not worry. (See Defrosting) fan guard as they may also give rise to noise, whether the compressor is running or not which is switched on the electricity supply. Do not load the appliance immediately it is quite normal. 6. We recommend that you set the thermostat...
User Manual
Page 16
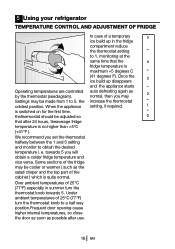
... you will obtain a colder fridge temperature and vice versa. 5 Using your refrigerator TEMPERATURE CONTROL AND ADJUSTMENT OF FRIDGE In case of a temporary 5 ice build up disappears and the appliance starts Operating temperatures are controlled auto defrosting again as by the thermostat (seediagram). Once the 3 ice build up in summer turn the thermostat knob to obtain the desired temperature i. When the appliance setting, if required. 1 is switched on for the first...
... you will obtain a colder fridge temperature and vice versa. 5 Using your refrigerator TEMPERATURE CONTROL AND ADJUSTMENT OF FRIDGE In case of a temporary 5 ice build up disappears and the appliance starts Operating temperatures are controlled auto defrosting again as by the thermostat (seediagram). Once the 3 ice build up in summer turn the thermostat knob to obtain the desired temperature i. When the appliance setting, if required. 1 is switched on for the first...
User Manual
Page 17
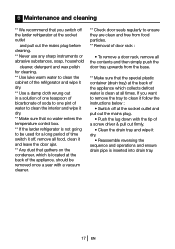
... soda to one pint of water to clean the interior and wipe it dry. ** Make sure that no water enters the temperature control box. ** If the larder refrigerator is not going to be used for a long period of time switch it off, remove all food, clean it and leave the door ajar. ** Any dust that the special plastic container (drain tray) at the socket outlet...
... soda to one pint of water to clean the interior and wipe it dry. ** Make sure that no water enters the temperature control box. ** If the larder refrigerator is not going to be used for a long period of time switch it off, remove all food, clean it and leave the door ajar. ** Any dust that the special plastic container (drain tray) at the socket outlet...
User Manual
Page 18
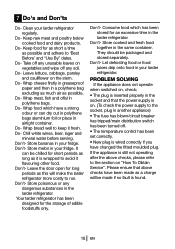
... the door open for short periods as long as a charge will make the larder refrigerator more costly to avoid it flavouring other food. Don't- Let defrosting food or food juices drip onto food in your larder refrigerator. Clean your fridge. Do...wired correctly if you have changed the fitted moulded plug. Don't- Your larder refrigerator has been designed for as short a time as possible. Don't- Don't- PROBLEM SOLVING If the appliance does not operate when switched on "How To Obtain Service". If the appliance is found. 18 EN Please ensure that the power supply...
... the door open for short periods as long as a charge will make the larder refrigerator more costly to avoid it flavouring other food. Don't- Let defrosting food or food juices drip onto food in your larder refrigerator. Clean your fridge. Do...wired correctly if you have changed the fitted moulded plug. Don't- Your larder refrigerator has been designed for as short a time as possible. Don't- Don't- PROBLEM SOLVING If the appliance does not operate when switched on "How To Obtain Service". If the appliance is found. 18 EN Please ensure that the power supply...
User Manual
Page 19
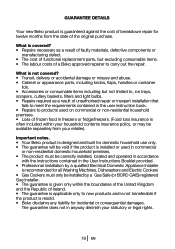
... functional replacement parts, but excluding consumable items. • The labour costs of a Beko approved repairer to new products and is not transferable if the product is recommended for all Washing Machines, Dishwashers and Electric Cookers • Gas Cookers must only be available separately from the date of frozen food in the User Instructions Booklet provided. • Professional installation by...
... functional replacement parts, but excluding consumable items. • The labour costs of a Beko approved repairer to new products and is not transferable if the product is recommended for all Washing Machines, Dishwashers and Electric Cookers • Gas Cookers must only be available separately from the date of frozen food in the User Instructions Booklet provided. • Professional installation by...
User Manual
Page 20
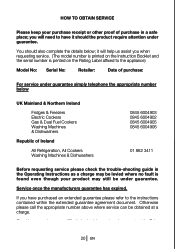
... should also complete the details below UK Mainland & Northern Ireland Fridges & Freezers Electric Cookers Gas & Dual Fuel Cookers Washing Machines & Dishwashers Republic of purchase in obtaining service please contact the Beko Customer Help-Line. Should you when requesting service. (The model number is printed on the Instruction Booklet and the serial number is found even though your product may still be obtained at...
... should also complete the details below UK Mainland & Northern Ireland Fridges & Freezers Electric Cookers Gas & Dual Fuel Cookers Washing Machines & Dishwashers Republic of purchase in obtaining service please contact the Beko Customer Help-Line. Should you when requesting service. (The model number is printed on the Instruction Booklet and the serial number is found even though your product may still be obtained at...

User Manual
Page 21
BEKO plc Beko House Caxton Way Watford Hertfordshire WD18 8UF Tel: 0845 6004911 Fax: 0845 6004922 e-mail: service@beko.co.uk website: www.beko.co.uk Printed in Turkey Part no: 57 1414 0000 Revision no: AD
BEKO plc Beko House Caxton Way Watford Hertfordshire WD18 8UF Tel: 0845 6004911 Fax: 0845 6004922 e-mail: service@beko.co.uk website: www.beko.co.uk Printed in Turkey Part no: 57 1414 0000 Revision no: AD


